
Learn How to Make Pasta Fresh at Home with Your KitchenAid Mixer in 10 Easy Steps!
Hi! If you’ve been following me for long you’ll already know this, but for those who are new, welcome to Far From The Farm. I’m Mona, the Brit behind the recipes, learning life and food in the States while sharing our debt-free journey and what’s on the menu in our home today!
Today we’re making a simple pasta and using our KitchenAid pasta attachments to make it all come together effortlessly!
As always, these photos are from my real kitchen here in our sweet military base home. No AI recipe images or staged lighting or spotless marble counters. Just real life and real food made in a small space. Proof that you can feed your family well without needing a dream kitchen or fancy tools!
So Why Make Pasta at Home?
There’s something deeply satisfying about mixing, rolling, and cutting your own pasta. It’s more than dinner, it’s an experience.
From the soft feel of fresh dough to the first bite of silky noodles, homemade pasta is comfort food at its best.
And when you use the Matte Black KitchenAid Mixer and the KitchenAid Pasta Attachments, you take all the hassle out of kneading and rolling Available on Amazon.com [ad]
These tools make it easy to focus on flavor and creativity without exhausting your arms in the process.

Equipment!

Before diving into this recipe, here’s the essential kitchen gear you’ll need:
- Matte Black KitchenAid Stand Mixer with Black Ceramic Bowl or Quilted Stainless Steel Bowl – modern, powerful, and gorgeous on your countertop.
- KitchenAid Pasta Roller & Cutter Set – the ultimate attachment for silky, restaurant-quality noodles.
- Nordic Ware Nonstick Baking Sheets – perfect for dusting with flour and laying your pasta strands.
Available on Amazon.com [ad]


Ingredients
- 3 & 1/2 cups all-purpose flour (spooned & leveled)
- 7 large eggs, room temperate
- 3 & 1/2 teaspoon sea salt
- ½ tablespoon extra virgin olive oil per batch (optional but I find it helps with the rolling out and not-sticking).
Need to scale the recipe up or down?
No problem! Just remember that for every 1/2 cup of flour you will need 1 egg and 1/2 tsp of salt!
Step-by-Step Instructions
Here’s a quick step by step guide to making the easiest possible pasta dough!

Step 1: Make the Dough
Add flour, eggs, olive oil, and salt into the KitchenAid bowl. Attach the dough hook and mix on low speed (speed 1 or ‘stir’ depending on your model of mixer) until it begins to come together.
I find that the salt is a must and that without it I just don’t appreciate the bland taste. But leave it out if your family prefers it.

Step 2: Mix the Dough
Let the mixer knead the dough for 8–10 minutes until it looks like the image below:

Step 3: Finish Kneading the Dough
Grab your dough and fight with it for a couple of minutes on the counter!

Honestly go to town, take all your frustrations out on your dough for 2 minutes or as long as it takes for it to feel less dry and more sticky.
I don’t use extra flour here, if it sticks I spray a little olive oil on my counter and hands.
Adding too much flour makes for a less tasty and more brittle pasta.

Step 4: Shape the Dough into a Ball and Let it Rest
Now it’s time to bring your dough back together and form a ball.

Then you’re going to want to wrap it in plastic wrap, spray the ball of dough lightly with olive oil if needed, to avoid sticking.

And now you’re going to let it rest for 30 minutes or more in the fridge, so that the gluten in the flour can do it’s magic (I’ve left it as long as 48 hours before and it’s still been fine).
Step 5: Knead Your Dough Again
So whenever you’re ready to make your pasta you’re going to want to grab that rested dough out of the fridge, unwrap it and knead it for a minute or so just so it becomes loosened again.
At this stage the dough should look much more glossy and be less sticky, like the picture below.

Step 6: Divide the Dough
Alright so now you’re going to want to take a knife or bench scraper and cut your pasta into manageable pieces, because no one wants a ten foot long piece of pasta!
I like to divide mine between 6-10 pieces. If you’re making lasagna sheets do 6, if you’re making spaghetti or fettuccine do more pieces.
I always make sure to re-cover the pieces with plastic wrap when I am not using them, to keep them from drying out.

Step 7: Rolling the Pasta
So now we’re going to grab our dough rolling pasta attachment and secure that in our KitchenAid mixer.
I also make sure to have a large baking dish I fill with flour underneath my kitchenaid, and a large sheet pan with parchment paper beside that – see images below.

Feed each piece through the pasta roller attachment on the widest setting (level 1) three times.
If you want a wider piece of pasta, like to use for lasagna, you can fold it over on itself before passing it through and create the width you desire.
Once you have the desired width then you can gradually increase settings from 1 – 5 each time you pass your sheet of dough through, until the dough is thin and silky.
I find level 5 is the perfect thickness for thin tasty pasta, but not so thin that it dissolves in the pan when you cook it!
Step 8: Cut the Pasta into Spaghetti or Fettuccine
Available on Amazon.com [ad]
I have this 3-cutter KitchenAid Pasta Attachment set (above), and I love to use my sheets of pasta to make fettuccine or spaghetti, because those are typically the pasta’s we are using most in our household.
This step of the process is the quickest and you’ll want to make sure you have all the equipment on hand.
To make fettuccine or spaghetti switch out your pasta roller attachment for your desired cutter attachment.

Run dough through fettuccine or spaghetti cutter once and lay noodles on a floured baking sheet or if you’re making a lot of pasta at once you can even grab one of these handy pasta – drying racks so you don’t need as much space!
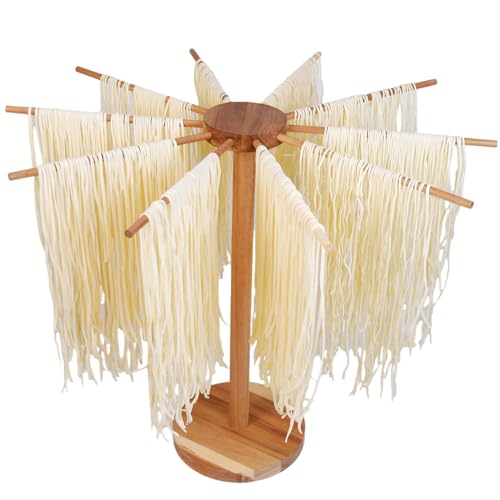
Available on Amazon.com [ad]
Step 9: Cook and Serve!

Boil a large pot of salted water. Fresh pasta cooks fast, you just boil for 1–2 minutes for al dente spaghetti or fettuccine, or 4-5 mins for softer textured pasta (which my family prefers!)
Drain, toss with olive oil or sauce, and enjoy!
Step 10: Freezing Your Uncooked Pasta
If you don’t want to eat your pasta straight away I find that freezing it, rather than drying it, is the best way to preserve that just freshly-made pasta texture.
It’s super easy, just gently grab your floured fresh pasta and place it in a freezer-safe dish with a lid.
Place parchment paper between layers.
When you want to cook the frozen pasta I find I just add another minute or two to the cooking time and it’s perfect!
Check out my step by step guide to freezing your fresh pasta HERE!

Serving Suggestions
Fresh pasta doesn’t need much. A drizzle of olive oil and Parmesan is divine. Or try:
- Basil pesto
- Marinara sauce
- Garlic butter and herbs
- Creamy Alfredo
Or try THIS Devine mushroom pasta recipe from Samantha over at dreamsofgraceandgrit.com!

Homemade Pasta Recipe with KitchenAid Attachments
Ingredients
Equipment
Method
- Step 1: Add flour, eggs, olive oil, and salt into the KitchenAid bowl. Attach the dough hook and mix on low speed (speed 1 or 'stir' depending on your model of mixer) until it begins to come together.I find that the salt is a must and that without it I just don't appreciate the bland taste. but leave it out if your family prefers it.
- Step 2: Mix the Dough.Let the mixer knead the dough for 8–10 minutes. Your mixture will look dry – don't worry this is normal.
- Step 3: Continue Kneading the Dough by Hand.Dump your dough out on the counter – it'll look dry and won't all come together yet, don't worry that's normal!Knead for 2 minutes or as long as it takes for it to feel less dry and more sticky. Note – I don't use extra flour here, if it sticks I spray a little olive oil on my counter and hands.
- Step 4: Shape the Dough into a Ball and Let it Rest.When you're done kneading, bring your dough back together and form a ball.Wrap it in plastic wrap, spray the ball of dough lightly with olive oil if needed, to avoid sticking.Let the dough rest for 30 minutes or more in the fridge, so that the gluten in the flour can do it's magic.I've left it as long as 48 hours before, and it's still been fine.
- Step 5: Knead Your Dough Again.When you're ready to cut the pasta, get you're rested dough out of the fridge, unwrap it and knead it for a minute or so just so it becomes loosened again.At this stage the dough should look much more glossy and be less sticky.
- Step 6: Divide the DoughTake a knife or bench scraper and cut your pasta into manageable pieces.I like to divide mine between 6-10 pieces. If you're making lasagna sheets do 6, if you're making spaghetti or fettuccine do more pieces.I always make sure to re-cover the pieces with plastic wrap when I am not using them, to keep them from drying out.
- Step 7: Rolling the PastaTake your dough rolling pasta attachment and secure that in your KitchenAid mixer.Feed each piece through the pasta roller attachment on the widest setting (level 1) three times. If you want a wider piece of pasta, like to use for lasagna, you can fold it over on itself before passing it through and create the width you desire.Once you have the desired width then you can gradually increase settings from 1 – 5 each time you pass your sheet of dough through, until the dough is thin and silky.I find level 5 is the perfect thickness for thin tasty pasta, but not so thin that it dissolves in the pan when you cook it!
- Step 8: Cutting the Pasta into Spaghetti or FettuccineTo make fettuccine or spaghetti switch out your pasta roller attachment for your desired cutter attachment. Run dough through the fettuccine or spaghetti cutters once, then lay the cut noodles on a floured baking sheet or a pasta drying rack.
- Step 9: Cooking the Fresh Pasta.Boil a large pot of salted water. Fresh pasta cooks fast, you just boil for 1–2 minutes for al dente spaghetti or fettuccine, or 4-5 mins for softer textured pasta (which my family prefers!)Drain, toss with olive oil or sauce, and enjoy!
- Step 10: Freezing Your Uncooked PastaIf you don't want to eat your pasta straight away I find that freezing it, rather than drying it, is the best way to preserve that just freshly-made pasta texture. It's super easy, just gently grab your floured fresh pasta and place it in a freezer-safe dish with a lid. Place parchment paper between layers.When you want to cook the frozen pasta I find I just add another minute to the cooking time and it's perfect!
Nutrition information is automatically calculated, so should only be used as an approximation.
Join the Side Hustle Homemakers Crew in the Kitchen!
If you haven’t already joined us over on Facebook then you’re missing out!
You can follow me HERE and you can join our Side Hustle Homemakers crew where we post lives of us actually doing the recipe, give advice on photography, blogging, homeschooling, recipes, decor and so much more!
Here’s our lovely Julie hopping on a live to make the pasta with her kids popping in as a homeschooling lesson:
You can see more of Julie over on her blog www.ourbeautifulchaos.com
As always we’re keeping it real, no staged perfect kitchens for us – this is our REAL life and we’d love you to join us!
Side Hustle Homemakers – Julie, Sam and Mona xoxo
And just a reminder that if you’re struggling and you need help with managing your budget or starting your own debt free journey then here’s some FREE resources below you may find helpful!
living frugally and fully
free tips and resources to make the most of what you have
The Takeaway
Homemade pasta is easier than you think, especially with a KitchenAid mixer and pasta attachments to guide the way.
With just 4 ingredients and a little time, you’ll be serving silky, chewy noodles that taste better than anything from a box.
Perfect for family dinners, date nights, or simply treating yourself!
What to Read Next


Share & Rate This Recipe!
If you tried this recipe, please share your feedback with a quick star rating or comment below. And if you loved it, don’t forget to share it with friends and family too!
Last update on 2026-06-28 / Affiliate links / Images from Amazon Product Advertising API


11 Comments