
The Easiest Soft and Buttery Stand Mixer Cinnamon Roll Dough You’ll Ever Make!
Hi! If you’ve been following me for long you’ll already know this, but for those who are new, welcome to Far From The Farm. I’m Mona, the Brit behind the recipes, learning life and food in the States while sharing our debt-free journey and what’s on the menu in our home today!
Cinnamon rolls have become one of those cosy breakfast bakes that feel like home for us now.
Back in the UK I never really made them from scratch, but here in the States they’re everywhere and the smell alone is enough to brighten even the roughest morning.
I love that they feel special while still being incredibly simple to make with just a stand mixer and a handful of affordable ingredients.
We don’t splurge on eating out very often because of our baby step 2 debt free journey, so making these warm, soft, bakery style cinnamon rolls from scratch has turned into such a treat in our kitchen.

And honestly the homemade version tastes even better than store bought.
No preservatives. No mystery additives.
Just a soft, sweet dough that works perfectly for any cinnamon roll recipe you love!
If you’ve been searching for a reliable, fluffy cinnamon dough that feels forgiving and fuss free, this is the one. It comes together quickly, kneads beautifully in a stand mixer and rises into the softest dough you can imagine.
You can use it for classic cinnamon rolls, sticky buns, monkey bread, sweet breakfast twists or anything that calls for a brioche style sweet dough.
And just a reminder that if you’re struggling and you need help with managing your budget or starting your own debt free journey then here’s some FREE resources below you may find helpful!
living frugally and fully
free tips and resources to make the most of what you have
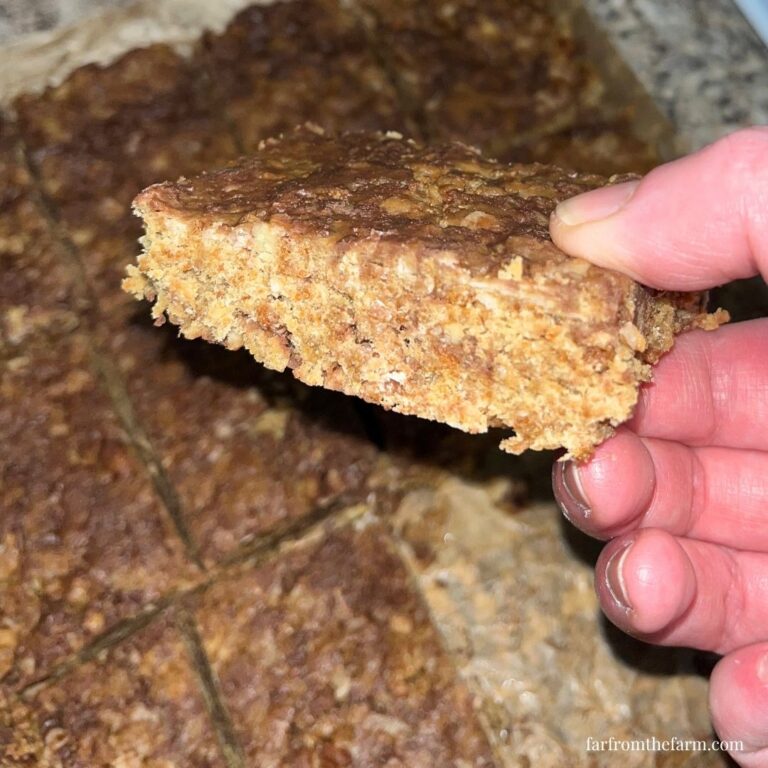
As always, these photos are from my real kitchen here in our sweet military base home. No AI recipe images or staged lighting or spotless marble counters. Just real life and real food made in a small space. Proof that you can feed your family well without needing a dream kitchen or fancy tools!
So grab your mixer bowl and we’ll get started. You’re going to love how simple this is!
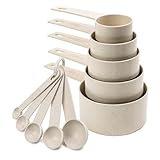
Equipment
- Stand mixer with dough hook
- Large mixing bowl
- Measuring jug
- Measuring cups and spoons
- Plastic wrap
- Rolling pin
- Sharp bread knife or bench scraper
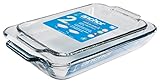
- baking dish
- Small bowl and spatula for frosting
Available on Amazon.com [ad]


Ingredients
Makes 1 very large batch, about 10 huge bakery style cinnamon rolls
Dough:
- 1 ⅓ cups warm water
- ⅓ cup white sugar
- 3 tsp active dry yeast
- 1 large egg
- ½ cup salted butter, softened
- 4 ½ cups all purpose flour
- 1 tsp salt
Filling:
- ½ cup softened salted butter (1 stick, soft enough to spread)
- 1 ½ cups brown sugar
- 2 tbsp cinnamon (or 1 tbsp cinnamon + 1 tbsp pumpkin pie spice for a cozy fall twist)
Frosting
Make my Not-Too-Sweet Cinnabon Copycat Cream Cheese Frosting Recipe – it pairs perfectly with these cinnamon rolls!
- ½ cup salted butter, softened (1 stick)
- 4 oz cream cheese, softened
- 1 cup powdered sugar
- 1 – 2 tsp vanilla extract
Step by Step Instructions
Step 1. Proof the yeast

Pour the warm water into your stand mixer bowl. Add the sugar and yeast, stir gently, and let it sit for 5 to 10 minutes until the top looks foamy, this means it has ‘proofed and is active’.
If it stays flat, your yeast is not active, so start again with a fresh packet.

Step 2. Add the egg and softened butter
Whisk in the egg until combined.
Add the softened butter. It will blend in as the dough mixes, so do not worry if you still see pieces.

Step 3. Add the dry ingredients
Add the flour on top of the mixture.
Sprinkle the salt over the flour so everything blends evenly once the mixer starts kneading.
Step 4. Knead the dough
Attach your dough hook.
Mix on low until the ingredients come together into a rough dough.
Turn the mixer to medium and knead for 7 to 8 minutes until the dough becomes smooth, soft and elastic.
If the dough feels sticky, add flour one tablespoon at a time.
If it feels dry, add water one teaspoon at a time.

Step 5. First rise
When your dough is finished mixing, remove it and shape it into a ball. Lightly oil the mixer bowl and place the dough back in it.

Covering with plastic wrap, let it rise in a warm spot for 1 hour, or until doubled in size.

Step 6. Cinnamon Sugar Filling
Mix the brown sugar and cinnamon together in a small bowl.

Step 7. Shape your cinnamon rolls
Once the dough has risen, lightly flour your counter. Roll the dough into a large rectangle, roughly 18 x 12 inches.
Spread out 1/2 cup of softened butter all over the top side of the dough.
Then sprinkle on the cinnamon sugar mixture, all the way to the edges. Starting from the long side, roll the dough tightly into a log.
Slice into 12 to 14 rolls using a sharp bread knife or unflavored dental floss.

Step 8. Second rise
Place the rolls in a 9 x 13 dish. Cover loosely with plastic wrap or a towel.
If you’re making them to eat same day you’ll now let them rise for 30 to 45 minutes until puffy.

Delay this second rise step if you want to make them ahead of time like this:
Step 9. Two Ways to Prep These Cinnamon Rolls for Later
Now at this point, if you want to make these rolls ahead of time, you have two really helpful options. Both work beautifully and still give you warm, fresh cinnamon rolls without any morning stress.
Just pause the recipe here before the second rise and choose whichever path fits your day!
Option 1. Refrigerate Overnight
Perfect for next day baking, they rise slowly in the fridge and turn out soft, fluffy and perfect!
- Keep the sliced rolls in the dish you want to eventually bake these in
- Cover tightly with plastic wrap
- Refrigerate up to 24 hours
- When ready to bake, remove from the fridge and let them sit at room temperature for 30 to 45 minutes so they can complete their second rise
- Bake as normal
Option 2. Freeze Before Baking
Great for stocking your freezer. They come out tasting just as fresh as a brand new batch. recipe here. The second rise will happen later!
- Place the sliced rolls on a cookie sheet, and freeze until firm
- Transfer to a freezer bag for up to 2 months
- Thaw overnight in the fridge
- Let rise at room temperature for about 45 minutes
- Bake as normal
Step 10. Bake
No matter which path you took (same day, overnight in the fridge, or thawed from frozen), once your rolls have finished their second rise they are ready for the oven!
- Bake at 350°F for 18 to 20 minutes until golden on top.
- If you are using a glass dish, add 2 to 3 extra minutes so the centers bake through properly.
Step 11. Make the Cream Cheese Frosting

While the rolls bake it’s time to mix up the cream cheese frosting as follows:
- Beat the softened butter and softened cream cheese until smooth.
- Add the powdered sugar and vanilla.
- Mix until creamy and spreadable.
- Add a little more powdered sugar or a splash of milk to get your perfect texture.
Step 12. Frost the warm rolls

Spread the frosting over the warm cinnamon rolls so it melts into the spirals. Serve immediately for the best soft, gooey cinnamon rolls. Enjoy!

Notes and Troubleshooting
Notes
- This dough is incredibly versatile. Use it for cinnamon rolls, sticky buns, monkey bread, fruit rolls, sweet braids and more.
- Cold butter gives the dough a soft, tender richness.
- If you have a colder kitchen, let the dough rise in the oven with the light on.
- Tip for soft centers: pour 2 to 3 tablespoons of cream or half and half into the base of your baking dish before adding the rolls.
Troubleshooting
Dough too sticky?
Add a tablespoon of flour at a time while kneading.
Dough too dry?
Add a teaspoon of water while the mixer runs.
Rolls not rising?
Yeast may have been old or your kitchen too cold.
Underdone middles?
Extend bake time slightly or tent with foil.
Storage
- Refrigerate dough for up to 2 days after the first rise
- Freeze dough tightly wrapped for up to 2 months
- Thaw overnight in fridge, then let rise 30 – 45 minutes before shaping
Serving Ideas
- Classic cinnamon rolls with cream cheese frosting
- Caramel pecan sticky buns
- Breakfast monkey bread
- Apple cinnamon rolls
- Chocolate or Nutella swirl rolls
Why You’ll Love This Recipe?!
- Simple, forgiving dough
- Budget friendly and preservative free
- Soft, fluffy and bakery worthy
- Stand mixer makes it effortless
- Freezer friendly for busy mornings
FAQ
Can I knead this dough by hand?
Yes, knead for about 10 to 12 minutes until smooth.
Is all purpose flour the same as plain flour?
Yes. In the UK it’s called plain flour.
Can I halve the recipe?
Absolutely. It scales down beautifully.
Can I double the recipe?
Yes if your mixer bowl is large enough.

Fluffy KitchenAid Cinnamon Roll Dough Recipe!
Ingredients
Equipment
Method
- Pour the warm water into your stand mixer bowl. Add the sugar and yeast, stir gently, and let it sit for 5 to 10 minutes until the top looks foamy.If it stays flat, your yeast is not active, so start again with a fresh packet.
- Add in the egg and the softened butter. It will blend in as the dough mixes, so do not worry if you still see pieces.
- Add the flour on top of the mixture.Sprinkle the salt over the flour so everything blends evenly once the mixer starts kneading.
- Attach your dough hook.Mix on low until the ingredients come together into a rough dough.Turn the mixer to medium and knead for 7 to 8 minutes until the dough becomes smooth, soft and elastic.If the dough feels sticky, add flour one tablespoon at a time.If it feels dry, add water one teaspoon at a time.
- When your dough is finished mixing, remove it and shape it into a ball. Lightly oil the mixer bowl and place the dough back in it. Covering with plastic wrap, let it rise in a warm spot for 1 hour, or until doubled in size.
- Mix the brown sugar and cinnamon together in a small bowl.
- Once the dough has risen, lightly flour your counter. Roll the dough into a large rectangle, roughly 18 x 12 inches.Spread out 1/2 cup of softened butter all over the top side of the dough.Then sprinkle on the cinnamon sugar mixture, all the way to the edges. Starting from the long side, roll the dough tightly into a log.Slice into 12 to 14 rolls using a sharp bread knife or unflavored dental floss.
- Place the rolls in a 9 x 13 dish. Cover loosely with plastic wrap or a towel.If you're making them to eat same day you'll now let them rise for 30 to 45 minutes until puffy.Delay this second rise step if you want to make them ahead of time like this:
- Two Ways to Prep These Cinnamon Rolls for LaterNow at this point, if you want to make these rolls ahead of time, you have two really helpful options. Both work beautifully and still give you warm, fresh cinnamon rolls without any morning stress.Just pause the recipe here before the second rise and choose whichever path fits your day!Option 1. Refrigerate OvernightPerfect for next day baking, they rise slowly in the fridge and turn out soft, fluffy and perfect!Keep the sliced rolls in the dish you want to eventually bake these inCover tightly with plastic wrapRefrigerate up to 24 hoursWhen ready to bake, remove from the fridge and let them sit at room temperature for 30 to 45 minutes so they can complete their second riseBake as normalOption 2. Freeze Before BakingGreat for stocking your freezer. They come out tasting just as fresh as a brand new batch. recipe here. The second rise will happen later!Place the sliced rolls on a cookie sheet, and freeze until firmTransfer to a freezer bag for up to 2 monthsThaw overnight in the fridgeLet rise at room temperature for about 45 minutesBake as normal
- No matter which path you took (same day, overnight in the fridge, or thawed from frozen), once your rolls have finished their second rise they are ready for the oven!Bake in a 350°F preheated oven, for 18 to 20 minutes until golden on top.If you are using a glass dish, add 2 to 3 extra minutes so the centers bake through properly.
- While the rolls bake it's time to mix up the cream cheese frosting as follows:Beat the softened butter and softened cream cheese until smooth.Add the powdered sugar and vanilla.Mix until creamy and spreadable.Add a little more powdered sugar or a splash of milk to get your perfect texture.
- Spread the frosting over the warm cinnamon rolls so it melts into the spirals. Serve immediately for the best soft, gooey cinnamon rolls. Enjoy!
Notes
- This dough is incredibly versatile. Use it for cinnamon rolls, sticky buns, monkey bread, fruit rolls, sweet braids and more.
- Cold butter gives the dough a soft, tender richness.
- If you have a colder kitchen, let the dough rise in the oven with the light on.
- Tip for soft centers: pour 2 to 3 tablespoons of cream or half and half into the base of your baking dish before adding the rolls.
Storage
- Refrigerate dough for up to 2 days after the first rise
Related Recipes:
See all our Cinnamon Roll Dough Recipes HERE!Nutrition information is automatically calculated, so should only be used as an approximation.

The Takeaway
This KitchenAid cinnamon roll dough is soft, buttery and unbelievably easy.
It gives bakery level results without fancy ingredients or complicated steps and it stretches your grocery budget while giving your family the sweetest breakfast treat!
What to Try Next?!


Share and Rate This Recipe!
If this fluffy cinnamon roll dough brightens your morning, share it with someone who loves warm sweet rolls as much as we do!
Last update on 2026-06-26 / Affiliate links / Images from Amazon Product Advertising API


One Comment