
The Best Herby Buttery Dinner Rolls You’ll Ever Have!
Why Garlic Dinner Rolls?
Hi! If you’ve been following me for long you’ll already know this, but for those who are new, welcome to Far From The Farm. I’m Mona, the Brit behind the recipes, learning life and food in the States while sharing our debt-free journey and what’s on the menu in our home today!
Since moving from the UK to the States, I’ve been spoiled with all the bread options here.
Trouble is, the store-bought ones just don’t sit right with me. I even switched to gluten free for a while, but the real issue was all the additives in store-bought bread.
When we first moved here, my parents sent me a compact Cuisinart bread maker from Amazon.com as a surprise gift [ad] .
I didn’t realize then how much I’d rely on it, but now it’s one of the few kitchen gadgets I’d truly miss if it disappeared! It saves us so much money to make food at home and that’s one of the ways that we’re able to stick to a very tight grocery budget and still save on baby step 2 of our debt free journey!
And just a reminder that if you’re struggling and you need help with managing your budget or starting your own debt free journey then here’s some FREE resources below you may find helpful!
living frugally and fully
free tips and resources to make the most of what you have
After many test runs (and some spectacular flops along the way), I landed on these herby garlic butter rolls, my family’s favorite.
We make them at least once a week. They’re the perfect side for Italian nights, soups, or even as a snack warm out of the oven.
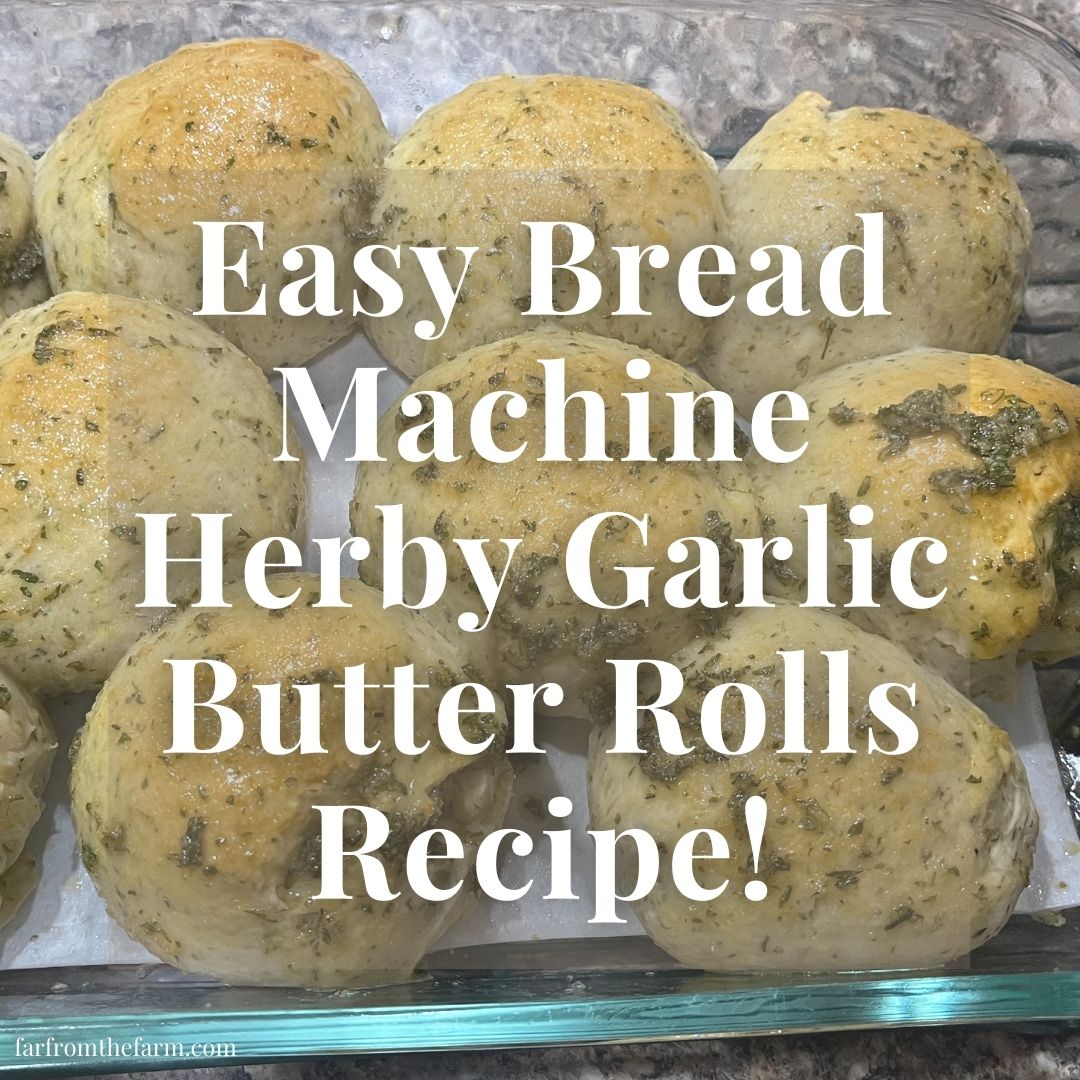
They’re firm enough to hold together, not too fluffy, not too dense, and topped with molten garlic butter that soaks right in. Simple. Delicious. Everything a dinner roll should be.
As always, these photos are from my real kitchen here in our sweet military base home. No AI recipe images or staged lighting or spotless marble counters. Just real life and real food made in a small space. Proof that you can feed your family well without needing a dream kitchen or fancy tools!
So let’s hop into the kitchen and make the most delicious and hearty garlic bread dinner rolls that your friends and family will love!
Recipe Disclaimer
All Far From The Farm recipes are shared as a guide based on what works in my home kitchen. Results may vary depending on your ingredients, equipment, and cooking setup, so always use your own judgement. Please check all ingredients for allergies, intolerances, or dietary needs before making any recipe. Far From The Farm is not responsible for any reactions or outcomes from the use of these recipes. Nutritional information is an estimate only.
Mona – Far From The Farm
Why You’ll Love Using a Bread Machine In Your Kitchen!
If you’re new here, you’ll quickly learn that I am such a fan of using a bread machine for dough. It has been one of the biggest helps in my kitchen, especially during busy or overwhelming seasons.
My parents gifted me this little Compact Cuisinart Bread Machine recently when I moved from the UK to the States after getting married, and it has worked like a little powerhouse ever since!

It kneads beautifully. It rises dough evenly. It keeps everything contained in one pan so I am not dealing with flour across every surface of the kitchen.
And on days where the house feels chaotic or I am juggling too much, I can add the ingredients, press the dough button, and let it get on with the work while I focus on everything else.
It takes away so much of the guesswork and makes homemade bread, pizza dough, cinnamon rolls, soft rolls, and sweet bakes feel much simpler.
It has also been a real blessing for our budget. Homemade dough costs pennies compared to store prepared versions and certainly compared to eating out. As a military family on baby step 2 of our debt free journey, little savings like that matter across an entire month.

Check out The Bread Machine Academy today!
Learn bread machine baking with beginner-friendly guides on flour, yeast, ingredients, troubleshooting, dough cycles, tips, and techniques!
If you have ever felt intimidated by bread making, this is your gentle nudge to give it a try. A dough cycle handles all the kneading for you.
You get soft, reliable, fluffy dough without standing over a counter for ages or worrying if things rose the way they should. It makes homemade cooking feel doable, even on days that are far from calm.
Browse Bread Machine Recipe Type
There are so many beginner friendly ideas to help you feel confident and excited about homemade dough – join the Facebook group today and share recipes and tips for perfect bread, every time!
Join our new Facebook Group!
THE BEST BREAD STARTS WITH THE RIGHT COMMUNITY…
Beginner-Friendly Bread Machine and Bread Recipes is our new Facebook group for home bakers who want bread baking to feel simple, doable, and encouraging.

Equipment
Here’s what I keep on hand to make these rolls quickly and with as little mess as possible:
- Bread maker with dough cycle – I love my Cuisinart Compact Bread Maker
- Measuring spoons and a measuring jug
- 1 cup scoop for flour
- A few small bowls for the eggs
- Pastry brush for the garlic butter topping
- 9” x 13” glass baking dish
- plastic wrap
- parchment paper
Available on Amazon.com [ad]


Ingredients
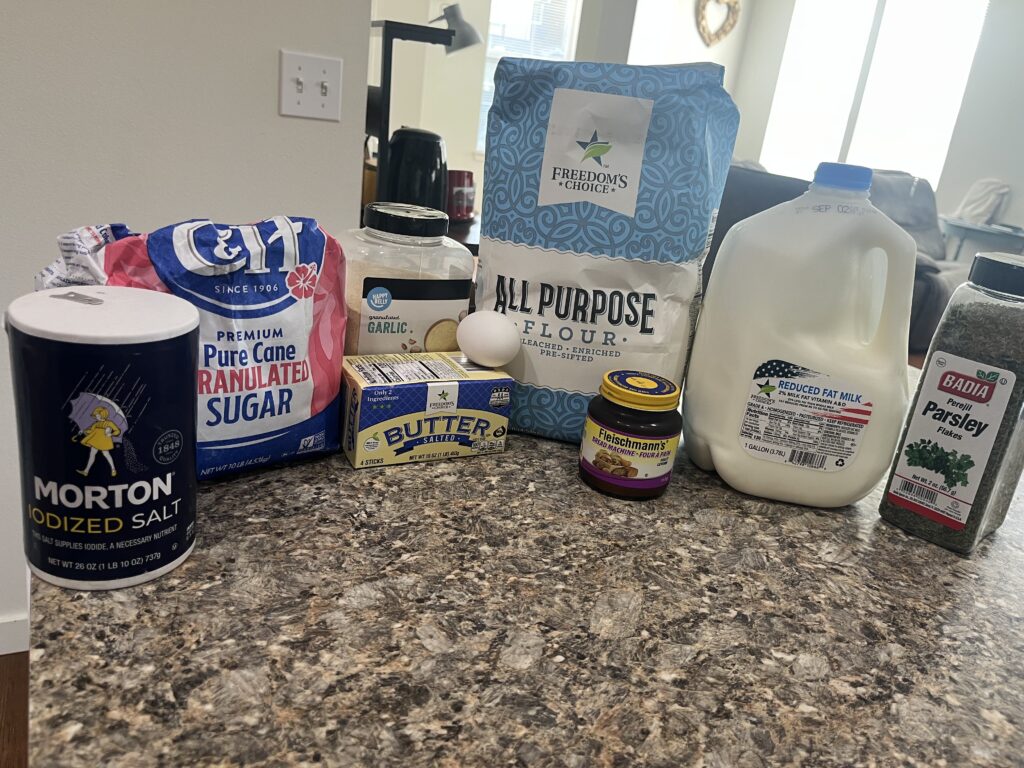
For the Dough:
- 1 cup warm milk (not too hot or it will kill the yeast)
- 1 tbsp white sugar
- 2 & 1/4 tsp bread machine yeast (equivalent to 1 packet)
- 4 & 1/2 tbsp salted butter, cubed
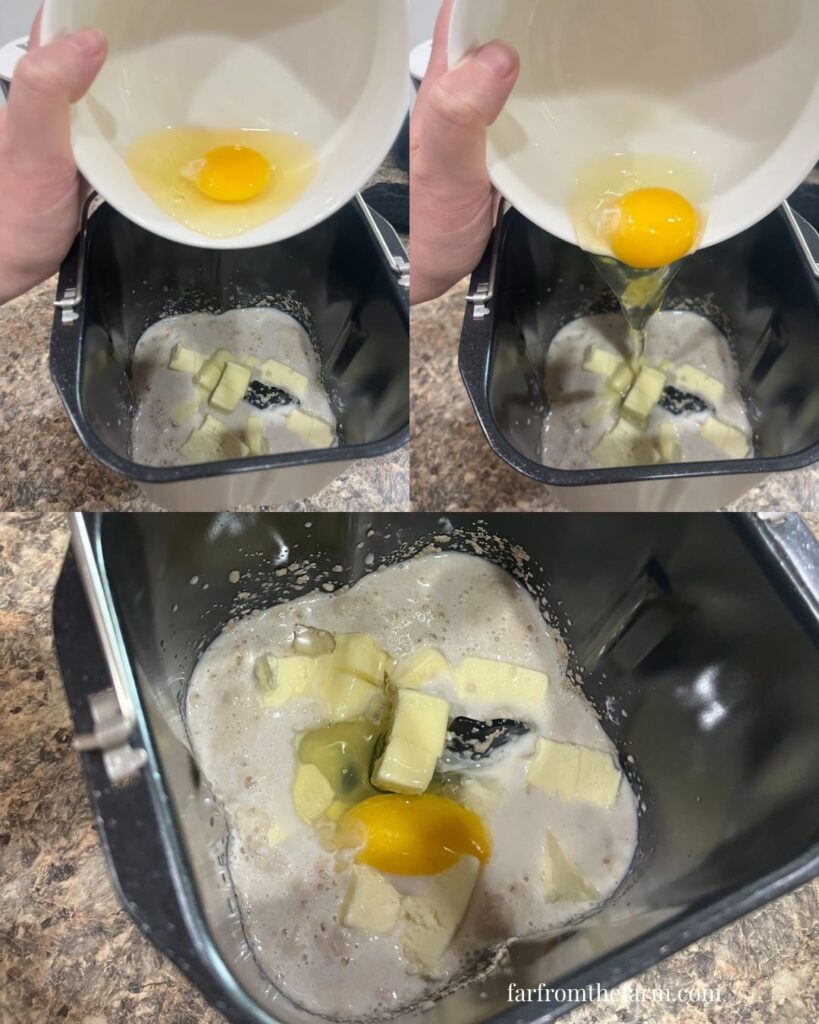
- 2 eggs (1 for dough, 1 for brushing tops before baking)
- 1 tbsp garlic powder
- 1 tbsp dried parsley flakes
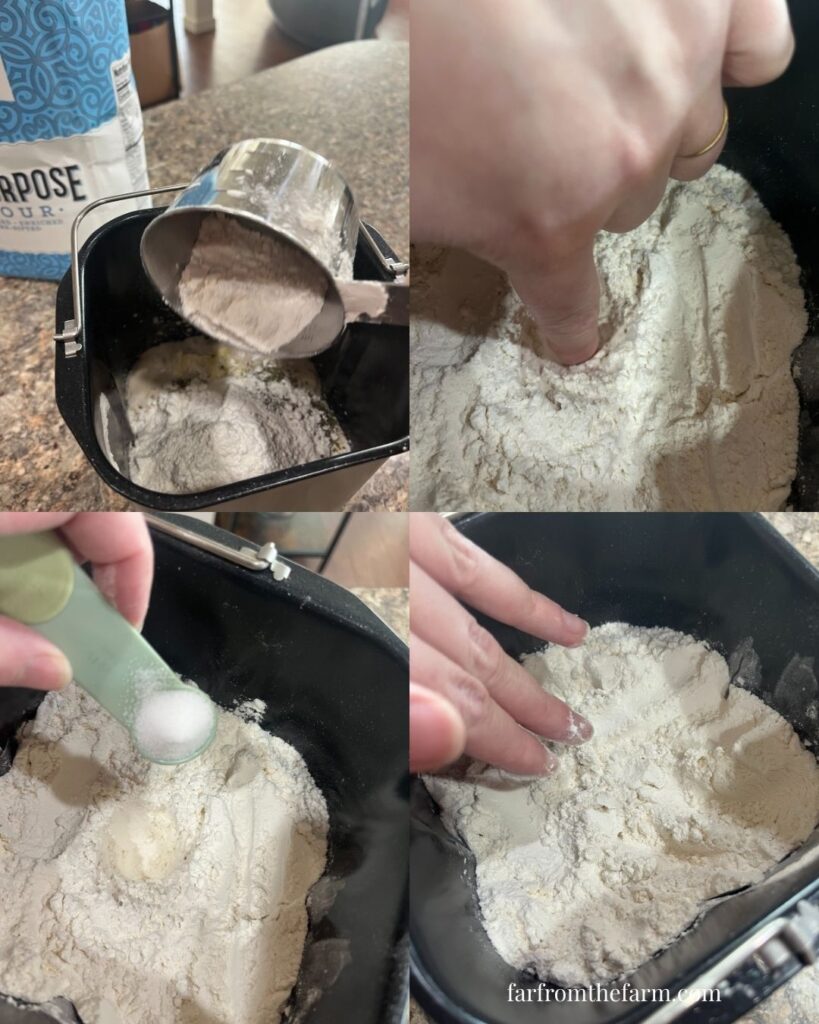
- 3 & 1/2 cups all-purpose flour
- 1 tsp salt (optional, since the butter already has salt)
- PAM cooking spray
For the Garlic Butter Topping:
- 2 tbsp salted butter, melted
- 1.5 tsp garlic powder
- 1.5 tsp dried parsley flakes
Quick Glance Instructions for Experienced Bread Machine Users
- Bloom yeast in warm milk with sugar for 5 minutes.
- Add butter, egg, garlic, parsley, flour, and salt.
- Run bread machine on “dough” cycle.
- Divide into 10–12 rolls, shape, and let rise in a greased 9×13 dish.
- Brush with egg wash, bake at 350°F for 20–25 minutes.
- Finish with garlic butter topping and serve warm.
Step-by-Step Instructions for Bread Machine Beginners
Step 1 – Remove the bread machine insert so you don’t spill ingredients into the machine.
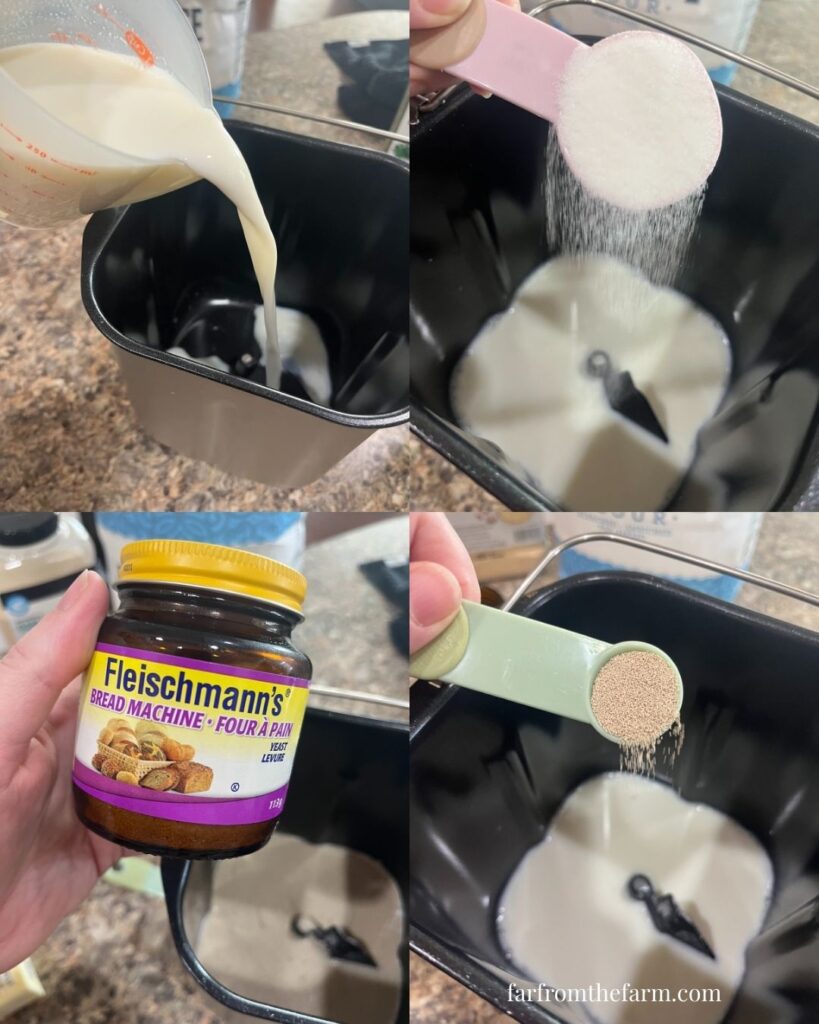
Step 2 – Add 1 cup warm milk.
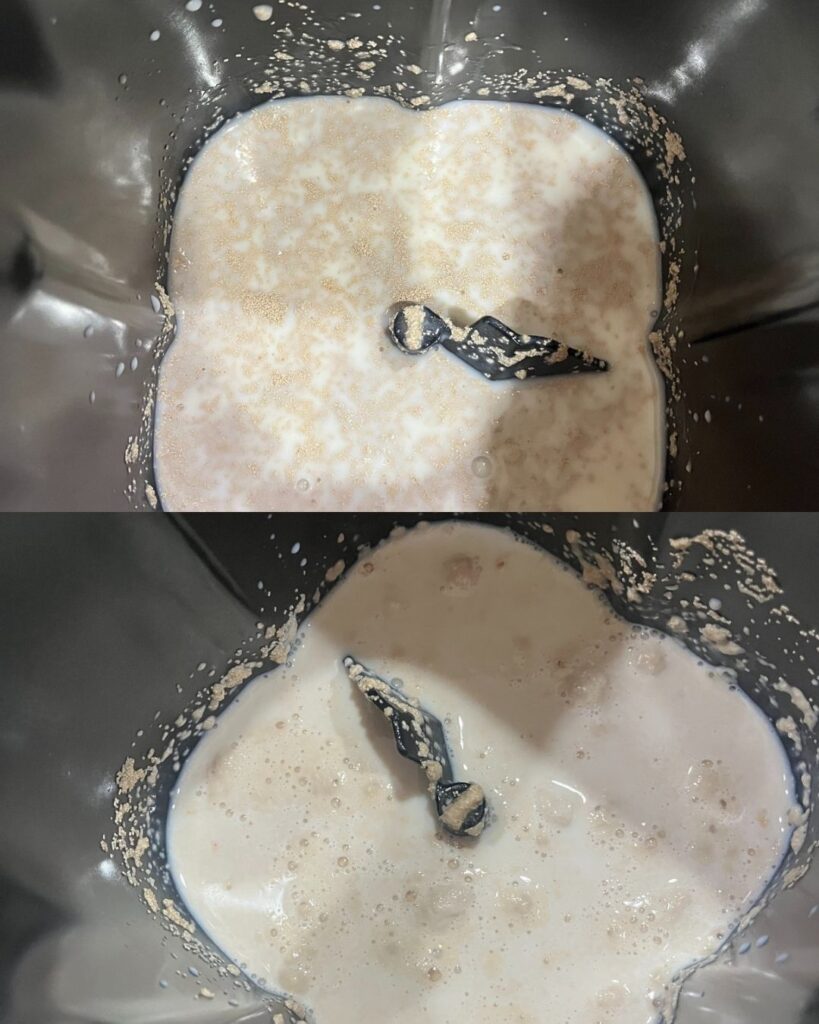
Step 3 – Stir in 1 tbsp sugar and 2 ¼ tsp yeast. Let bloom 5 minutes until cloudy and bubbly (if not you’ll need to toss the mixture restart with fresh yeast).
Step 4 – Add 4 ½ tbsp cubed butter.
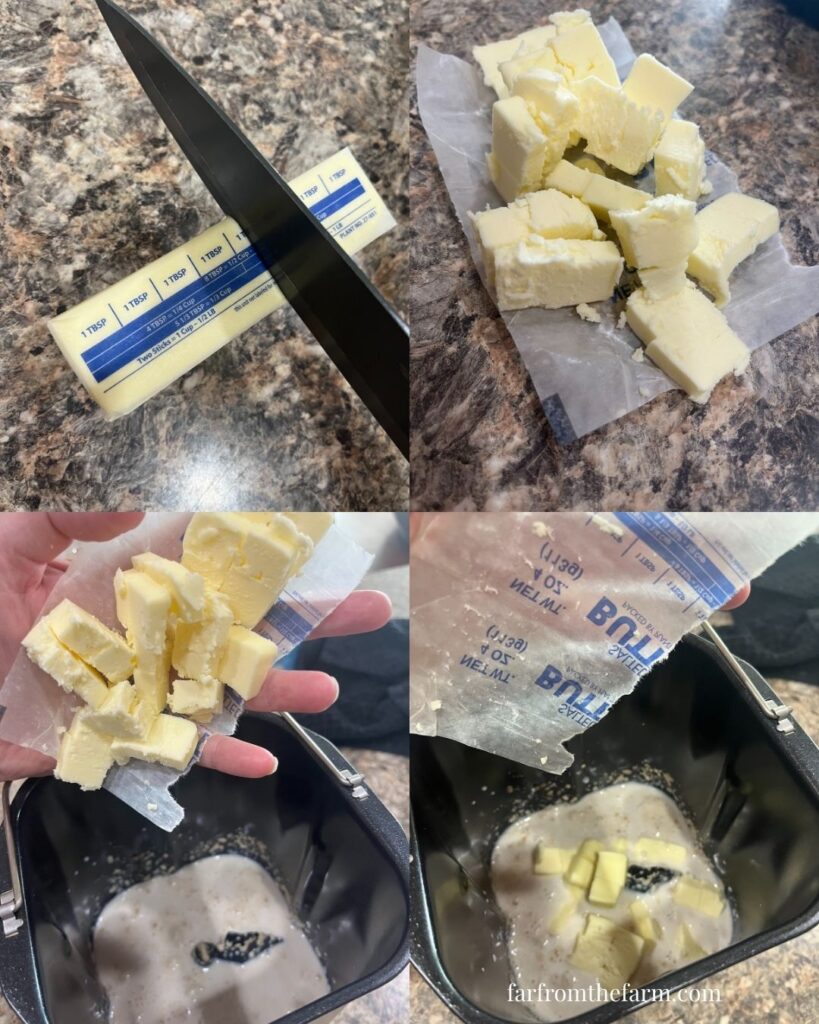
Step 5 – Crack 1 egg into a small bowl (never straight into dough!) and add it in.
Step 6 – Sprinkle in 1 tbsp garlic powder and 1 tbsp parsley flakes.

Step 7 – Add 3 ½ cups flour. Make a small well, add 1 tsp salt (optional), and cover lightly.
Step 8 – Return the insert to the machine. Select the “dough” cycle (mine runs 1 hr 30 mins).
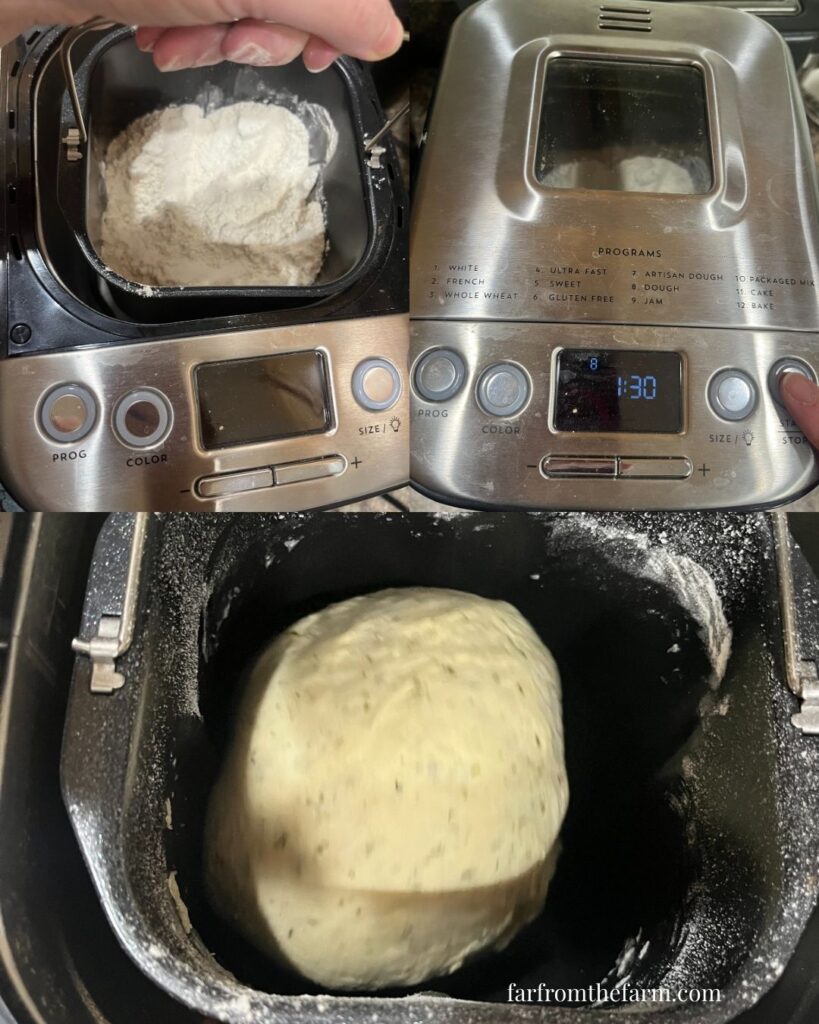
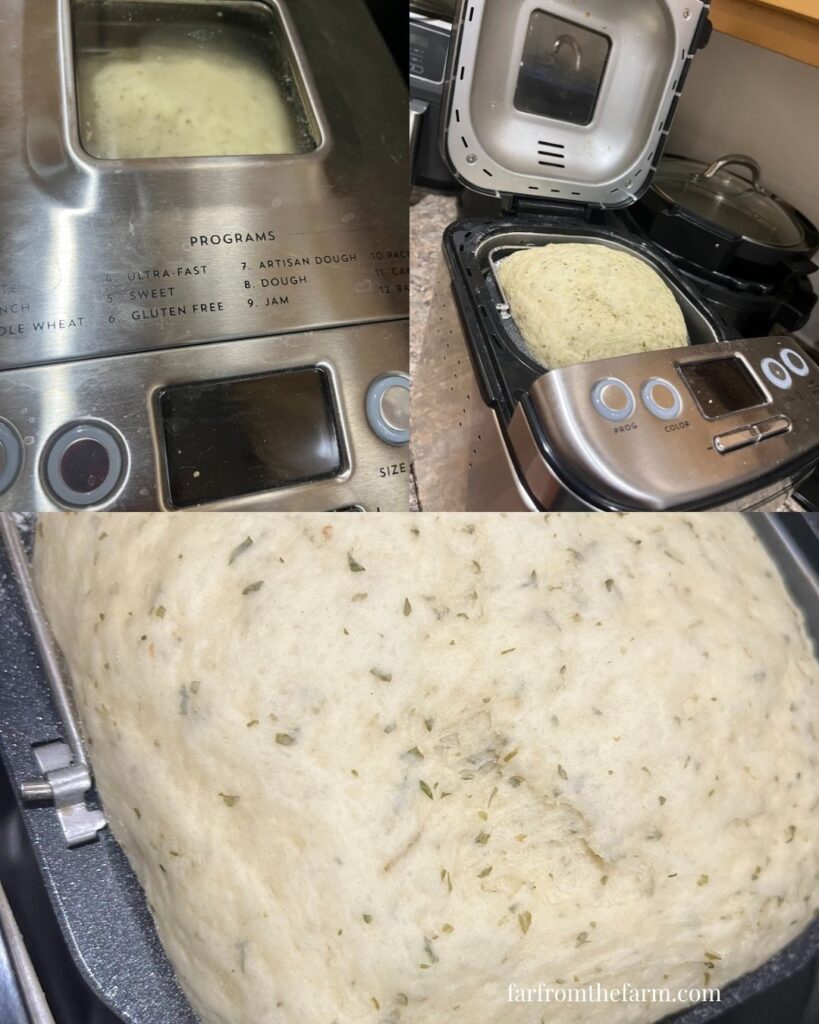
Step 9 – When the cycle finishes, tip dough onto a floured surface.
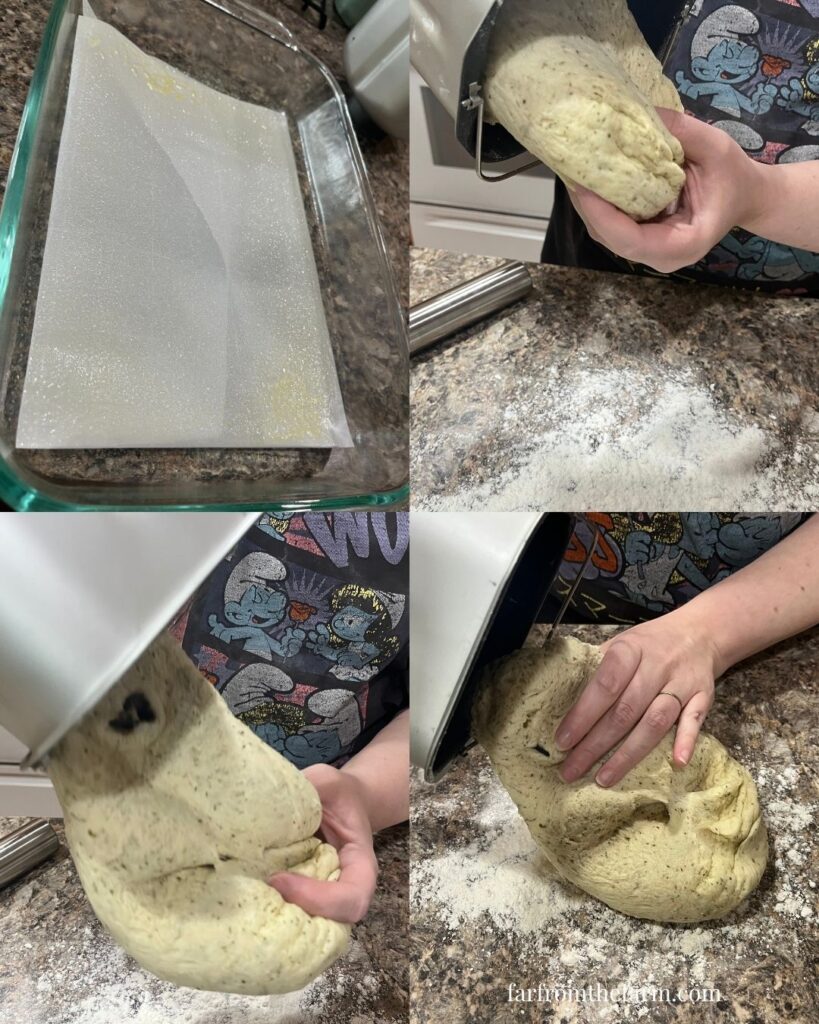
Shape the dough into a ball, kneading slightly til it comes together, took me about a minute. This helps improve elasticity in the dough.
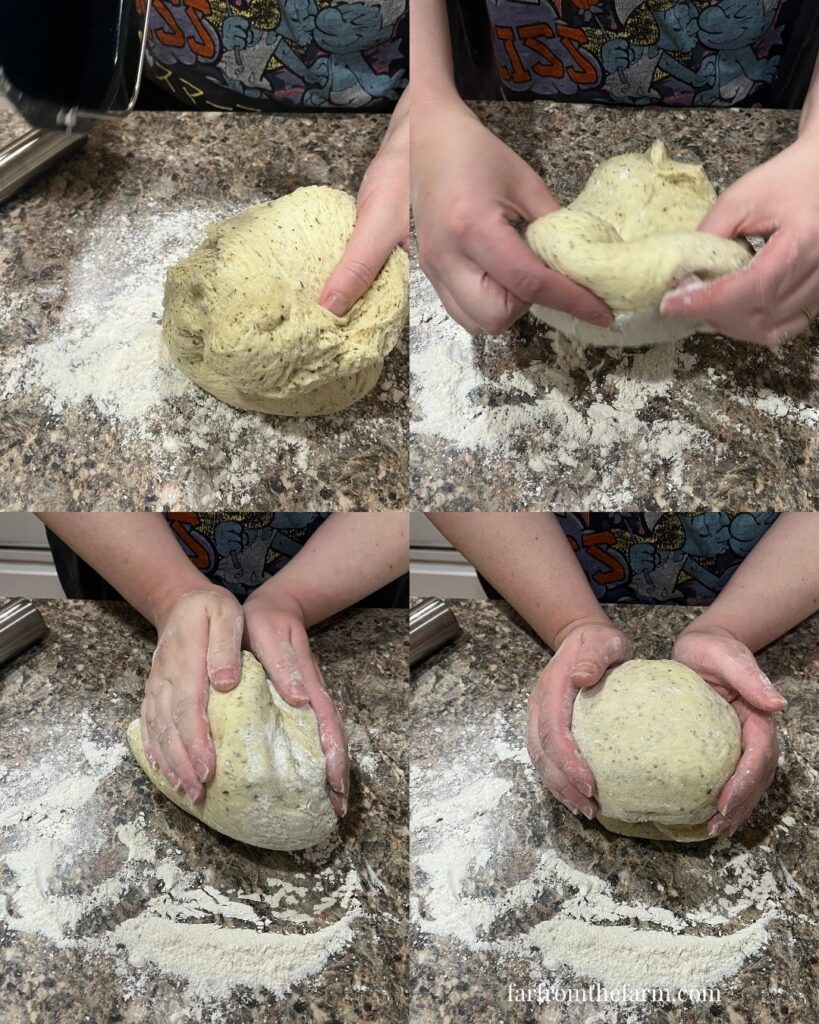
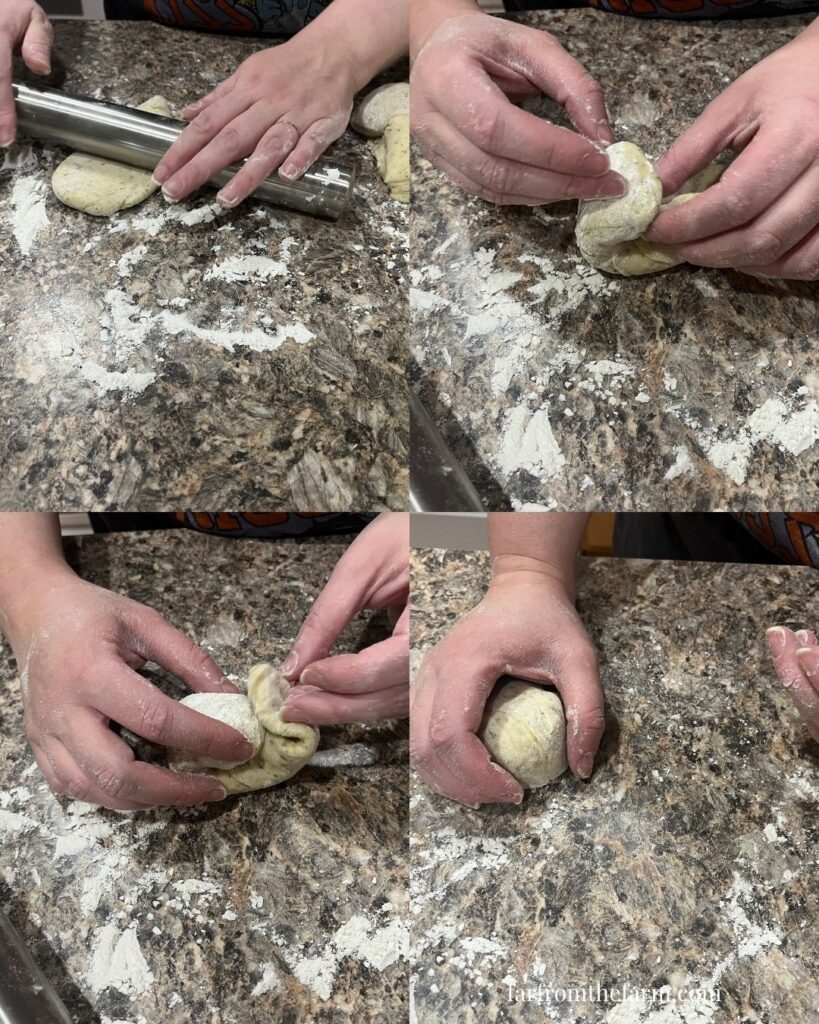
Divide the dough into 10–12 pieces. We prefer a substantial roll so aim for 10 pieces.

Step 10 – Shape into rolls, folding edges under and pinching shut (or roll like hotdog buns, up to you).
Step 11 – Line a 9×13 glass dish with parchment paper and spray with oil.
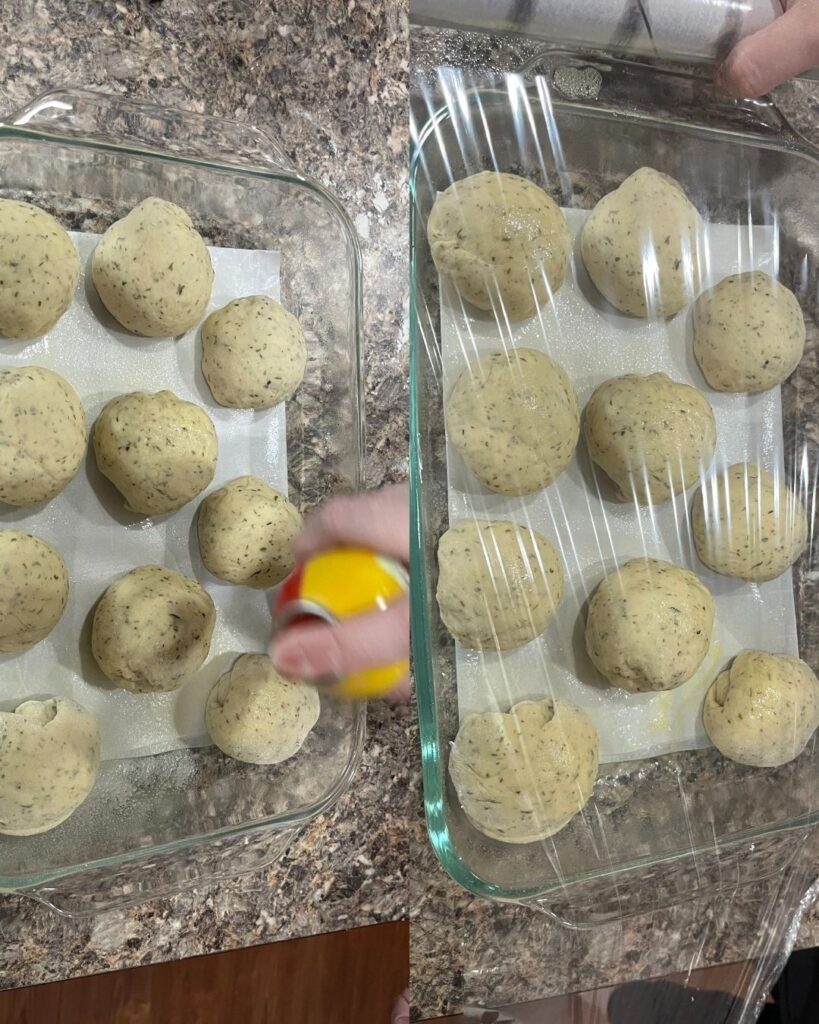
Step 12 – Arrange rolls in the dish, cover with plastic wrap, and rise 30 minutes until nearly doubled.
Step 13 – Preheat oven to 350°F.
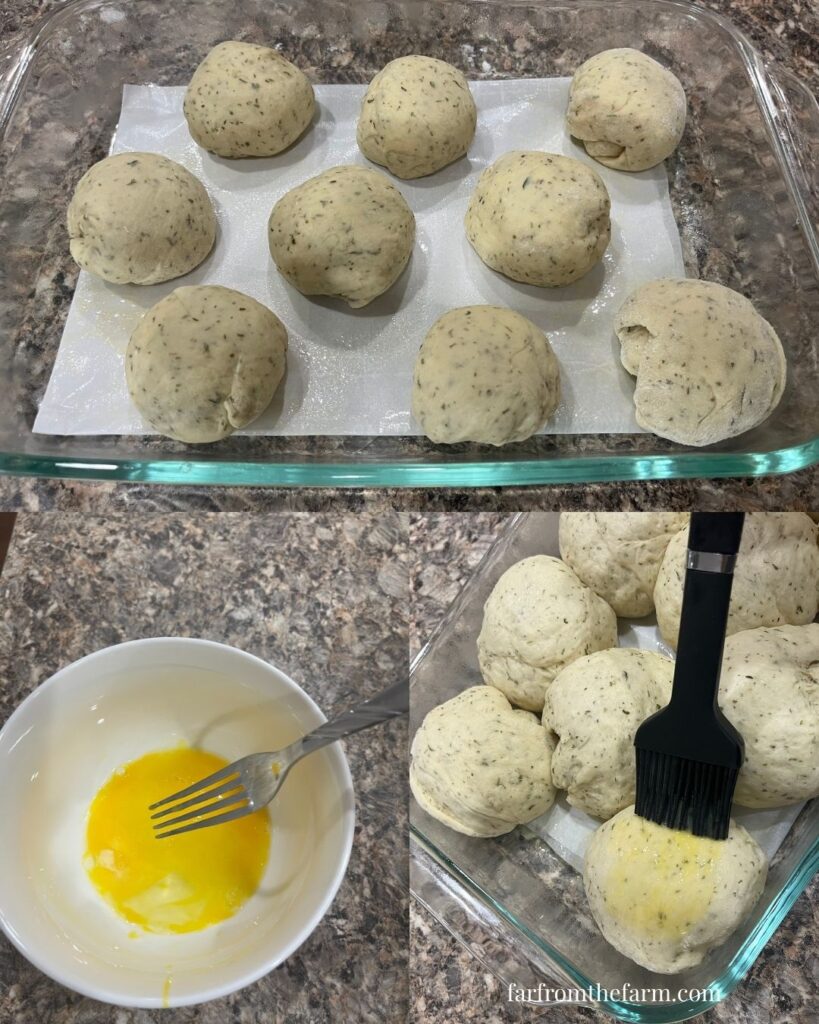
Step 14 – Beat 1 egg with 1 tbsp water, brush over rolls.
Step 15 – Bake 20–25 minutes until golden and firm.
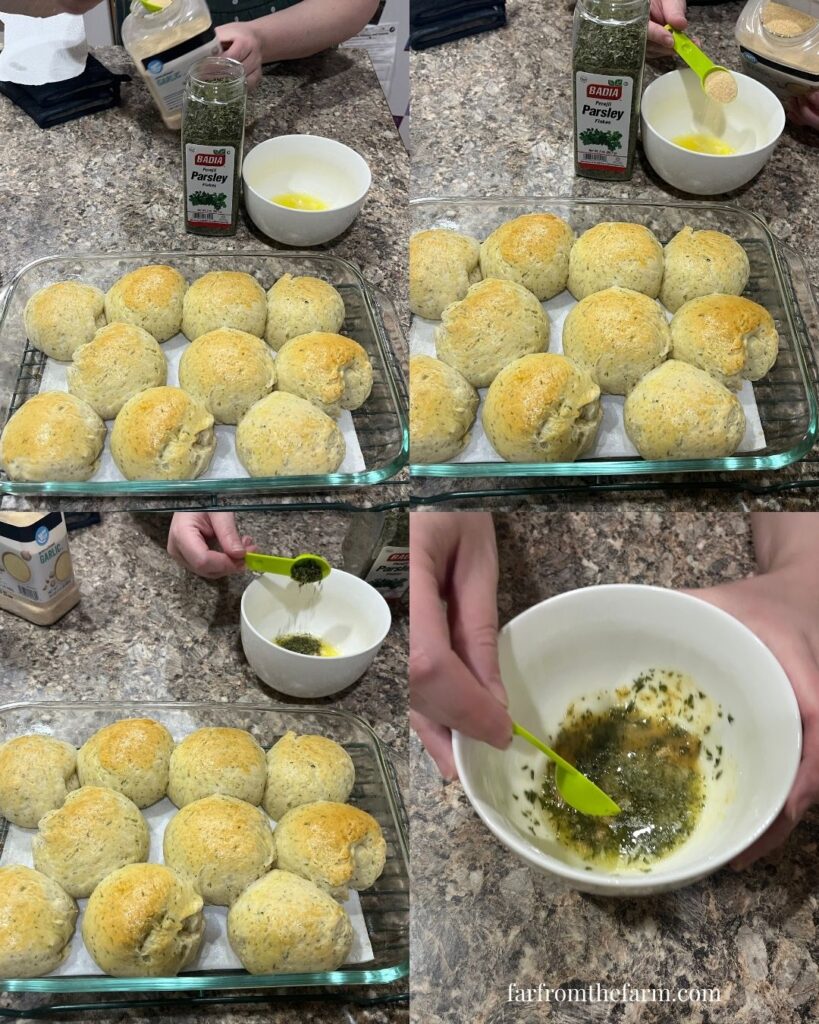
Step 16 – Mix topping: 2 tbsp melted butter, 1 ½ tsp garlic powder, 1 ½ tsp parsley flakes.
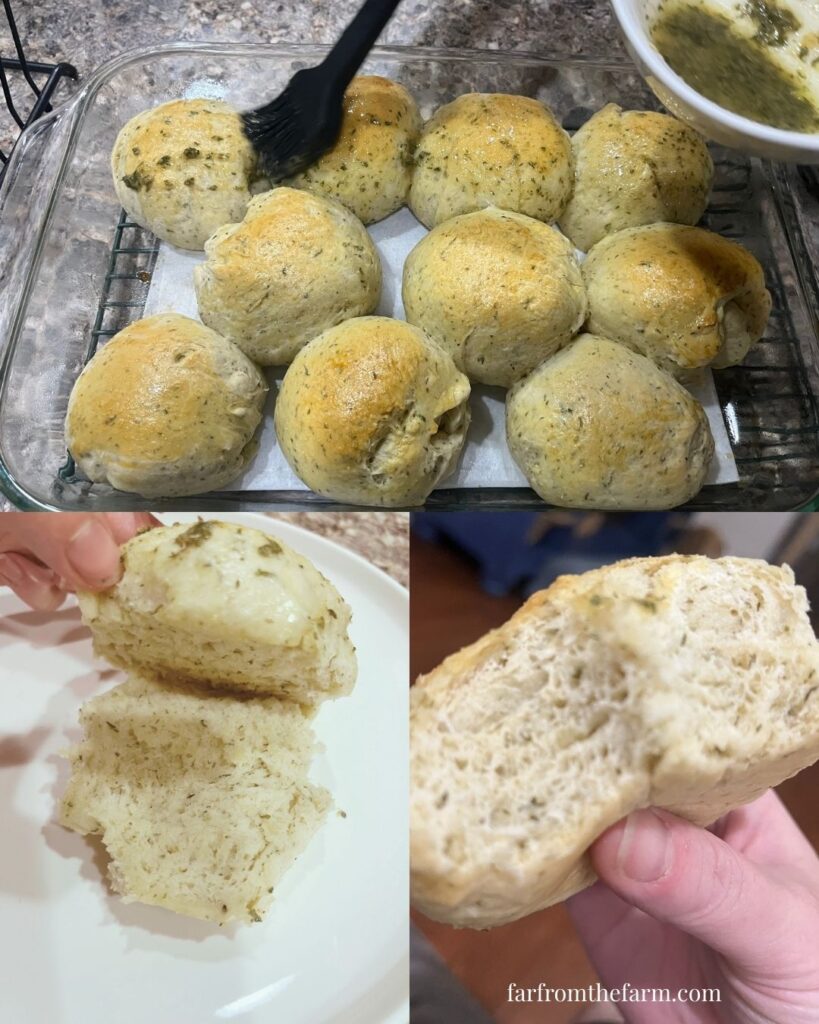
Step 17 – Brush hot rolls with garlic butter. Let soak a couple minutes, then serve warm!
Storage
Best eaten fresh on the same day. If you do have leftovers, store in an airtight container for up to 24 hours.
To reheat from your airtight container, pop them individually in the oven for a few minutes or give them a quick blast in the microwave.
Yes, you can freeze these rolls after baking too!
Skip the garlic butter topping step and let them cool completely, then wrap each roll in plastic wrap and place in a freezer-safe bag.
When ready to serve, take them straight from the freezer, no need to thaw.
Place on a baking sheet and reheat in a preheated 350°F (175°C) oven for 8–10 minutes until warmed through. Add the garlic butter step when they come out of the oven and serve warm.
Extra Tips
- You can swap out parsley for Italian seasoning, thyme, or oregano.
- Brush extra garlic butter on just before serving for a glossy finish.
- Serve them alongside soups, pasta dishes, or roast chicken dinners.
Serving Suggestions
Best served warm. We like them as a side for spaghetti nights, but they also stand on their own with just a little extra butter.
Easy Bread Machine Herby Garlic Butter Rolls Recipe
Ingredients
Equipment
Method
- Remove the bread machine insert so you don’t spill ingredients into the machine.
- Add 1 cup warm milk.
- Stir in 1 tbsp sugar and 2 ¼ tsp yeast. Let bloom 5 minutes until cloudy and bubbly (if not, restart with fresh yeast).
- Add 4 ½ tbsp cubed butter.
- Crack 1 egg into a small bowl (never straight into dough!) and add it in.
- Sprinkle in 1 tbsp garlic powder and 1 tbsp parsley flakes.
- Add 3 ½ cups flour. Make a small well, add 1 tsp salt (optional), and cover lightly.
- Return the insert to the machine. Select the “dough” cycle (mine runs 1 hr 30 mins).
- When the cycle finishes, tip dough onto a floured surface and divide into 10–12 pieces.
- Shape into rolls, folding edges under and pinching shut (or roll like hotdog buns, up to you).
- Line a 9×13 glass dish with parchment and spray with oil.
- Arrange rolls in the dish, cover with plastic wrap, and rise 30 minutes until nearly doubled.
- Preheat oven to 350°F.
- Beat 1 egg with 1 tbsp water, brush over rolls.
- Bake 20–25 minutes until golden and firm.
- Mix your 2 tbsp melted butter, 1 ½ tsp garlic powder, 1 ½ tsp parsley flakes together until well combined.
- Brush hot rolls with garlic butter. Let soak a couple minutes, then serve warm!
Notes
Storage:
Best eaten fresh on the same day. If you do have leftovers, store in an airtight container for up to 24 hours. To reheat from your airtight container, pop them individually in the oven for a few minutes or give them a quick blast in the microwave.How to Freeze Your Dough:
Bake your rolls but skip the garlic butter topping step and let them cool completely, then wrap each roll in plastic wrap and place in a freezer-safe bag. When ready to serve, take them straight from the freezer, no need to thaw. Place your frozen rolls on a baking sheet and reheat in a preheated 350°F (175°C) oven for 8–10 minutes until warmed through. Add the garlic butter step when they come out of the oven and serve warm.Nutrition information is automatically calculated, so should only be used as an approximation.
The Takeaway
These rolls are everything you want in a bread basket. Easy, herby, buttery, and guaranteed to disappear before dinner is done.
If you’re nervous about bread baking or the kneading process then let the bread machine do the hard part.
All that’s left is shaping, baking, and enjoying!
What to Read Next


Share & Rate This Recipe!
If you tried this recipe, please share your feedback with a quick star rating or comment below. And if you loved it, don’t forget to share it with friends and family too!
Last update on 2026-07-14 / Affiliate links / Images from Amazon Product Advertising API


3 Comments