How to make fluffy, large, big batch of dairy-free English muffins in your bread machine that freeze beautifully for breakfast sandwiches, jam, and butter!
“These fluffy bread machine English muffins are perfect toasted with butter and jam, but they really shine as homemade breakfast sandwiches straight from the freezer.” – Mona, Far From The Farm
Hi! If you’ve been following me for long you’ll already know this, but for those who are new, welcome to Far From The Farm. I’m Mona, the Brit behind the recipes, learning life and food in the States while sharing our debt-free journey and what’s on the menu in our home today!
I already have a stand mixer English muffin recipe, and it has quickly become one of those recipes I am so glad I took the time to write down properly.
But lately I have been valuing convenience more than ever.
There are seasons of life where making everything from scratch feels lovely and slow and cozy. Then there are seasons where you still want homemade food, but you also need the appliances to do some of the heavy lifting while you get on with everything else.
That is exactly why I love using my bread machine for English muffin dough.
Being able to add the ingredients, press the Dough cycle, and come back later to dough that is ready to shape and cook has been such a huge help in our home. The bread machine does the mixing, kneading, and first rise while I get on with the rest of the day.
And English muffins are one of those recipes that really earn their place in the freezer.
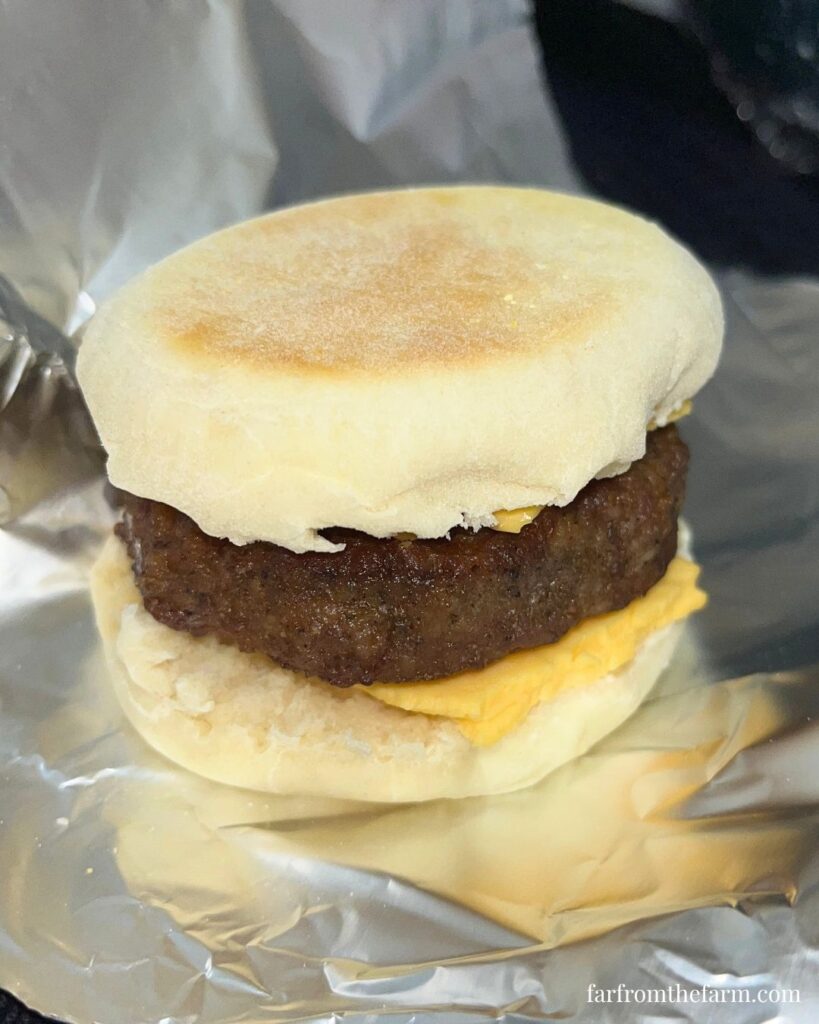
We love them for little homemade copycat Sausage McMuffin-style breakfast sandwiches, especially because they last a few days in the fridge once assembled and reheat so well. They are also wonderful toasted with butter and jam, peanut butter and honey, or just served warm alongside eggs and bacon.
The big win for me is that these freeze beautifully once cooked. I always try to keep some homemade English muffins on hand because they make breakfast feel sorted before I have even properly started the day.
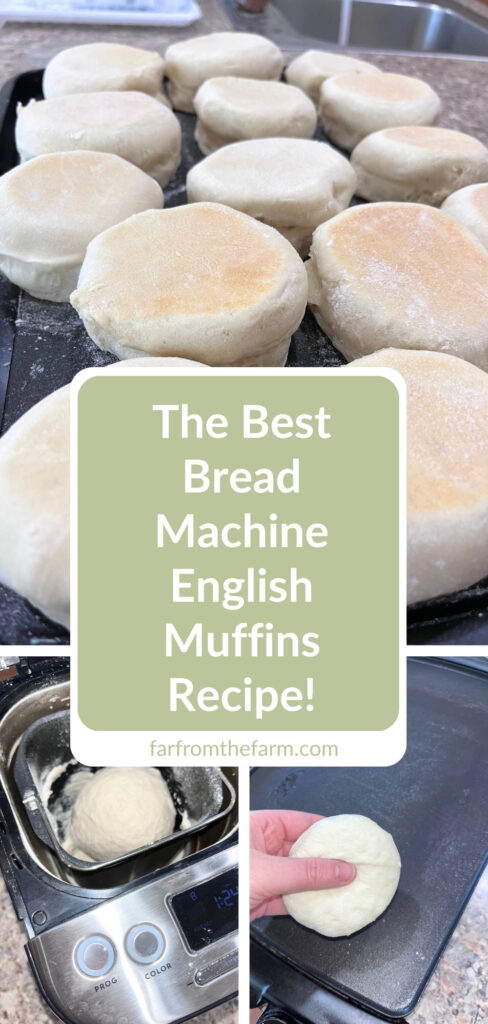
This recipe does make a generous amount of dough, so you will need a bread machine that can handle up to a 2 lb loaf. There needs to be enough room for the dough to mix, knead, and rise without overflowing. If your bread machine is smaller, or if you are not sure how much dough it can safely handle, go ahead and halve the recipe.
And of course I just have to mention again, that using a bread machine has genuinely changed the way I cook at home, and I think it could help you out too!
My little bread machine does so much for me, dough for sweet rolls, soft dinner rolls, pizza nights, everyday sandwich loaves, quick cakes, even small batches of jam.
It takes on all the fiddly steps and frees me up to carry on with everything else at home. It keeps things consistent and budget friendly, and honestly it has made homemade baking feel achievable even on my busiest days. I’ll share the one I use later on in this post.
As a military family working through Baby Step 2 of our debt-free journey, we are making more things at home these days.
Every dollar we can stretch that little bit further helps. Homemade English muffins are a lovely example of that because they use basic ingredients, freeze well, and can turn into easy breakfasts for several days.
And just a reminder that if you’re struggling and you need help with managing your budget or starting your own debt free journey then here’s some FREE resources below you may find helpful!
living frugally and fully
free tips and resources to make the most of what you have
As always, these photos are from my real kitchen here in our sweet military base home. No AI recipe images or staged lighting or spotless marble counters. Just real life and real food made in a small space. Proof that you can feed your family well without needing a dream kitchen or fancy tools!
So grab your bread machine, warm up the griddle, and head into the kitchen to make these fluffy bread machine English muffins!
Recipe Disclaimer
All Far From The Farm recipes are shared as a guide based on what works in my home kitchen. Results may vary depending on your ingredients, equipment, and cooking setup, so always use your own judgement. Please check all ingredients for allergies, intolerances, or dietary needs before making any recipe. Far From The Farm is not responsible for any reactions or outcomes from the use of these recipes. Nutritional information is an estimate only.
Mona – Far From The Farm
Equipment
- Bread machine with Dough cycle, suitable for up to 2 lb loaves
- Measuring jug, cups and spoons
- Plastic wrap or clean kitchen towel
- Silicone bench mat or lightly floured work surface
- Bench scraper
- Rolling pin
- 3-inch cutter or drinking glass
- Electric griddle
- Spatula
- Cooling rack
- Baking sheet, if finishing in the oven
Available on Amazon.com [ad]





Ingredients
Makes: 14 – 16 Large English Muffins
- 1 3/4 cups warm water
- 1 1/2 tbsp honey
- 2 tsp active dry yeast
- 3 tbsp vegetable oil
- 4 cups all-purpose flour
- 1 1/2 tsp salt
- Cornmeal or semolina, for dusting (optional, flour works too).
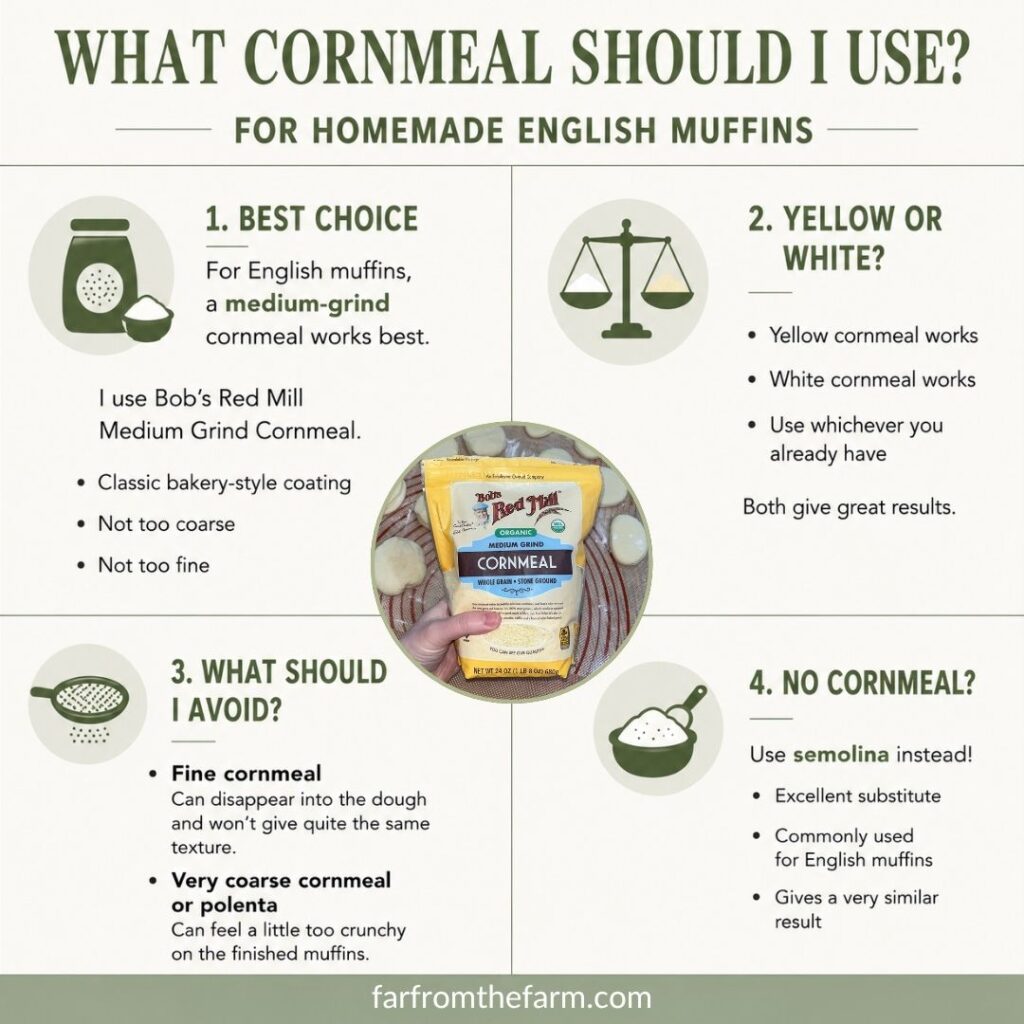
Note: I use Bob’s Red Mill Medium Grind Cornmeal when I have it, but semolina works beautifully too. If you don’t have either on hand, don’t worry. A very light dusting of flour works perfectly well to stop the dough sticking while shaping and cooking.
Available on Amazon.com [ad]

Step-by-Step Instructions
Step 1. Add the water, honey, and yeast
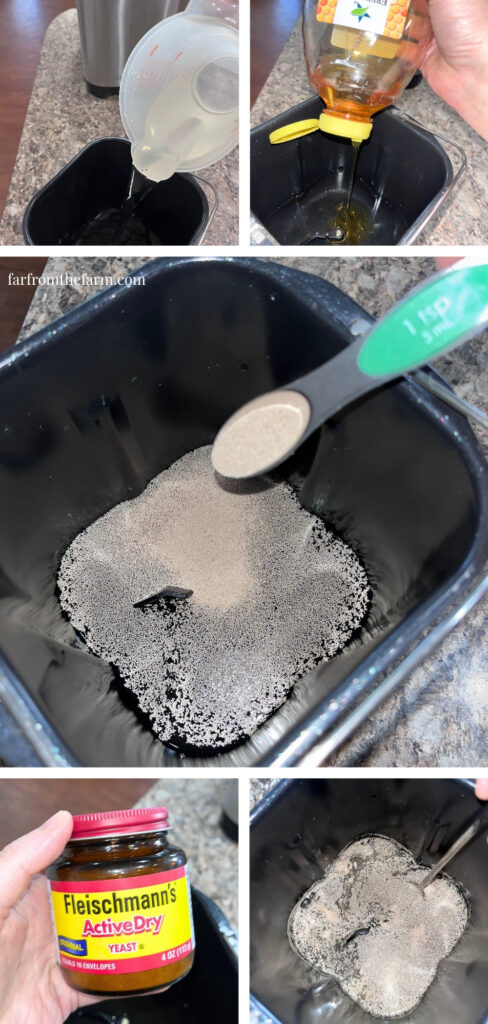
Remove the bread machine pan from the bread machine before adding your ingredients.
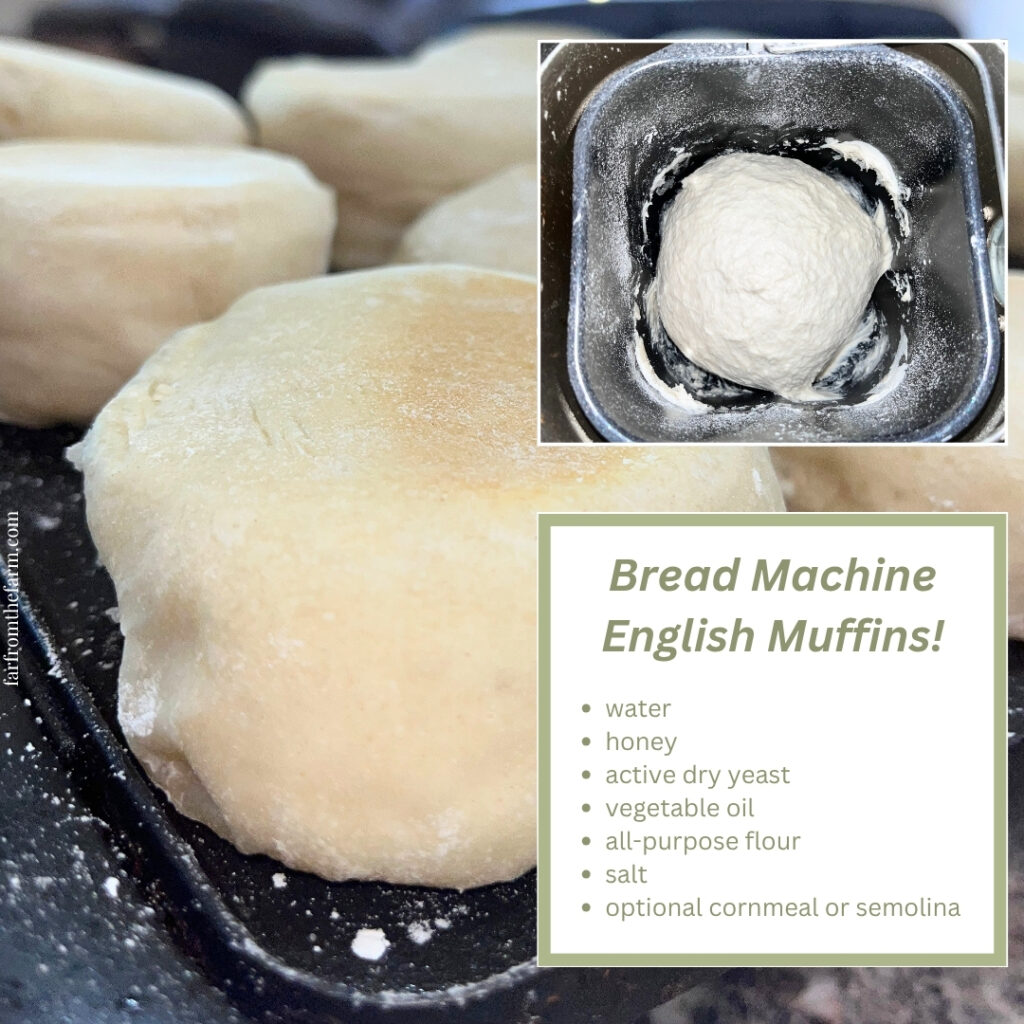
Add the warm water, honey, and active dry yeast into the bread machine pan. Stir gently, then cover the pan with plastic wrap or a clean kitchen towel.
Allow it to sit for 5 to 10 minutes.
I like removing the bread machine pan first because I have had accidents before, and I would much rather wipe up the counter than try to clean ingredients out of the bottom of the machine.
Step 2. Check the yeast
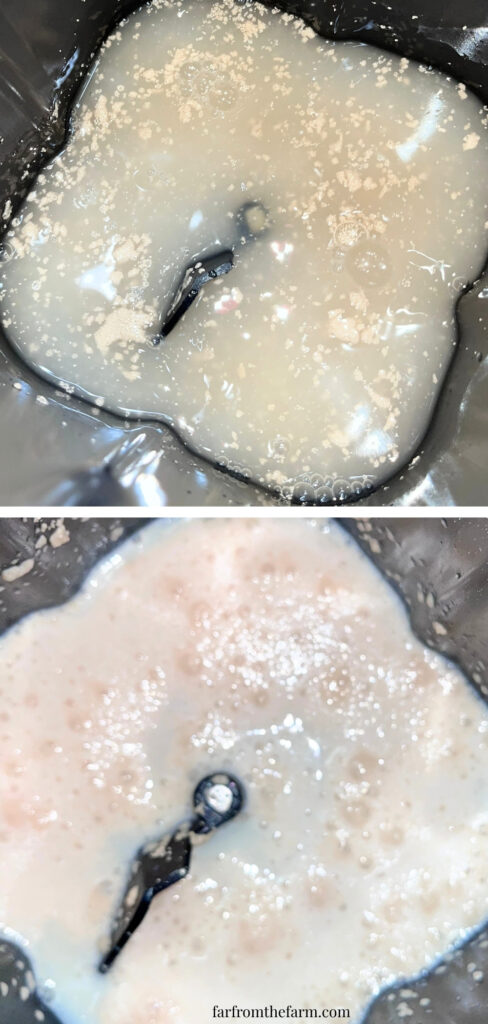
After 5 to 10 minutes, the yeast mixture should look frothy with some bubbles on the surface.
If nothing happens, discard it and start again with fresh yeast. This step is worth doing because old or inactive yeast will leave you with sad, flat English muffins.
Step 3. Add the oil
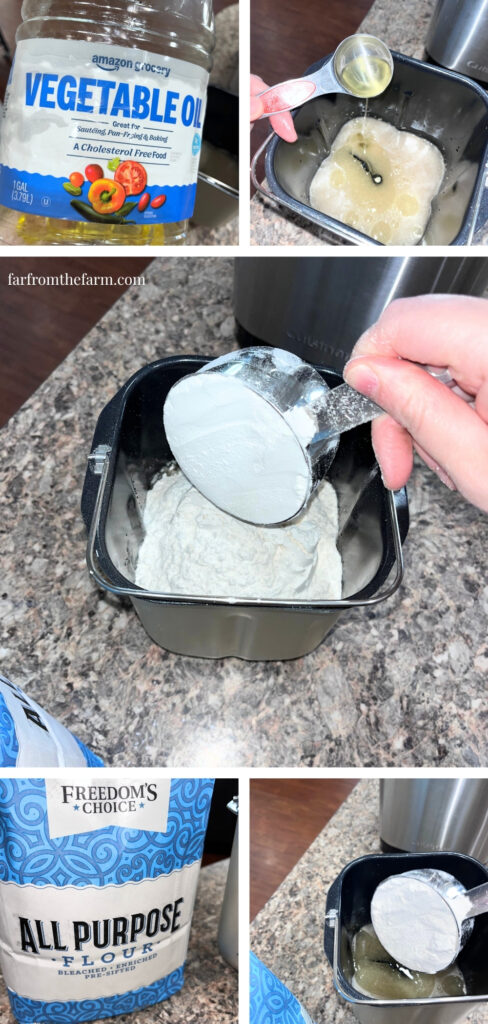
Add the vegetable oil to the yeast mixture.
No need to mix here. Just add it in before the flour goes on top.
Step 4. Add the flour
Add the all-purpose flour on top of the liquid ingredients.
There is no need to mix it in by hand. The bread machine will take care of that during the Dough cycle.
Step 5. Add the salt
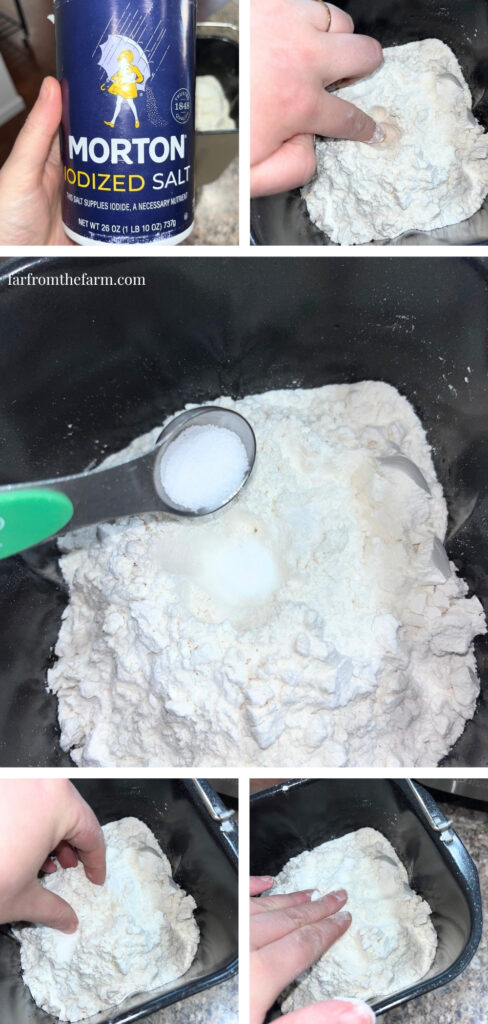
Make a small hole or well with your finger in the top of the flour.
Add the salt into that little well, then cover it with a bit of the surrounding flour.
This helps prevent the salt from coming into direct contact with the yeast too early in the mixing process, which in my experience can affect the rise. You don’t see that noted in bread machine manuals, but it is one of those little bread machine habits I have picked up and kept.
Since I started doing this extra step I have had a lot less bread machine failures!
Step 6. Run the Dough cycle
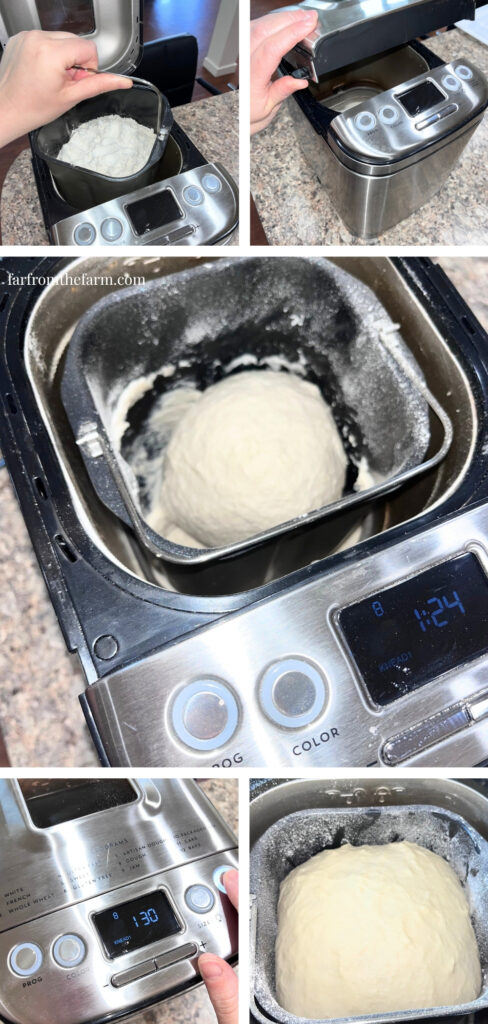
Insert the bread machine pan back into the bread machine. Select and run the Dough cycle.
My Cuisinart Compact bread machine takes about 90 minutes to complete its Dough cycle, which is the same for most basic models.
One thing I discovered while testing this recipe is that the extra hour of resting really does improve the flavour of the finished English muffins, but don’t leave the dough sitting inside the bread machine for that extra hour.
This recipe makes a generous amount of dough, and mine continued rising until it was trying to escape around the bread pan. Trust me, cleaning dough out of a bread machine isn’t how you want to spend your afternoon!
Instead, as soon as the Dough cycle finishes, tip the dough straight onto a lightly floured work surface.
Using a bench scraper, gently fold and gather the dough into a rough ball for about 2 minutes, which greatly reduces how sticky the dough is.
Lightly dust the top with flour, then cover with a clean kitchen towel or plastic wrap and allow it to rest for 1 hour.
The light dusting of flour helps stop the covering sticking to the soft dough, and you still get the extra flavour from that additional resting time without risking an overflowing bread machine.
Note on dough size!

This recipe makes a generous amount of dough, and is intended for bread machines with a 2 lb loaf capacity.
Don’t be surprised if the dough rises right to the top of the bread pan during the Dough cycle. That’s completely normal and you’ve done nothing wrong.
If your bread machine struggles with larger batches, you’re concerned about the amount of dough, or your machine is smaller than a 2 lb model, simply halve the recipe and continue as written.
Note: It is your responsibility to confirm that your bread machine is suitable for this recipe and to operate it in accordance with the manufacturer’s instructions. Bread machines vary in capacity and performance, so always use your own judgement and do not exceed the manufacturer’s recommended limits.
Step 7. Preheat the griddle
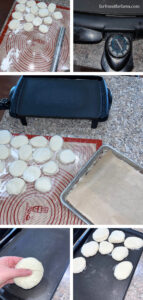
Once the dough has finished resting, preheat your electric griddle to 300°F.
Step 8. Roll the dough
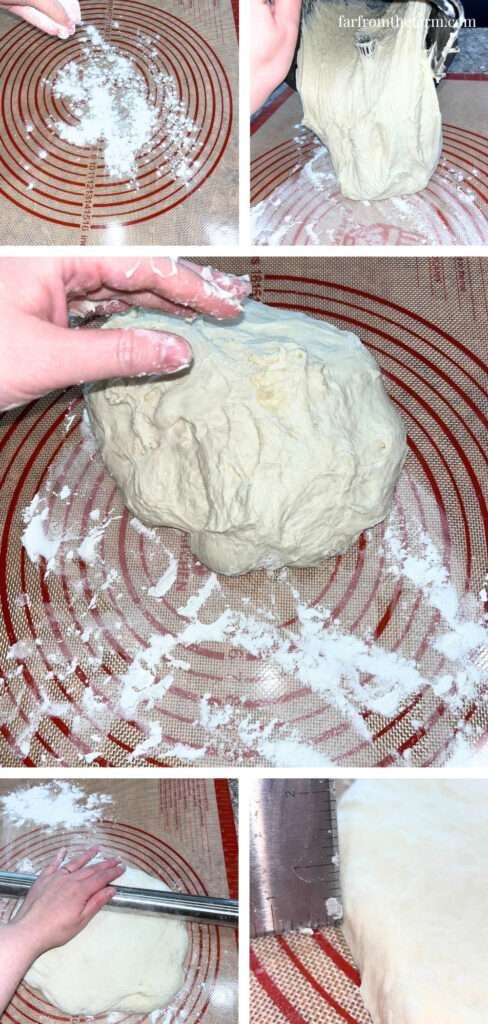
Lightly flour your silicone bench mat or clean work surface if needed.
Using a rolling pin, roll the dough to approximately 1/4 inch thick.
Try to keep the thickness as even as possible so the muffins cook evenly on the griddle.
Step 9. Cut out the muffins
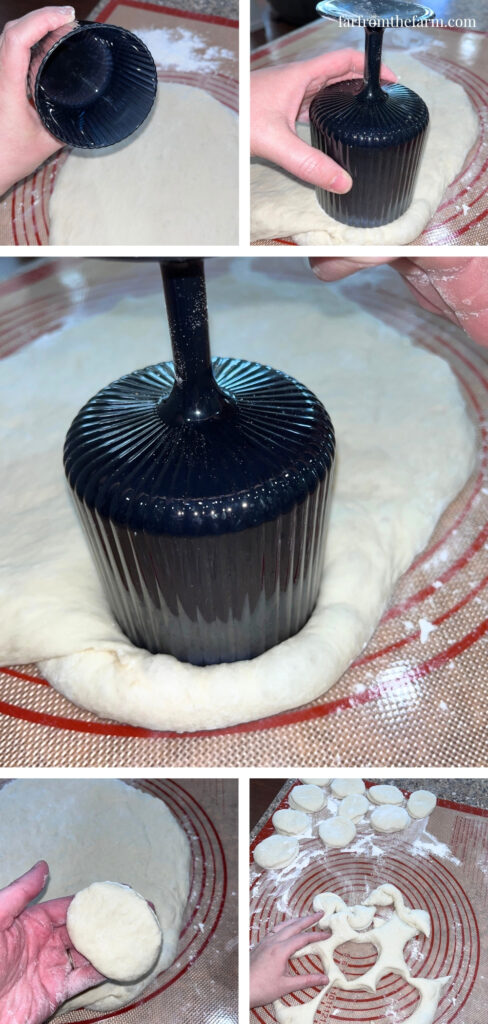
Use a 3-inch cutter, drinking glass, or similar round cutter to cut out the English muffins. Press don’t twist, as it can affect the rise.
Gather scraps as needed and gently reroll to use up the remaining dough.
I usually get between 14 – 16 large English muffins out of this batch of dough.
Step 10. Dust with cornmeal or semolina
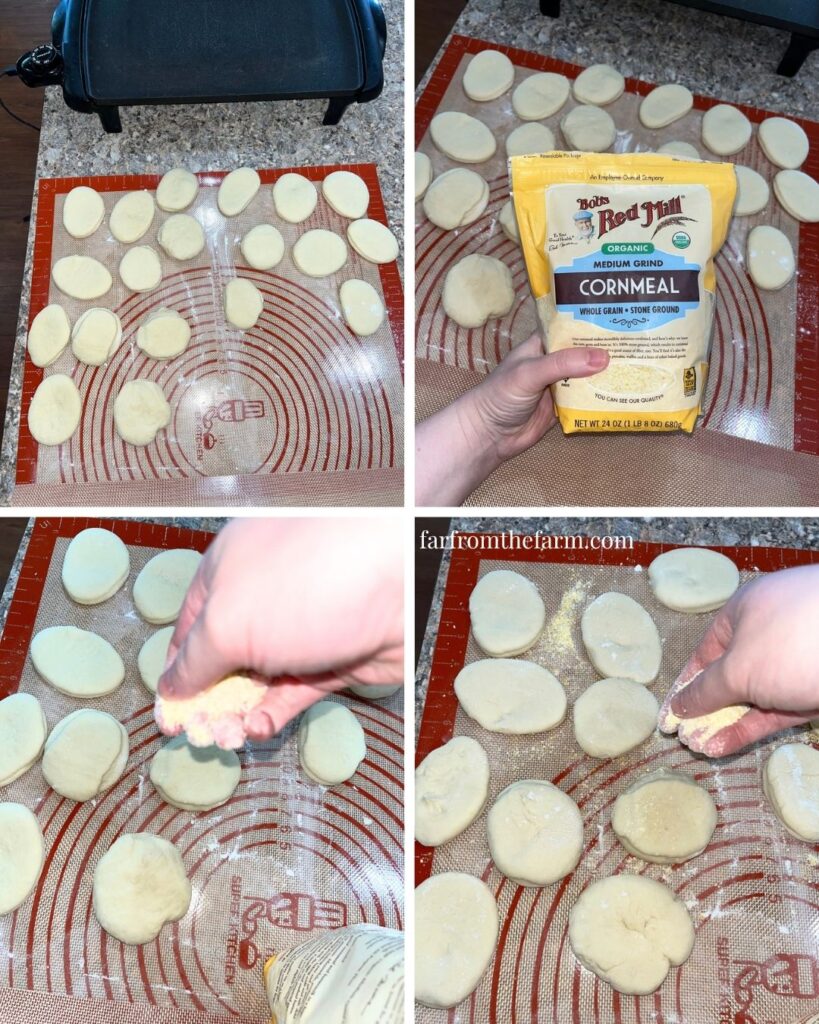
Sprinkle each round lightly with medium-grind cornmeal or semolina.
Flip them over and lightly dust the other side too.
If you don’t have either on hand, don’t worry. A very light dusting of flour works well too and helps prevent the soft dough sticking while shaping and cooking.
Cornmeal gives the most traditional finish, but all three methods work.
Step 11. Cook on the griddle
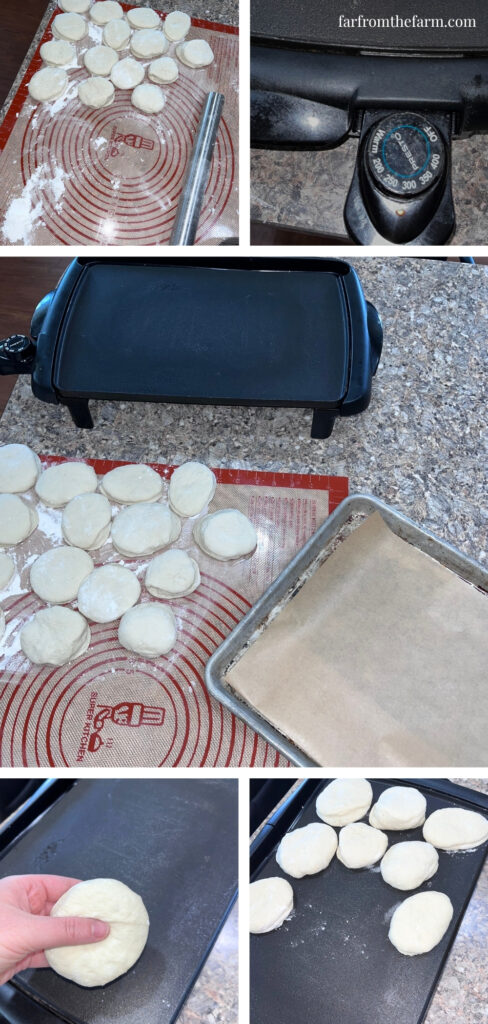
Place the English muffins onto the preheated 300°F electric griddle.
Cook for about 12 minutes on the first side, then carefully flip and cook for another 12 minutes on the second side.
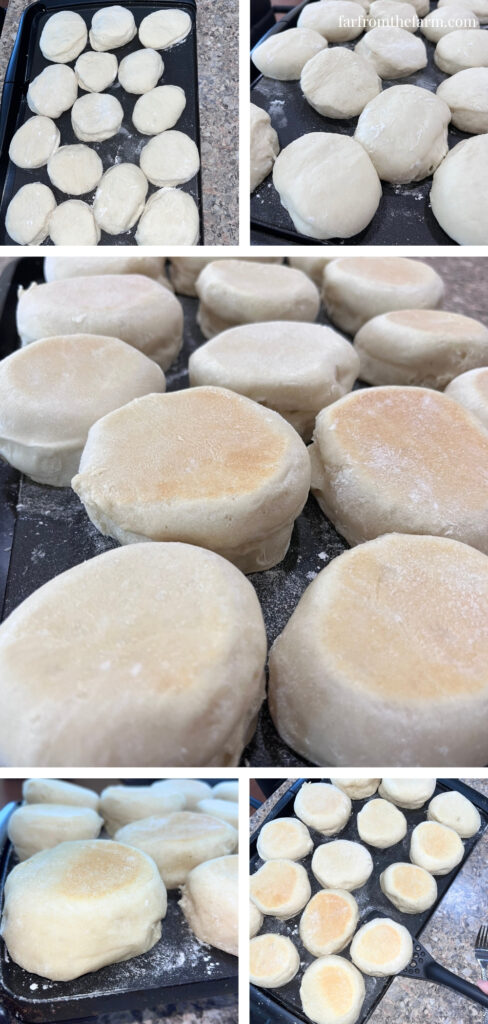
The muffins should be lightly golden and feel set when gently pressed.
Step 12. Finish in the oven if needed
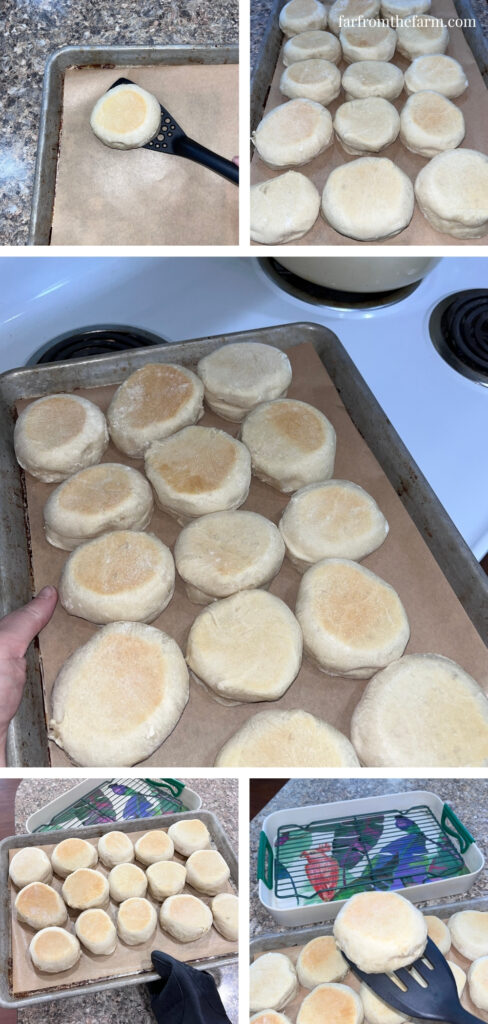
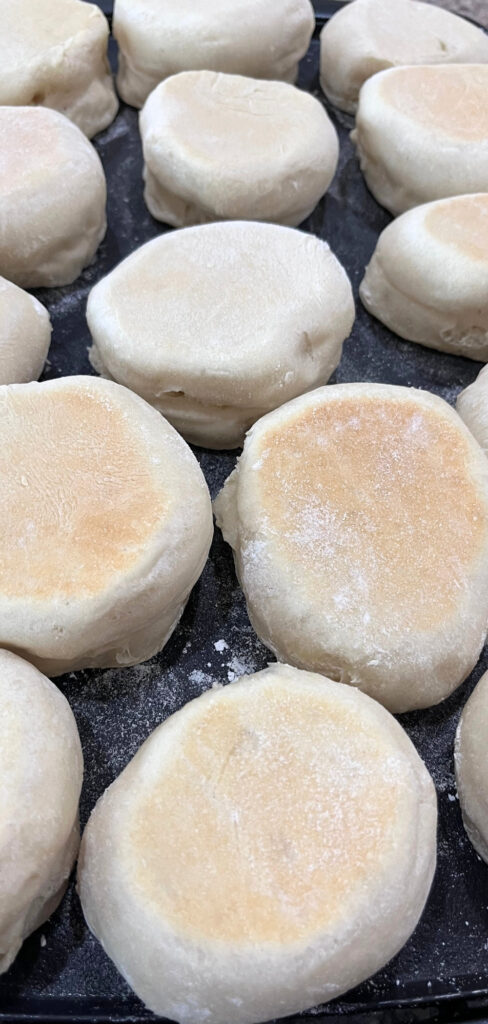
If the centers still seem doughy, transfer the muffins to a baking sheet and finish them in a 350°F oven for about 8-10 minutes.
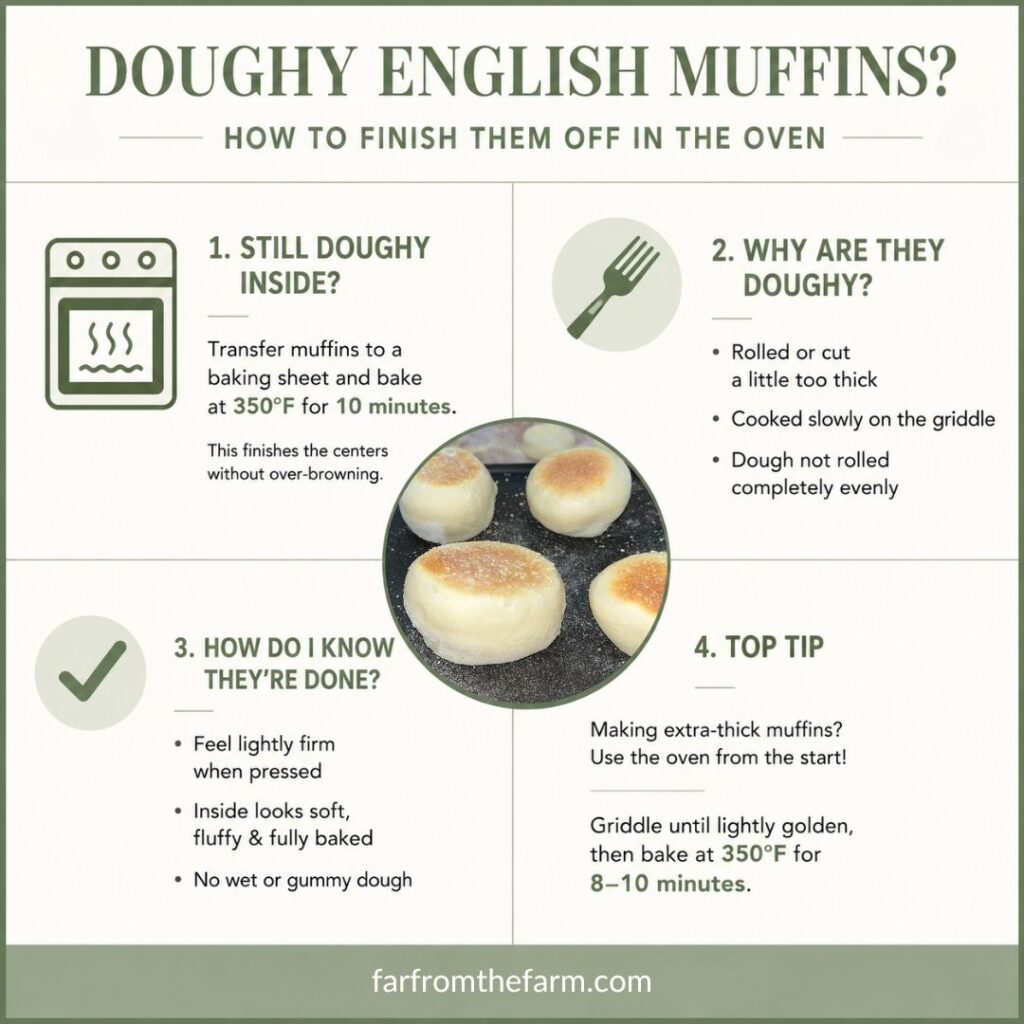
This is especially helpful if your muffins are a little thicker than planned.
Step 13. Cool before storing or freezing
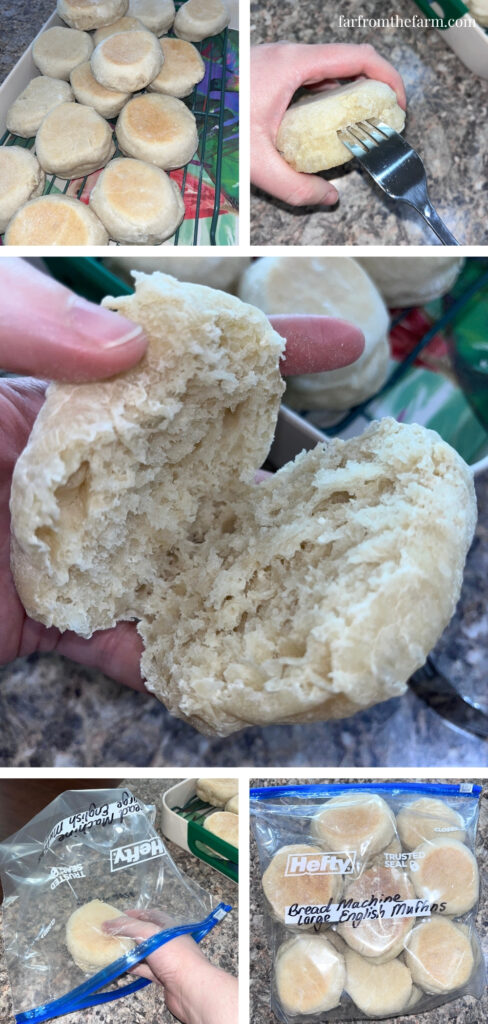
Transfer the cooked English muffins to a cooling rack.
Allow them to cool before serving, storing, or freezing.
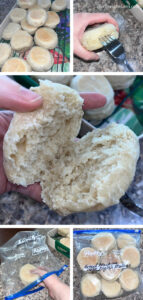
If freezing, use the tines of a fork to work your way around the center seam of each muffin before freezing. Do not pull them fully apart. Just create that natural split line so they are easier to separate later.
Notes
- This recipe makes a generous amount of dough and works best in a bread machine that can handle up to 2 lb loaves.
- If your bread machine is smaller, halve the recipe.
- I remove the bread machine pan before adding ingredients to avoid spills inside the machine.
- The extra 60-minute rest really does improve the flavor of the finished English muffins. I recommend removing the dough from the bread machine as soon as the Dough cycle finishes, shaping it into a rough ball, lightly dusting it with flour, covering it, and allowing it to rest on your work surface instead. Leaving this much dough inside the bread machine for another hour may cause it to rise around the bread pan.
- Cornmeal gives the classic English muffin finish and semolina works beautifully too. If you don’t have either available, a very light dusting of flour also works well to prevent sticking.
- These English muffins freeze very well once cooked and cooled.
- For breakfast sandwiches, try to cut the muffins close to the size of your sausage patties.
Troubleshooting
Your yeast may be old or the water may have been too hot or too cold. Discard and start again with fresh yeast.
This recipe makes a generous amount of dough.
Once the Dough cycle has finished, remove the dough from the bread machine, gently gather it into a rough ball, cover it, and allow it to complete its final one-hour rest on your work surface.
Leaving it inside the bread machine for another hour may cause it to rise around the bread pan.
They may have been rolled thicker than 1/4 inch. Finish them in a 350°F oven for about 8-10 minutes.
Too much flour may have been added during shaping. Use just enough flour to handle the dough.
Storage
- Store cooled English muffins in an airtight container at room temperature for up to 2 days.
- For longer storage, keep them in an airtight container in the refrigerator for up to 5 days.
- To freeze, cool completely first. Use the tines of a fork to partially split each muffin around the center seam, but do not pull apart completely. Place into freezer bags or airtight containers and freeze for up to 3 months.
- Toast from frozen, or thaw overnight in the refrigerator before using.
Serving Ideas
These bread machine English muffins are perfect for:
- Toasting with butter and jam
- Peanut butter and honey
- Homemade breakfast sandwiches
- Sausage, egg, and cheese muffins
- Bacon and egg muffins
- Freezer breakfast meal prep
- Weekend brunch
- Eggs Benedict-style breakfasts
- Toasted avocado and egg muffins
- Quick breakfasts before school, work, or church
They are especially good for homemade copycat Sausage McMuffin-style breakfasts!
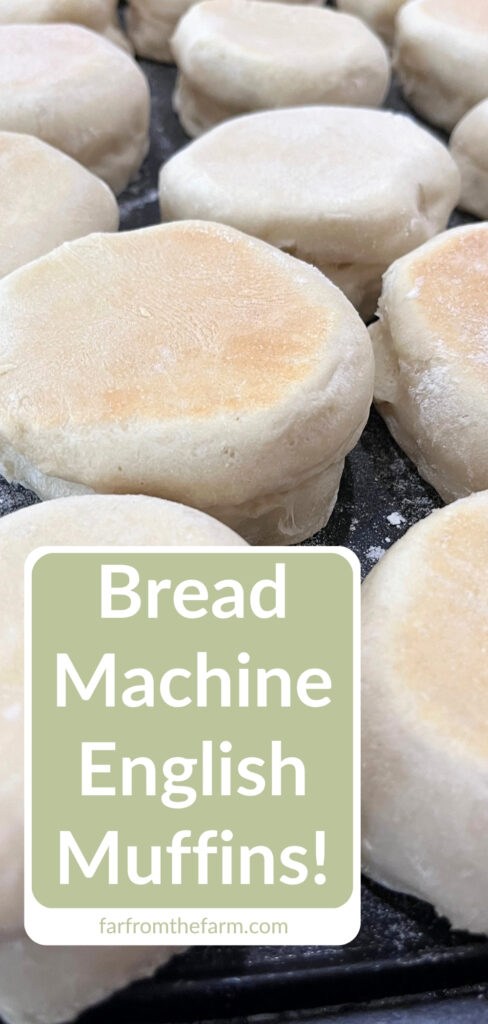
Why You’ll Love This Recipe?!
- Dairy-free and vegetarian.
- The bread machine does the mixing and kneading for you.
- Perfect for busy seasons when you still want homemade food.
- Makes a big batch.
- Great for freezer breakfasts.
- Lovely toasted with butter and jam.
- Perfect for homemade breakfast sandwiches.
- Uses simple pantry ingredients.
- Budget-friendly.
- The extra rest time gives better flavor.
- Great recipe for building confidence with your bread machine.
FAQ
Yes. If your bread machine is smaller or you are worried about the dough rising too much, halve the recipe.
This recipe makes a generous amount of dough, so use a bread machine that can handle up to 2 lb loaves.
Yes. Cool them completely, partially split each muffin with a fork, then freeze in freezer bags or airtight containers for up to 3 months.
Yes. If the centers still seem doughy after griddle cooking, place them on a baking sheet and bake at 350°F for about 8-10 minutes.
A medium-grind cornmeal works best for English muffins. If you don’t have that you can substitute with semolina. Check out the image below for more information.
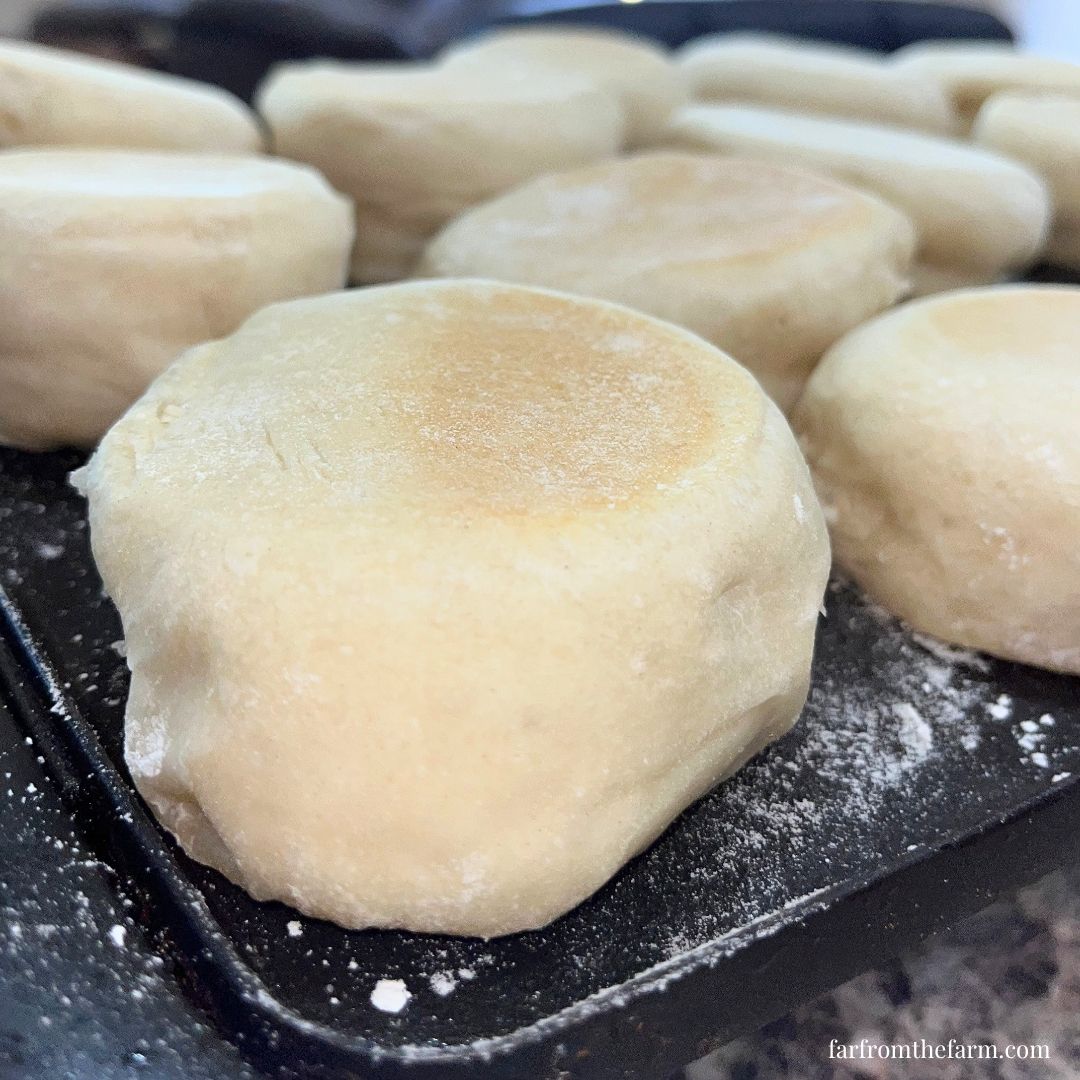
The Best Bread Machine English Muffins Recipe!

Ingredients
Equipment
Method
- Remove the bread machine pan from the machine. Add the warm water, honey, and yeast. Stir gently, cover, and leave for 5-10 minutes until the yeast is foamy.
- Add the vegetable oil.
- Add the flour over the liquid.
- Make a small well in the flour, add the salt, then lightly cover it with flour.
- Return the pan to the bread machine and run the Dough cycle.
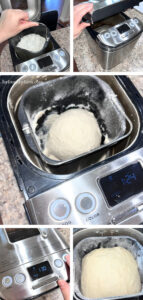
- As soon as the Dough cycle finishes, immediately remove the dough from the bread machine. Lightly flour your work surface and tip the dough out.
- Using a bench scraper, gently fold and gather the dough into a rough ball for about 2 minutes. This helps reduce the stickiness without adding lots of extra flour.
- Lightly dust the top of the dough with flour. Cover with plastic wrap or a clean kitchen towel and allow it to rest on the work surface for 1 hour.
- Preheat an electric griddle to 300°F.
- Roll the dough to approximately ¼ inch thick.
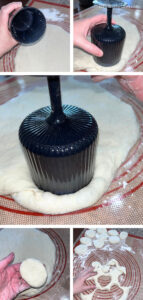
- Cut into rounds using a 3-inch cutter or drinking glass. Use a 3-inch cutter, drinking glass, or similar round cutter to cut out the English muffins. Press don't twist, as it can affect the rise.Gather scraps together gently and reroll until all the dough has been used. You should get around 14-16 large English muffins.
- Lightly dust both sides with cornmeal or semolina. If you don’t have either, use a very light dusting of flour to prevent sticking.
- Cook on the preheated griddle for about 12 minutes. Flip and cook for another 12 minutes, until lightly golden.
- If the centres still seem doughy, transfer to a baking sheet and bake at 350°F for about 8-10 minutes.
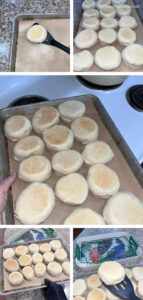
- Cool completely on a wire rack before serving, storing or freezing. For easier splitting later, run the tines of a fork around the centre seam before freezing without pulling the muffins apart.
Notes
- This recipe is written for a bread machine capable of handling up to a 2 lb loaf. If your machine is smaller or you’re unsure of its capacity, halve the recipe.
- The dough may rise right to the top of the bread pan during the Dough cycle. That’s completely normal.
- Do not leave the dough inside the bread machine for the additional one-hour rest. During testing, the dough continued rising and began pushing out around the bread pan. Remove it as soon as the Dough cycle ends, then complete the final rise on your work surface instead.
- The additional one-hour rest is worth it because it noticeably improves the flavour of the finished English muffins.
- Lightly dusting the dough with flour before covering helps prevent the towel or plastic wrap from sticking.
- Cornmeal gives the traditional English muffin finish, but semolina works beautifully. If you don’t have either, a light dusting of flour works well too.
- Avoid adding lots of extra flour while shaping or the muffins may become dry.
- If your muffins are thicker than planned or still seem doughy inside, finish them in a 350°F oven for about 8-10 minutes.
Storage
- Store in an airtight container:
- Room temperature: up to 2 days
- Refrigerator: up to 5 days
- Freezer: Cool completely first, freeze up to 3 months
Related Recipes
- Bread Machine Dough Cycle Recipes
- Bread Machine Breakfast Breads
- Stand Mixer version of English Muffins!
Nutrition information is automatically calculated, so should only be used as an approximation.
Looking for more homemaking inspiration?

It’s so important to be part of a community that not only understands you but that champions you, encourages, challenges and cheers you on. We couldn’t find one – so we created it instead!
Join the Side Hustle Homemakers Team Julie, Sam and I over at the Recipes, Homesteading and More! Facebook Group for Food Blogging Tips, Homesteading and Homemaking content and encouragement!
We’re 3 very different US/UK military families who met and became instant forever friends. We share what’s working in our kitchens, gardens, homes and more!
We created the group to share real life around recipes, homesteading, homemaking and more. Head on over, say Hi, share you tips and gain some friends and knowledge along the way!
The Takeaway
This is exactly the kind of bread machine recipe I appreciate most in a busy season.
Simple ingredients go into the pan. The machine handles the mixing, kneading, and rising. A couple of hours later, you have English muffin dough ready to roll, cut, dust, and cook.
For our home, that kind of convenience matters.
These English muffins are soft, practical, freezer-friendly, and perfect for homemade breakfast sandwiches. They also give you another way to make more everyday food at home without feeling like you have to stand in the kitchen for hours.
Toast them with butter and jam, turn them into breakfast sandwiches, or stash a batch in the freezer for later!
What to Try Next?!

Share & Rate This Recipe!
If these bread machine English muffins earn a place in your freezer breakfast routine, I’d love to hear how they turned out. Leave a star rating on the recipe card and a quick comment below to help other readers baking in real kitchens like ours.
Why You’ll Love Using a Bread Machine In Your Kitchen!
If you’re new here, you’ll quickly learn that I am such a fan of using a bread machine for dough. It has been one of the biggest helps in my kitchen, especially during busy or overwhelming seasons.
My parents gifted me this little Compact Cuisinart Bread Machine recently when I moved from the UK to the States after getting married, and it has worked like a little powerhouse ever since!

It kneads beautifully. It rises dough evenly. It keeps everything contained in one pan so I am not dealing with flour across every surface of the kitchen.
And on days where the house feels chaotic or I am juggling too much, I can add the ingredients, press the dough button, and let it get on with the work while I focus on everything else.
It takes away so much of the guesswork and makes homemade bread, pizza dough, cinnamon rolls, soft rolls, and sweet bakes feel much simpler.
It has also been a real blessing for our budget. Homemade dough costs pennies compared to store prepared versions and certainly compared to eating out. As a military family on baby step 2 of our debt free journey, little savings like that matter across an entire month.
Check out The Bread Machine Academy today!
Learn bread machine baking with beginner-friendly guides on flour, yeast, ingredients, troubleshooting, dough cycles, tips, and techniques!
If you have ever felt intimidated by bread making, this is your gentle nudge to give it a try. A dough cycle handles all the kneading for you.
You get soft, reliable, fluffy dough without standing over a counter for ages or worrying if things rose the way they should. It makes homemade cooking feel doable, even on days that are far from calm.
Browse Bread Machine Recipe Type
There are so many beginner friendly ideas to help you feel confident and excited about homemade dough – join the Facebook group today and share recipes and tips for perfect bread, every time!
Join our new Facebook Group!
THE BEST BREAD STARTS WITH THE RIGHT COMMUNITY…
Beginner-Friendly Bread Machine and Bread Recipes is our new Facebook group for home bakers who want bread baking to feel simple, doable, and encouraging.

Last update on 2026-10-08 / Affiliate links / Images from Amazon Product Advertising API