A Lighter Style Garlic Butter Pizza to Enjoy as an Appetiser or Side!
Hi! If you’ve been following me for long you’ll already know this, but for those who are new, welcome to Far From The Farm. I’m Mona, the Brit behind the recipes, learning life and food in the States while sharing our debt-free journey and what’s on the menu in our home today!
Italian food in the US is a joy. Olive Garden has honestly become my happy place since moving from the UK. I adore the creamy sauces, the big bowls of pasta, the baskets of breadsticks, and the loaded American style pizzas my family always orders.
But every now and then I really miss the European style garlic bread pizzas we used to grab with our takeaway back home. Pizza shaped, brushed all over with garlic butter or olive oil, light on toppings, and full of flavour without feeling heavy.

More than a side, not quite a full loaded pizza. Just that perfect in between.
On one of our recent pizza nights I wanted to recreate that feeling. Something a little lighter, something you could share before a meal or enjoy with a salad without needing a full nap afterwards.
So I pulled out my trusty Basic KitchenAid Mixer Pizza Dough recipe that we make multiple times a month on a budget, and started playing.

After a couple of tests, this version hit exactly what I was aiming for. A thin base baked until just golden, then brushed generously with melted garlic butter and sprinkled with parsley. No heavy blanket of cheese, no long list of toppings, just that cosy garlic bread flavour in pizza form.
It works beautifully as an appetiser, as a side with pasta or salad, or as a simple lunch shared between two people with a glass of wine. You could even cut it into strips and serve it as a snack during movie night. Garlic breath is completely acceptable when everyone joins in.
And about the butter. Yes, it really is that much. European style garlic bread leans into flavour. Rich garlic notes, plenty of butter, and a soft yet slightly crisp base that makes you want one more slice every time.
Every time I make homemade dough for recipes like this, it feels like another win for us on baby step 2 of our debt free journey. One more meal made at home, one less takeaway that chips away at the budget.
And just a reminder that if you’re struggling and you need help with managing your budget or starting your own debt free journey then here’s some FREE resources below you may find helpful!
living frugally and fully
free tips and resources to make the most of what you have
As always, these photos are from my real kitchen here in our sweet military base home. No AI recipe images or staged lighting or spotless marble counters. Just real life and real food made in a small space. Proof that you can feed your family well without needing a dream kitchen or fancy tools!
So roll up your sleeves and head into the kitchen with me to make the easiest European style garlic bread pizza that feels a little nostalgic, very budget friendly, and totally delicious!
Equipment
- Stand mixer with mixing bowl and dough hook
- Measuring jug
- Measuring cups and spoons
- Extra bowl for the garlic butter
- Plastic wrap
- Parchment paper
- Pizza tray or baking sheet
- Silicone pastry brush
Available on Amazon.com [ad]


Ingredients
Serves 2 to 4 as a generous side or starter
- 1 batch of my Basic KitchenAid Mixer Pizza Dough (for 1 large thin pizza base)
- ½ cup butter, melted
- 2 tbsp minced garlic
- 1 tsp dried parsley
- Optional: 1 tsp salt or garlic salt, to taste
- Optional: 1 tbsp red pepper flakes if you prefer a spicier garlic butter
- Optional: 2 tbsp grated parmesan cheese
Step-by-Step Instructions
Step 1. Make the pizza dough
Prepare 1 batch of my Basic KitchenAid Mixer Pizza Dough as written in the original recipe. Allow it to go through the first rise, then shape it for one large pizza base.
After the first rise, your dough should be soft, stretchy, and doubled in size.
Step 2. Shape the base
On to your work surface (no need to flour it) shape the dough into your desired form. The full batch makes one thin 16 to 18 inch pizza, or a slightly thicker smaller round if you prefer.
Transfer the shaped base to a parchment lined pizza tray or baking sheet.

Step 3. Rest the shaped dough
Cover the shaped base lightly with plastic wrap or a clean towel and let it rest for about 15 minutes. This helps relax the gluten and gives you a softer, more tender base.
Step 4. Bake
Preheat your oven to 425°F.

Remove the covering from the dough and bake the bare base for 12 to 15 minutes, checking from 12 minutes onward. You want it just starting to turn lightly golden at the edges while still soft in the middle.
Step 5. Make the garlic butter
While the base bakes, melt the butter in a small bowl or jug. Stir in the minced garlic, dried parsley, and the salt or garlic salt if you are using it.
Give it a quick taste and adjust the seasoning to your liking.

Step 6. Brush the baked base
As soon as the pizza base comes out of the oven, use a pastry brush or spoon to spread the garlic butter all over the surface. Make sure you get right to the edges and around the crust so every bite has flavour.
Let the garlic butter soak in for a couple of minutes. The warmth of the base helps it absorb.
Sprinkle on the optional red pepper flakes and grated parmesan for a little spice and flavor, if you prefer.
Step 7. Slice and serve
Slice into wedges or strips and serve warm. Enjoy as a light starter, a side with pasta or salad, or with a glass of wine for a simple date night at home!

Notes
- Use your favourite pizza dough if you prefer. I love my Basic KitchenAid Mixer Pizza Dough because it is reliable and uses pantry staples, but a good store bought dough will also work in a pinch.
- Fresh garlic will give a stronger flavour than jarred. Use what you have. Both work.
- You can swap dried parsley for dried Italian seasoning for a slightly more herb heavy version.
- For a slightly cheesier feel without turning it into a full pizza, add a very light sprinkle of Parmesan over the top right after brushing with garlic butter.
- This recipe works well as two smaller pizzas if you want individual portions. Just divide the dough and reduce the prebake time by a few minutes.
Troubleshooting
Base feels too soft or pale
Bake it for an extra 2 to 3 minutes before brushing with garlic butter. Ovens run differently, so the first time you make this, watch closely near the end.
Too salty
Use unsalted butter and regular salt instead of garlic salt next time. You can also reduce the salt in the garlic butter and rely more on the garlic and herbs for flavour.
Garlic flavour too strong
Reduce the minced garlic to 1 tablespoon, or use a mix of butter and olive oil for a gentler finish.
Garlic burns
If your garlic is sitting on top in big clumps it can catch easily. Make sure it is stirred well into the butter so it coats the base evenly and is not piled in one spot.
Storage
- Store leftover slices in an airtight container in the fridge for up to 3 days.
- Reheat on a baking sheet in a 350°F oven for about 8 to 10 minutes until warmed through. This keeps the crust from going chewy in the microwave.
- You can also freeze baked slices. Cool completely, layer with parchment, and freeze up to 2 months. Reheat from frozen at 350°F until hot in the middle.
Serving Ideas
Serve this European-style garlic bread pizza:
- As a starter before a pasta or Italian style dinner
- With a big green salad for a light lunch
- Cut into thin strips as part of a snack board
- Alongside soup on cold evenings
- As a base for dipping in marinara, ranch, or a simple tomato sauce
- With a simple gin and tonic or a glass of red wine for date night
- As a fun sharer for movie nights or game nights
Why You’ll Love This Recipe?!
- Uses a dough you already know and love
- Feels special but uses very simple ingredients
- Budget friendly compared to takeaway garlic bread pizza
- Flexible enough to work as a starter, side, or snack
- A nice change from cheese heavy pizzas
- Perfect for using up extra pizza dough from another recipe
- Easy to customise with herbs and a touch of cheese
- Great for feeding a crowd on a budget
FAQ
Can I make this with store bought pizza dough?
Yes. Use one ball of store bought dough that is meant for a large pizza. Shape, rest, and prebake as written.
Can I make the base in advance?
You can prebake the plain base earlier in the day, cool it, then rewarm it for 3 to 5 minutes at 400°F before brushing with garlic butter and serving.
How do I get a crisper crust like a takeaway pizzeria?
Use a preheated pizza stone or an upside down baking sheet that has been heating in the oven for at least 20 minutes.
Roll the dough slightly thinner, bake it on the hot surface, and aim for the lower third of the oven.
A slightly hotter oven, around 450°F, will also give more colour and crunch if your dough can handle it.
Can I add cheese on top?
Yes. A light sprinkle of Parmesan or mozzarella after you add the garlic butter is lovely. Just pop it back into the oven for a couple of minutes to melt.
Does this work with wholewheat dough?
It does. The texture will be a little heartier, but the garlic butter softens it nicely. Wholewheat or part wholewheat dough gives a more rustic feel.
Is this spicy at all?
No. This is a gentle garlic butter flavour. If you want a little heat, add a pinch of red pepper flakes to the butter mixture.

Easy European-style Garlic Bread Pizza Recipe!
Ingredients
Equipment
Method
- Prepare 1 batch of my Basic KitchenAid Mixer Pizza Dough as written in the original recipe (linked in the notes below). Allow it to go through the first rise, then shape it for one large pizza base.After the first rise, your dough should be soft, stretchy, and doubled in size.
- On to your work surface (no need to flour it), shape the dough into your desired form. The full batch makes one thin 16 to 18 inch pizza, or a slightly thicker smaller round if you prefer.Transfer the shaped base to a parchment lined pizza tray or baking sheet.
- Cover the shaped base lightly with plastic wrap or a clean towel and let it rest for about 15 minutes.This helps relax the gluten and gives you a softer, more tender base.
- Preheat your oven to 425°F.Remove the covering from the dough and bake the bare base for 12 to 15 minutes, checking from 12 minutes onward. You want it just starting to turn lightly golden at the edges while still soft in the middle.
- While the base bakes, melt the butter in a small bowl or jug. Stir in the minced garlic, dried parsley, and the salt or garlic salt if you are using it.Give it a quick taste and adjust the seasoning to your liking.
- As soon as the pizza base comes out of the oven, use a pastry brush or spoon to spread the garlic butter all over the surface. Make sure you get right to the edges and around the crust so every bite has flavour.Let the garlic butter soak in for a couple of minutes. The warmth of the base helps it absorb.
- Slice into wedges or strips and serve warm. Enjoy as a light starter, a side with pasta or salad, or with a glass of wine for a simple date night at home!
Notes
- Use your favourite pizza dough if you prefer. I love my Basic KitchenAid Mixer Pizza Dough because it is reliable and uses pantry staples, but a good store bought dough will also work in a pinch.
- Fresh garlic will give a stronger flavour than jarred. Use what you have. Both work.
- You can swap dried parsley for dried Italian seasoning for a slightly more herb heavy version.
- For a slightly cheesier feel without turning it into a full pizza, add a very light sprinkle of Parmesan over the top right after brushing with garlic butter.
- This recipe works well as two smaller pizzas if you want individual portions. Just divide the dough and reduce the prebake time by a few minutes.
Storage
- Store leftover slices in an airtight container in the fridge for up to 3 days.
- Reheat on a baking sheet in a 350°F oven for about 8 to 10 minutes until warmed through. This keeps the crust from going chewy in the microwave.
- You can also freeze baked slices. Cool completely, layer with parchment, and freeze up to 2 months. Reheat from frozen at 350°F until hot in the middle.
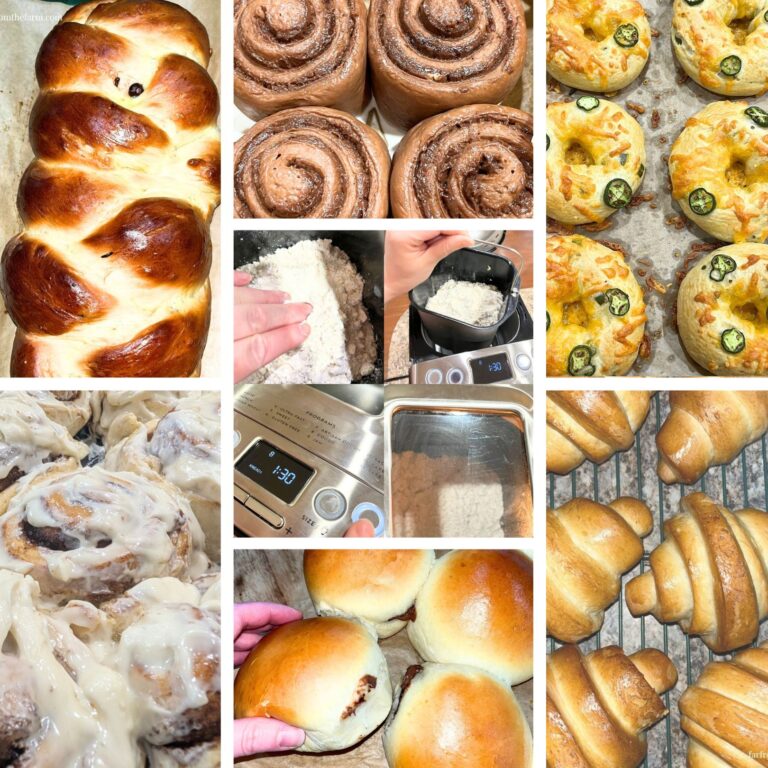
Related Recipes:
Nutrition information is automatically calculated, so should only be used as an approximation.

The Takeaway
This European style garlic bread pizza is a simple way to bring those nostalgic takeaway flavours into your own kitchen. A soft, thin base, brushed generously with garlic butter and herbs, feels like such a treat without being heavy.
It uses ingredients you already keep on hand, stretches your homemade dough into another meal, and slots perfectly into your budget friendly meal plan.
Keep this one in your rotation for cosy date nights, shared appetisers, and the sort of casual food that makes evenings at home feel just a little more special!
What to Try Next?!


Share & Rate This Recipe!
If this European-style garlic bread pizza earns a regular spot on your meal plan, tap the stars on the recipe card and leave a quick comment. Share it with a friend who loves cosy pizza night ideas as much as you do!
Last update on 2026-06-27 / Affiliate links / Images from Amazon Product Advertising API