
How to Make an Easy and Versatile Pizza Dough in Your Stand Mixer with 6 Ingredients!
Homemade Pizza Dough That Actually Works Every Time!
Hi! If you’ve been following me for long you’ll already know this, but for those who are new, welcome to Far From The Farm. I’m Mona, the Brit behind the recipes, learning life and food in the States while sharing our debt-free journey and what’s on the menu in our home today!
My husband and family love anything pizza related. Breadsticks, pizza pockets, calzones, you name it and they’ll eat it!

And since we’re a military family working through baby step 2 of our debt-free journey, those take-out nights started to add up quickly. Between the delivery fees and tip, even one pizza night could blow a week’s fun budget!
And just a reminder that if you’re struggling and you need help with managing your budget or starting your own debt free journey then here’s some FREE resources below you may find helpful!
living frugally and fully
free tips and resources to make the most of what you have
So, I set out to create a simple, reliable pizza dough that I could mix up fast in my KitchenAid stand mixer without needing to knead by hand.
After a few experiments and a couple of less-than-perfect attempts (we’ve all had the “too tough to chew” one!), this version has become our go-to. It’s soft, stretchy, and costs just a few dollars to make.
This basic dough is versatile enough for all your favorite pizza shop-style bakes. It makes a lovely thin crust if you roll it out thinner, or a chewy base if you like it thicker.
You can also use it to make breadsticks, garlic knots, or even cheesy ‘crazy breads’.
And as with all my recipes the ingredients are simple pantry staples, and the steps are written for busy families, not professional chefs.
As always, these photos are from my real kitchen here in our sweet military base home. No AI recipe images or staged lighting or spotless marble counters. Just real life and real food made in a small space. Proof that you can feed your family well without needing a dream kitchen or fancy tools!
So roll up your sleeves and head into the kitchen with me and let’s make the easiest pizza dough ever, and you’ll never need to buy store-bought crust again!
Equipment
- KitchenAid (or other stand mixer) with dough hook and mixing bowl
- Measuring jug
- Measuring cups and spoons
- Plastic wrap
Available on Amazon.com [ad]


Ingredients (Makes 1 Large Pizza Base)
- 1 ¼ cups warm water
- 1 tbsp sugar
- 2 ½ tsp active dry yeast (I mostly use bread machine yeast since that’s what I always have on hand)
- 1 tbsp olive oil, plus a little extra for drizzling
- 3 cups all-purpose flour
- 1 tsp salt
Step-by-Step Instructions
Step 1. Proof the yeast.
Add the warm water, sugar, and yeast into the bowl of your stand mixer. Give it a quick stir, then cover the bowl with plastic wrap and let it sit for 5 to 10 minutes.

When the mixture looks bubbly and frothy, your yeast is alive and ready to go.

If it doesn’t foam up, don’t go any further because the yeast isn’t active, and your dough won’t rise. Discard it and start again with fresh yeast.
Step 2. Mix the dough.

Once your yeast is active, add in the oil, flour, and salt.

Using the dough hook attachment, mix on medium speed for about 5 minutes until a smooth dough forms and pulls away cleanly from the sides of the bowl.
Step 3. First rise.
Form the dough into a ball, drizzle with a tiny bit of oil, and cover the bowl with plastic wrap. Let it rise for about 1 hour in a warm spot until it doubles in size.

Step 4. Shape and Second Quick Rise.
After the dough has risen, punch it down gently and shape it into your desired form. This recipes makes one large pizza base or two smaller ones.
Then we like to let that rest for another 10 to 15 minutes under either a damp towel or plastic wrap. This step helps it to be fluffy and not as dense – but of course skip this step if you prefer a denser crust.

Step 6. Enjoy fresh from the oven.
If making pizza, preheat your oven to 425°F and bake for 12 to 15 minutes depending on thickness and topping load.
For breadsticks or crazy bread, 400°F for 12 to 15 minutes also works beautifully!

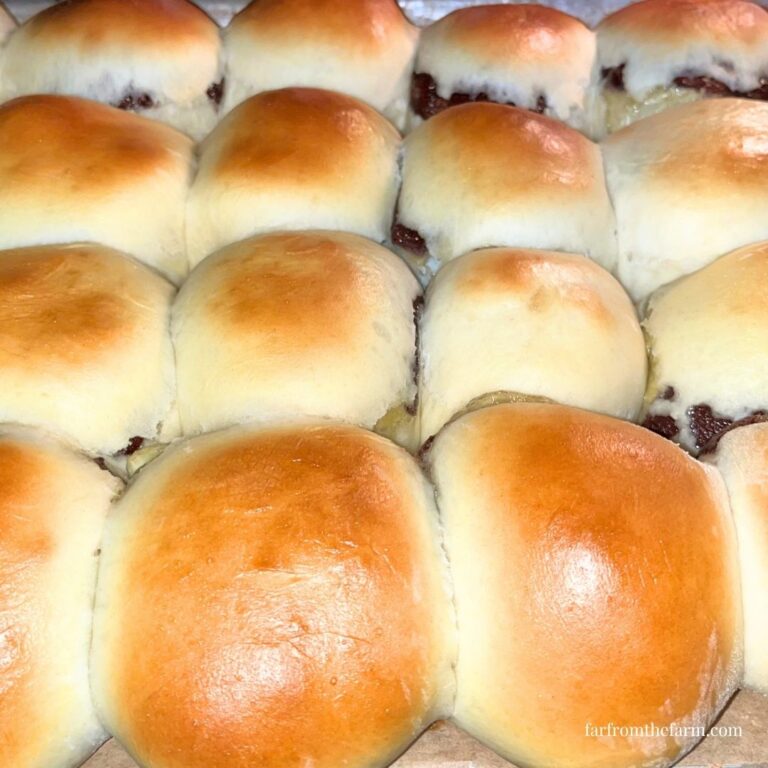
Brush with garlic butter, sprinkle with cheese, or pile on your favorite toppings. Fresh, soft, chewy pizza dough from scratch that costs next to nothing!
Notes and Troubleshooting
Notes:
- For extra flavor, add 1 tsp of Italian seasoning or garlic powder to the dough.
- If you prefer whole-wheat crust, swap 1 cup of the all-purpose flour for whole-wheat flour.
- This dough can also be refrigerated overnight for even better flavor development.
Troubleshooting:
- Dough too sticky? Add flour one tablespoon at a time while mixing.
- Dough too dry? Add a splash more water.
- Crust too tough? Reduce baking time slightly or make sure you didn’t add too much flour.
Storage
Wrap leftover dough tightly in plastic wrap and refrigerate for up to 3 days. To freeze, portion the dough into balls, coat lightly in oil, and store in freezer bags for up to 3 months.
To use frozen dough, thaw in the fridge overnight and bring to room temperature before shaping.
Serving Ideas
Use this dough for:
- Homemade pizza night with your favorite toppings
- Garlic butter breadsticks
- Mini calzones for lunchboxes
- “Crazy bread” brushed with garlic butter and Parmesan
It also pairs perfectly with my Easy Zingy Egg Salad Recipe as a fun sandwich base or toast alternative!
Why You’ll Love This Recipe?!
- Uses pantry staples only
- Takes just minutes to mix in your stand mixer
- Freezes beautifully
- Budget-friendly and perfect for meal planning
- Family-approved and super versatile
FAQ
Can I use bread flour instead of all-purpose?
Yes! Bread flour gives a slightly chewier texture, which is great for pizza crust.
Do I need to oil the bowl?
A light drizzle of oil helps prevent sticking and keeps the dough moist during the rise.
Can I make this without a stand mixer?
Absolutely. Mix everything in a large bowl with a wooden spoon until combined, then knead by hand for about 8 minutes.

Basic KitchenAid Mixer Pizza Dough Recipe
Ingredients
Equipment
Method
- Add the warm water, sugar, and yeast into the bowl of your stand mixer. Give it a quick stir, then cover the bowl with plastic wrap and let it sit for 5 to 10 minutes.When the mixture looks bubbly and frothy, your yeast is alive and ready to go.If it doesn’t foam up, don’t go any further because the yeast isn’t active, and your dough won’t rise. Discard it and start again with fresh yeast.
- Once your yeast is active, add in the oil, flour, and salt. Using the dough hook attachment, mix on medium speed for about 5 minutes until a smooth dough forms and pulls away cleanly from the sides of the bowl.
- Form the dough into a ball, drizzle with a tiny bit of oil, and cover the bowl with plastic wrap. Let it rise for about 1 hour in a warm spot until it doubles in size.
- After the dough has risen, punch it down gently and shape it into your desired form. This recipes makes one large pizza base or two smaller ones.Then we like to let that rest for another 10 to 15 minutes under either a damp towel or plastic wrap. This step helps it to be fluffy and not as dense, but of course skip this step if you prefer a denser crust.
- If making pizza, preheat your oven to 425°F and bake for 12 to 15 minutes depending on thickness and topping load.For breadsticks or crazy bread, 400°F for 12 to 15 minutes also works beautifully!
Notes
- For extra flavor, add 1 tsp of Italian seasoning or garlic powder to the dough.
- If you prefer whole-wheat crust, swap 1 cup of the all-purpose flour for whole-wheat flour.
- This dough can also be refrigerated overnight for even better flavor development.
Storage
- Wrap leftover dough tightly in plastic wrap and refrigerate for up to 3 days.
- To freeze, portion the dough into balls, coat lightly in oil, and store in freezer bags for up to 3 months.
- To use frozen dough, thaw in the fridge overnight and bring to room temperature before shaping.
What to Try Next?!
Give our Spicy Garlic-Parmesan Crazy Recipe a try – made with this dough it perfectly balances the heat from red pepper flakes with delicious garlic-cheese buttery goodness!Nutrition information is automatically calculated, so should only be used as an approximation.

The Takeaway
This KitchenAid pizza dough is simple, affordable, and reliable. It’s one of those base recipes that makes weeknight dinners faster and weekends more fun.
With a few pantry staples and five minutes of mixing time, you can have fresh pizza dough ready for any topping combination your family loves.
Homemade always tastes better, and when you realize how much cheaper it is, you’ll never go back to store-bought crust again!
What to Try Next?!


Share & Rate This Recipe!
Tried this Basic KitchenAid Mixer Pizza Dough Recipe? Tap the stars to rate it and share it with a friend who loves homemade pizza nights as much as you do!
Last update on 2026-06-28 / Affiliate links / Images from Amazon Product Advertising API


2 Comments