
Make this Easy Cinnamon Loaf and Store Slices in the Freezer for Perfect French Toast Every Time!
Hi! If you’ve been following me for long you’ll already know this, but for those who are new, welcome to Far From The Farm. I’m Mona, the Brit behind the recipes, learning life and food in the States while sharing our debt-free journey and what’s on the menu in our home today!
When we moved from the UK to the U.S., my parents gifted us a compact Cuisinart bread machine, and I honestly had no idea how much of a role it would play in my kitchen.
Between the long adjustment to new ingredients here, and the prices of good bread, this little gadget has become one of my favorite tools.
It’s budget friendly, easy to clean, and gives that fresh-baked comfort that makes even an ordinary weekday feel special.
There’s just something about the smell of cinnamon drifting through the house that says, “home.” In America, fall is all about those warm, spiced flavors like cinnamon, nutmeg, cloves etc, and this loaf fits right in.

It’s cozy, fragrant, and the perfect way to turn a simple breakfast into something that feels like a celebration. I make it for French toast on lazy Saturdays or slice and freeze it for those mornings when time’s tight but you still want something delicious.
This bread has a soft, rich texture thanks to the butter and egg, with that gentle hint of cinnamon that fills the air as it bakes. If you want to take it up another notch, sprinkle in some raisins, dried cranberries, or chopped dates for little bursts of sweetness.
I’ve even made it once with a handful of diced dried apple for a rustic fall twist – heavenly!
And it’s not just about flavor. Making your own bread saves money, especially when store-bought loaves have jumped in price. Homemade is also easier on the gut, since you control every ingredient and skip all those additives.
If you’re feeding kids or looking for simple wins in your weekly food budget, this one’s a keeper.
And just a reminder that if you’re struggling and you need help with managing your budget or starting your own debt free journey then here’s some FREE resources below you may find helpful!
living frugally and fully
free tips and resources to make the most of what you have
As always, these photos are from my real kitchen here in our sweet military base home. No AI recipe images or staged lighting or spotless marble counters. Just real life and real food made in a small space. Proof that you can feed your family well without needing a dream kitchen or fancy tools!
So go ahead and pull out your bread machine. Once you smell this cinnamon loaf baking, you’ll understand why it’s a staple around here because it’s simple, cozy, and good for both the wallet and the soul!
Why You’ll Love Using a Bread Machine In Your Kitchen!

If you’re new here, you’ll quickly learn that I am such a fan of using a bread machine for dough. It has been one of the biggest helps in my kitchen, especially during busy or overwhelming seasons.
My parents gifted me this little Compact Cuisinart Bread Machine recently when I moved from the UK to the States after getting married, and it has worked like a little powerhouse ever since!

It kneads beautifully. It rises dough evenly. It keeps everything contained in one pan so I am not dealing with flour across every surface of the kitchen.
And on days where the house feels chaotic or I am juggling too much, I can add the ingredients, press the dough button, and let it get on with the work while I focus on everything else.
It takes away so much of the guesswork and makes homemade bread, pizza dough, cinnamon rolls, soft rolls, and sweet bakes feel much simpler.
It has also been a real blessing for our budget. Homemade dough costs pennies compared to store prepared versions and certainly compared to eating out. As a military family on baby step 2 of our debt free journey, little savings like that matter across an entire month.

If you have ever felt intimidated by bread making, this is your gentle nudge to give it a try. A dough cycle handles all the kneading for you.
You get soft, reliable, fluffy dough without standing over a counter for ages or worrying if things rose the way they should. It makes homemade cooking feel doable, even on days that are far from calm.
There are so many beginner friendly ideas to help you feel confident and excited about homemade dough!
Equipment
- Bread machine
- Knife
- Spoon
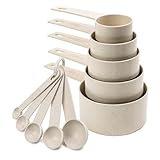
- Measuring jug
- Measuring spoons and cups
- Plastic wrap
Available on Amazon.com [ad]


Ingredients (makes a 1 & ½ lb loaf)
- 1 cup warm milk
- 1 tablespoon brown sugar
- 2 teaspoons bread machine yeast
- 1 egg
- 4 tablespoons butter
- 1 to 2 tablespoons cinnamon (to taste)
- 1 teaspoon vanilla extract
- 3 cups all-purpose or bread flour
- ½ teaspoon salt
Step-By-Step Instructions
Step 1: Warm the milk.
Microwave the milk in a measuring jug for about 30 seconds. You want it warm to touch but not hot, so it doesn’t kill the yeast. Pour the milk into your bread machine insert.

Step 2: Activate the yeast.
Stir in the brown sugar and yeast, then cover loosely with plastic wrap. Let it sit for 5 minutes.
I know most bread machine manuals skip this step, but I can’t tell you how many times inactive yeast has ruined a batch. I’d rather toss a little milk and sugar than waste the entire loaf.

Step 3: Check the yeast.
After 5 minutes, your mixture should look a little foamy with small bubbles on top. That’s your sign that it’s alive and ready to go. If not, discard and start fresh with new yeast.

Step 4: Add the wet ingredients.
Crack in your egg, then add vanilla, butter, and cinnamon. You don’t need to stir, the machine will handle it.
Step 5: Add the flour.
Pour your flour right on top of the wet ingredients. It creates a clean layer and helps the bread rise evenly.

Step 6: Add the salt.
Use your finger to make a small well in the top of the flour and add the salt. Lightly cover it back up with flour. This keeps it from coming into contact with the yeast too early, which can slow down the rise.
Step 7: Start the bread machine.
Insert the pan back into the machine, select the Sweet Bread program, and choose the 1 & ½ lb loaf size. Press start.
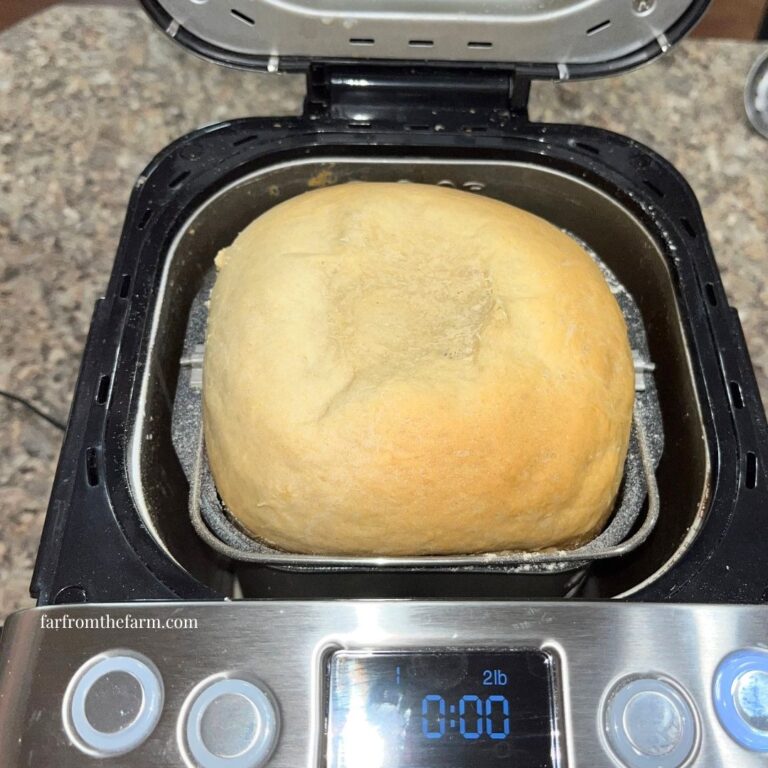
My compact Cuisinart runs for about 3 hours 20 minutes. I prefer the darkest crust setting for this loaf, it brings out that caramelized cinnamon color and gives the edges a slight crunch that’s beautiful for French toast.

Step 8: Cool and slice.
When the cycle finishes, carefully remove the pan with oven gloves. Turn the loaf out onto a cooling rack and let it rest at least 30 minutes before slicing. It’s tempting to dive in, but slicing while warm can crush the crumb.
Step 9: Freeze for later.
Once cool, slice into thick pieces, around ½ to 1 inch. Stack them in freezer bags and freeze flat. They’ll stay perfect for up to 3 months, ready for your next weekend brunch.
Notes & Troubleshooting
Notes:
- Swap cinnamon for pumpkin pie spice during the holidays for a festive twist.
- A handful of raisins or chopped nuts gives extra texture and sweetness.
- For a lighter crumb, use half bread flour and half all-purpose.
Troubleshooting:
- Top collapse: Often too much liquid or over-proofing. Try 1 tablespoon less milk next time or move your machine away from heat sources.
- Dense loaf: Usually caused by cold milk or salt touching the yeast. Make sure the liquids are warm and your salt is tucked into the flour.
- Pale crust: Choose a darker crust setting or leave the loaf in the warm machine for an extra 5–10 minutes after the bake finishes.
Storage
I slice this bread when cold into ½ to 1 inch thick, chunky slices for French toast. Store sliced in freezer bags and use within 90 days for best flavor.
You can store it like any other bread at room temperature for up to 2 days, but it truly shines once frozen and reheated as it toasts beautifully too!
Serving Ideas
This cinnamon loaf is exquisite when used as the base for my Decadent Pumpkin Crème Brûlée Overnight French Toast Recipe.
It’s also lovely as:
- Simple cinnamon toast with butter and brown sugar
- Thick slices with cream cheese and honey
- French toast casserole
- Bread pudding with maple syrup drizzle
Why You’ll Love This Recipe!
- Hands-off bread machine method – just dump and go!
- Your house will smell like a bakery
- Perfect for freezing ahead for breakfasts or holidays
- Budget-friendly and family-approved comfort food
FAQ
How do I stop the bread collapsing on top?
Usually too much liquid or a warm environment. Try reducing the milk slightly or letting the dough proof in a cooler part of your kitchen.
Can I double the cinnamon?
Absolutely. It will make a darker, more fragrant loaf. Perfect if you love bold flavor or plan to use it for French toast.
Can I bake it in the oven instead?
Yes. Run the dough cycle on your machine, shape the loaf, and bake in a greased pan at 350°F for about 30 minutes, or until golden and hollow-sounding when tapped.

Easy Bread Machine Cinnamon Loaf Recipe that Makes the Best French Toast!
Ingredients
Equipment
Method
- Microwave the milk in a measuring jug for about 30 seconds. You want it warm to touch but not hot, so it doesn’t kill the yeast. Pour the milk into your bread machine insert.
- Stir in the brown sugar and yeast, then cover loosely with plastic wrap. Let it sit for 5 minutes. I know most bread machine manuals skip this step, but I can’t tell you how many times inactive yeast has ruined a batch. I’d rather toss a little milk and sugar than waste the entire loaf!
- After 5 minutes, your mixture should look a little foamy with small bubbles on top. That’s your sign that it’s alive and ready to go. If not, discard and start fresh with new yeast.Crack in your egg, then add vanilla, butter, and cinnamon. You don’t need to stir, the machine will handle it.
- Pour your flour right on top of the wet ingredients. It creates a clean layer and helps the bread rise evenly.
- Use your finger to make a small well in the top of the flour and add the salt. Lightly cover it back up with flour. This keeps it from coming into contact with the yeast too early, which can slow down the rise.
- Insert the pan back into the machine, select the Sweet Bread program, and choose the 1 & ½ lb loaf size. Press start.
- My compact Cuisinart runs for about 3 hours 20 minutes. I prefer the darkest crust setting for this loaf, it brings out that caramelized cinnamon color and gives the edges a slight crunch that’s beautiful for French toast.
- When the cycle finishes, carefully remove the pan with oven gloves. Turn the loaf out onto a cooling rack and let it rest at least 30 minutes before slicing.
Notes
- Swap cinnamon for pumpkin pie spice during the holidays for a festive twist.
- A handful of raisins or chopped nuts gives extra texture and sweetness.
- For a lighter crumb, use half bread flour and half all-purpose.
Storage
- I slice this bread when cold into ½ to 1 inch thick, chunky slices for French toast. Store sliced in freezer bags and use within 90 days for best flavor.
- You can store it like any other bread at room temperature for up to 2 days, but it truly shines once frozen and reheated as it toasts beautifully too!
Nutrition information is automatically calculated, so should only be used as an approximation.
The Takeaway
Making bread at home doesn’t have to be complicated or time-consuming. With a bread machine, you can have a soft, fragrant cinnamon loaf with almost no effort and it tastes a hundred times better than anything you’ll find at the store!
This loaf fills your kitchen with that cozy cinnamon smell that makes everyone wander in asking what’s baking. Slice it, toast it, freeze it, or turn it into French toast. It’s one of those simple, steady recipes that makes life taste a little better.
And if you’re feeding your family on a budget or just craving a warm, homemade touch to breakfast, this recipe will win you over in one bite.
What to Try Next?!


Share & Rate This Recipe!
If you tried this recipe, please share your feedback with a quick star rating or comment below. And if you loved it, share it with friends and family too!
Last update on 2026-06-26 / Affiliate links / Images from Amazon Product Advertising API


One Comment