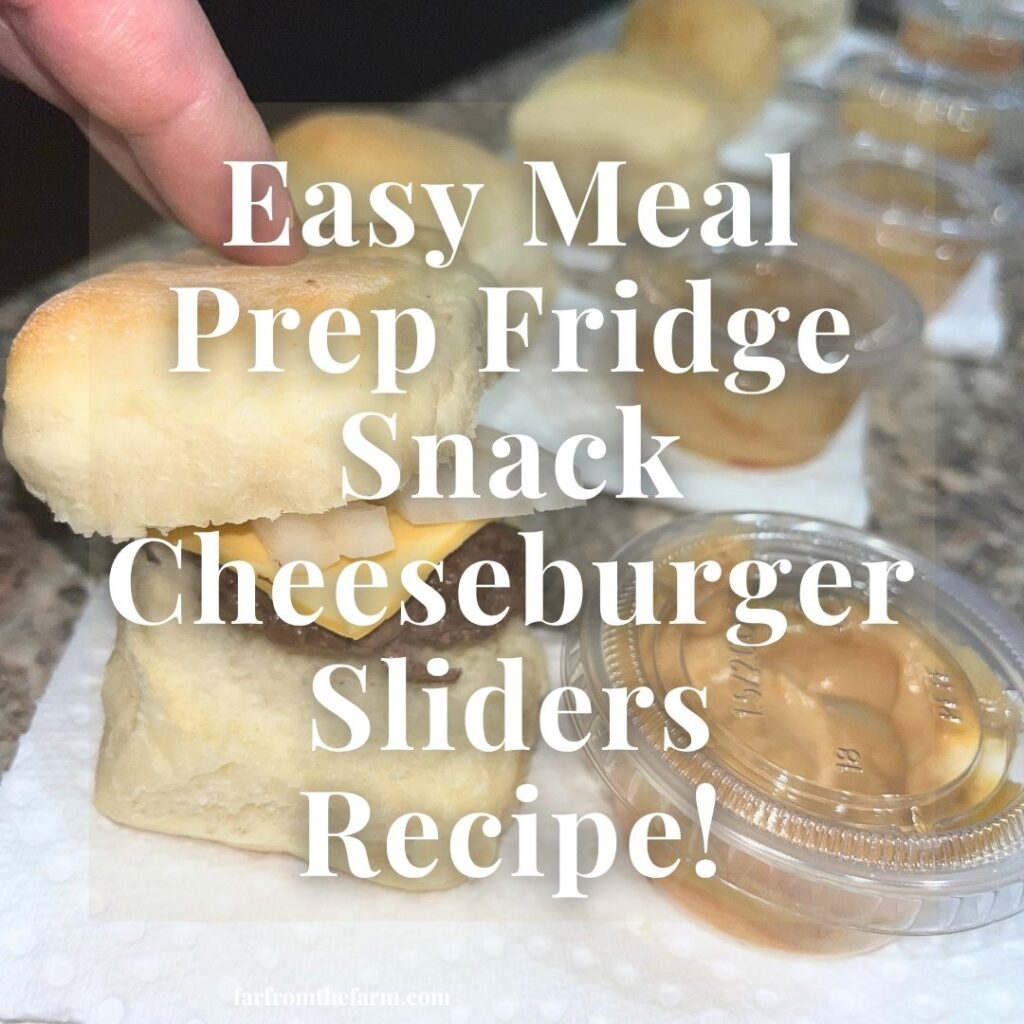
How to Fill the Fridge with Little Cheeseburger Slider Packs That Keep Hungry Teens Full Between Meals!
Hi! If you’ve been following me for long you’ll already know this, but for those who are new, welcome to Far From The Farm. I’m Mona, the Brit behind the recipes, learning life and food in the States while sharing our debt-free journey and what’s on the menu in our home today!
Feeding teenagers can feel like a full-time job all by itself.
One minute you’ve finished making breakfast and the next someone is standing in the kitchen asking what’s available to eat before lunch. Then comes the after-school hunger, the evening snack request, and somehow another round of food before bed.
For families with older children, especially active teens, it can feel like the kitchen is permanently open.
That’s one reason I’ve started leaning harder into homemade convenience foods.
Not the heavily processed snack foods that seem to disappear from the pantry in record time. Real food made with real ingredients that can be prepared ahead of time and grabbed quickly when someone needs something filling.

These little cheeseburger slider packs have become one of our favorite options for after school snacks.
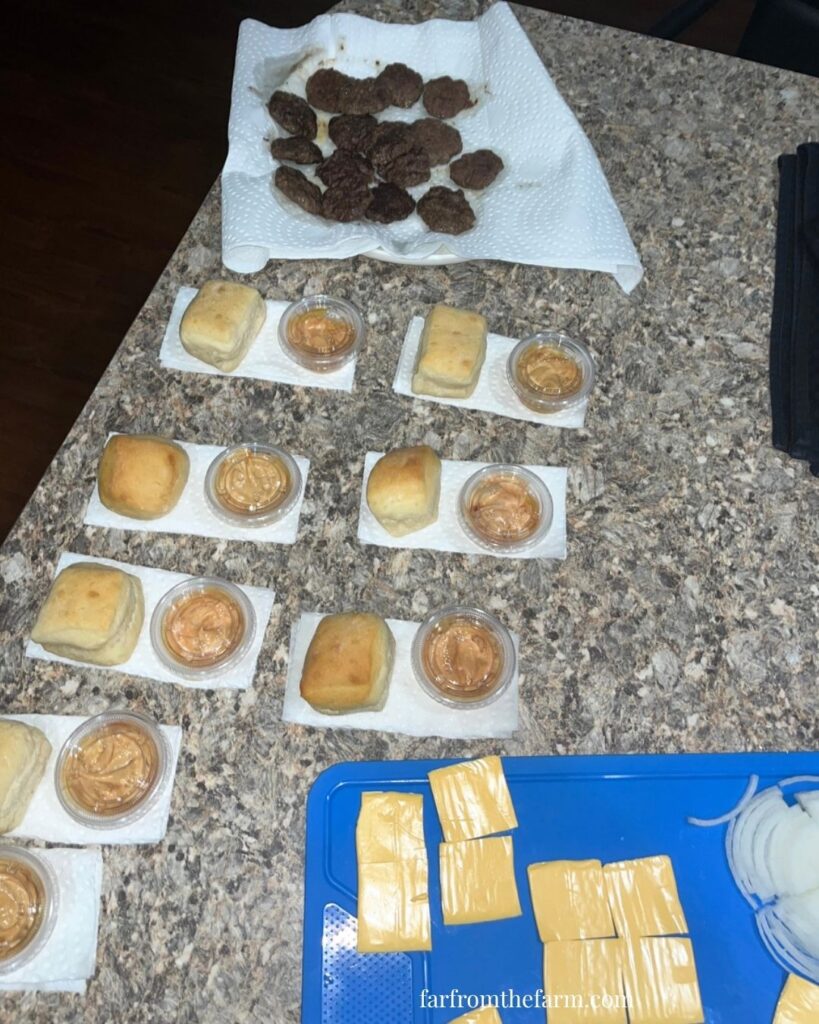
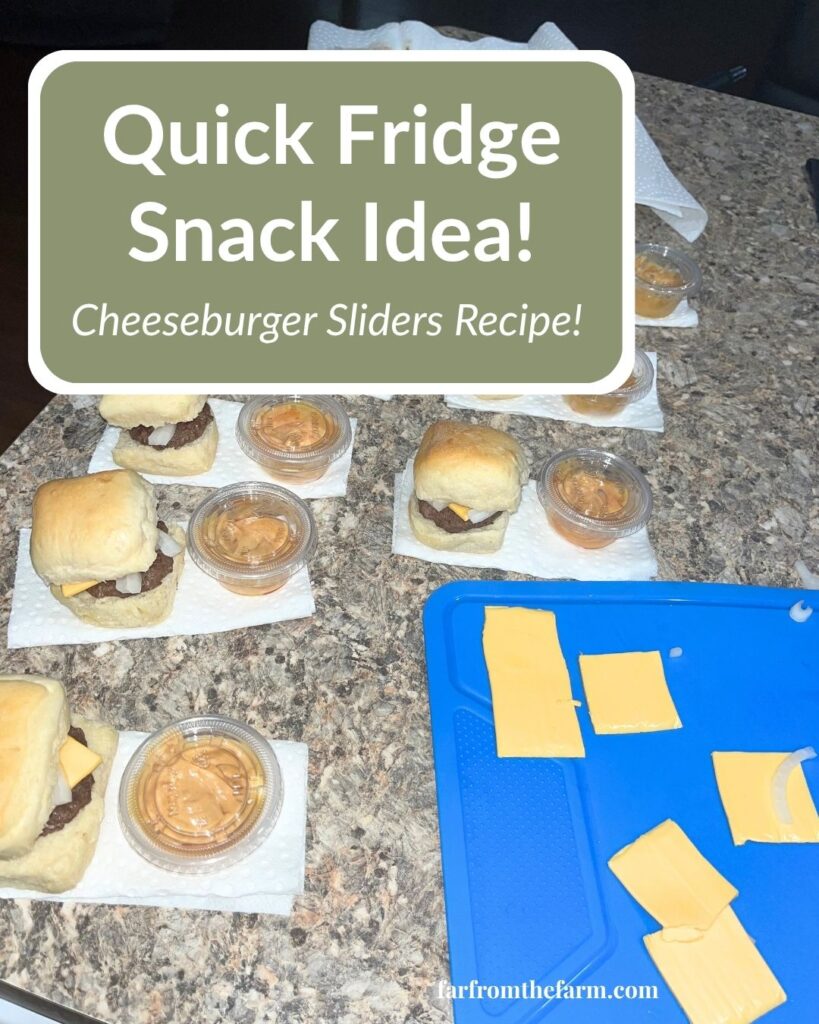
Each one contains a homemade mini cheeseburger tucked into a small roll, wrapped individually, and paired with its own little condiment cup. They sit ready in the fridge so that hungry teenagers can help themselves without pulling every ingredient out of the refrigerator and leaving a trail of dishes behind them!
As a military family working through Baby Step 2 of our debt-free journey, we’re making more and more things at home these days.
Every dollar that stays in our pocket is another dollar that can go toward our financial goals, and homemade snacks like these cost far less than constantly buying prepackaged convenience foods.
And just a reminder that if you’re struggling and you need help with managing your budget or starting your own debt free journey then here’s some FREE resources below you may find helpful!
living frugally and fully
free tips and resources to make the most of what you have
The beauty of this recipe is how flexible it is.
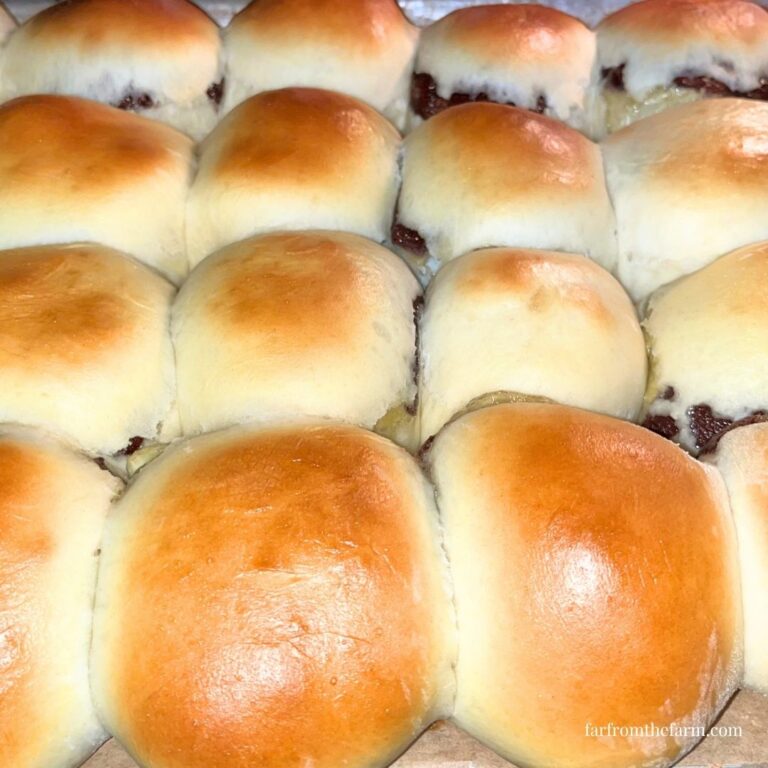
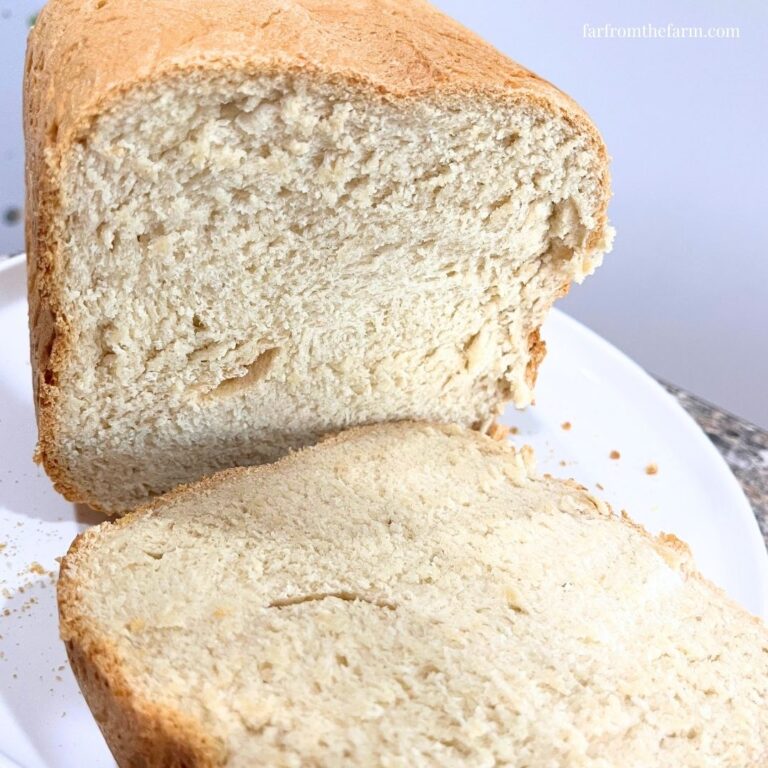
Use homemade rolls. Use store-bought slider buns. Use cheddar cheese, American cheese, pepper jack, or Swiss. Change the condiments depending on what your family enjoys. The basic method stays exactly the same.
For our family, I usually make a big batch all at once and wrap each slider individually alongside a little condiment pot. When someone gets hungry, they grab a pack from the fridge, unwrap it, microwave the burger while it’s sitting on the paper towel, and have a hot snack ready in under a minute.
As always, these photos are from my real kitchen here in our sweet military base home. No staged lighting or spotless marble counters. Just real life and real food made in a small space. Proof that you can feed your family well without needing a dream kitchen or fancy tools!
So let’s roll up our sleeves and head into the kitchen to make these easy meal prep cheeseburger slider packs!

Equipment
- Baking sheet
- Aluminum foil
- Bread knife
- Plastic wrap
- Small condiment cups with lids
Available on Amazon.com [ad]


Ingredients
Serves 16 Slider Packs
- 1 lb ground beef (80/20 recommended)
- Salt and pepper, to taste
- 4 American cheese slices
- 1/4 onion, sliced very thin
- 16 small slider rolls or mini buns
Step-by-Step Instructions
Step 1
Preheat your oven to 350°F.
Step 2
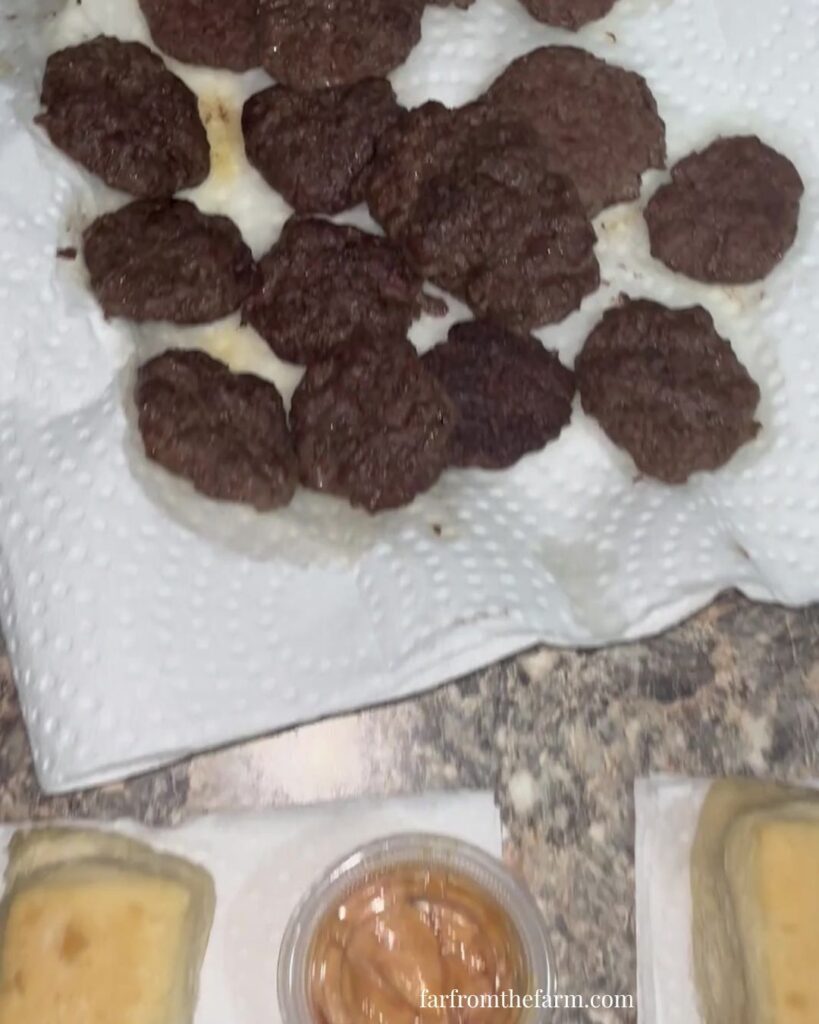
Divide the ground beef into 16 equal portions. Roll each portion into a ball and gently flatten into a small slider-sized patty.
Season both sides with salt and pepper.
Step 3
Line a baking sheet with foil.
Arrange the mini patties in a single layer, leaving a little space between each one.
Step 4
Bake for approximately 20 minutes.
Because these patties are small, there is no real need to flip them during cooking. If you’d like extra browning on both sides, you can turn them halfway through.
Cook until fully done and safe to eat.
Step 5
While the burgers are baking, prepare the rest of the components.
Slice each roll in half using a bread knife.
We use frozen homemade Texas Roadhouse Rolls from our freezer stash, but any small slider-sized roll works well.
Step 6
Cut the American cheese slices into quarters. Each small burger will get one cheese square.
Step 7
Now take 1/4 of an onion and slice it thinly.
Step 8
Remove the burgers from the oven. Allow them to cool completely before assembling.
Tip: Taking the time to cool them is important because wrapping warm burgers creates condensation and can make the rolls soggy!
Step 9
Build the sliders:
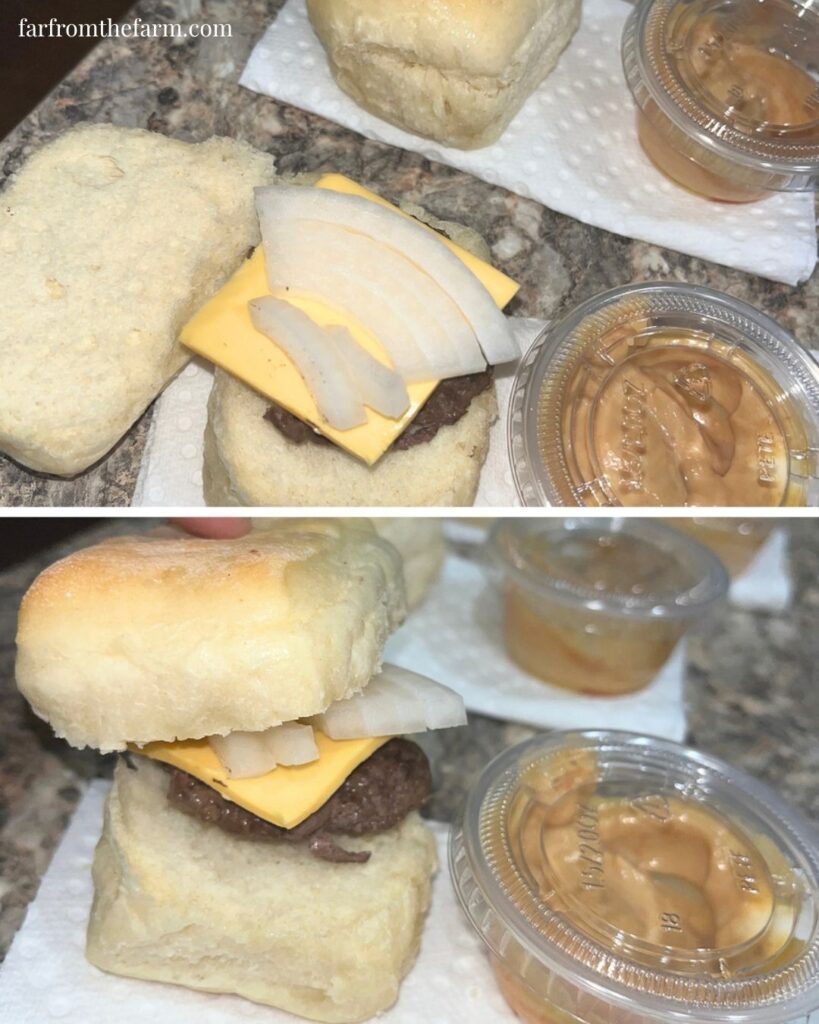
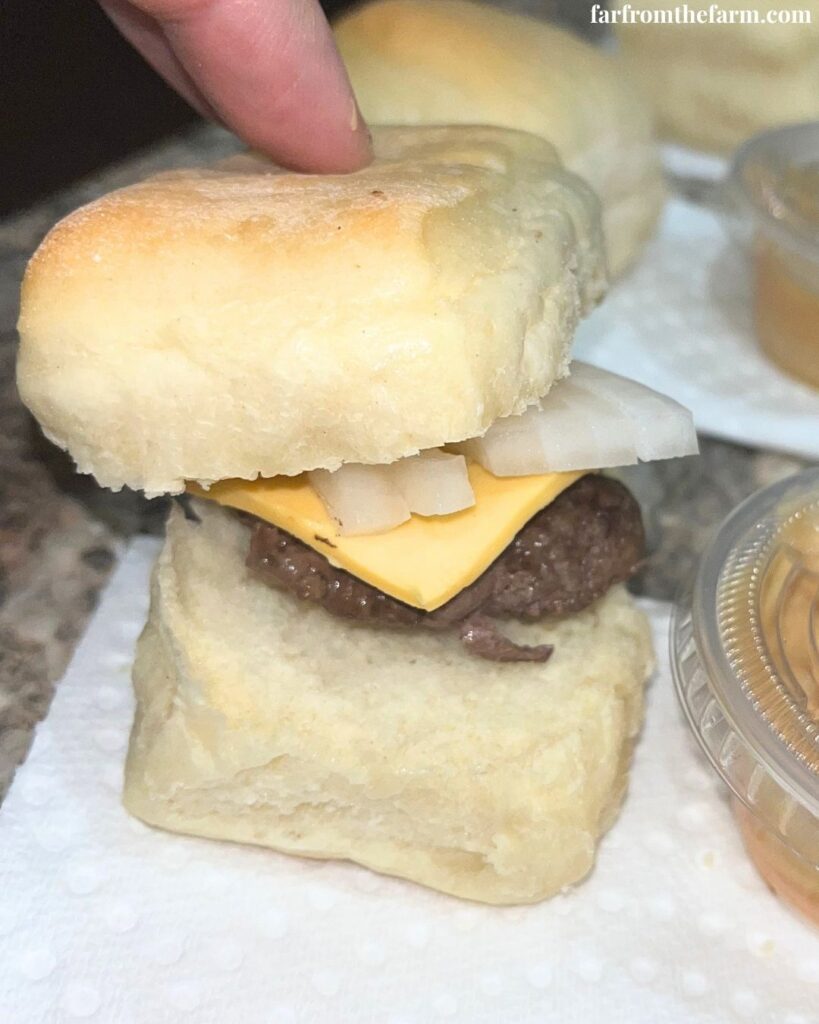
- Place one mini burger patty onto the bottom half of each roll.
- Top with a square of cheese and a few thin slices of onion.
- Place the top bun on each slider.
Step 10
Create your fridge packs:
- Place a slider onto a folded paper towel.
- Fill a small condiment cup with your family’s favorite sauce.
- Easy Cheeseburger Sauce works great, but ketchup, burger sauce, barbecue sauce, spicy mayo, or thousand island dressing are all good choices.
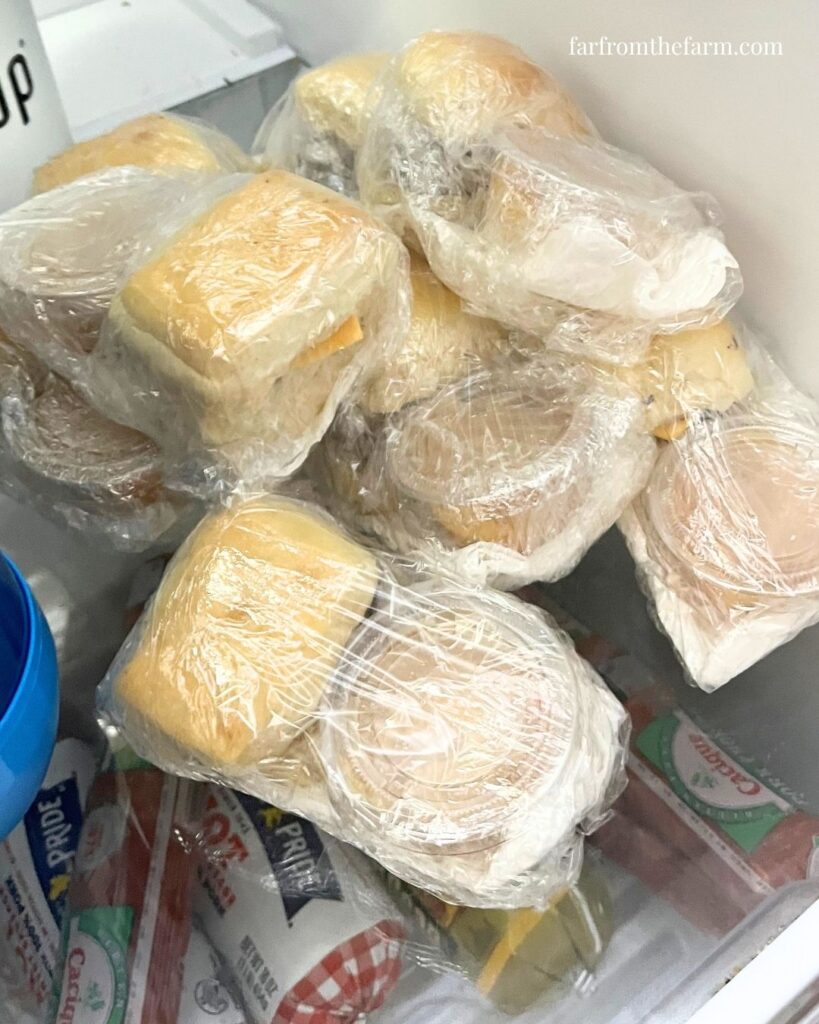
- Wrap the burger, condiment cup, and paper towel together tightly in plastic wrap.
- Store in the refrigerator until needed, for up to 4 days.
Step 11
When it’s time to eat, unwrap the packet.
Leave the burger sitting on the paper towel and microwave for 45 seconds to 1 minute.
Open the condiment cup and either dip the slider or spread the sauce inside the burger. Enjoy!
Notes and Troubleshooting
Notes
- 80/20 ground beef gives the juiciest burgers.
- Leaner beef works but tends to dry out faster.
- American cheese melts beautifully for this recipe.
- Homemade rolls freeze and thaw especially well.
- Thin onion slices add flavor without overwhelming the small burgers.
Troubleshooting
My burgers are dry.
Use 80/20 beef and avoid overcooking.
My rolls became soggy.
Make sure the burgers cool completely before wrapping.
My cheese didn’t melt.
The heat from the burger usually softens it slightly. The microwave finishes the job during reheating.
My sliders fall apart.
Keep patties slightly wider than the rolls because they shrink while cooking.
Storage
- Store wrapped slider packs in the refrigerator for up to 4 days.
- For longer storage, freeze the assembled sliders without the condiment cups.
- Thaw overnight in the refrigerator before reheating.
- Store sauces separately if freezing.
Serving Ideas
- Pack with homemade burger sauce
- Pair with baked fries
- Serve alongside fruit cups
- Add pickle slices
- Include veggie sticks
- Use different dipping sauces throughout the week
- Wrap each slider with an individual condiment cup for easy grab-and-go snacking
Why You’ll Love This Recipe!
- Provides homemade snacks made with real ingredients
- Helps keep hungry teens satisfied between meals
- Saves money compared to store-bought convenience foods
- Easy to batch prep ahead of time
- Customizable with different cheeses and sauces
- Quick reheating straight from the refrigerator
- Minimal cleanup for busy families
- Great for meal prep days
FAQ
Up to 4 days when wrapped and stored properly.
Yes. Freeze the sliders separately and add fresh condiment cups after thawing.
American cheese melts beautifully, but cheddar, Swiss, pepper jack, and Colby Jack all work well.
Absolutely. Cook over medium heat until fully cooked through.
Of course. Leave them off if your family prefers plain cheeseburgers.

Easy Meal Prep Fridge Snack Cheeseburger Sliders Recipe!
Ingredients
Equipment
Method
- Preheat the oven to 350°F.
- Divide the ground beef into 16 equal portions. Roll into balls, flatten into small slider-sized patties, and season both sides with salt and pepper.
- Line a baking sheet with foil and arrange the patties in a single layer.
- Bake for about 20 minutes, or until fully cooked. No flipping is required, although you can flip them halfway through if desired.
- While the burgers are cooking, slice the rolls in half.
- Cut the American cheese slices into quarters.
- Thinly slice the 1/4 onion.
- Remove the burgers from the oven and allow them to cool completely before assembling.
- Place a burger patty onto the bottom half of each roll. Top with a piece of cheese and a few slices of onion, then add the top bun.
- Place each slider onto a folded paper towel.
- Fill small condiment cups with your family’s preferred dipping sauce such as burger sauce, ketchup, barbecue sauce, spicy mayo, or thousand island dressing.
- Wrap each slider, condiment cup, and paper towel together tightly in plastic wrap and refrigerate for up to 4 days.
- To serve, unwrap a slider pack, leave the slider on the paper towel, and microwave for 45 seconds to 1 minute. Use the sauce for dipping or spread it inside the slider before eating.
Notes
- 80/20 ground beef gives the juiciest burger patties.Leaner beef works but may dry out faster.
- American cheese melts well, but cheddar, Swiss, pepper jack, or Colby Jack can also be used.
- Homemade rolls or store-bought slider buns both work.
Storage:
- Allow the burger patties to cool completely before wrapping to prevent soggy rolls.
- Store wrapped slider packs in the refrigerator for up to 4 days.
- For longer storage, freeze the assembled sliders without the condiment cups.
- Thaw overnight in the refrigerator before reheating.
- Store sauces separately if freezing.
Related Recipes:
- Need more make-ahead ideas? Browse our Meal Prep Recipes!
- Looking for more hearty snack ideas? Check out our Snack Recipes!
- Feeding a hungry family tonight? Explore our Dinner Recipes!
Nutrition information is automatically calculated, so should only be used as an approximation.
Looking for more homemaking inspiration?

It’s so important to be part of a community that not only understands you but that champions you, encourages, challenges and cheers you on. We couldn’t find one – so we created it instead!
Join Julie, Sam and I over at the Side Hustle Homemakers Facebook Community for Food Blogging Tips, Homesteading and Homemaking content and encouragement!
We’re 3 very different US/UK military families who met and became instant forever friends.
We created Side Hustle Homemakers to share real life around recipes, food blogging, homemaking, military life, homesteading and more. Head on over, say Hi, share you tips and gain some friends and knowledge along the way!
The Takeaway
Keeping a fridge stocked with homemade grab-and-go food can make a huge difference when you’re feeding growing teenagers.
These little cheeseburger slider packs give you the convenience of ready-made snacks while still using ingredients you chose yourself. They’re simple, filling, budget-friendly, and easy for teens to heat up independently.
A little meal prep today can save a whole lot of kitchen chaos later in the week!
Other After School Snack Options!
Share & Rate This Recipe!
If these meal prep cheeseburger slider packs become a favorite in your home, I’d love to hear about it! Leave a rating on the recipe card and share a comment below. Tell me what sauces and toppings your family loves most!
Last update on 2026-06-14 / Affiliate links / Images from Amazon Product Advertising API