How to Make Homemade Meltaway Cream Cheese Butter Mints for Holidays and Special Events!
If you have ever been to a church function, wedding reception, baby shower, or Christmas gathering in the American South, chances are you have seen these little pastel mints sitting quietly on a tray. They look simple, almost unassuming. And then you taste one…
That is usually the moment people ask for the recipe.
Hi! If you’ve been following me for long you’ll already know this, but for those who are new, welcome to Far From The Farm. I’m Mona, the Brit behind the recipes, learning life and food in the States while sharing our debt-free journey and what’s on the menu in our home today!
Since moving to the US from the UK, I have been on a bit of a personal food discovery mission. I love finding the kinds of recipes that families here have been making quietly for generations.
The budget friendly ones. The crowd pleasing ones. The recipes that do not require fancy equipment or complicated techniques.
Southern cream cheese mints fit that description perfectly.
These meltaway mints are incredibly popular across the South, especially at weddings and special events.
Around Christmas time, peppermint flavored versions start appearing everywhere, from bake sales to holiday markets.
Peppermint is a huge holiday flavor here in the States, very different from the spiced sweets I grew up with back in Europe.
Our family loves making these in soft pastel shades. They are beautiful for weddings, Easter, baby showers, and spring gatherings. You can absolutely lean into seasonal colors, or keep them classic and simple.

Once you understand the base dough, the options really open up. You can swap peppermint for lemon or orange extract. You can shape them differently. You can even dip them in chocolate if you are feeling fancy.
One very important word of warning before you start. Do not skip the silicone bench protector. The food coloring and kneading process can stain countertops, especially lighter ones. Ask me how I know!
As always, these photos are from my real kitchen here in our sweet military base home. No AI recipe images or staged lighting or spotless marble counters. Just real life and real food made in a small space. Proof that you can feed your family well without needing a dream kitchen or fancy tools!
And just a reminder that if you’re struggling and you need help with managing your budget or starting your own debt free journey then here’s some FREE resources below you may find helpful!
living frugally and fully
free tips and resources to make the most of what you have
So grab your mixer, clear a little counter space, and head into the kitchen to make these classic Southern cream cheese mints!
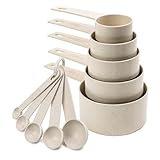
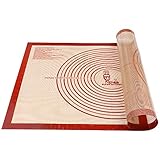
Equipment
- KitchenAid stand mixer with paddle attachment
- Measuring cups and spoons
- Silicone bench protector or silicone mat
- Plastic wrap
- Fork
- Cookie sheets or large plates
- Parchment paper (if using cookie sheets)
Available on Amazon.com [ad]


Ingredients
Makes about 100 mints

For the peppermint dough:
- 8 oz block of cream cheese, softened
- 2 tbsp salted butter, softened
- 8 cups powdered sugar
- 1 tsp peppermint extract
- 3/4 tsp vanilla extract
- Gel food coloring, colors of choice
For drying:
- Additional 1/2 cup powdered sugar
Step by Step Instructions
Step 1: Mix the Cream Cheese Mint Dough
Add the softened cream cheese, softened butter, powdered sugar, peppermint extract, and vanilla extract to the bowl of your stand mixer.

Step 2: Bring the Dough Together

Using the paddle attachment, mix on the lowest speed for about 3 minutes until fully combined. The mixture should form a soft dough. It may feel slightly crumbly, but when pressed together it should hold its shape.

Step 3: Divide and Wrap the Dough
Turn the peppermint dough out onto your silicone bench protector. Divide it into four equal portions. Wrap each portion tightly in plastic wrap and set aside while you work with one at a time.

Step 4: Color the Dough Portions
Take one portion of dough and add a few drops of gel food coloring. Knead by hand for 2 to 3 minutes until the color is evenly distributed. Wrap the colored dough back in plastic wrap.
Step 5: Finish Coloring All Portions
Repeat the coloring and kneading process with the remaining portions of dough, using different colors if desired.
Step 6: Chill the Dough for Shaping
Place all wrapped dough portions in the refrigerator and chill for at least 1 to 2 hours. This step helps the dough firm up and makes shaping much easier.
Step 7: Shape the Mints
Once chilled, remove one portion of dough at a time. Roll teaspoon sized portions of dough into smooth balls.

Step 8: Coat and Press the Mints
Roll each dough ball in powdered sugar until lightly coated. Then gently press with a fork to create the classic flat circle patterned mint.
Step 9: Dry the Mints
Place the mints on large plates or parchment lined cookie sheets and allow them to dry at room temperature for at least 8 hours, preferably overnight.

Step 10: Store the Finished Mints
Once fully set, transfer the mints to an airtight container for storage.
Notes and Troubleshooting
Notes
- For classic butter mint shapes, roll the dough into a thin log and cut into small pillow shapes
- Swap peppermint extract for lemon, orange, or almond for different flavor profiles
- Dip fully dried mints in melted dark chocolate to create peppermint patties
- Sparkling sugar or granulated sugar can be used instead of powdered sugar for a decorative finish
Troubleshooting
- Dough too sticky: Add powdered sugar one tablespoon at a time
- Dough too dry: Knead in a teaspoon of softened cream cheese
- Colors streaky: Continue kneading until fully blended
- Mints spreading: Chill dough longer before shaping
Storage
- Store in an airtight container at room temperature for up to 7 days
- For longer storage, refrigerate for up to 2 weeks
- These mints can be frozen for up to 2 months
- Thaw at room temperature before serving
Serving Ideas
- Wedding dessert tables
- Holiday cookie trays
- Baby showers and bridal showers
- Church potlucks and bake sales
- Gift boxes with homemade sweets
Why You’ll Love This Recipe?!
- Soft meltaway texture
- Simple pantry ingredients
- Perfect make ahead treat
- Budget friendly for large groups
- Customizable colors and flavors
FAQ
Can I make these without a stand mixer?
Yes, but mixing by hand is much more labor intensive. A stand mixer gives the smoothest texture.
Do these need to be refrigerated?
The finished mints do not need to be refrigerated once they are fully dried and set. They can be stored at room temperature in an airtight container for several days. If you want to store them for longer than a week, refrigeration is recommended.
The dough, however, should always be refrigerated during the chilling stage before shaping. This helps the mints hold their shape and makes them easier to work with.
Can I use liquid food coloring?
Gel food coloring is recommended to avoid adding excess moisture.
Can I make these ahead of time?
Yes, they are ideal for making several days in advance.
Make This Recipe With Me!
Sometimes it’s just easier to watch a video than read a recipe card isn’t it?! So here’s a quick tutorial on how to make this simple and delicious recipe at home and on a budget – thank you for joining me in the kitchen today!

The Best Southern Cream Cheese Mints Recipe!
Ingredients
Equipment
Method
- Add the cream cheese, butter, powdered sugar, peppermint extract, and vanilla extract to the bowl of a stand mixer.
- Mix on low speed with the paddle attachment for about 3 minutes until a soft dough forms. The dough should hold together when pressed.
- Turn the dough out onto a silicone mat and divide into four equal portions. Wrap each portion tightly in plastic wrap.
- Knead gel food coloring into each portion by hand until evenly colored. Wrap again.
- Refrigerate the wrapped dough portions for 1 to 2 hours until firm.
- Roll teaspoon sized portions of dough into smooth balls.
- Roll each dough ball in powdered sugar until lightly coated, then gently press with a fork to create the classic mint pattern.
- Place the mints on large plates or parchment lined baking sheets and allow to dry at room temperature for at least 8 hours or overnight.
- Transfer fully set mints to an airtight container for storage.
Video
Notes
- For classic butter mint shapes, roll the dough into thin logs and cut into small pillow pieces.
- Flavor variations include lemon, orange, or almond extract in place of peppermint.
- Mints can be dipped in melted dark chocolate once fully dried.
Storage
- Store in an airtight container at room temperature for up to 7 days.
- Refrigerate for up to 2 weeks.
- Freeze for up to 2 months. Thaw at room temperature before serving.
Related Recipes
- See more of my Christmas Recipes!
Nutrition information is automatically calculated, so should only be used as an approximation.

The Takeaway
Southern cream cheese mints are one of those recipes that quietly steal the show. They are easy, affordable, and endlessly adaptable.
When you’ve made them once, it is easy to see why they appear at so many special gatherings across the South!
What to Try Next?!


Share & Rate This Recipe!
If you make these Southern cream cheese mints, tap the stars on the recipe card and leave a quick comment. And if someone asks for the recipe, you will know you did it right.
Last update on 2026-07-14 / Affiliate links / Images from Amazon Product Advertising API