How to Make Easy No-Heat Homemade Hazelnut Creamer Made in the Blender in Just Minutes!
Hi! If you’ve been following me for long you’ll already know this, but for those who are new, welcome to Far From The Farm. I’m Mona, the Brit behind the recipes, learning life and food in the States while sharing our debt-free journey and what’s on the menu in our home today!
Hazelnut coffee just feels cozy, doesn’t it?
It has that warm café style flavor that somehow makes an ordinary cup of coffee feel a little more comforting without needing a full coffee shop run.
And while I absolutely love my original from scratch homemade hazelnut coffee creamer recipe, lately I’ve also been trying to simplify things even further where I can, whilst also expanding the types of homemade creamers I make.
And some days I simply do not want another saucepan to wash!
This easy dairy-free version has become one of my favorite quick little shortcuts because it comes together entirely in the blender with no heating required at all.
Just pour, blend, refrigerate, and it’s ready to go for the week ahead.
I also really love that homemade dairy-free creamers usually contain far fewer ingredients than the store bought versions.

A lot of bottled dairy-free creamers can end up packed with oils, gums, stabilizers, and extra ingredients that honestly make my head spin a little when I read the label.
This version keeps things simple, creamy, and budget friendlier too.
As a military family deep into baby step 2 of our debt free journey, homemade little swaps like this genuinely help stretch our grocery budget further without making life feel boring or restrictive.
And because this uses canned coconut milk, it creates a surprisingly rich and creamy texture that works beautifully in both hot coffee and iced coffee.
The vanilla softens the hazelnut flavor slightly and helps give it that cozy coffee shop feel without needing loads of ingredients.
And the best part? It takes about two minutes to make.
And just a reminder that if you’re struggling and you need help with managing your budget or starting your own debt free journey then here’s some FREE resources below you may find helpful!
living frugally and fully
free tips and resources to make the most of what you have
As always, these photos are from my real kitchen here in our sweet military base home. No AI recipe images or staged lighting or spotless marble counters. Just real life and real food made in a small space. Proof that you can feed your family well without needing a dream kitchen or fancy tools!
So grab your blender and let’s make this super simple dairy-free hazelnut coffee creamer together!
Recipe Disclaimer
All Far From The Farm recipes are shared as a guide based on what works in my home kitchen. Results may vary depending on your ingredients, equipment, and cooking setup, so always use your own judgement. Please check all ingredients for allergies, intolerances, or dietary needs before making any recipe. Far From The Farm is not responsible for any reactions or outcomes from the use of these recipes. Nutritional information is an estimate only.
Mona – Far From The Farm
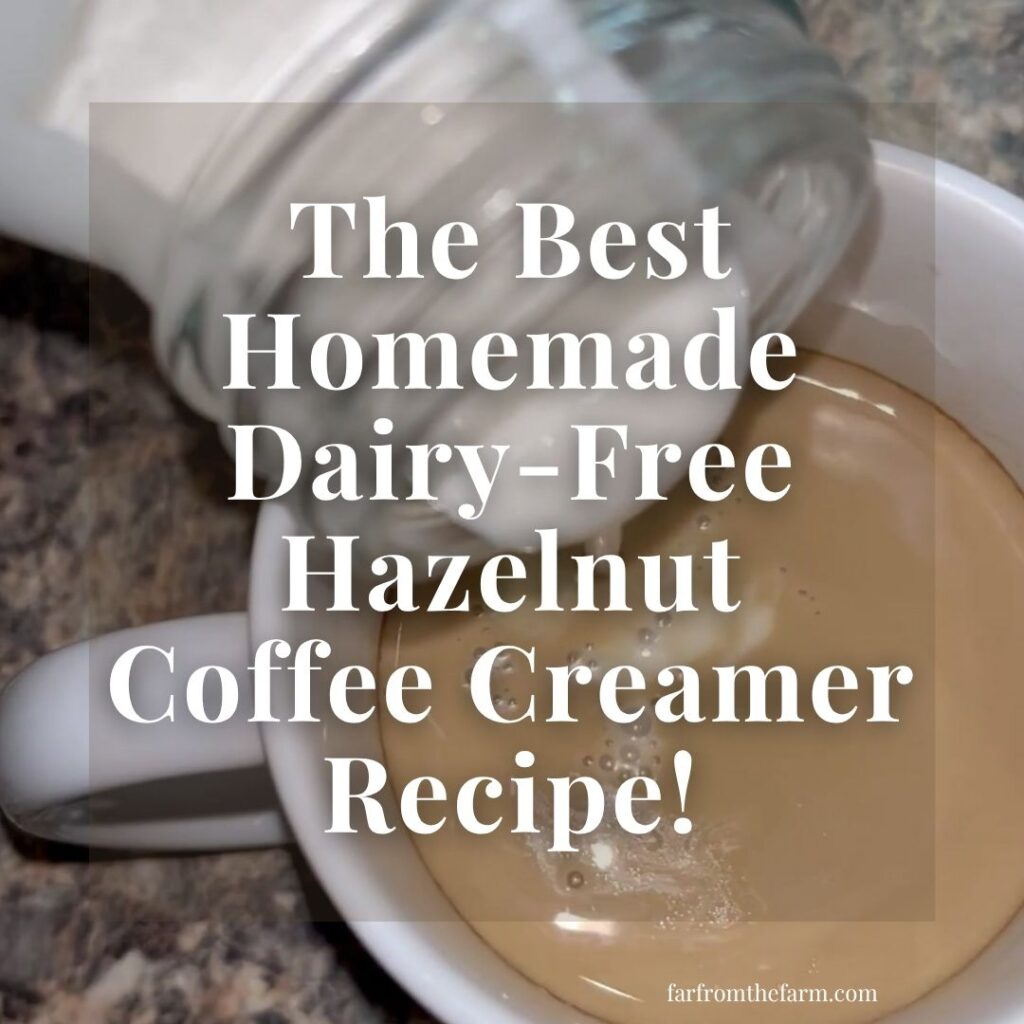
Sneak Peak!
Sometimes you need to see the end product before you commit to making it, right?! So here’s a quick glimpse of how it turned out for me today along with the recipe at a glance!
Equipment
- High-speed blender like the Vitamix range
- Measuring spoons
- Glass jar or airtight container
Available on Amazon.com [ad]

Ingredients

Makes about 2 cups
- 14 oz coconut milk (most store bought cans will be 13.5–14 oz, either is fine)
- 3 tbsp dairy-free sugar-free hazelnut syrup, like the one below
- 1 tbsp vanilla extract
Available on Amazon.com [ad]

Step-by-Step Instructions
Step 1
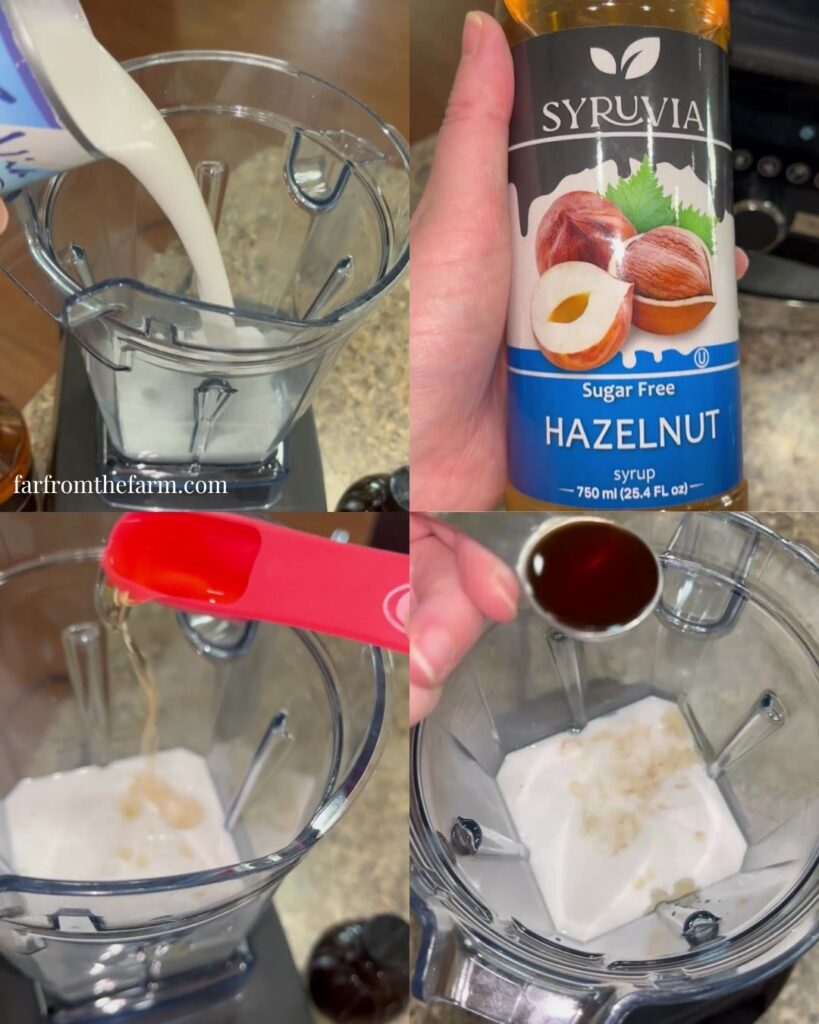
Pour the coconut milk, hazelnut syrup and vanilla extract into your blender.
We personally use sugar-free hazelnut syrup, but you absolutely do not have to. The vanilla helps round out the flavor and makes it taste a little richer.
Canned coconut milk can naturally separates in the can, this is normal and it will blend up fine so don’t worry about it.
Step 2

Blend on high for 15–30 seconds until fully combined and creamy.
Step 3

Pour into a glass jar or airtight container and refrigerate.
Shake before each use and enjoy in coffee, cold brew, or tea!

Notes and Troubleshooting
Notes
- Full-fat coconut milk gives the creamiest texture.
- Sugar-free hazelnut syrup keeps this lower sugar but regular syrup works too.
- Blending the coconut milk first helps create a smoother finished creamer.
- This recipe works beautifully in both hot and iced coffee.
Troubleshooting
My creamer separated in the fridge
That’s completely normal for homemade dairy-free creamers. Just shake before using.
My hazelnut flavor tastes too light
Add another tablespoon of hazelnut syrup next time for a stronger café style flavor.
My creamer tastes too thick
Add a small splash of dairy-free milk and shake well.

Storage
- Store leftovers in an airtight container in the refrigerator for up to 1 week.
- Shake before each use for the best creamy texture.
- Do not freeze.
Serving Ideas
- Stir into hot coffee
- Add to iced coffee or cold brew
- Use in homemade lattes
- Add to chai tea
- Mix into overnight oats or smoothies
- Use for cozy coffee bar setups
Why You’ll Love This Recipe?!
- No heating required
- Made in just minutes
- Dairy-free and budget friendly
- Simple recognizable ingredients
- Creamy café style flavor
- Perfect for busy mornings
- Works with hot or iced coffee
- Easy blender recipe
FAQ
Can I use regular hazelnut syrup instead of sugar-free?
Absolutely. Either works perfectly here.
Does this taste strongly like coconut?
Not heavily. The hazelnut and vanilla soften the coconut flavor quite a bit.
Can I use another dairy-free milk?
You can, but canned coconut milk gives the richest and creamiest texture.
Is separation normal?
Yes. Homemade dairy-free creamers naturally separate a little in the fridge. Just shake before using.

The Best Homemade Dairy-Free Hazelnut Coffee Creamer Recipe!
Ingredients
Equipment
Method
- Pour the coconut milk, hazelnut syrup and vanilla extract into your blender. Note: Canned coconut milk can naturally separates in the can, this is normal and it will blend up fine so don't worry about it.
- Blend on high for 15–30 seconds until fully combined and creamy.
- Pour into a glass jar or airtight container and refrigerate.
- Shake before each use and enjoy in coffee, iced coffee, cold brew, or tea.
Video
Notes
- Full-fat coconut milk gives the creamiest texture.
- Sugar-free hazelnut syrup keeps this lower sugar but regular syrup works too.
- Blending the coconut milk first helps create a smoother finished creamer.
- This recipe works beautifully in both hot and iced coffee.
Storage
- Store leftovers in an airtight container in the refrigerator for up to 1 week.
- Shake before each use for the best creamy texture.
- Do not freeze.
Related Recipes
- Check out all our Coffee Creamer Recipes!
- Try more Easy Dairy-Free Recipes here!
Nutrition information is automatically calculated, so should only be used as an approximation.
Looking for more homemaking inspiration?

It’s so important to be part of a community that not only understands you but that champions you, encourages, challenges and cheers you on. We couldn’t find one – so we created it instead!
Join the Side Hustle Homemakers Team Julie, Sam and I over at the Recipes, Homesteading and More! Facebook Group for Food Blogging Tips, Homesteading and Homemaking content and encouragement!
We’re 3 very different US/UK military families who met and became instant forever friends. We share what’s working in our kitchens, gardens, homes and more!
We created the group to share real life around recipes, homesteading, homemaking and more. Head on over, say Hi, share you tips and gain some friends and knowledge along the way!
And check out Julie’s 5 Homemade Dairy-Free Creamer Recipes HERE for more inspo!

The Takeaway
This easy dairy-free hazelnut coffee creamer is one of those tiny homemade swaps that makes mornings feel a little cozier without adding extra work to your day.
Simple ingredients. No heating. Just a quick blender recipe that helps bring that warm coffee shop flavor home for a fraction of the cost!
What To Try Next?!


Share & Rate This Recipe!
If this dairy-free hazelnut coffee creamer becomes part of your morning coffee routine too, I’d love if you could leave a quick review on the recipe card and share it with another coffee loving friend!
Last update on 2026-07-09 / Affiliate links / Images from Amazon Product Advertising API


One Comment