How to Make Deli Style Cheddar Jalapeño Bagels With Help From Your Bread Machine’s Dough Cycle!
Make chewy, cheesy, deli style bagels at home with your bread machine doing the hard work.
Hi! If you’ve been following me for long you’ll already know this, but for those who are new, welcome to Far From The Farm. I’m Mona, the Brit behind the recipes, learning life and food in the States while sharing our debt-free journey and what’s on the menu in our home today!
My husband loves the cheddar and jalapeño combo on almost everything. Nachos. Burgers. Breakfast sandwiches. You name it. But these bagels might be his favourite of all.
As a military family working on baby step 2 of our debt free journey, we do not have the budget to nip out for Panera style bagels whenever the craving hits. Grabbing fresh deli bagels a few times a week adds up fast.
So once I realised I could use my trusty bread machine to do the mixing, kneading, and first rise, these homemade cheddar jalapeño bagels quickly became a regular in our house!

And of course I just have to mention again, that using a bread machine has genuinely changed the way I cook at home, and I think it could help you out too!
My little bread machine does so much for me, dough for sweet rolls, soft dinner rolls, pizza nights, everyday sandwich loaves, quick cakes, even small batches of jam.
It takes on all the fiddly steps and frees me up to carry on with everything else at home. It keeps things consistent and budget friendly, and honestly it has made homemade baking feel achievable even on my busiest days. I’ll share the one I use later on in this post.
The dough is made in the bread machine on the dough cycle, then shaped, boiled, topped with cheese and jalapeño slices, and baked on a tray. You still get that proper bagel chew and golden top, without standing over a mixer or kneading by hand.
And of course I just have to mention again, that using a bread machine has genuinely changed the way I cook at home, and I think it could help you out too!
My little bread machine does so much for me, dough for sweet rolls, soft dinner rolls, pizza nights, everyday sandwich loaves, quick cakes, even small batches of jam.
It takes on all the fiddly steps and frees me up to carry on with everything else at home. It keeps things consistent and budget friendly, and honestly it has made homemade baking feel achievable even on my busiest days. I’ll share the one I use later on in this post.
And do not be intimidated by the boiling step. It sounds fancy, but it is honestly quick and simple. I usually keep the same pot of water on the stove and batch cook bagels for the freezer.
We slice them, wrap them in plastic wrap, pop them into a freezer bag, and stash them away. On busy mornings you can pull out a frozen bagel, split it, and toast it straight from the freezer.
We love ours toasted with just a little plain cream cheese. The melted cheddar and gentle jalapeño heat make them taste like something from a bakery!
As always, these photos are from my real kitchen here in our sweet military base home. No AI recipe images or staged lighting or spotless marble counters. Just real life and real food made in a small space. Proof that you can feed your family well without needing a dream kitchen or fancy tools!
So come into the kitchen with me and use your bread machine to make these deli style cheddar jalapeño bagels that feel like a treat but still respect your grocery budget!
And just a reminder that if you’re struggling and you need help with managing your budget or starting your own debt free journey then here’s some FREE resources below you may find helpful!
living frugally and fully
free tips and resources to make the most of what you have
Why You’ll Love Using a Bread Machine In Your Kitchen!

If you’re new here, you’ll quickly learn that I am such a fan of using a bread machine for dough. It has been one of the biggest helps in my kitchen, especially during busy or overwhelming seasons.
My parents gifted me this little Compact Cuisinart Bread Machine recently when I moved from the UK to the States after getting married, and it has worked like a little powerhouse ever since!

It kneads beautifully. It rises dough evenly. It keeps everything contained in one pan so I am not dealing with flour across every surface of the kitchen.
And on days where the house feels chaotic or I am juggling too much, I can add the ingredients, press the dough button, and let it get on with the work while I focus on everything else.
It takes away so much of the guesswork and makes homemade bread, pizza dough, cinnamon rolls, soft rolls, and sweet bakes feel much simpler.
It has also been a real blessing for our budget. Homemade dough costs pennies compared to store prepared versions and certainly compared to eating out. As a military family on baby step 2 of our debt free journey, little savings like that matter across an entire month.

If you have ever felt intimidated by bread making, this is your gentle nudge to give it a try. A dough cycle handles all the kneading for you.
You get soft, reliable, fluffy dough without standing over a counter for ages or worrying if things rose the way they should. It makes homemade cooking feel doable, even on days that are far from calm.
There are so many beginner friendly ideas to help you feel confident and excited about homemade dough!
Make Bagels With Me!
Sometimes it’s easier to watch a video rather than read written instructions – here’s me making these bagels in my kitchen today – be sure to watch and follow along!
Equipment
- Bread machine with a dough cycle (I use the Cuisinart Compact Bread Machine which I will link below!)
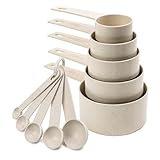
- Measuring cups and spoons
- Measuring jug
- Knife
- Cutting Board
- Plastic wrap
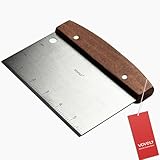
- Bench scraper for portioning dough
- Kitchen scale (optional if you prefer every bagel the same weight)
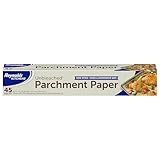
- 2 baking sheets lined with parchment paper
- Large pot for boiling the bagels
- Spider strainer or slotted spoon
- Fork for beating the egg (egg wash step)
- Small bowl for the egg wash
- Pastry brush for egg wash
- Cooling rack
Available on Amazon.com [ad]


Ingredients
Makes 6 large deli style bagels
For the dough
- 1 cup plus 1 tbsp warm water (about 100 to 110°F, from the tap)
- 2 tbsp white granulated sugar
- 2 & ¼ tsp bread machine yeast (equivalent to 1 packet)
- 3 cups flour (all purpose or bread flour, both work)
- 1 & ½ tsp table salt
- 2 fresh jalapeños, deseeded and finely diced
- 1 cup shredded cheddar cheese
For boiling
- Large pot of water
- 3 tbsp honey (or substitute 3 tbsp white or brown sugar)
For egg wash and toppings
- 1 egg, beaten with 1 tbsp water
- 1 cup shredded cheddar cheese
- 1 jalapeño, thinly sliced into rings (keep seeds for more heat, remove for milder topping)
Step By Step Instructions
Step 1. Proof the yeast in the bread machine pan
Remove the insert from your bread machine and make sure the paddle is in place.
Pour the warm water into the bread machine insert.
Add the sugar and stir until dissolved.
Sprinkle the bread machine yeast over the surface of the water and give it a gentle stir.

Cover the pan loosely with plastic wrap and leave it for 5 to 10 minutes.
When the mixture looks bubbly or lightly foamy, your yeast is active and ready. If there is no activity, discard and start again with fresh yeast so you do not waste flour and cheese.

Step 2. Add the flavour mix ins
Once the yeast mixture is bubbly, add:
- The 2 finely diced jalapeños (seeds removed)
- 1 cup shredded cheddar cheese
Stir gently with a spoon just to distribute them through the liquid. You do not need everything perfectly mixed because the machine will finish that part for you.

Step 3. Add flour and salt in the right order
Pour the 3 cups of flour on top of the liquid mixture so that it creates a full layer and covers the liquid completely.
Use a finger or the handle of a spoon to make a small well in the top of the flour. Add the salt into that well, then cover it lightly with a bit of the surrounding flour.

Keeping the salt up in the flour like this stops it from touching the yeast too early, which can affect how strongly the dough rises.
Place the insert back into the bread machine.
Step 4. Run the dough cycle
Select the “dough” cycle on your bread machine. My compact Cuisinart dough cycle runs for about 1 hour 30 minutes.
When the cycle finishes, the dough should feel soft, slightly tacky, and well risen.
Step 5. Rest the dough and divide it
Remove the dough from the machine and pull out the paddle if it is stuck inside.

Shape the dough into a rough ball and place it on a lightly floured surface or in a lightly oiled bowl. Cover with plastic wrap and let it rest for 15 to 20 minutes. This short rest relaxes the gluten and makes shaping easier.
After resting, use a bench scraper or knife to divide the dough into 6 equal pieces for large deli style bagels. You can weigh them if you want perfect consistency, but I usually eyeball it.
Roll each piece into a smooth ball and keep them under plastic wrap while you work. Starting boiling your water whilst you move on to shape your bagels.

Step 6. Shape the bagels
There are two easy methods that work well, and I find I do not need to use any extra flour with my bagel dough.
- Option 1: Rope method Roll each ball into a short rope, bring the ends together, and pinch the seam firmly. Roll the seam gently on the counter to seal.
- Option 2: Poke and stretch method Flatten a ball slightly, poke a hole through the centre with your thumb, then gently stretch it in circles until the hole is larger than you think it should be. It will shrink during boiling and baking.
Place the shaped bagels on a parchment lined baking sheet.
Step 7. Boil the bagels
Preheat your oven to 375°F.
When you’ve brought a large pot of water to a gentle boil. Stir in the 3 tbsp honey. This gives the bagels a lovely colour and a hint of sweetness, a lot like bakery bagels.
Working in batches, lower the bagels into the boiling water. Do not crowd the pot.
Boil each bagel for about 30 seconds per side (1 minute total). Use a spider strainer or slotted spoon to flip gently.
As they come out of the water, place them on a clean parchment lined baking sheet ready for baking.
Do not skip the boiling step. It is what gives bagels their classic dense chew and shiny crust.

Step 8. Top with egg wash, cheddar and jalapeños
Beat the egg with 1 tbsp water to make a simple egg wash.
Brush the tops and sides of each boiled bagel with egg wash.
Sprinkle the 1 cup shredded cheddar evenly over the bagels. Press lightly so it clings.
Arrange the jalapeño slices over the tops. You can place one or two rings on each bagel, or add more if your family enjoys a stronger kick.
If you prefer a milder topping, use deseeded jalapeño slices. If you enjoy heat, leave the seeds in.

Step 9. Bake until golden and cheesy
Bake the topped bagels at 375°F for about 20 to 25 minutes, depending on your oven.
You are looking for:
- Deep golden colour
- Melted cheddar that is bubbling and just starting to crisp at the edges
- Bagels that feel set and firm on the outside but still soft when gently pressed
Transfer to a cooling rack and let them cool for at least 15 minutes before slicing. The cheese will set slightly as they cool which makes them easier to cut.
Then enjoy! These are utterly delicious and just as good as the bakery kind!

Notes and Troubleshooting
Notes
- All purpose or bread flour both work. Bread flour will give a slightly chewier texture.
- You can swap cheddar for other cheeses. Asiago, Colby Jack, or a pepper jack blend all work beautifully.
- Adjust heat easily. For less spice, remove all seeds from the jalapeños and reduce the number of slices on top. For more spice, add a third jalapeño into the dough or keep the seeds in the garnish.
- Make the centre hole larger than you think. It shrinks during boiling and baking.
Troubleshooting
Bagels too pale
Bake a few extra minutes next time, or move the tray slightly higher in the oven for stronger top heat.
Bagels feel very dense
They may have over boiled or over baked. Stick closer to 30 seconds per side in the water and the lower end of the baking time.
Dough feels too sticky to shape
Lightly flour your hands and work surface. Avoid adding too much extra flour or the bagels will lose some chew.
Cheese burning on top
Tent loosely with foil for the last 5 minutes or reduce oven temperature by 10 to 15 degrees.
Storage
- Store cooled bagels in an airtight container for up to 3 days.
- For longer storage, slice bagels in half, wrap each one tightly in plastic wrap, then place in a freezer bag. Freeze for up to 1 month.
- To reheat from frozen, unwrap, separate the halves, and toast straight from the freezer. You can also bake at 350°F for 8 to 10 minutes.
Serving Ideas
These cheddar jalapeño bagels are incredible for:
- Breakfast sandwiches loaded with egg and bacon
- Simple toasted bagels with cream cheese
- Lunch sandwiches with deli meat and lettuce
- A cosy “breakfast for dinner” plate with scrambled eggs
- Serving alongside soup or chilli for a filling meal
They are hearty, full of flavour, and feel a bit like something you picked up from your favourite bagel shop!
Why You Will Love This Recipe?!
- Uses a bread machine so there is no kneading by hand
- Deli style flavour without deli prices
- Easy freezer friendly breakfast for busy mornings
- Customisable heat level to suit your family
- Proper bagel chew from the boiling step
- Uses basic pantry ingredients plus fresh jalapeños and cheese
- Makes 6 generous sized bagels that feel like a treat
FAQ
Can I make these less spicy?
Yes. Remove all the seeds from the jalapeños, use only one jalapeño in the dough instead of two, and top with fewer slices. You still get flavour without as much heat.
Can I use a different cheese?
Absolutely. Asiago, Colby Jack, pepper jack, or a sharp white cheddar all work nicely. Harder cheeses sprinkle better and give a lovely crusty top.
Can I skip the boiling step and just bake them?
You can, but they will turn out more like regular bread rolls with holes, not true bagels. The boiling step is what gives that classic chewy skin and dense interior.
Can I double the recipe?
Yes. Use the same method and keep an eye on the dough in your bread machine so it does not overflow. You may need to boil and bake in more batches.
Do I have to use a bread machine?
No. You can mix and knead the dough with a stand mixer or by hand, then follow the same shaping, boiling, and baking steps. The bread machine just takes work off your plate.

Easy Cheddar Jalapeño Bread Machine Bagels!
Ingredients
Equipment
Method
- Remove the insert from your bread machine and make sure the paddle is in place.Pour the warm water into the bread machine insert. Add the sugar and stir until dissolved.Sprinkle the bread machine yeast over the surface of the water and give it a gentle stir.
- Cover the pan loosely with plastic wrap and leave it for 5 to 10 minutes.When the mixture looks bubbly or lightly foamy, your yeast is active and ready. If there is no activity, discard and start again with fresh yeast so you do not waste flour and cheese.
- Once the yeast mixture is bubbly, add the 2 finely diced jalapeños (seeds removed), and the 1 cup shredded cheddar cheeseStir gently with a spoon just to distribute them through the liquid. You do not need everything perfectly mixed because the machine will finish that part for you.
- Pour the 3 cups of flour on top of the liquid mixture so that it creates a full layer and covers the liquid completely.
- Use a finger or the handle of a spoon to make a small well in the top of the flour. Add the salt into that well, then cover it lightly with a bit of the surrounding flour.Keeping the salt up in the flour like this stops it from touching the yeast too early, which can affect how strongly the dough rises.
- Place the insert back into the bread machine.Select the “dough” cycle on your bread machine. My compact Cuisinart dough cycle runs for about 1 hour 30 minutes.When the cycle finishes, the dough should feel soft, slightly tacky, and well risen.
- Remove the finished dough from the machine and pull out the paddle if it is stuck inside.Shape the dough into a rough ball and place it on a lightly floured surface or in a lightly oiled bowl. Cover with plastic wrap and let it rest for 15 to 20 minutes. This short rest relaxes the gluten and makes shaping easier.
- After resting, use a bench scraper or knife to divide the dough into 6 equal pieces for large deli style bagels. You can weigh them if you want perfect consistency, but I usually eyeball it.Roll each piece into a smooth ball and keep them under plastic wrap while you work. Starting boiling your water whilst you move on to shape your bagels.
- There are two easy methods that work well, and I find I do not need to use any extra flour with my bagel dough. Option 1: Rope method Roll each ball into a short rope, bring the ends together, and pinch the seam firmly. Roll the seam gently on the counter to seal.Option 2: Poke and stretch method Flatten a ball slightly, poke a hole through the centre with your thumb, then gently stretch it in circles until the hole is larger than you think it should be. It will shrink during boiling and baking.Place the shaped bagels on a parchment lined baking sheet.
- Preheat your oven to 375°F.
- When you've brought a large pot of water to a gentle boil. Stir in the 3 tbsp honey. This gives the bagels a lovely colour and a hint of sweetness, a lot like bakery bagels.Working in batches, lower the bagels into the boiling water. Do not crowd the pot.
- Boil each bagel for about 30 seconds per side (1 minute total). Use a spider strainer or slotted spoon to flip gently.As they come out of the water, place them on a clean parchment lined baking sheet ready for baking.Do not skip the boiling step. It is what gives bagels their classic dense chew and shiny crust.
- Beat the egg with 1 tbsp water to make a simple egg wash, and brush the tops and sides of each boiled bagel with egg wash.
- Sprinkle the 1 cup shredded cheddar evenly over the bagels. Press lightly so it clings.Arrange the jalapeño slices over the tops. You can place one or two rings on each bagel, or add more if your family enjoys a stronger kick.
- Bake the topped bagels at 375°F for about 20 to 25 minutes, depending on your oven, until golden brown with melted cheddar that is bubbling and just starting to crisp at the edges. The bagels should feel set and firm on the outside but still soft when gently pressed
- Transfer to a cooling rack and let them cool for at least 15 minutes before slicing. The cheese will set slightly as they cool which makes them easier to cut.Then enjoy! These are utterly delicious and just as good as the bakery kind!
Video
Notes
- All purpose or bread flour both work. Bread flour will give a slightly chewier texture.
- You can swap cheddar for other cheeses. Asiago, Colby Jack, or a pepper jack blend all work beautifully.
- Adjust heat easily. For less spice, remove all seeds from the jalapeños and reduce the number of slices on top. For more spice, add a third jalapeño into the dough or keep the seeds in the garnish.
- Make the centre hole larger than you think. It shrinks during boiling and baking.
Storage
- Store cooled bagels in an airtight container for up to 3 days.
- For longer storage, slice bagels in half, wrap each one tightly in plastic wrap, then place in a freezer bag. Freeze for up to 1 month.
- To reheat from frozen, unwrap, separate the halves, and toast straight from the freezer. You can also bake at 350°F for 8 to 10 minutes.
Related Recipes:
Check out all our bagel recipes HERE!Nutrition information is automatically calculated, so should only be used as an approximation.

The Takeaway
These Easy Cheddar Jalapeño Bread Machine Bagels prove that you do not need a fancy bakery or a huge budget to enjoy deli style bread at home.
Your bread machine handles the mixing, kneading, and first rise while you get on with the other parts of life. You come back when it beeps, shape, boil, bake, and suddenly the kitchen smells like a bagel shop.
Cheesy, gently spicy, chewy, and freezer friendly. This is the kind of recipe that quietly becomes a family favourite and makes staying on budget feel a little more joyful!
What to Try Next?!


Share & Rate This Recipe!
If these cheddar jalapeño bagels make your mornings or lunches a little better, tap the stars in the recipe card or leave a quick comment on the blog. Share it with a friend who loves homemade bread and a little kick of heat.
Last update on 2026-06-27 / Affiliate links / Images from Amazon Product Advertising API