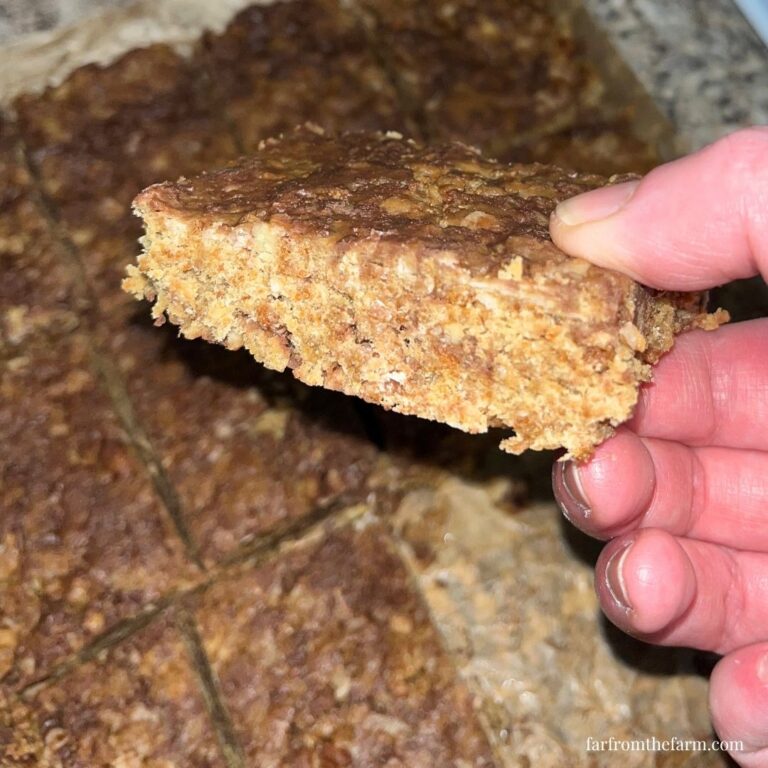
These Soft Sweet Light Pink Rolls Made With Cherry Juice are Perfect for Valentine’s Day, Baby Showers, or Any Pink-Themed Celebration!
Make soft, sweet, slightly pink bread rolls right in your bread machine with just a few pantry staples!
Hi! If you’ve been following me for long you’ll already know this, but for those who are new, welcome to Far From The Farm. I’m Mona, the Brit behind the recipes, learning life and food in the States while sharing our debt-free journey and what’s on the menu in our home today!
These rolls were created in the most real life way possible. One of those nights where you want something warm and homemade for dinner, but the pantry looks back at you like you’re asking too much.
I needed Hawaiian-style rolls for dinner so we could use up some leftover pulled meat, only to discover we were completely out of pineapple juice. What I did have was a bottle of cherry juice in the fridge, so instead of giving up, I tried it.
And honestly? It worked beautifully!
Some recipes are passed down for generations. Some happen by accident. Some happen out of pure necessity. This one falls into that last category. One tiny swap and suddenly I had a soft, fluffy, slightly sweet roll with the prettiest hint of pink. Equal parts adorable and practical.

The cherry juice doesn’t make the rolls taste like dessert. It simply adds a gentle sweetness and a lovely color that works so well for:
- Valentine’s Day dinners
- Baby girl showers
- Bridal showers
- Pink-themed birthdays
- Afternoon tea spreads
- Or just a fun twist on your usual dinner rolls
If your cherry juice is on the lighter side, the color may be very subtle, which is still lovely. If you want a stronger pink, add one or two drops of gel food coloring. Gel is important because liquid coloring could throw off the hydration in a bread machine recipe.
To mimic the acidity that pineapple juice gives traditional Hawaiian rolls, we add a small amount of lemon juice. It keeps the dough soft, tender, and well-balanced.
These rolls pair perfectly with sliders, pulled pork, fried chicken, deli meats, holiday spreads, or a simple bowl of soup. They also slice beautifully and reheat like a dream.
And of course I just have to mention again, that using a bread machine has genuinely changed the way I cook at home, and I think it could help you out too!
My little bread machine does so much for me, dough for sweet rolls, soft dinner rolls, pizza nights, everyday sandwich loaves, quick cakes, even small batches of jam.
It takes on all the fiddly steps and frees me up to carry on with everything else at home. It keeps things consistent and budget friendly, and honestly it has made homemade baking feel achievable even on my busiest days. I’ll share the one I use later on in this post.
Easy and affordable to make – baking rolls like these at home means that I’m able to stretch my grocery budget that little bit further. As a military family on baby step 2 of our debt free journey every penny saved goes towards our goal!
And just a reminder that if you’re struggling and you need help with managing your budget or starting your own debt free journey then here’s some FREE resources below you may find helpful!
living frugally and fully
free tips and resources to make the most of what you have
As always, these photos are from my real kitchen here in our sweet military base home. No AI recipe images or staged lighting or spotless marble counters. Just real life and real food made in a small space. Proof that you can feed your family well without needing a dream kitchen or fancy tools!
So grab your ingredients and get the bread machine humming. You’re going to love this one!
Why You’ll Love Using a Bread Machine In Your Kitchen!

If you’re new here, you’ll quickly learn that I am such a fan of using a bread machine for dough. It has been one of the biggest helps in my kitchen, especially during busy or overwhelming seasons.
My parents gifted me this little Compact Cuisinart Bread Machine recently when I moved from the UK to the States after getting married, and it has worked like a little powerhouse ever since!

It kneads beautifully. It rises dough evenly. It keeps everything contained in one pan so I am not dealing with flour across every surface of the kitchen.
And on days where the house feels chaotic or I am juggling too much, I can add the ingredients, press the dough button, and let it get on with the work while I focus on everything else.
It takes away so much of the guesswork and makes homemade bread, pizza dough, cinnamon rolls, soft rolls, and sweet bakes feel much simpler.
It has also been a real blessing for our budget. Homemade dough costs pennies compared to store prepared versions and certainly compared to eating out. As a military family on baby step 2 of our debt free journey, little savings like that matter across an entire month.

If you have ever felt intimidated by bread making, this is your gentle nudge to give it a try. A dough cycle handles all the kneading for you.
You get soft, reliable, fluffy dough without standing over a counter for ages or worrying if things rose the way they should. It makes homemade cooking feel doable, even on days that are far from calm.
There are so many beginner friendly ideas to help you feel confident and excited about homemade dough!
Equipment
- Bread machine
- Measuring cups and spoons
- Bench scraper for portioning out the dough
- Kitchen scale – optional if you prefer to have all your rolls an equal size
- Baking dish or sheet pan
- Silicone brush for the butter glaze
Available on Amazon.com [ad]


Ingredients
Makes 12 Soft Sweet Rolls
- 1 ¼ cup warmed cherry juice
- ¼ cup granulated sugar
- 2 ¼ tsp instant yeast (bread machine yeast works perfectly)
- 3 tbsp salted butter, cold and cubed
- 1 large egg
- 1 tsp lemon juice
- 3 ½ cups bread flour
- 1 tsp salt
- 2 tbsp half and half (to brush the tops of the rolls with before baking)
- Optional: 1 to 2 drops gel pink/red food coloring for a brighter shade!
- Optional: 2 tbsp additional butter (to brush over the rolls when they’re fresh out of the oven for a shiny glossy look!)
Available on Amazon.com [ad]

Step-By-Step Instructions

Step 1. Proof the yeast in the bread machine pan
Warm the cherry juice by microwaving for 30 – 40 seconds. Then pour it into the bread machine insert.
Add the sugar. Mix well.
Sprinkle the instant yeast over the liquids and give it a gentle stir.

Cover the pan with a piece of plastic wrap and let it sit for 5 to 10 minutes until the surface looks bubbly or lightly foamy.
If the yeast doesn’t activate you will need to discard everything and start over with fresh yeast.

Step 2. Add the remaining wet ingredients
Once the yeast mixture is bubbly and active, add the butter, egg, lemon juice and optional food coloring if using.

Step 3. Add the dry ingredients.
Pour the bread flour on top of the liquids so it creates a full layer covering everything underneath.
With your finger make a little well in the flour, and add the salt into it, covering with some of the surround flour.
This keeps the salt from meeting the yeast too early on in the kneading process as that can affect the rise.

Step 4. Run the Dough Cycle
Insert the pan into your bread machine and select Dough Cycle.
The machine will mix, knead, and handle the full first rise.
Depending on your model, this usually takes 1 hour 30 minutes.

When finished, the dough should be smooth, puffy, slightly tacky, soft and light pink from the cherry juice.
Step 5. Shape the rolls

Turn the dough out onto a lightly floured surface.
Use a bench scraper or kitchen scale if you prefer even portions.
Divide into 12 equal balls and shape them gently for smooth tops.
Place the dough balls into a parchment lined or greased baking dish or sheet pan, leaving a little space between each.

Step 6. Second rise

Cover loosely with plastic wrap or a tea towel.
Let the rolls rise for 30 to 45 minutes until noticeably puffy and touching each other.
Step 7. Bake

Brush the tops of your rolls with the half and half just before putting them in the oven.
Bake at 350°F for 18 to 22 minutes, depending on the size of your rolls and your oven (we go up to 22 in ours for these rolls).
Remove when the tops look set and very lightly golden.
The inside should be soft, fluffy, sweet, and have just the slightest pink tinge to them (more if you used food colouring, of course).

Step 8. Brush with butter
While still warm, brush the tops with butter for that classic Hawaiian-style soft finish, then enjoy!

Notes and Troubleshooting
Notes
- Cherry juice creates a soft, slightly sweet dough
- Lemon juice helps tenderize the dough
- Bread flour gives the rolls structure and chew
- Gel food coloring helps boost pink without changing hydration
- Great make-ahead recipe for holidays
Troubleshooting
Rolls didn’t rise well
Your room may have been too cold. Let the shaped rolls rise longer next time.
Rolls taste too sour
Your cherry juice may be extra tart. Reduce lemon juice to 1 tbsp.
Rolls too pale
Add a touch more gel coloring or brush with melted butter before and after baking.
Rolls too dense
Dough may have been too dry. Add a teaspoon or two more cherry juice next time.
Storage
- Store cooled rolls in an airtight container for 3 days
- Freeze baked rolls for up to 2 months
- Warm in the microwave for 10 seconds or in the oven for a few minutes
Serving Ideas
These pretty pink rolls are perfect for:
- Valentine’s Day dinners
- Baby showers
- Bridal brunch boards
- Homemade burger sliders
- Pulled pork sandwiches
- Pretty afternoon tea spreads
- Adding something special to an ordinary dinner
Why You’ll Love This Recipe?!
- Unique and adorable – sometimes it’s just fun to make something a little different!
- Bread machine friendly
- Soft and sweet with perfect texture
- Ideal for themed events
- Budget friendly
- No complicated steps
- Turns out beautifully every time
- Kids love the color
- Adults love the flavor
- Great for gifting
FAQ
Can I make these without a bread machine?
Yes. Mix and knead by hand or with a stand mixer, then follow the shaping and baking steps.
Will these taste like cherries?
Not strongly. The flavor is soft and gently fruity.
How do I get a crispier crust like a bakery?
Brush tops lightly with melted butter halfway through baking and bake uncovered on a sheet pan instead of a baking dish.
Can I make the dough ahead?
Yes. Store in the fridge after the first rise for up to 24 hours.

Sweet Pink Bread Machine Hawaiian-Style Rolls Made With Cherry Juice!
Ingredients
Equipment
Method
- Warm the cherry juice slightly, about 30 to 40 seconds in the microwave, until warm but not hot. Pour into the bread machine pan.
- Add the sugar and lemon juice, then sprinkle the yeast over the liquid. Stir gently and let sit for 5 to 10 minutes until foamy.
- Add the butter, egg, and optional gel food coloring.
- Pour the bread flour over the liquids to fully cover them. Make a small well in the flour and add the salt.
- Insert the pan into the bread machine and select the Dough Cycle. Allow the machine to mix, knead, and complete the first rise, about 1 hour 30 minutes.
- Turn the dough out onto a lightly floured surface. Divide into 12 equal portions and shape into smooth balls.
- Place the dough balls into a greased baking dish or onto a parchment-lined baking sheet, leaving a little space between each.
- Cover loosely and let rise for 30 to 45 minutes until puffy and touching.
- Preheat the oven to 350°F.
- Brush the tops of the rolls with the half and half right before baking.Bake for 18 to 22 minutes until the tops are set and very lightly golden.
- Remove from the oven and brush the warm rolls with melted butter before serving.
Notes
- Cherry juice creates a soft, slightly sweet dough
- Lemon juice helps tenderize the dough
- Bread flour gives the rolls structure and chew
- Gel food coloring helps boost pink without changing hydration
- Great make-ahead recipe for holidays
Storage
- Store cooled rolls in an airtight container for 3 days
- Freeze baked rolls for up to 2 months
- Warm in the microwave for 10 seconds or in the oven for a few minutes
Related Recipes
- Check out all our Bread Machine Recipes HERE!
- Check out all our Hawaiian-style Recipes HERE!
Nutrition information is automatically calculated, so should only be used as an approximation.

The Takeaway
These Sweet Pink Hawaiian-Style Rolls are the cutest little surprise you can make in your bread machine. Soft, fluffy, lightly sweet, and just plain joyful.
They fit everything from everyday dinners to baby showers to Valentine’s celebrations. Homemade rolls that feel special without stressing you out.
And even better – your bread machine does the hard work and you get all the credit!
What to Try Next?!


Share & Rate This Recipe!
If these soft pink rolls bring a little fun to your table, tap the stars in the card or leave a quick comment. Share them with a friend who loves cute and cosy homemade food too!
Last update on 2026-06-26 / Affiliate links / Images from Amazon Product Advertising API