How to Bake the Perfect Vegan White Bread in a Bread Machine Every Time
So Why Make This Bread?
Moving from the UK to the U.S., I was over the moon with all the bread options at the store.
But after a few weeks, the sandwich loaves stopped agreeing with me. I tried gluten free, dairy free etc, and still no change.
I swapped to sourdough for a season but that was either expensive to buy or involved quite a lot more time in the kitchen that I had to spare in this season.
Then one day my parents surprised me with a compact Cuisinart Bread Maker straight from Amazon.com [ad] , and I can honestly say it’s now the one kitchen gadget I’d never give up!
After plenty of trial and error, testing recipes and adjusting them to our tastes we think we’ve finally nailed the perfect white sandwich bread – and we’re sharing it with you today!
We bake it two or three times a week. It slices beautifully, holds its structure for sandwiches, and doesn’t fall apart in the toaster.
Bonus: it’s dairy free so it’s budget friendly and safe to bring along to gatherings where friends or kids might have dairy allergies.
And if you’ve been around here for a while, you’ll know I keep it real.
We currently live on a military base, and so our kitchen is far from Instagram-perfect. This means you’ll always see my real process and photos.
Because there’s nothing worse than clicking through from Pinterest only to find a staged recipe that looks nothing like what you’ll make at home!
So from my REAL kitchen to yours – here’s our favorite easy white bread recipe for bread machines – enjoy and be sure to bake along side me and check out my videos of this recipe in the sections below!
Equipment You’ll Need
These are the basics I always use:
- Cuisinart Compact Bread Maker – reliable, easy to use, and perfect for 2 lb loaves
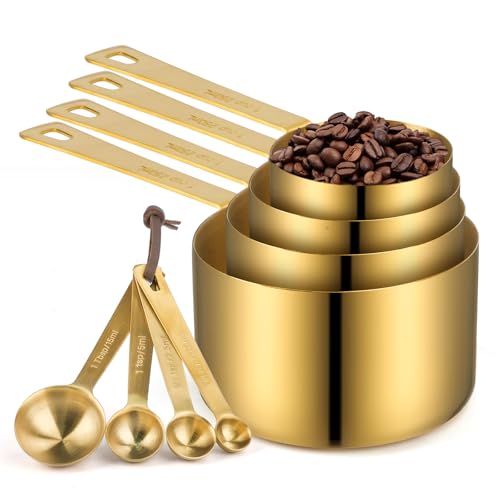
- Measuring spoons – accurate measurements make all the difference
- Measuring jug – for water and oil
- 1 cup flour scoop – keeps the flour level and easy to portion
Ingredients

- 1 and 1/4 cups warm water (from the tap, not boiling)
- 2 tbsp white sugar
- 2 and 1/4 tsp bread machine yeast
- 2 tbsp olive oil
- 4 cups bread flour
- 2 tsp table salt
Note: warm water is key. If it’s too hot, the yeast won’t rise. Too cold, and you’ll get a dense loaf.
Step-by-Step Instructions

Step 1. Remove the insert from your bread machine before adding ingredients. This keeps spills out of the machine.

Step 2. Pour in 1 and 1/4 cups warm water.

Step 3. Add 2 tbsp sugar.

Step 4. Add 2 and 1/4 tsp bread machine yeast. Stir gently, then set aside for 5 minutes to bloom.

Step 5. Check your yeast. If it’s cloudy and bubbly, you’re good to go. If not, toss it and start fresh from step 1.

Step 6. Add 2 tbsp olive oil. Don’t stir.

Step 7. Add 4 cups bread flour. Leave it sitting right on top of the wet mixture.

Step 8. Make a small well in the flour. Add 2 tsp table salt, then cover it lightly with flour.
This prevents early contact with the yeast which may potentially prevent your bread from rising.
Step 9. Place the insert back in the machine.

Step 10. Select the “white bread” setting and the 2 lb loaf size. Press start. My machine runs for 3 hrs 30 mins, so I like to set it around 1pm for fresh bread by dinner.

Step 11. Once finished, carefully remove the insert with oven gloves. Turn the bread out onto a cooling rack. Don’t forget to remove the mixing paddle if it’s stuck in the bottom.
Step 12. Store leftovers in an airtight container for 1–2 days. This bread doesn’t contain preservatives, so it’s best enjoyed fresh.
Extra Tips
- We eat through a loaf in a day, but if you manage to save some, slice it and freeze it in a freezer bag. Pull out slices as needed for grilled cheese or toast.
- For softer crust, cover the loaf with a clean tea towel while it cools.
- Swap in half whole wheat flour if you want a heartier loaf.
Serving Suggestions
This bread is best served once cooled so the crumb stays intact. Perfect for sandwiches, toast with jam, or alongside soup.
If you’re in the mood for another comfort food dessert, check out my Budget Friendly Banana Pudding Trifle!
Bake Along With Me!
I know it can be easier to watch a video that to read instructions so hang out with me here in my kitchen and bake alongside me!
Adding the ingredients into the bread machine:
Removing the loaf from the bread machine and slicing in to it!
Easy Bread Machine Dairy Free White Bread Recipe!
Equipment
- Bread Machine use one that can make a 2lb loaf
- Measuring spoons
- Measuring jug
- Cup for measuring flour
Ingredients
- 1 & 1/4 cup warm water from the faucet (make sure it's warm to touch but not boiling hot or it will kill your yeast!)
- 2 tbsp white sugar
- 2 & 1/4 tsp bread machine yeast must be yeast for bread machines
- 2 tbsp olive oil
- 4 cups bread flour leveled, not packed
- 1-2 tsp salt to taste
Instructions
- Step 1: Remove the insert from your bread machine before adding ingredients. This keeps spills out of the machine.
- Step 2: Pour in 1 and 1/4 cups warm water.
- Step 3: Add 2 tbsp sugar.
- Step 4: Add 2 and 1/4 tsp bread machine yeast. Stir gently, then set aside for 5 minutes to bloom.
- Step 5: Check your yeast mixture after 5 minutes. If it’s cloudy and bubbly, you’re good to go. If not, toss it and start fresh from step 1.
- Setp 6: Add 2 tbsp olive oil. Don’t stir.
- Step 7: Add 4 cups bread flour. Leave it sitting right on top of the wet mixture.
- Step 8: Make a small well in the flour. Add 2 tsp table salt, then cover it lightly with flour.This prevents early contact with the yeast which may potentially prevent your bread from rising.
- Step 9: Place the insert back in the machine.
- Step 10: Select the “white bread” setting and the 2 lb loaf size. Press start. My machine runs for 3 hrs 30 mins, so I like to set it around 1pm for fresh bread by dinner!
- Step 11: Once finished, carefully remove the insert with oven gloves. Turn the bread out onto a cooling rack. Don’t forget to remove the mixing paddle if it’s stuck in the bottom!
- Step 12: Let the loaf cool before slicing if you're planning to use it for sandwiches.
Video
Notes
Serving Suggestions
This bread is best served once cooled so the crumb stays intact. Perfect for sandwiches, toast with jam, or alongside soup. If you’re in the mood for another comfort food dessert, check out my Budget Friendly Banana Pudding Trifle!The Takeaway
Homemade bread feels like a luxury, but this recipe proves it’s easy, affordable, and worth every second of waiting.
Simple and dairy-free ingredients, a reliable bread maker, and you’ll never want to go back to store-bought!
What to Read Next
Share & Rate This Recipe!
If you tried this recipe, please share your feedback with a quick star rating or comment below. And if you loved it, don’t forget to share it with friends and family too!
Last update on 2025-11-09 / Affiliate links / Images from Amazon Product Advertising API


5 Comments