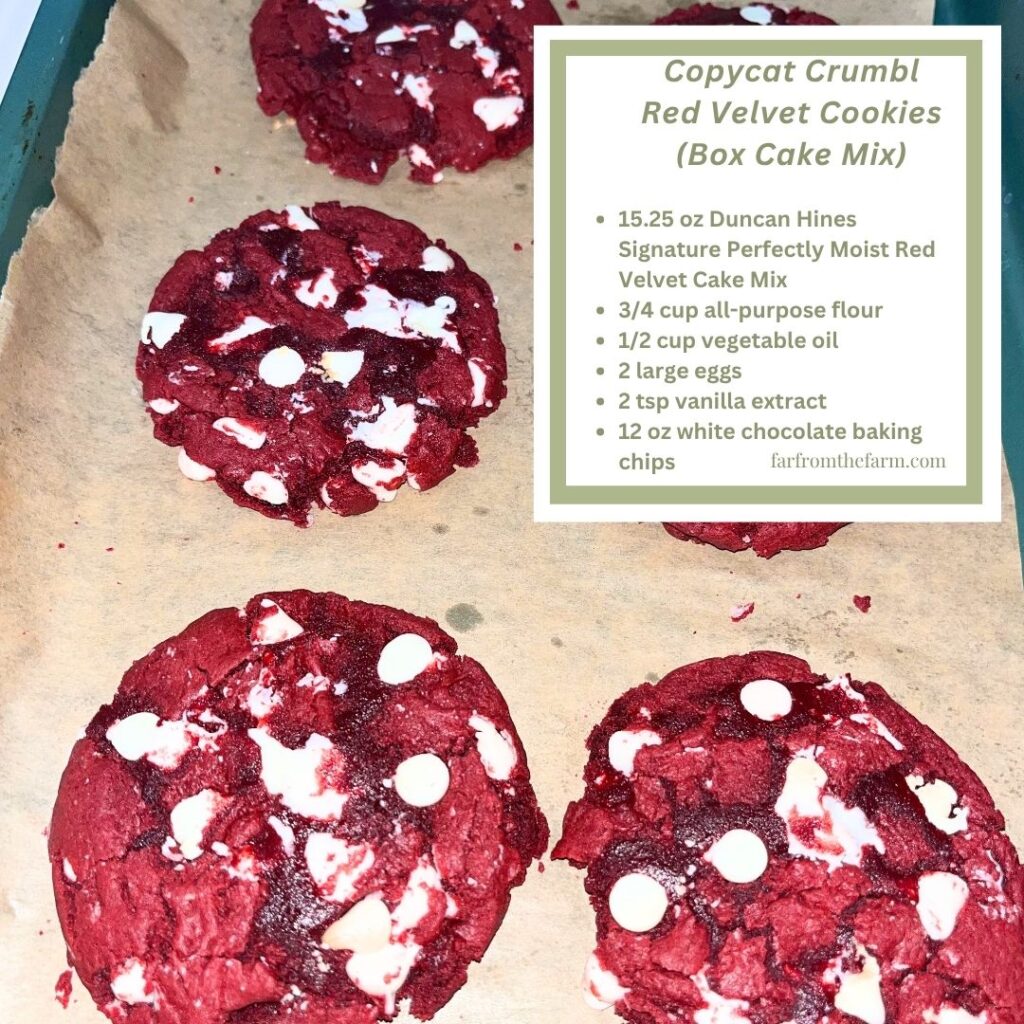
How to Make Thick Bakery-Style Red Velvet Cookies with White Chocolate Chips!
Soft, thick, bakery-style red velvet cookies made with box cake mix, extra flour, vanilla, and white chocolate chips.
Perfect for Valentine’s Day, Christmas cookie swaps, holiday trays, parties, bake sales, and Crumbl-inspired cookie nights at home!
Hi! If you’ve been following me for long you’ll already know this, but for those who are new, welcome to Far From The Farm. I’m Mona, the Brit behind the recipes, learning life and food in the States while sharing our debt-free journey and what’s on the menu in our home today!
After making a few Crumbl-inspired box cake mix cookies lately, I knew my husband’s favorite red velvet version was calling! Because red velvet cookies just feel special, don’t they?
They’re rich without being too heavy, beautifully colored, and just dramatic enough to look like you made far more effort than you actually did. Which is my favorite kind of baking.
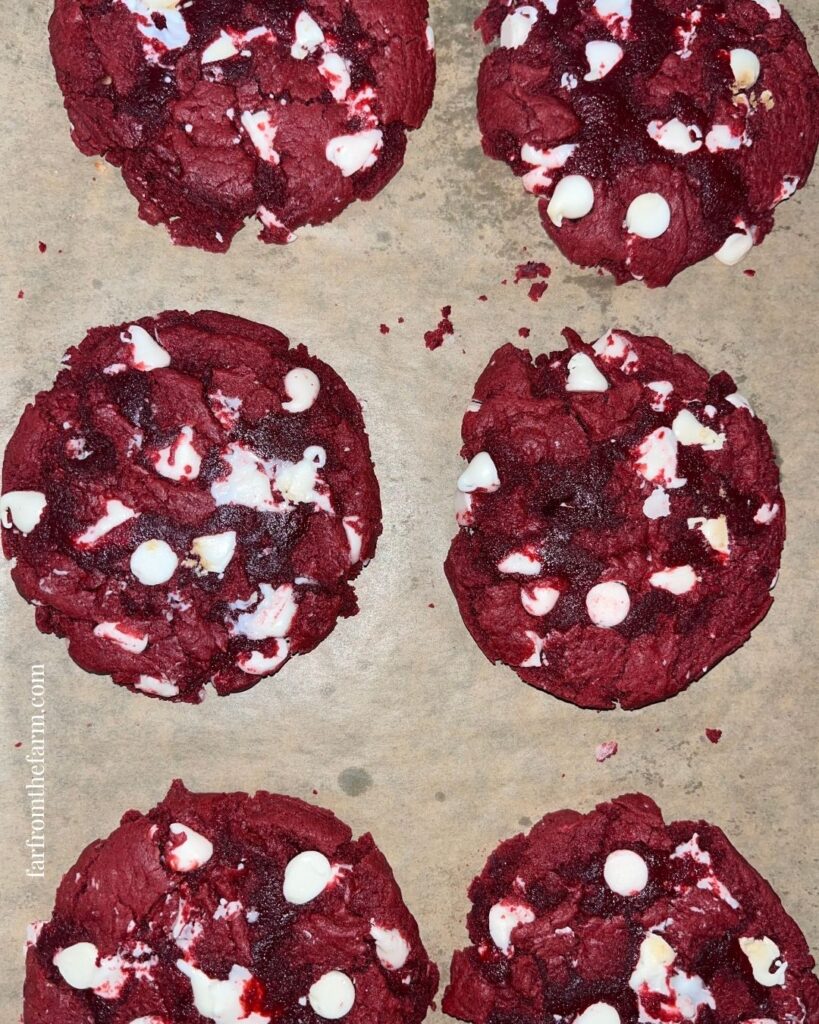
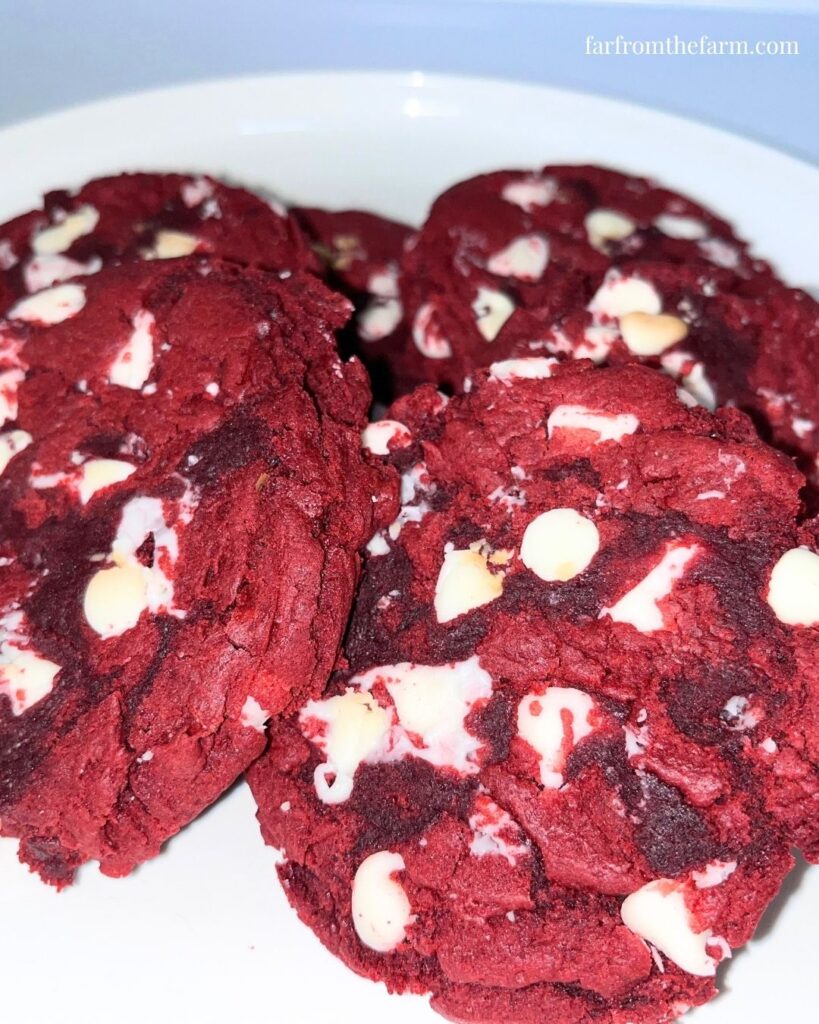
These thick red velvet cookies are soft, chewy, packed with white chocolate chips, and absolutely gorgeous on a cookie tray.
They would be perfect for Valentine’s Day because of that deep red color and sweet white chocolate contrast. But they also work beautifully for Christmas, holiday cookie swaps, classroom parties, military spouse and family gatherings, bake sales, birthday dessert tables, or any time you want a cookie that looks a bit more impressive than a basic chocolate chip cookie.
They are decadent. A little whimsical. And oh so pretty!
Serve one with a cold glass of milk, a mug of hot cocoa, coffee, or just enjoy it on its own as a dessert or snack.
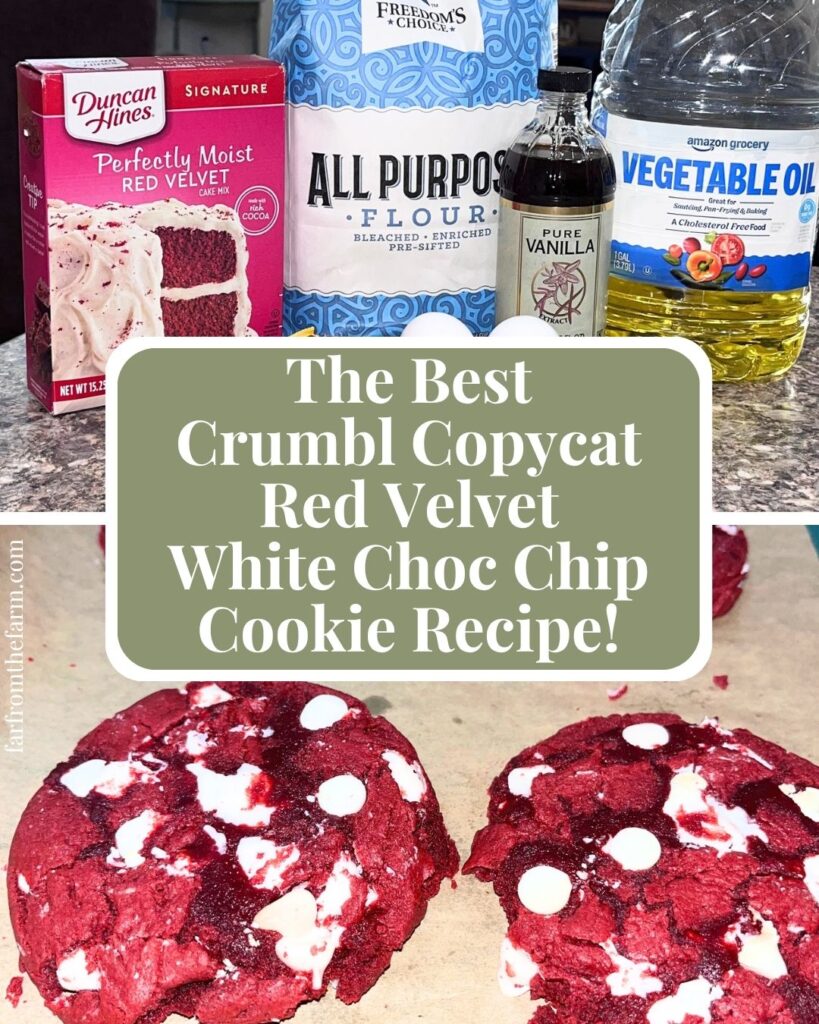
For this version, I’m using Duncan Hines Signature Perfectly Moist Red Velvet Cake Mix because that is the one that gives me the best results. Other red velvet cake mixes should still work, but if you’re shopping specifically for this recipe, that’s the box I’d grab.
Just like my other Crumbl-inspired cake mix cookies, this recipe starts with a boxed cake mix and then gets a little help from extra all-purpose flour.
Word to the wise: don’t skip adding the all purpose flour. Without it, cake mix cookies can turn out too soft, too cakey, and a bit too much like little cake mounds instead of bakery-style cookies.
The flour helps the dough behave more like cookie dough. The chill time helps the cookies stay thick. And the mug shaping trick after baking gives them that round, bakery-style Crumbl cookie look without needing any special tools.
The white chocolate chips really feel like the red velvet cookie shop version.
You’ll fold most of them into the dough, but I like to save a small amount to freeze and press gently into the tops of the cookie dough balls right before baking. That gives you those pretty white chocolate chips on top instead of hiding every single one inside the dough.
Freezing the chocolate chips is an old trick that helps them hold their shape a little better on top of the cookies during baking.
Tiny step. BIG visual payoff.
One more little practical note before we get started: use a silicone spatula or silicone spoon for mixing if you can. Red velvet cake mix can stain wooden spoons, and nobody needs a permanently pink baking spoon unless that is the look you are intentionally going for.
The dough will seem extra stiff at first when you start mixing the wet ingredients into the dry ingredients. Keep going. After a minute or two it comes together into a thick, slightly oily, non-sticky cookie dough.
Don’t be tempted to add any additional liquid or they won’t hold their shape like we need them to, and you’ll end up with a cookie-spread nightmare!
As a military family currently working through Baby Step 2 of our debt-free journey, we’re making more things at home these days. Every dollar we don’t spend unnecessarily is another dollar that can go towards our goals, and those little savings really do add up over time.
A box of specialty cookies from a cookie shop can get expensive fast, especially if you’re buying for a family, a party, or a holiday gathering.
Recipes like this let us enjoy that fun bakery-style cookie feeling at home for a fraction of the cost.
And just a reminder that if you’re struggling and you need help with managing your budget or starting your own debt free journey then here’s some FREE resources below you may find helpful!
living frugally and fully
free tips and resources to make the most of what you have
As always, these photos are from my real kitchen here in our sweet military base home. No AI recipe images or staged lighting or spotless marble counters. Just real life and real food made in a small space. Proof that you can feed your family well without needing a dream kitchen or fancy tools!
So roll up your sleeves, grab that red velvet cake mix, and head into the kitchen with me to make these thick bakery-style red velvet cookies with white chocolate chips!
Recipe Disclaimer
All Far From The Farm recipes are shared as a guide based on what works in my home kitchen. Results may vary depending on your ingredients, equipment, and cooking setup, so always use your own judgement. Please check all ingredients for allergies, intolerances, or dietary needs before making any recipe. Far From The Farm is not responsible for any reactions or outcomes from the use of these recipes. Nutritional information is an estimate only.
Mona – Far From The Farm
Equipment
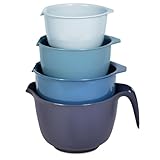
- Mixing bowls
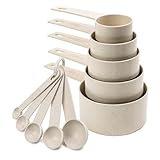
- Measuring jug, cups and spoons
- Whisk
- Silicone spatula or silicone spoon
- Plastic wrap
- Cookie sheet
- Parchment paper
- Large cookie scoop (2.5 to 3 tbsp size)
- Cooling rack
- Large mug for shaping cookies
Available on Amazon.com [ad]


Ingredients
Makes 12-14 large cookies
- 15.25 oz Duncan Hines Signature Perfectly Moist Red Velvet Cake Mix
- 3/4 cup all-purpose flour
- 1/2 cup vegetable oil
- 2 large eggs
- 2 tsp vanilla extract
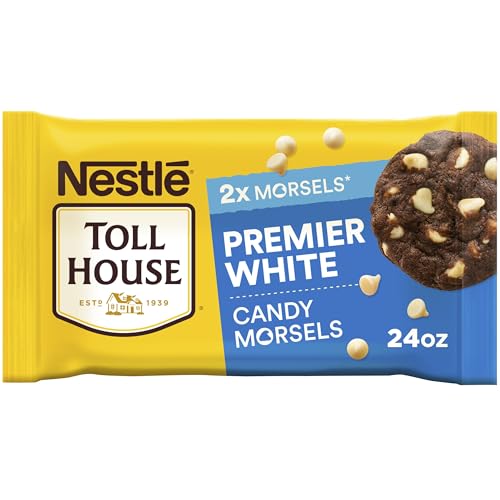
- 12 oz white chocolate baking chips or white chocolate morsels, divided
Available on Amazon.com [ad]

Step-by-Step Instructions
Step 1
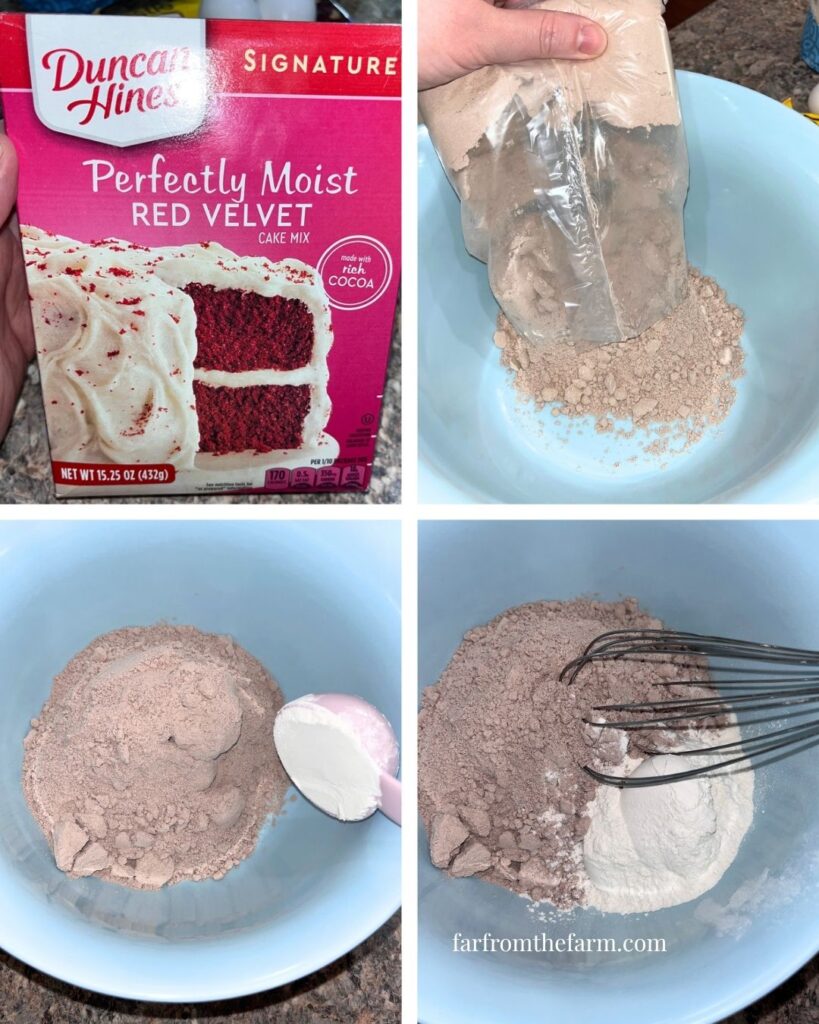
Add the red velvet cake mix and all-purpose flour to a large mixing bowl.
Whisk together until evenly combined.
Top Tip: This extra flour helps turn the cake mix into a thicker bakery-style cookie dough instead of a softer cake-like cookie.
Step 2
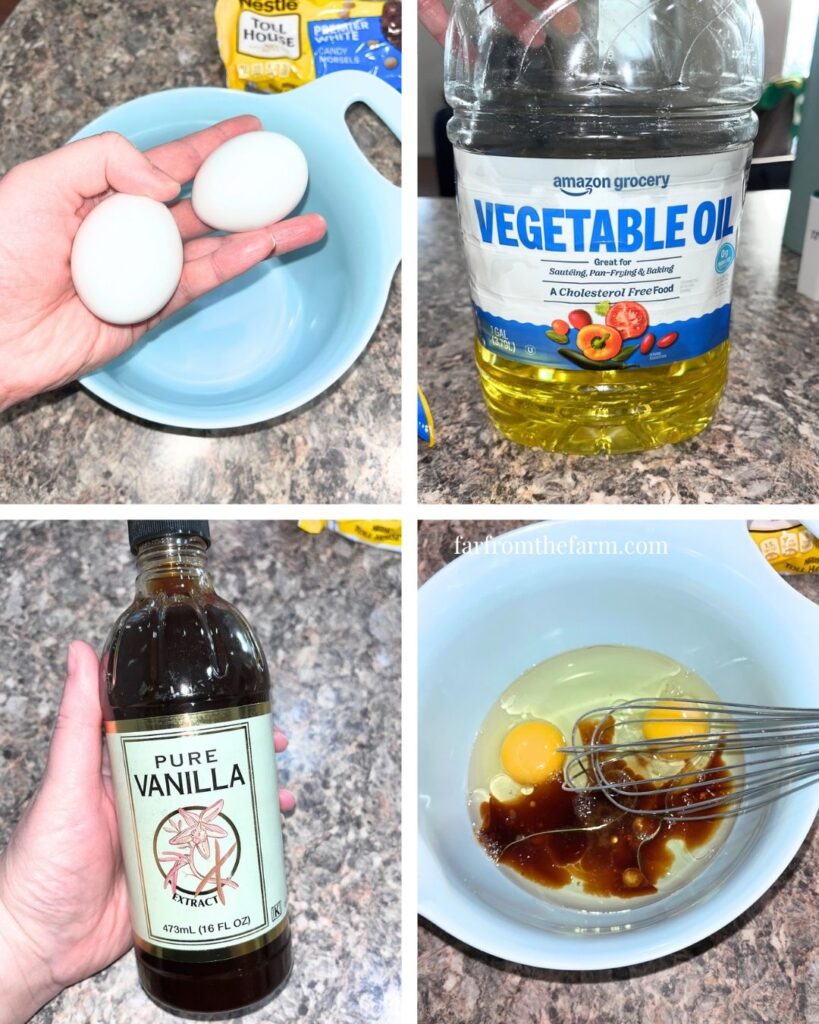
In a separate bowl, add the eggs, vegetable oil, and vanilla extract.
Whisk together until smooth and fully combined.
Step 3
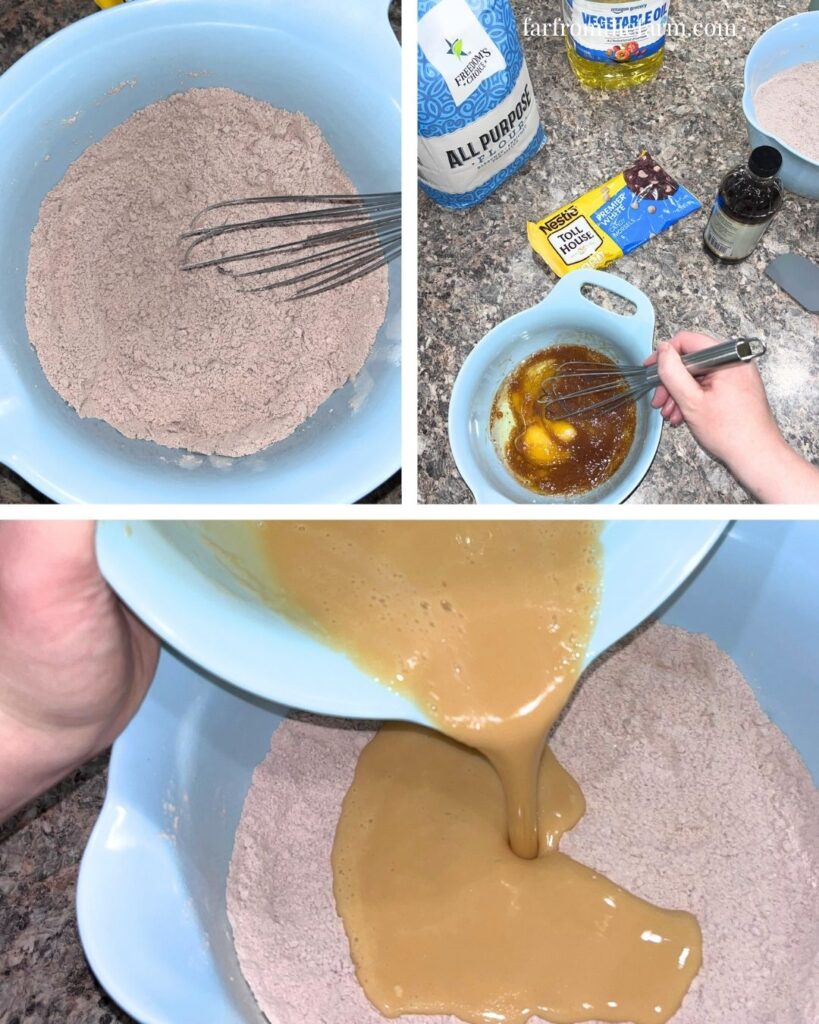
Pour the wet ingredients into the dry ingredients.
Using a silicone spatula or silicone spoon, begin folding everything together.
Do not use a wooden spoon if you can avoid it because red velvet cake mix may stain it.
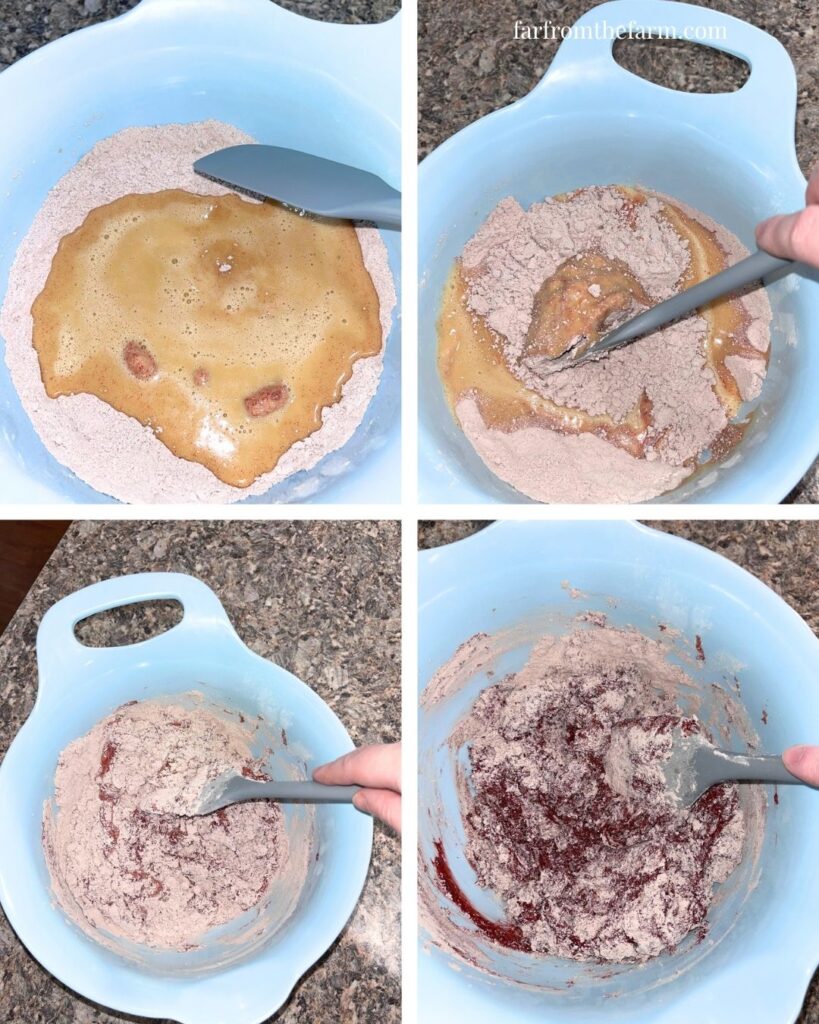
At first, the mixture may seem too dry and stiff. Keep going. After a minute or two it will come together into a thick cookie dough.
Eventually, you should have a non-sticky, slightly oily, thick red velvet cookie dough.
Step 4
Open the white chocolate baking chips.
Remove 1/4 cup of the chips and place them in a small bowl.
Cover the bowl with plastic wrap and place those chips in the freezer. These will be used later for pressing into the tops of the cookie dough balls before baking.
This helps give the finished cookies that pretty bakery-style look with visible white chocolate chips on top.
Step 5
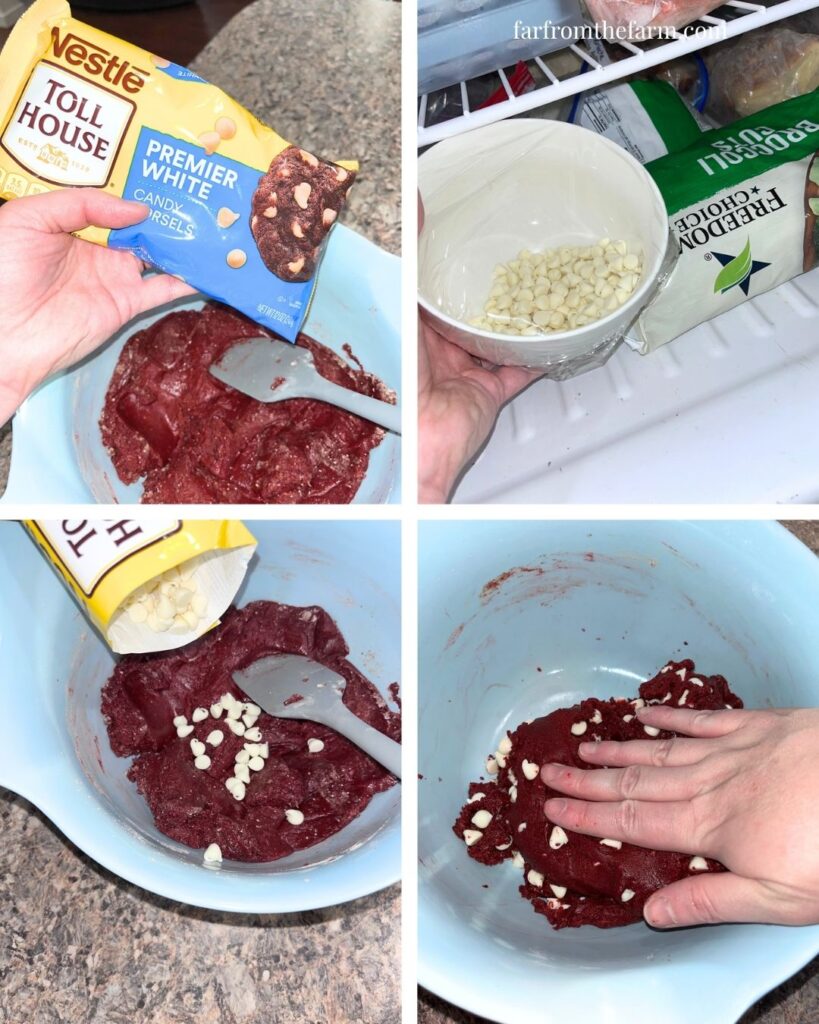
Add the remaining white chocolate chips to the cookie dough a little at a time.
I like to fold them in about 1/4 cup at a time so they distribute more evenly through the thick dough.
If the dough feels too stiff to mix with the spatula, go in with clean hands and gently work the chips through the dough.
Step 6
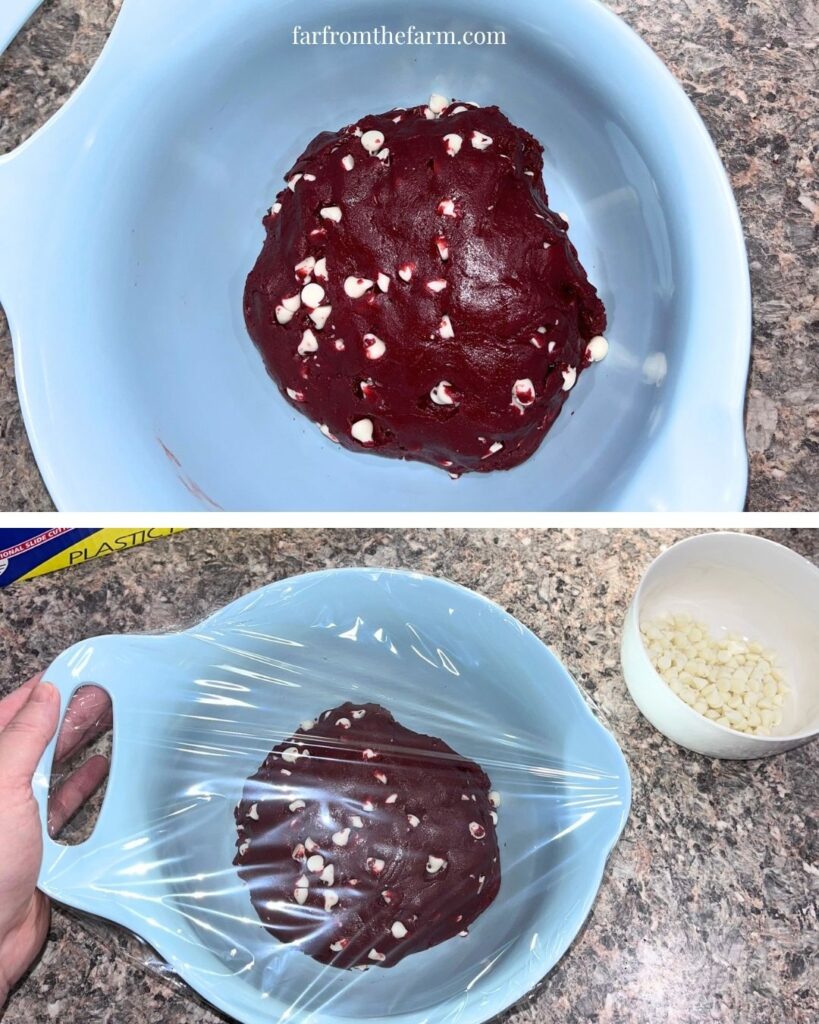
Bring the dough together into a rough ball or disc and place it back into the bowl.
Cover the bowl tightly with plastic wrap.
Refrigerate the dough for at least 1 hour. For the best texture, I prefer 2 to 4 hours.
The dough can remain refrigerated for up to 3 days before baking if you need to make it ahead of time.
Top Tip: You can also scoop the dough into balls and freeze them for later. See the freezer dough section further down for full freezing and baking instructions.
Step 7
When you are ready to bake, preheat your oven to 350°F.
Line a cookie sheet with parchment paper.
Step 8
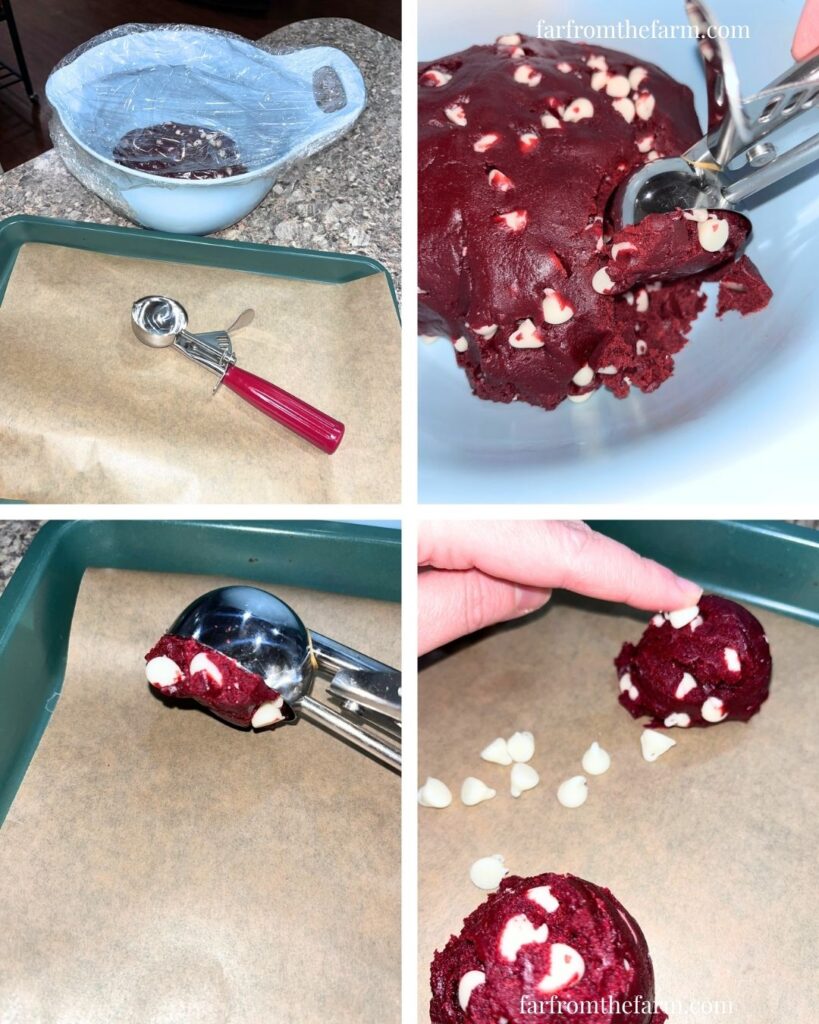
Using a large 2.5 to 3 tablespoon cookie scoop, portion the chilled dough into 12-14 balls.
Place the dough balls onto the prepared baking sheet, leaving room between each cookie.
DO NOT flatten them. Keeping the dough balls tall before baking helps create that thick bakery-style texture later.
Step 9
Remove the reserved white chocolate chips from the freezer.
Press a few frozen white chocolate chips gently into the top of each cookie dough ball.
Do not press too hard. You want the chips to sit on top without flattening the dough.
Step 10
Bake for 10 to 11 minutes.
The cookies will still look mound shaped and soft in the middle.
Do not be tempted to keep baking them until they look fully firm, or they may turn out too hard once cooled.
Step 11
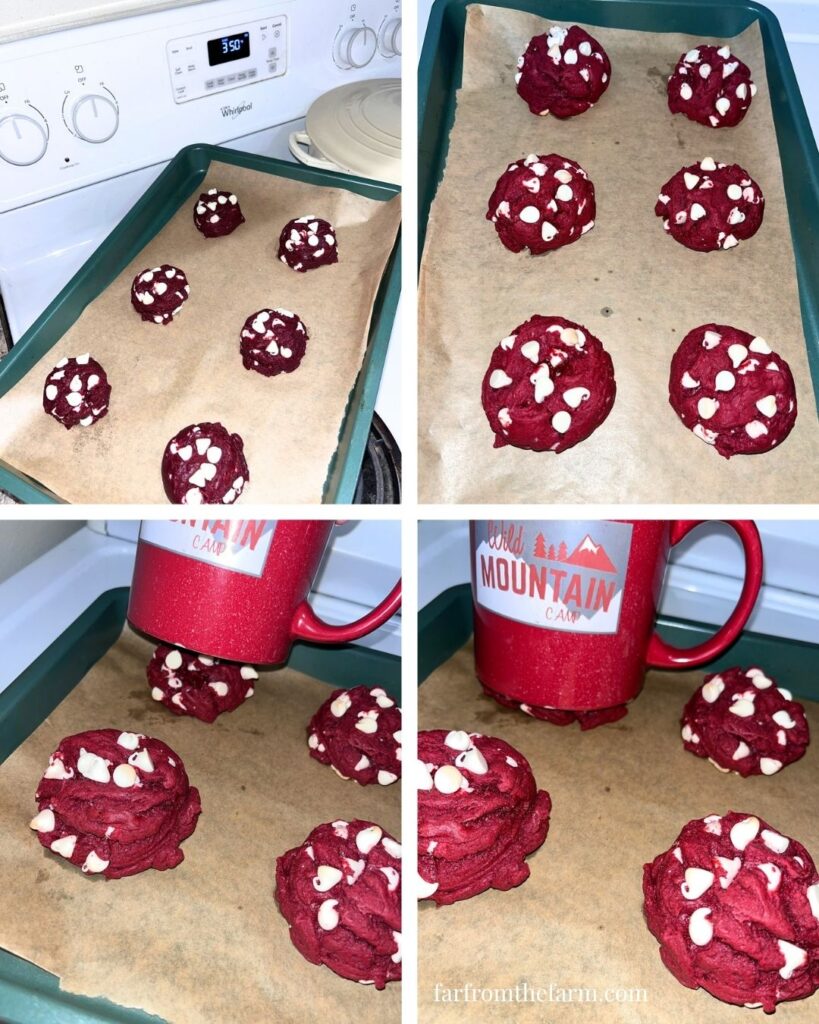
Immediately after removing the cookies from the oven, carefully use the flat base of a large mug to gently press each cookie down. Aim for roughly 1/4 to 1/2-inch thickness.
Be careful not to squash them aggressively. You just want to encourage them into that thick bakery-style shape.
Step 12
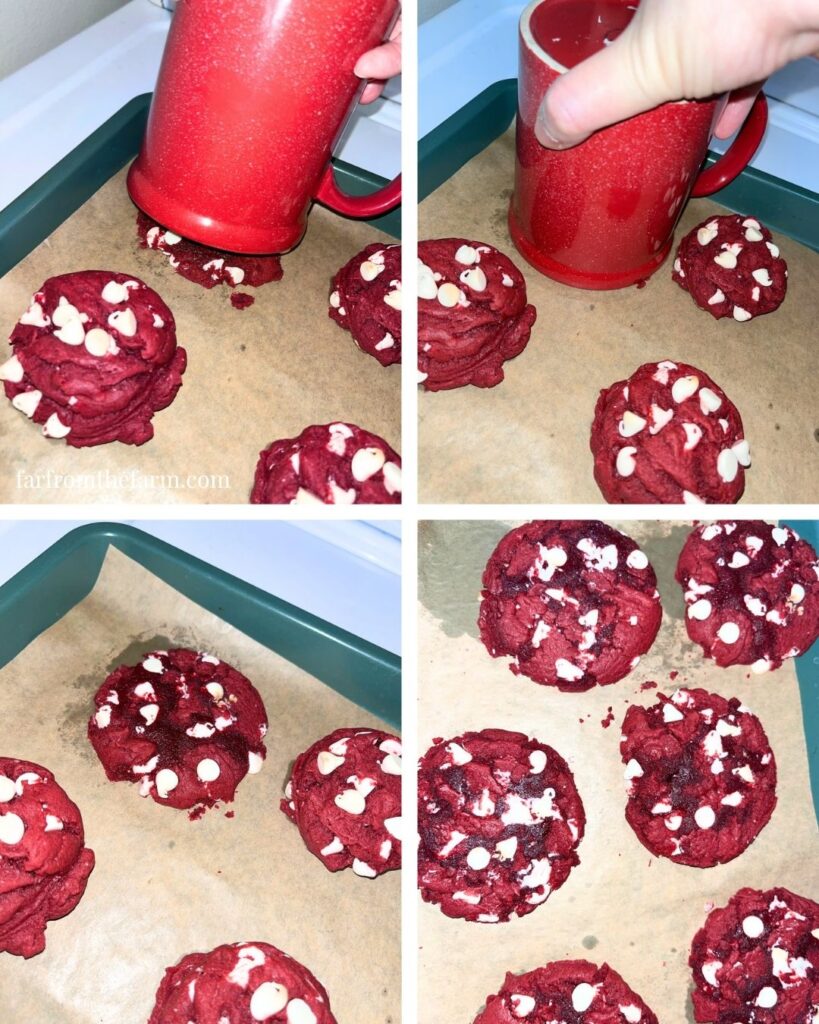
Next, place the open end of the mug over the cookie so the cookie sits inside the rim.
Keeping the mug flat against the baking sheet, make a few small circular motions around the cookie.
This gently pulls the edges inward and creates that neat round cookie shop shape.
Step 13
Allow the cookies to cool completely on the baking sheet. They will still be quite soft when warm.
As they cool, they will firm up while staying soft and chewy in the center.
Serve and enjoy!
Notes and Troubleshooting
Notes
- Duncan Hines Signature Perfectly Moist Red Velvet Cake Mix gave us the best results for this recipe. Other red velvet cake mixes can be used, but the color, flavor, and texture may vary slightly.
- Use a silicone spatula or silicone spoon because red velvet cake mix can stain wooden spoons.
- Don’t skip the chilling time. It helps the cookies stay thick.
- Saving some white chocolate chips for the tops makes the finished cookies look prettier.
- Freezing the reserved chips before adding them to the tops helps them hold their shape a little better during baking.
- The mug shaping technique makes a big difference to the final bakery-style look!
Troubleshooting
My dough seems too dry
Keep mixing. It often looks too dry at first, then comes together after a minute or two. If needed, use clean hands to bring the dough together.
My cookies spread too much
The dough likely was not chilled long enough. Try chilling for at least 2 hours next time.
My cookies are too cakey
Make sure you added the extra flour and did not flatten the dough balls before baking.
My cookies turned out hard
They were likely baked too long. Remove them while the centers still look soft.
My white chocolate chips disappeared into the dough
Reserve 1/4 cup of chips for topping and press them into the dough balls right before baking.
My cookies are not round
Use the mug shaping technique while the cookies are still hot from the oven.
Storage
- Store cooled cookies in an airtight container at room temperature for up to 4 days.
- For longer storage, freeze baked cookies in an airtight container or freezer bag for up to 3 months.
- Allow frozen cookies to thaw at room temperature before serving.
- They are also delicious warmed in the microwave for a few seconds.
Can I Freeze The Cookie Dough?
Absolutely. This dough freezes really well and is perfect for keeping on hand for quick homemade cookies.
After scooping the chilled dough into balls, place them onto a parchment-lined baking sheet and freeze until solid, usually about 1 to 2 hours. This time you’ll want to press a few of your reserved white chocolate chips into the tops of the frozen dough balls before freezing.
Once frozen, transfer the dough balls into a freezer-safe zip-top bag or airtight container.
Freeze for up to 3 months.
When you are ready to bake, place the frozen dough balls straight onto a parchment-lined baking sheet and bake at 350°F, adding an extra 1 to 2 minutes to the baking time if needed.
Remember not to flatten the dough before baking.
Keep them tall, then use the mug shaping trick after baking just as you would with freshly made dough.
Serving Ideas
- Serve with a cold glass of milk.
- Add to Valentine’s Day dessert boards.
- Serve with hot cocoa during the holidays.
- Bring to Christmas cookie swaps.
- Add to holiday cookie trays.
- Package in treat bags for homemade gifts.
- Serve at birthday parties or bake sales.
- Enjoy as an afternoon treat with coffee.
- Serve warm with vanilla ice cream.
- Make a batch for movie night!
Why You’ll Love This Recipe!
- Uses a simple budget box cake mix
- Thick bakery-style texture
- Beautiful red velvet color
- Packed with white chocolate chips
- Perfect for Valentine’s Day
- Great for Christmas cookie swaps
- Freezer dough friendly
- Budget-friendly Crumbl-inspired treat
- Pretty enough for gifting
- Easy enough for beginner bakers

FAQ
Do I need to use Duncan Hines Red Velvet Cake Mix?
No. I used Duncan Hines Signature Perfectly Moist Red Velvet Cake Mix because it gave us the best results. You can use another red velvet cake mix if that is what you have available.
How many cups are in a 12 oz bag of white chocolate chips?
Measurements can vary slightly by brand (usually 11-12oz per standard bag), but 12 oz is the standard bag size I use for this recipe, and a 12 oz bag of white chocolate chips is usually about 2 cups.
Can I use white chocolate chunks instead?
Yes. White chocolate chunks can work, but the cookies may look a little different. White chocolate baking chips or morsels give the most classic Crumbl-style look.
Do I need to chill the dough?
Yes. Chilling helps the dough firm up and keeps the cookies thick.
Do I need to use the mug shaping trick?
Yes, if you want that thick bakery-style cookie shape. The cookies will still taste good without it, but the shaping step makes them look much more like cookie shop cookies.
Can I freeze the cookie dough?
Yes. Freeze portioned dough balls and bake directly from frozen, adding an extra minute or two if needed. See the freezer dough section above for full instructions.
Why add extra flour?
The extra flour helps the cake mix behave more like cookie dough instead of cake batter. It creates a thicker, chewier cookie.
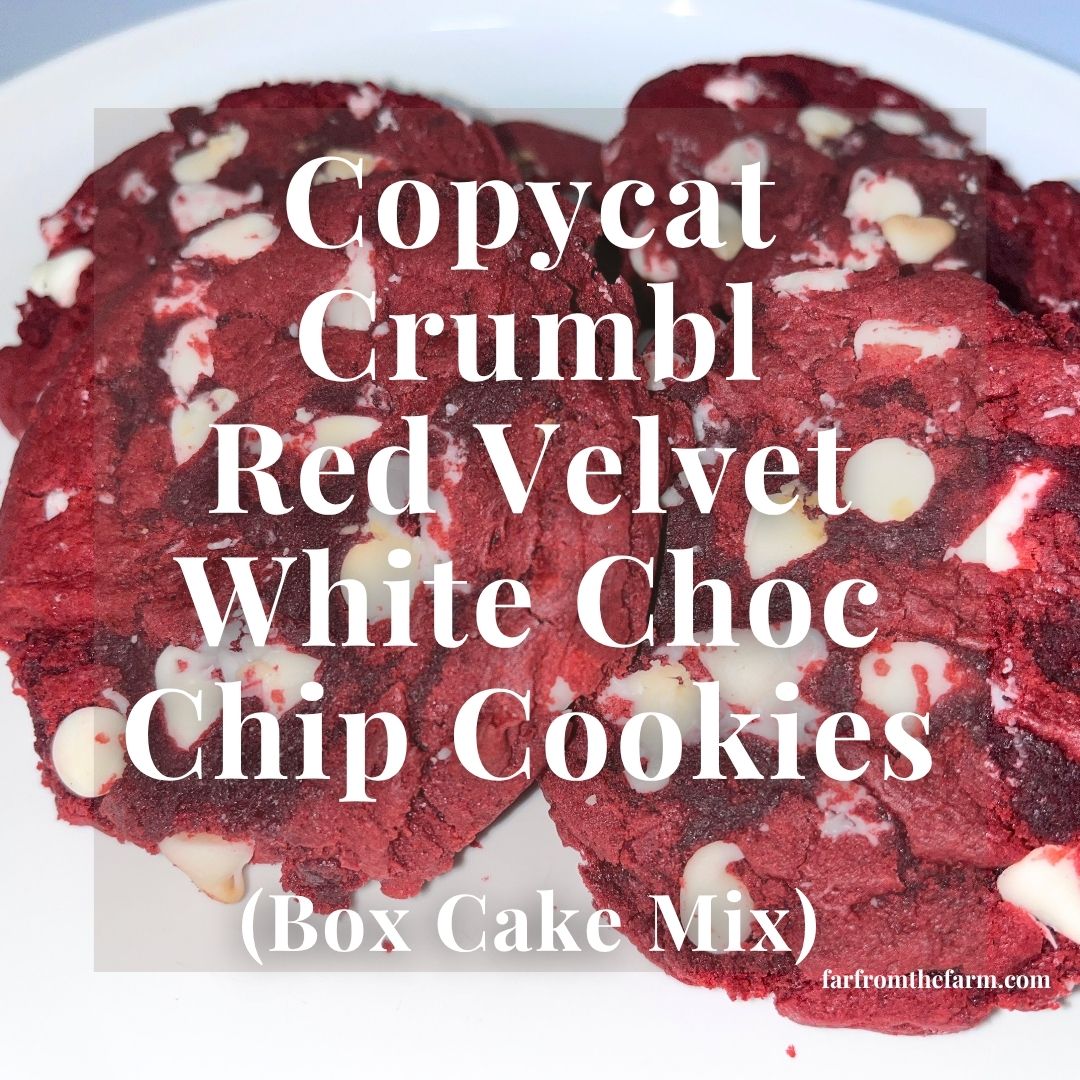
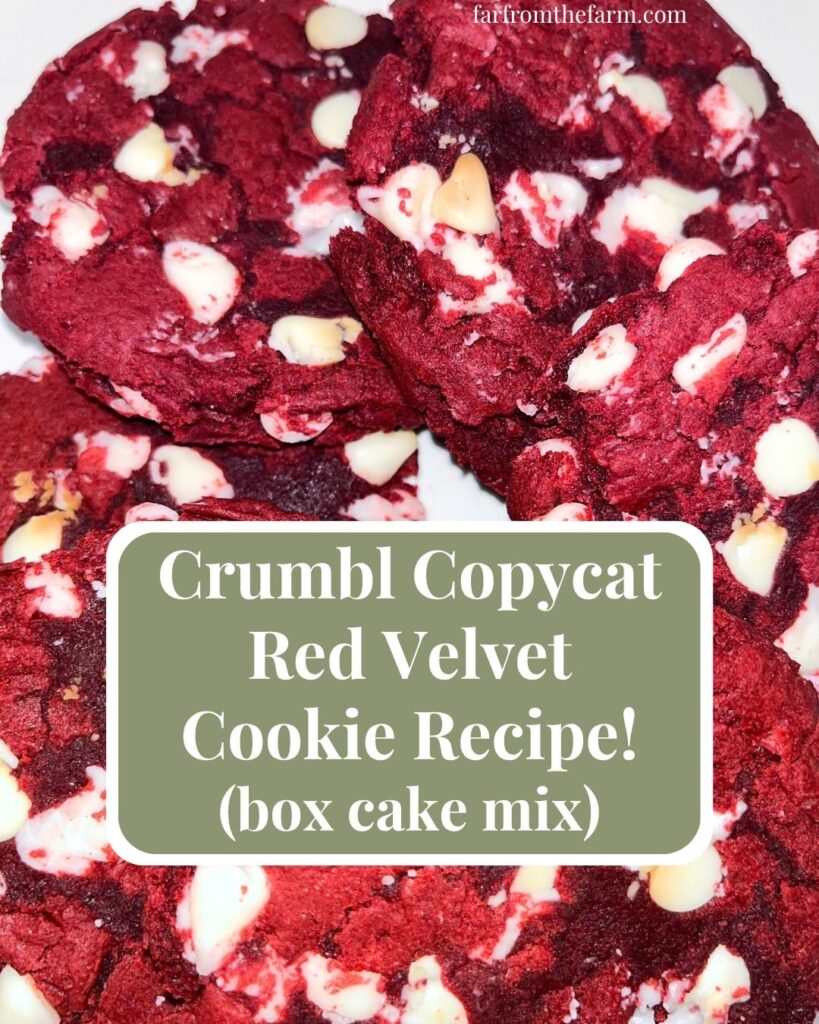
The Best Copycat Crumbl Red Velvet Cookie Recipe! (Using Box Cake Mix)
Ingredients
Equipment
Method
- Add the red velvet cake mix and flour to a large mixing bowl and whisk until combined.
- In a separate bowl whisk together the eggs, vegetable oil, and vanilla extract.
- Pour the wet ingredients into the dry ingredients and mix using a silicone spatula or spoon until a thick cookie dough forms.
- Remove 1/4 cup of the white chocolate chips and place them in a small bowl. Cover and freeze until needed.
- Fold the remaining white chocolate chips into the dough until evenly distributed.
- Form the dough into a rough ball or disc, cover with plastic wrap, and refrigerate for at least 1 hour.
- Preheat the oven to 350°F and line a cookie sheet with parchment paper.
- Using a large cookie scoop, portion the chilled dough into 12-14 balls and place them on the prepared baking sheet. Do not flatten.
- Remove the reserved white chocolate chips from the freezer and gently press a few into the top of each cookie dough ball.
- Bake for 10-11 minutes.
- Immediately after baking, gently press each cookie down using the flat base of a large mug until approximately 1/4 to 1/2-inch thick.
- Place the open end of the mug over each cookie and make small circular motions to create a neat bakery-style shape.
- Allow the cookies to cool completely on the baking sheet before serving.
Notes
- Duncan Hines Signature Perfectly Moist Red Velvet Cake Mix gave us the best results for this recipe.
- Other red velvet cake mixes can be used, but color and texture may vary slightly.
- Use a silicone spatula or silicone spoon if possible, as red velvet cake mix can stain wooden utensils.
- Do not skip the chill time. It helps the cookies stay thick and bakery-style.
- Freezing the reserved white chocolate chips helps them keep their shape better on top of the cookies during baking.
- The mug shaping technique makes a big difference to the finished appearance.
Storage
- Store cooled cookies in an airtight container at room temperature for up to 4 days.
- Freeze baked cookies in an airtight container or freezer bag for up to 3 months.
- Allow frozen cookies to thaw at room temperature before serving.
Freezer Cookie Dough Instructions
After scooping the dough into balls, press a few reserved white chocolate chips into the tops. Place on a parchment-lined baking sheet and freeze until solid, about 1-2 hours. Transfer to a freezer-safe container or zip-top bag. Freeze for up to 3 months. Bake directly from frozen at 350°F, adding 1-2 extra minutes to the baking time if needed. Do not flatten before baking. After baking, use the mug shaping technique exactly as directed.Related Recipes
- Browse all our Copycat Crumbl Recipes
- See all the Cookie Recipes!
Nutrition information is automatically calculated, so should only be used as an approximation.
Looking for more homemaking inspiration?

It’s so important to be part of a community that not only understands you but that champions you, encourages, challenges and cheers you on. We couldn’t find one – so we created it instead!
Join the Side Hustle Homemakers Team Julie, Sam and I over at the Recipes, Homesteading and More! Facebook Group for Food Blogging Tips, Homesteading and Homemaking content and encouragement!
We’re 3 very different US/UK military families who met and became instant forever friends. We share what’s working in our kitchens, gardens, homes and more!
We created the group to share real life around recipes, homesteading, homemaking and more. Head on over, say Hi, share you tips and gain some friends and knowledge along the way!
The Takeaway
If you love red velvet cookies and want a bakery-style treat without the cookie shop price, this Crumbl-inspired version is a brilliant one to keep in your recipe box.
A box of Duncan Hines Red Velvet Cake Mix, extra flour, white chocolate chips, and one easy mug shaping trick gives you thick, soft, beautiful cookies that are perfect for Valentine’s Day, Christmas cookie swaps, parties, or a cozy night at home.
Serve with milk, hot cocoa, or coffee, and enjoy every rich red velvet bite!
What to Try Next?!

Share & Rate This Recipe!
If these Crumbl-inspired red velvet cookies become a new favorite in your kitchen, I’d love for you to leave a quick review on the recipe card and share it with a fellow cookie lover!
Last update on 2026-07-24 / Affiliate links / Images from Amazon Product Advertising API