
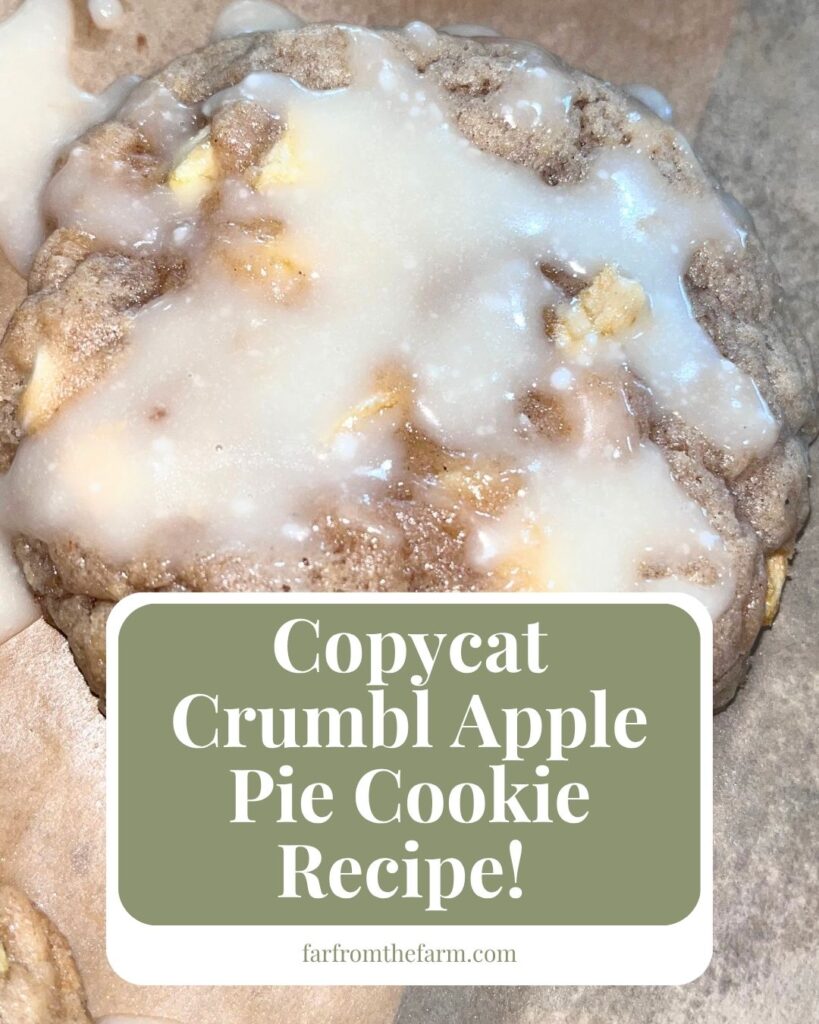
How to make a soft Crumbl Apple Pie Cookie Copycat Recipe. Bougie bakery-style apple pie cookie recipe packed with fresh apple, cozy fall spices, and creamy white chocolate chips, all finished with a simple vanilla glaze!
“If apple pie and a giant bakery cookie had a baby, this would be it. Soft, buttery, full of real apple pieces, and finished with a sweet vanilla glaze that makes every bite taste like fall.” – Mona, Far From The Farm.
Hi! If you’ve been following me for long you’ll already know this, but for those who are new, welcome to Far From The Farm. I’m Mona, the Brit behind the recipes, learning life and food in the States while sharing our debt-free journey and what’s on the menu in our home today!
There are a handful of flavours that immediately make me smile every autumn, and apples are right at the top of that list.
Moving from Britain to America has introduced me to so many new seasonal traditions, but one thing I completely understand now is this country’s love affair with apple desserts!
The orchards, the roadside farm stands, the incredible choice of apples every fall, and of course apple pie. It feels like cinnamon is in the air everywhere you go, and I am absolutely here for it.
Whether it’s just a September dessert tray, an autumn cookie on a cool day, an Oktoberfest or Halloween treat or a grand part of your Thanksgiving entertaining routine this year – these are sure to please!
Here’s my copycat take, or ode if you will, to the wonderful Crumbl Apple Pie Cookies, using simple ingredients and making everything from scratch at home.

These cookies have quickly become one of my favourite autumn bakes because they’re exactly what I hoped they’d be.
Soft, thick bakery-style cookies packed with tiny pieces of fresh apple, warm cinnamon, creamy white chocolate chips and finished with a simple vanilla glaze. They remind me of apple pie, but in cookie form, and they’re the kind of bake that disappears far quicker than you’d expect.
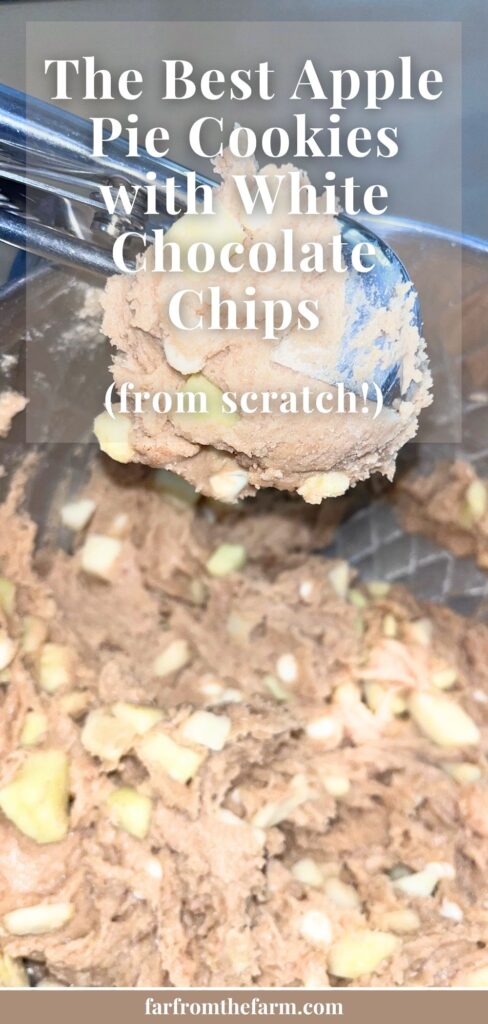
For the apple I really wanted little bursts of juicy apple all the way through the cookies, not chewy bits that disappear into the dough.
I used four of those inexpensive little lunchbox apples you can buy in bags at the grocery store, peeled and diced them really small, soaked them briefly in cold water with a little lemon juice while I measured everything else, then drained and dried them really well before adding them to the mixer.
Fresh apples naturally release moisture while they bake, so taking a minute to pat them dry makes a huge difference to the finished cookies.
Another thing I discovered after making batch after batch was that is no need to fuss over the mixing method.
Everything goes into the stand mixer together. Butter, sugars, eggs, vanilla, flour, spices, apples and white chocolate chips all get mixed in one bowl.
Traditional cookie recipes often tell you to cream the butter and sugar first, and if that’s how you like making cookies then by all means carry on. I just couldn’t find enough difference in these particular cookies to justify the extra bowl, the extra time, and the extra washing up.
I’m learning to embrace little shortcuts where they genuinely make life easier without sacrificing the end result. Homemade food doesn’t have to mean making everything the hardest possible way.
If I can save myself ten minutes in the kitchen and still end up with cookies that everyone reaches for before they’ve even cooled properly, I’ll happily take that trade every single time!
As a military family working through Baby Step 2 of our debt-free journey, we’re making more things at home these days because every penny we can stretch a little further really does add up.
Baking treats like these costs far less than buying giant bakery cookies, and I honestly think they taste even better because they’re loaded with real apple and warm spices instead of artificial flavourings.
And just a reminder that if you’re struggling and you need help with managing your budget or starting your own debt free journey then here’s some FREE resources below you may find helpful!
living frugally and fully
free tips and resources to make the most of what you have
As always, these photos are from my real kitchen here on base. No staged lighting or spotless counters. Just real life and real food made in a small space. Proof that you can feed your family well without needing a dream kitchen or fancy tools!
If you’re looking for a cookie that tastes like autumn, fills the house with the smell of cinnamon, and goes perfectly with a mug of tea or coffee on a chilly afternoon, I think you’re going to love these!
Recipe Disclaimer
All Far From The Farm recipes are shared as a guide based on what works in my home kitchen. Results may vary depending on your ingredients, equipment, and cooking setup, so always use your own judgement. Please check all ingredients for allergies, intolerances, or dietary needs before making any recipe. Far From The Farm is not responsible for any reactions or outcomes from the use of these recipes. Nutritional information is an estimate only.
Mona – Far From The Farm
Equipment
- Stand mixer and mixing bowl, fitted with a dough hook or paddle attachment
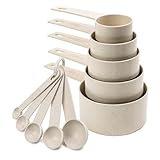
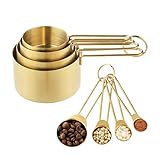
- Measuring cups and spoons
- Vegetable peeler
- Sharp knife and chopping board
- Medium bowl for soaking the apples
- Colander
- Paper towels
- Cookie scoop (about 2 to 2 1/2 tablespoons)
- Large baking sheets
- Parchment paper
- Cooling rack
- Small bowl and spoon for the glaze
Available on Amazon.com [ad]




Ingredients
Makes: 20 to 22 large bakery-style cookies
Cookie Dough
- 1 cup salted butter, softened
- 1 cup granulated sugar
- 1 cup packed light brown sugar
- 2 tsp pure vanilla extract
- 2 large eggs
- 3 1/4 cups all-purpose flour
- 1 tsp baking soda
- 1/2 tsp baking powder
- 1 tsp fine sea salt
- 2 tsp ground cinnamon
- 1/2 tsp ground nutmeg
- 1/4 tsp ground allspice
- 4 small apples, peeled and finely diced
- 1/2 cup white chocolate chips
Vanilla Glaze
- 3/4 cup powdered sugar
- 1 1/2 tsp salted butter
- 1/2 tsp pure vanilla extract
- 1 to 2 tbsp milk or half and half
Step-by-Step Instructions
Step 1. Prepare the apples

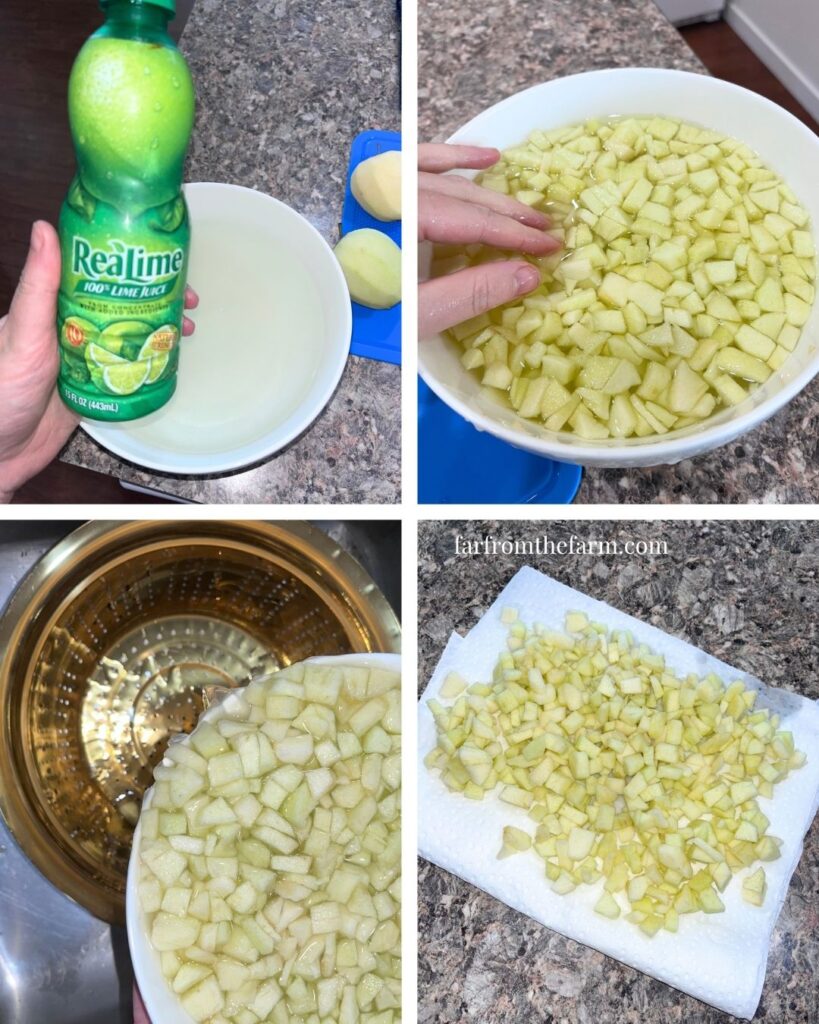
Peel and finely dice the apples into small pieces, roughly the size shown in my photos.
Place them into a bowl of cold water with 2 tablespoons of lemon or lime juice while you prepare the remaining ingredients.
This keeps them looking fresh and prevents browning if you’re not quite ready to mix the dough.
Step 2. Drain and dry thoroughly
Drain the apples well in a colander, then spread them over several layers of paper towels and gently press another layer over the top.
Don’t skip this step. Fresh apples hold a surprising amount of water, and drying them well helps the cookies bake up thick instead of spreading too much.
Step 3. Preheat the oven
Heat your oven to 375°F and line large baking sheets with parchment paper.
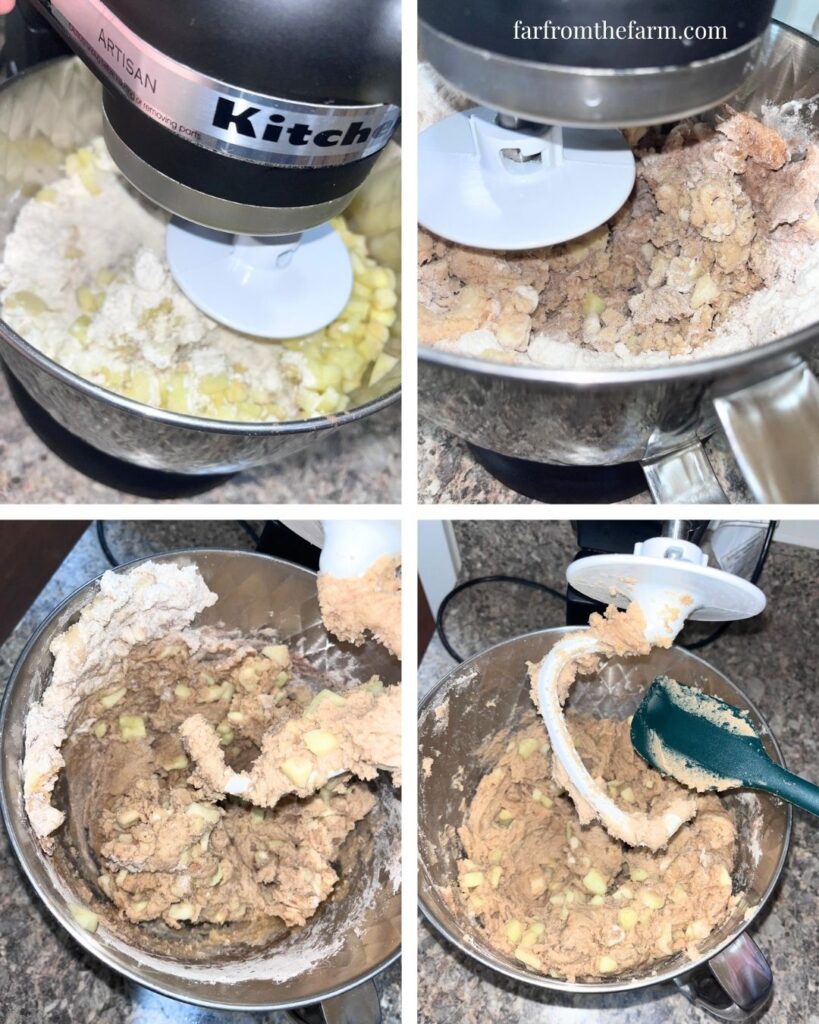
Step 4. Mix the cookie dough


Add the softened butter, both sugars, vanilla, eggs, flour, baking soda, baking powder, salt, cinnamon, nutmeg, allspice, dried apple pieces and white chocolate chips to the bowl of your stand mixer.
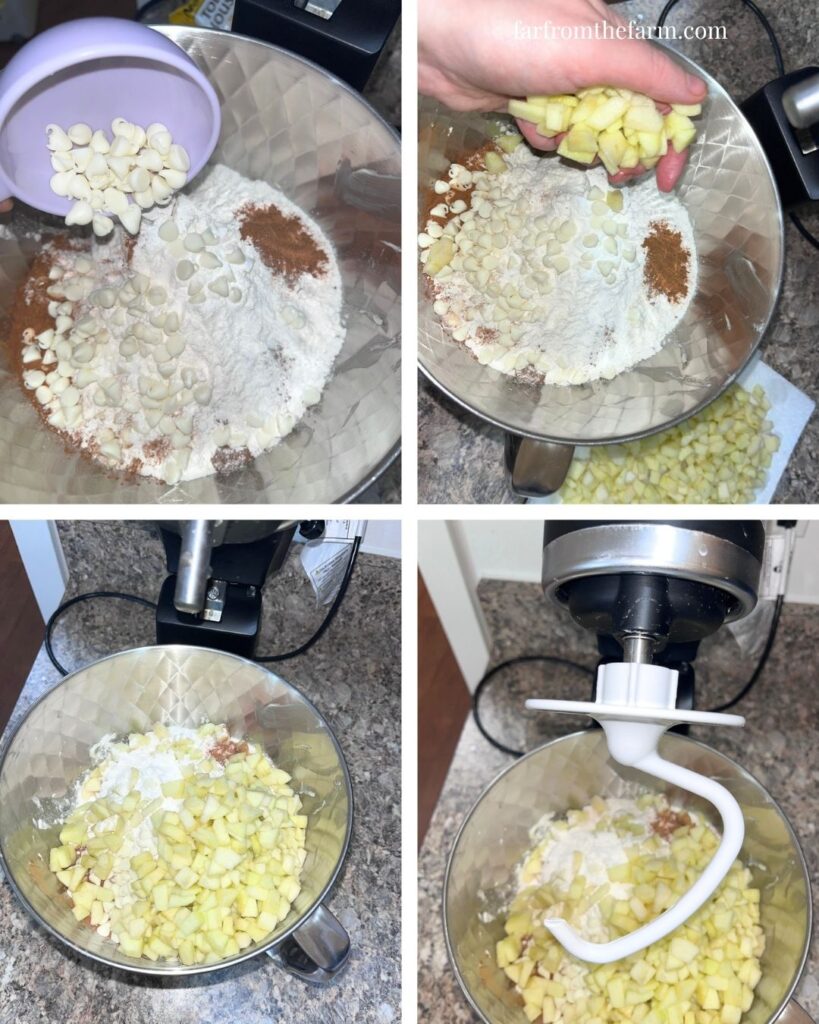
Using a dough hook or paddle attachment ( I prefer dough hook for all my American cookie dough recipes as it tends to result in less overheating my mixer), mix on medium speed for about 2 minutes, scrape down the sides of the bowl, then mix for another 2 minutes until everything is evenly combined.
The dough will be thick and loaded with apple pieces and white chocolate chips.
Step 5. Scoop the cookies
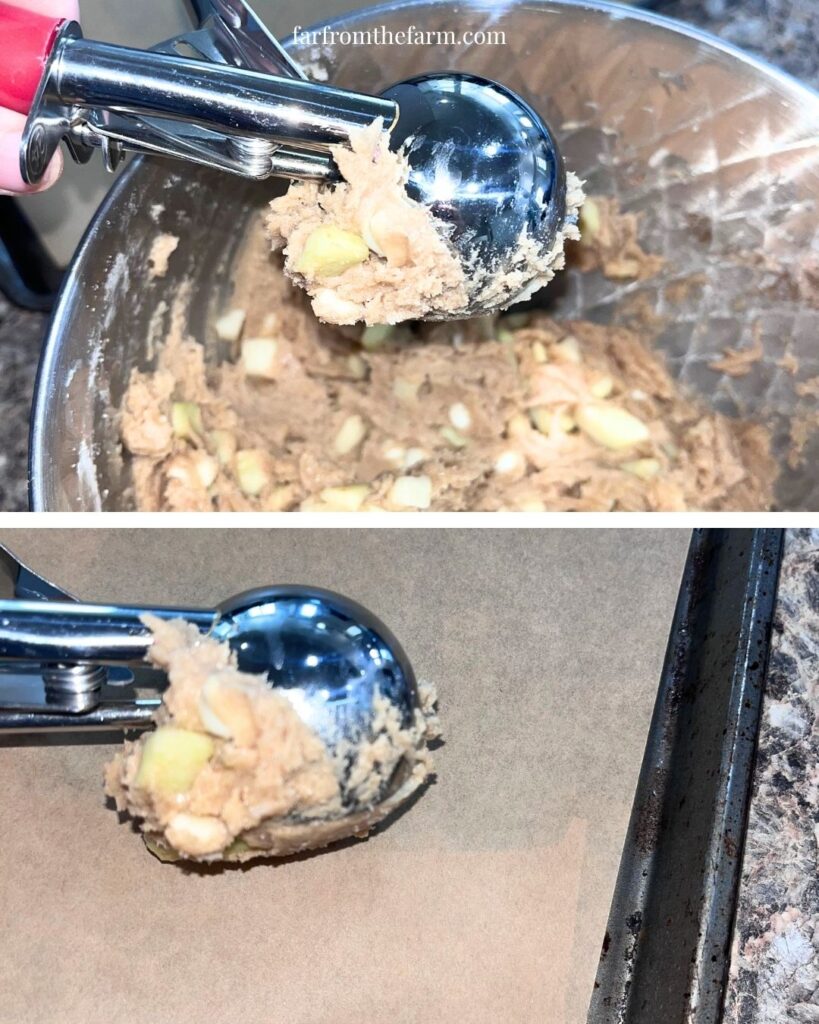
Using a large cookie scoop holding about 2 to 2 1/2 tablespoons of dough, portion the cookies onto the prepared baking sheets, leaving about 2 inches between each one.
There’s no need to chill the dough first. Just scoop and bake.
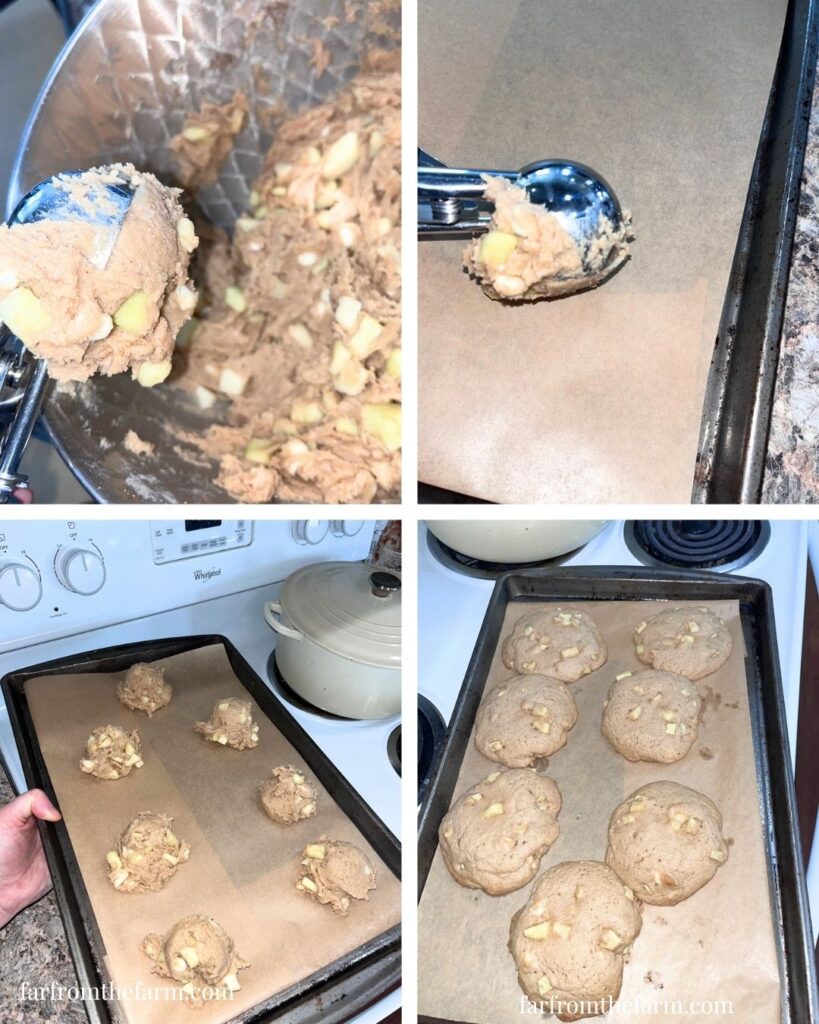
Step 6. Bake
Bake for 11 to 13 minutes.
My American husband loves them at the 11-minute mark because they’re incredibly soft and gooey in the middle. I usually leave mine for the full 13 minutes because I like a slightly firmer cookie that’s sturdy enough for dunking into a mug of tea.
The edges should look set while the centres still appear slightly soft.
Step 7. Shape into perfect bakery-style cookies
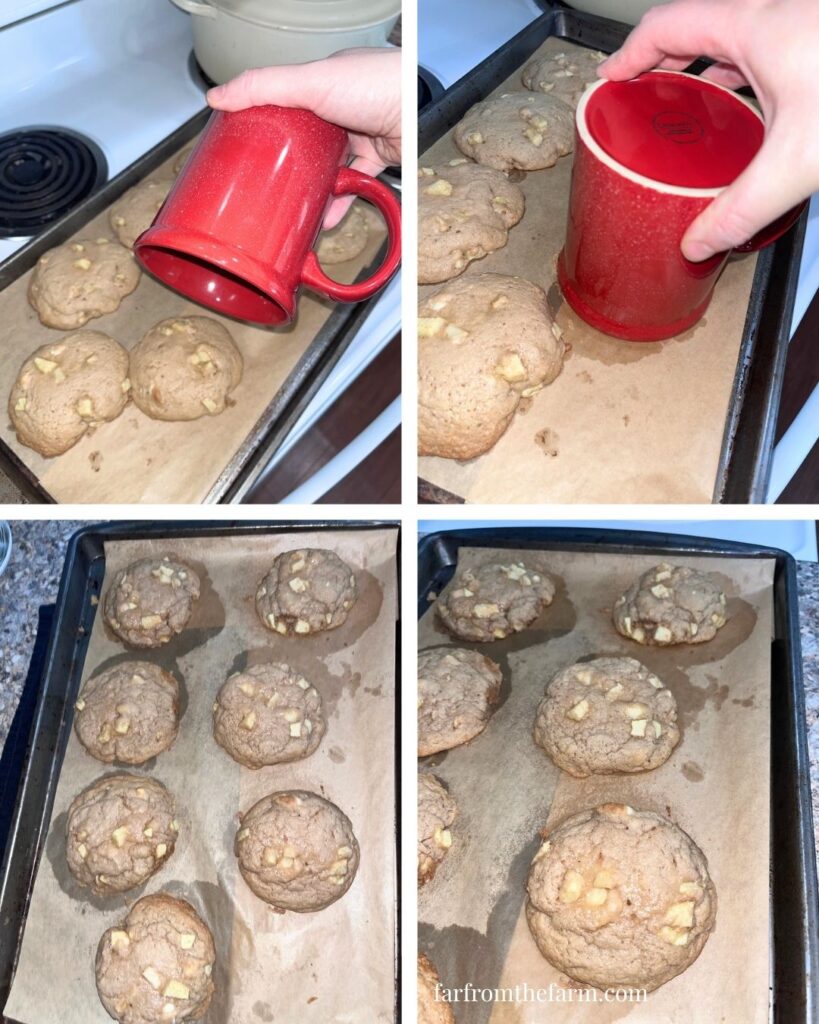
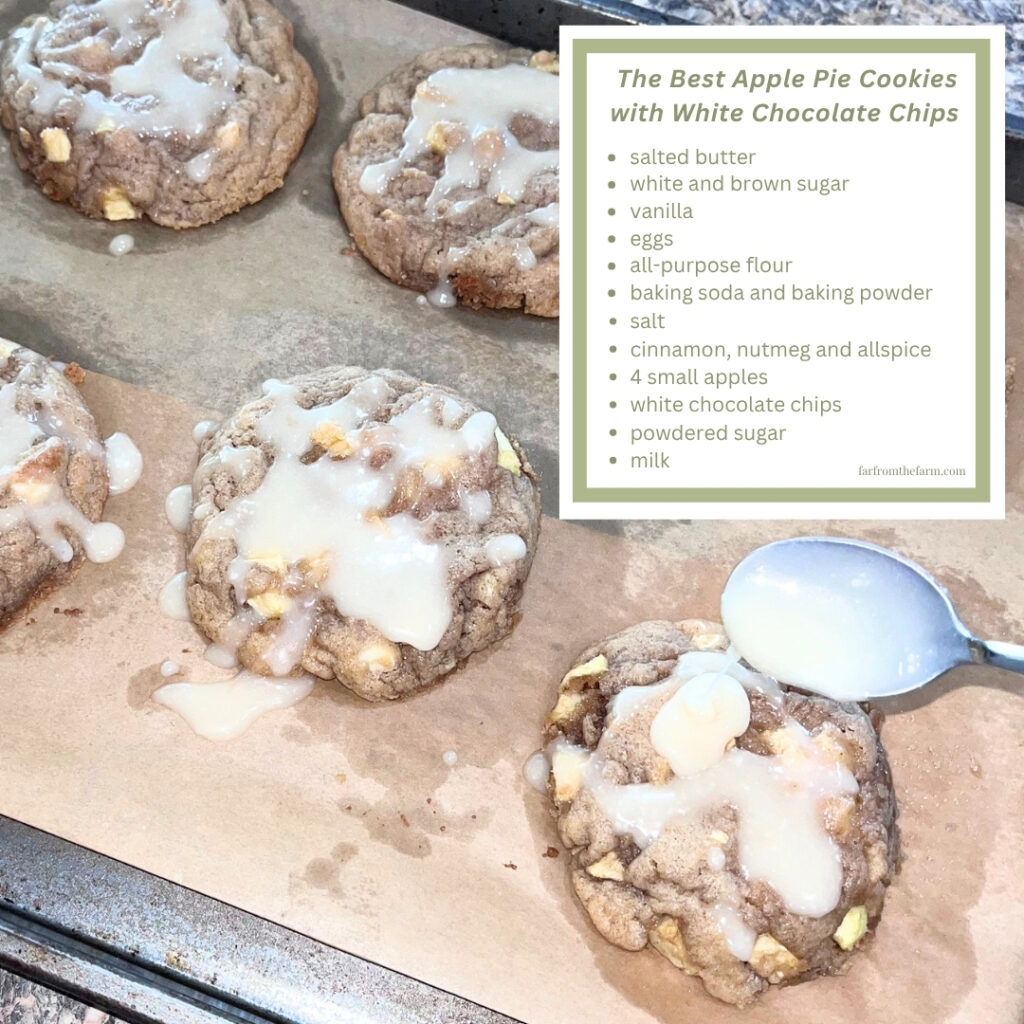
As soon as the tray comes out of the oven, place an upside-down mug over each cookie and gently swirl it in a small circular motion. This pulls any uneven edges back into shape and gives you those beautiful thick bakery-style rounds.
You’ll only have about a minute before the cookies begin to set, so work fairly quickly.
Step 8. Cool completely
Leave the cookies on the baking tray until completely cool.
They’ll continue setting as they cool and are quite delicate while still warm because of all the fresh apple inside.
Step 9. Make the vanilla glaze
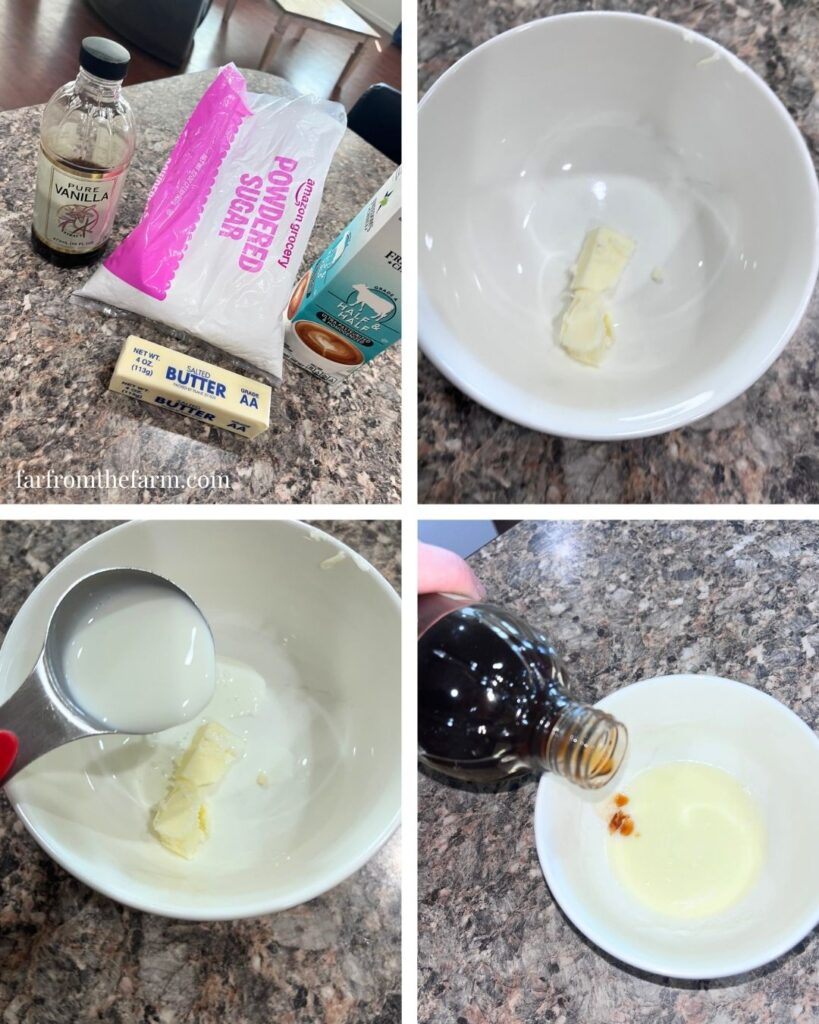
Whisk together the powdered sugar and butter into a small bowl and microwave for 10 – 30 seconds or until melted.
Then add in the vanilla and 1 tablespoon of half and half or milk.
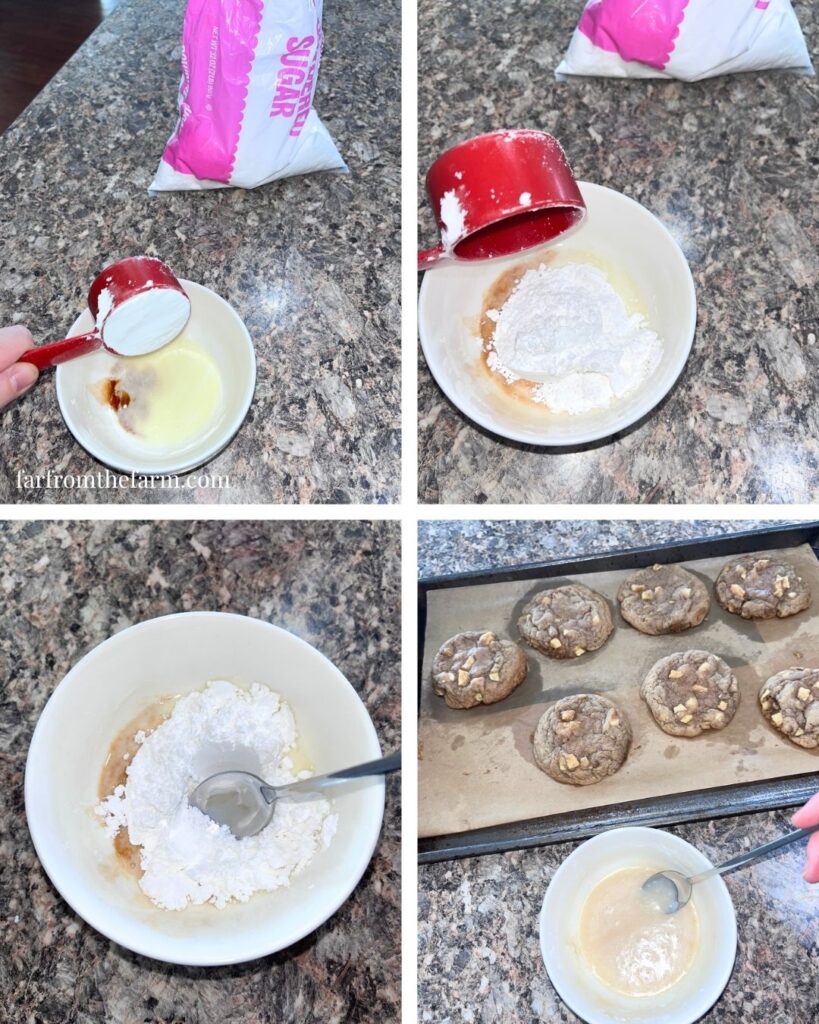
Add a little more milk if needed until the glaze slowly drizzles from a spoon. You’re looking for a ribbon consistency rather than something runny.
Step 10. Glaze the cookies

Drizzle the glaze generously over the cooled cookies and leave it to set before serving.
The vanilla glaze adds just enough sweetness to make these taste wonderfully reminiscent of a slice of homemade apple pie!

Notes
- This recipe was tested using four small lunchbox-style apples, not large baking apples.
- Dice the apples very finely so they distribute evenly through every cookie.
- Drying the apples thoroughly is one of the biggest secrets to getting thick bakery-style cookies.
- The dump-and-go mixing method works beautifully for this recipe and saves both time and washing up.
- The upside-down mug trick creates beautifully round bakery-style cookies and is worth doing while they’re still hot.
- White chocolate balances the tart apple and warm spices perfectly, but cinnamon baking chips would also be delicious if you can find them.
Troubleshooting
The Fix: The apples probably still contained too much moisture. Pat them very dry before adding them to the dough, and make sure your butter is softened rather than melted.
The Fix: They continue cooking from the residual heat while cooling on the baking tray. Don’t judge them straight from the oven.
The Fix: Add milk a teaspoon at a time until it reaches a smooth ribbon consistency.
The Fix: Stir in a little more powdered sugar until it thickens again.

Storage
- Store the glazed cookies in an airtight container at room temperature for up to 3 days.
- Because these cookies contain fresh apple, they’re at their very best during the first couple of days when they’re wonderfully soft and moist.
Freezing the baked cookies
If you’d like to freeze the baked cookies, I recommend doing so before glazing. Allow them to cool completely, then place them into an airtight freezer-safe container or freezer bag with baking parchment between the layers if needed. Freeze for up to 2 months.
Thaw at room temperature, then make and drizzle over the fresh vanilla glaze before serving.
Freezing the cookie dough
These cookies also freeze beautifully as unbaked cookie dough.
Scoop the dough into individual cookie portions and place them onto a parchment-lined baking tray. Freeze until firm, about 1 to 2 hours, then transfer the frozen dough balls to a freezer-safe bag or airtight container. Label and freeze for up to 2 months.
When you’re ready to bake, place the frozen cookie dough straight onto a parchment-lined baking tray. There’s no need to thaw. Bake at 375°F, adding 2 to 4 extra minutes to the baking time. The cookies are ready when the edges are set and the centres still look slightly soft.
Serving Ideas
These bakery-style apple pie cookies are perfect served:
- With a hot mug of tea or coffee on a chilly fall afternoon.
- Alongside a scoop of vanilla bean ice cream for an easy dessert.
- As part of an autumn dessert board with caramel dip, apple slices, and fudge.
- Wrapped individually for bake sales, church events, or homemade gifts.
- Packed into lunchboxes for a seasonal treat.
- Served warm after Sunday dinner with the glaze still slightly soft.
- On Thanksgiving dessert tables alongside pie for anyone who prefers cookies.
- With hot apple cider while watching football or enjoying a bonfire.
- As an after-school treat during apple picking season.
- Dunked into a proper mug of tea if you’re British like me.
- Take them to work and share with colleagues. (I sent my husband to work with an entire tray of 22 of these apple pie cookies for his squadron – they loved them! Sometimes not-overthinking the presentation and just sharing your goodies works just as well!)
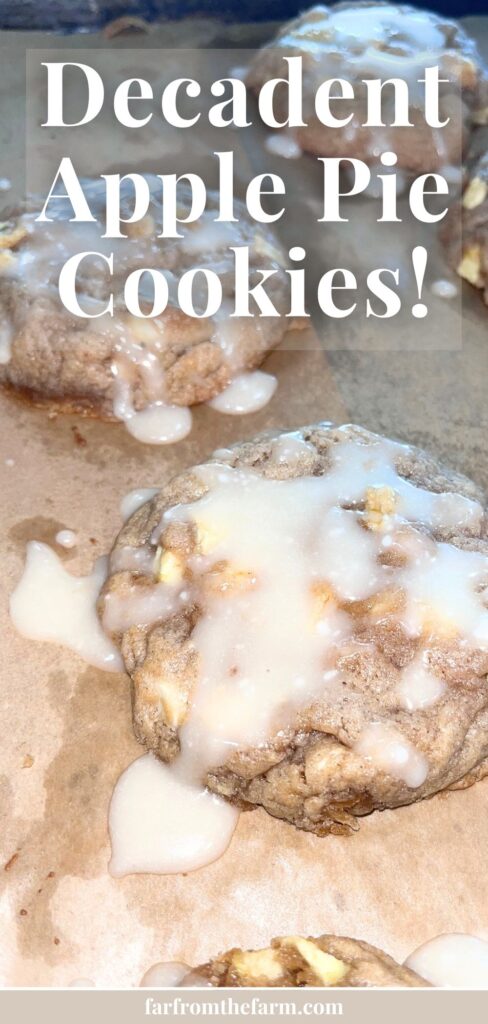
Why You’ll Love This Recipe!
- Thick, soft bakery-style cookies with plenty of texture.
- Made with real fresh apples instead of dried fruit.
- Warm cinnamon, nutmeg, and allspice give every bite that classic apple pie flavour.
- White chocolate chips add creamy sweetness without overpowering the apples.
- Finished with a simple vanilla glaze that makes them look bakery worthy.
- No chilling required, so they’re ready to bake straight after mixing.
- The dump-and-go mixing method saves both time and washing up.
- Perfect for fall baking, Thanksgiving, bake sales, and cookie exchanges.
- Freezer friendly for making ahead.
- A wonderful alternative to traditional apple pie when you’re craving something a little different.
FAQ
Yes. Four small lunchbox apples are roughly equal to two large apples. The important part is drying the diced apples thoroughly before adding them to the dough.
No. I tested this recipe using the dump-and-go method and had excellent results. If you prefer the traditional creaming method, you can certainly do that instead.
I tested these using small lunchbox apples, but most firm eating apples such as Gala, Honeycrisp, Fuji, Pink Lady, or Granny Smith should all work well. Just peel them, dice them finely, and pat them dry before adding them to the dough.
Absolutely. The cookies are delicious on their own, but the vanilla glaze gives them that bakery-style finish and really leans into the apple pie flavour.

The Best Apple Pie Cookies with White Chocolate Chips!

Ingredients
Equipment
Method
- Peel and finely dice the apples. If preparing ahead, soak them in cold water with 2 tablespoons of lemon or lime juice while measuring the remaining ingredients. Drain thoroughly and pat very dry with paper towels.
- Preheat the oven to 375°F and line baking sheets with parchment paper.
- Add the softened butter, both sugars, vanilla, eggs, flour, baking soda, baking powder, salt, cinnamon, nutmeg, allspice, dried apple pieces, and white chocolate chips to the bowl of a stand mixer.
- Mix on medium speed for about 2 minutes. Scrape down the bowl, then mix for another 2 minutes until evenly combined.
- Scoop the dough into 2 to 2 1/2 tablespoon portions onto the prepared baking sheets, leaving about 2 inches between each cookie. No chilling is required.

- Bake for 11-13 minutes, until the edges are set but the centres still look slightly soft.

- Immediately after baking, place an upside-down mug over each cookie and gently swirl it in a circular motion to create perfectly round bakery-style cookies.
- Leave the cookies on the baking tray until completely cool.
- Add the butter and milk (or half and half) into a small bowl and microwave for 10 – 30 seconds until melted. Then add the vanilla and powdered sugar. Mix until desired consistency, adding a little more milk or half and half at a time if needed.
- Drizzle the glaze over the cooled cookies and allow it to set before serving.
Notes
- Pat the diced apples very dry before adding them to the dough. Too much moisture can cause the cookies to spread more than intended.
- No chilling is needed. Scoop the dough and bake straight away.
- Bake for 11 minutes for a softer, gooier centre or 13 minutes for a slightly firmer cookie.
- Shape the cookies immediately after baking by placing an upside-down mug over each one and gently swirling it into a neat circle. This only works while they’re still hot.
- The cookies will look slightly underdone when they come out of the oven but will continue setting as they cool on the baking tray.
- Add the milk to the glaze a little at a time until it reaches a smooth drizzling consistency.
Storage
- Store the glazed cookies in an airtight container at room temperature for up to 3 days.
- Because these cookies contain fresh apple, they’re at their best during the first couple of days while they’re wonderfully soft and moist.
- For longer storage, freeze the baked cookies before glazing for up to 2 months. Thaw at room temperature and add the fresh vanilla glaze before serving.
- To freeze the cookie dough, scoop into individual portions and freeze on a parchment-lined baking tray until firm. Transfer to a labelled freezer bag or airtight container and freeze for up to 2 months. Bake straight from frozen at 375°F, adding 2-4 minutes to the baking time.
Related Recipes
Nutrition information is automatically calculated, so should only be used as an approximation.
Looking for more homemaking inspiration?

It’s so important to be part of a community that not only understands you but that champions you, encourages, challenges and cheers you on. We couldn’t find one – so we created it instead!
Join the Side Hustle Homemakers Team Julie, Sam and I over at the Recipes, Homesteading and More! Facebook Group for Food Blogging Tips, Homesteading and Homemaking content and encouragement!
We’re 3 very different US/UK military families who met and became instant forever friends. We share what’s working in our kitchens, gardens, homes and more!
We created the group to share real life around recipes, homesteading, homemaking and more. Head on over, say Hi, share you tips and gain some friends and knowledge along the way!
The Takeaway
There are plenty of apple desserts that only make an appearance once or twice each autumn, but I have a feeling these cookies are going to become one of those recipes that gets made over and over again in our house.
They’re simple enough for an ordinary Tuesday afternoon, special enough to put on a Thanksgiving dessert table, and they make the whole house smell incredible while they’re baking.
If you’re looking for a bakery-style cookie that’s packed with real apple flavour and doesn’t take half the day to make, I hope these become a favourite in your kitchen too!
What to Try Next?!

Share & Rate This Recipe!
If these apple pie cookies make an appearance in your kitchen this fall, I’d love to hear what you think! Leave a star rating on the recipe card and a comment below to let me know how they turned out. Your reviews help other home bakers and really do mean the world to me.
Last update on 2026-09-25 / Affiliate links / Images from Amazon Product Advertising API