Bakery-Soft Homemade White Bread with the Convenience of a Bread Machine!
“If you’ve ever wished your bread machine could produce a loaf that’s as soft as bakery bread with a beautiful golden crust, this Honey Yogurt Bread Machine Loaf is the recipe you’ve been waiting for.” – Mona, Far From The Farm.
If you’re searching for the best Honey Yogurt Bread Machine Loaf, you’re in for a treat.
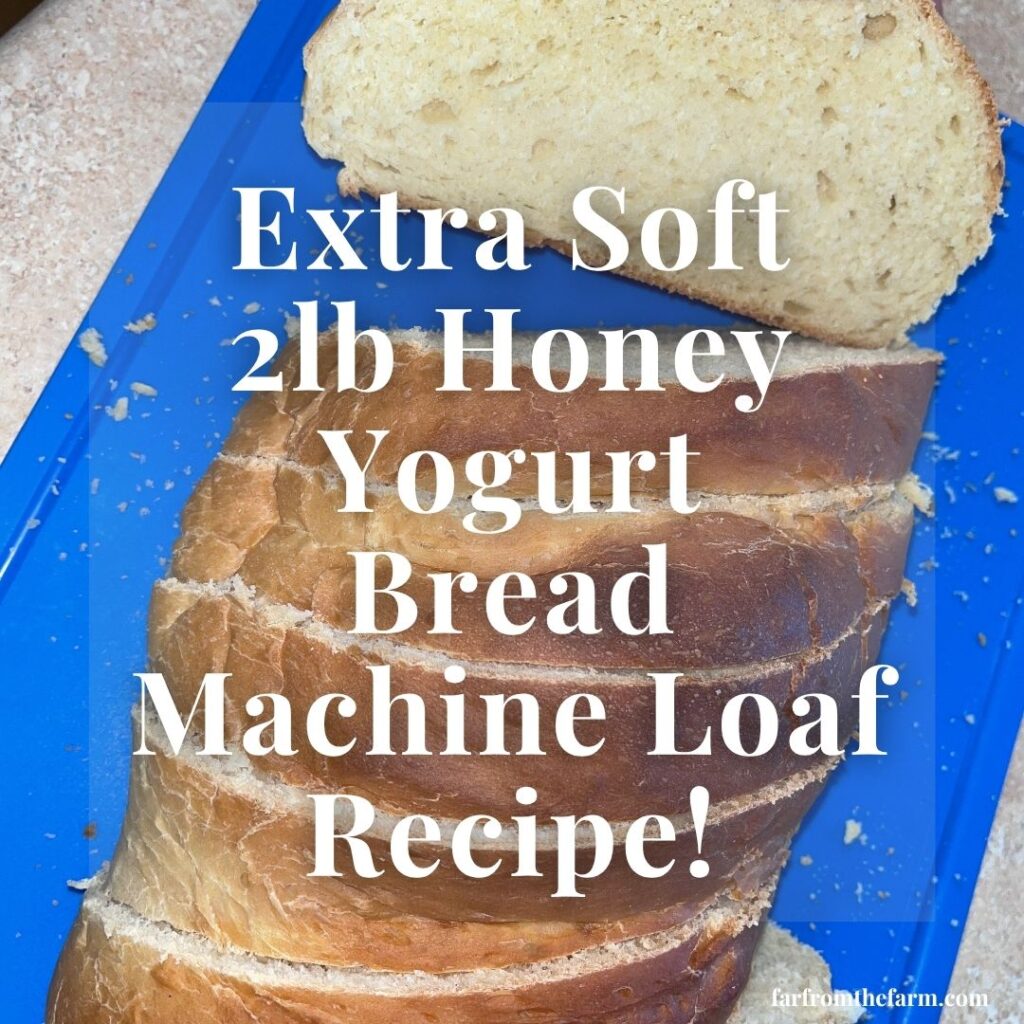
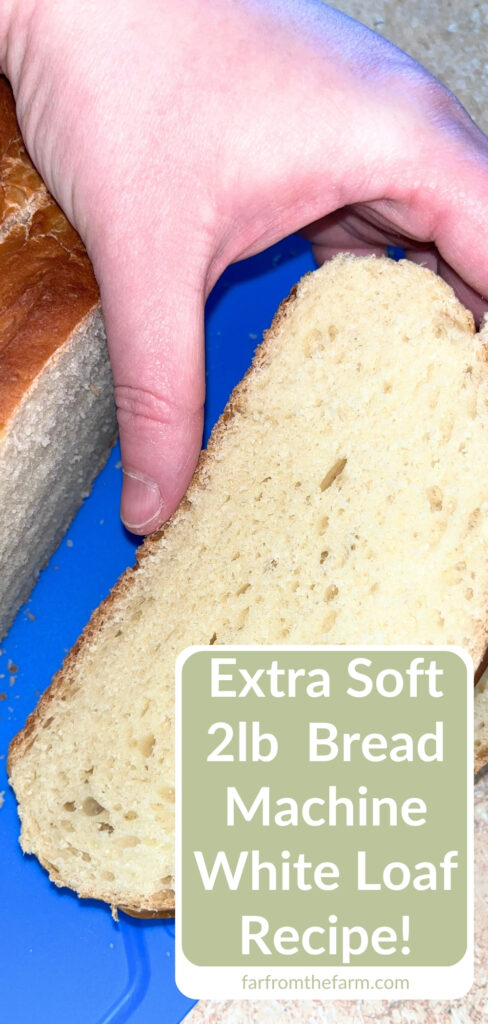
This extra soft 2lb white loaf has a wonderfully tender crumb, a beautifully golden crust, and a flavor that’s mild enough for everything from sandwiches to garlic bread. It’s one of those recipes that makes people wonder if it really came from a bread machine.
Hi! If you’ve been following me for long you’ll already know this, but for those who are new, welcome to Far From The Farm. I’m Mona, the Brit behind the recipes, learning life and food in the States while sharing our debt-free journey and what’s on the menu in our home today!
Bread is one of those foods that instantly makes a house feel like home. It doesn’t matter how hectic life feels outside the kitchen. A fresh loaf cooling on the counter somehow makes everything feel a little calmer for a while.
America has some wonderful bakeries, but supermarket sandwich bread often leans sweeter and softer than what I grew up with.
British loaves tend to have a slightly chewier texture, while many artisan bakery loaves have thick crusts that aren’t always ideal for sandwiches. This loaf sits somewhere beautifully in the middle.
It has the pillowy softness people love in a homemade sandwich loaf while still looking like something you’d happily set in the middle of the dinner table alongside a bowl of soup or a family pasta dinner.
One of the biggest misconceptions about bread machines is that they can only make square, dense loaves with paddle holes in the bottom. They absolutely don’t have to.
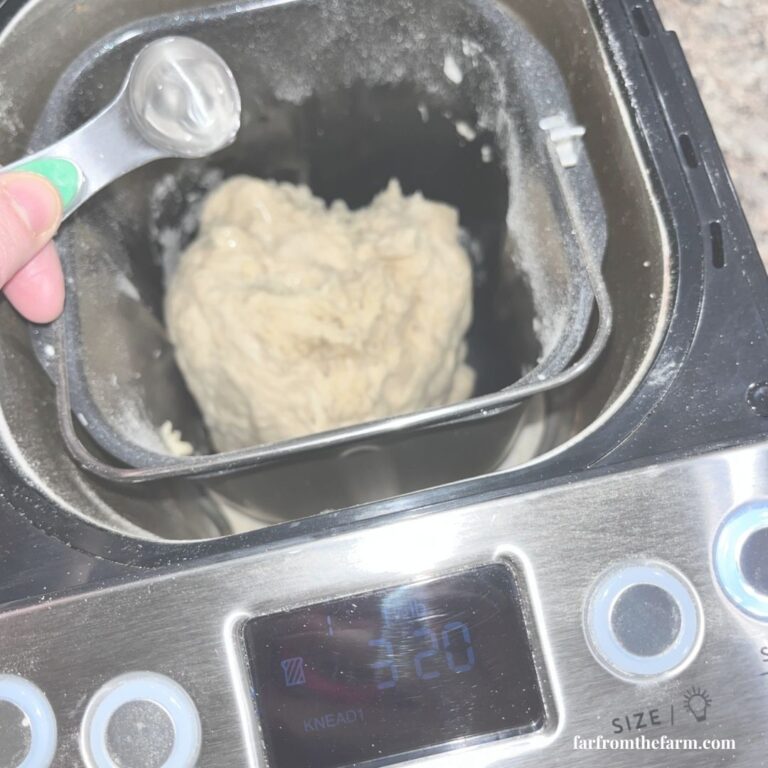
I use my bread machine for what it does brilliantly, mixing, kneading and giving the dough a perfectly controlled first rise. After that, I shape the dough by hand, give it one final rise, then bake it in the oven. The result is a loaf that has all the convenience of a bread machine with the appearance of bakery bread.
Of course, if you’d rather let the bread machine handle everything, this recipe works beautifully that way too. I’ll show you both options so you can choose whichever suits your day.
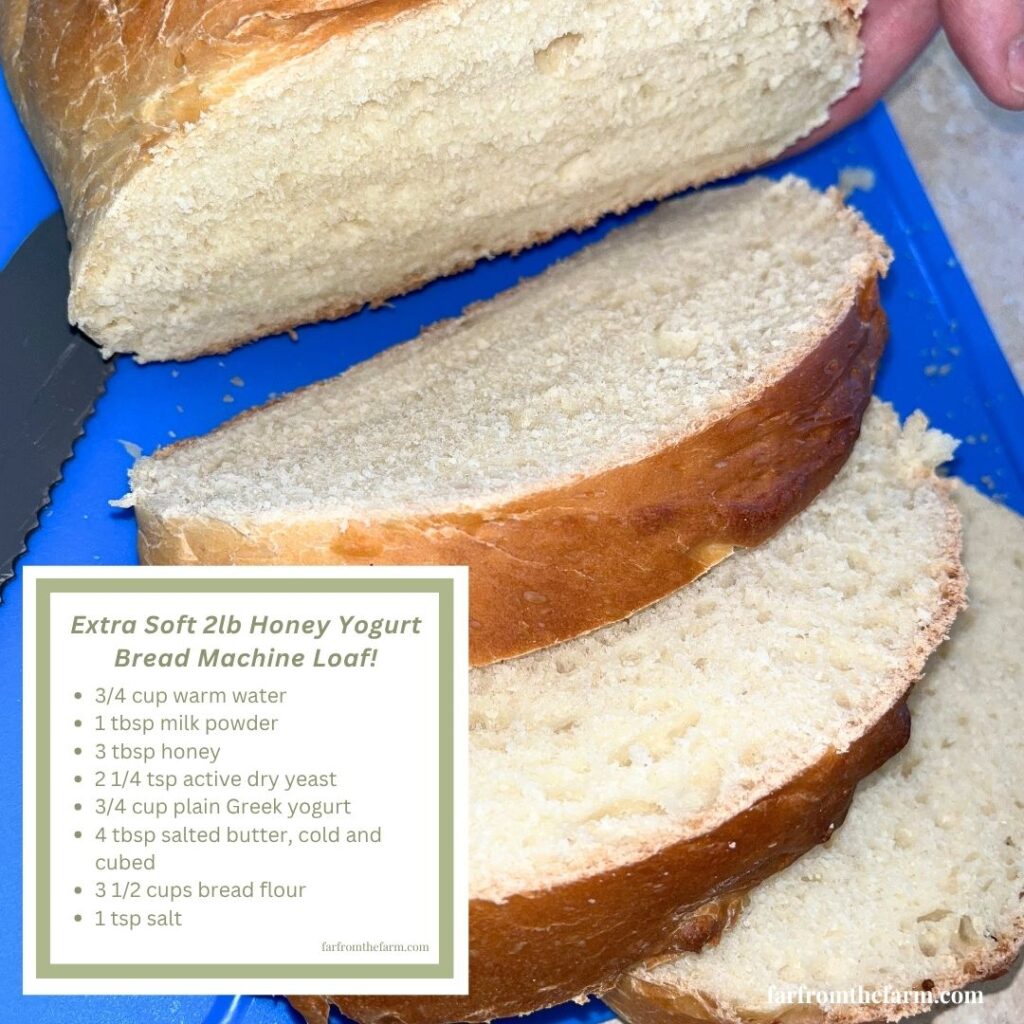
Greek yogurt works to help produce an incredibly soft crumb that stays tender for days, and you don’t taste the yogurt in the finished bread.
Combined with honey and an old bakery trick (milk powder), it creates a loaf that’s noticeably softer than many traditional white bread recipes.
It’s one of our favorite everyday breads to have on hand. It slices beautifully for packed lunches, makes incredible toast, holds up to thick sandwich fillings, and turns into some of the best homemade garlic bread we’ve made in a long time.
As a military family working through Baby Step 2 of our debt-free journey, we’re making more things from scratch these days.
Every dollar we can stretch a little further helps move us closer to our goals, and homemade bread has become one of the simplest ways to cut grocery costs without feeling like we’re sacrificing quality.
Once you realize how inexpensive a loaf like this is to make, it’s hard not to keep coming back to it. Flour, honey, yogurt and a few pantry staples quickly become something that would easily cost several dollars more at a bakery.
Fresh bread also has another advantage that can’t really be measured in dollars. The divine smell. There really is nothing quite like walking back into the kitchen while a loaf finishes baking to makes you smile.
And just a reminder that if you’re struggling and you need help with managing your budget or starting your own debt free journey then here’s some FREE resources below you may find helpful!
living frugally and fully
free tips and resources to make the most of what you have
Whether you bake the entire loaf in your bread machine or finish it in the oven for that beautiful artisan-style shape, I think you’re going to be amazed at just how soft this bread turns out.
As always, these photos are from my real kitchen here in our sweet military base home. No AI recipe images or staged lighting or spotless marble counters. Just real life and real food made in a small space. Proof that you can feed your family well without needing a dream kitchen or fancy tools!
So roll up your sleeves and let’s head into the kitchen to make this Extra Soft Honey Yogurt Bread Machine Loaf!
Recipe Disclaimer
All Far From The Farm recipes are shared as a guide based on what works in my home kitchen. Results may vary depending on your ingredients, equipment, and cooking setup, so always use your own judgement. Please check all ingredients for allergies, intolerances, or dietary needs before making any recipe. Far From The Farm is not responsible for any reactions or outcomes from the use of these recipes. Nutritional information is an estimate only.
Mona – Far From The Farm
Equipment
- Bread machine (2lb capacity)
- Measuring jug, cups and spoons
- Silicone spatula
- 9×13-inch glass baking dish or similar oven-safe dish
- Sharp bread lame or serrated knife (for scoring)
- Clean kitchen towel
- Cooling rack
Available on Amazon.com [ad]





Ingredients
Makes one 2lb loaf
- 3/4 cup warm water
- 1 tbsp milk powder
- 3 tbsp honey
- 2 1/4 tsp active dry yeast
- 3/4 cup plain Greek yogurt
- 4 tbsp salted butter, cold and cubed
- 3 1/2 cups bread flour
- 1 tsp salt
Available on Amazon.com [ad]


How to Make This Extra Soft Bread Machine Loaf in the Bread Machine
Step 1. Activate the Yeast
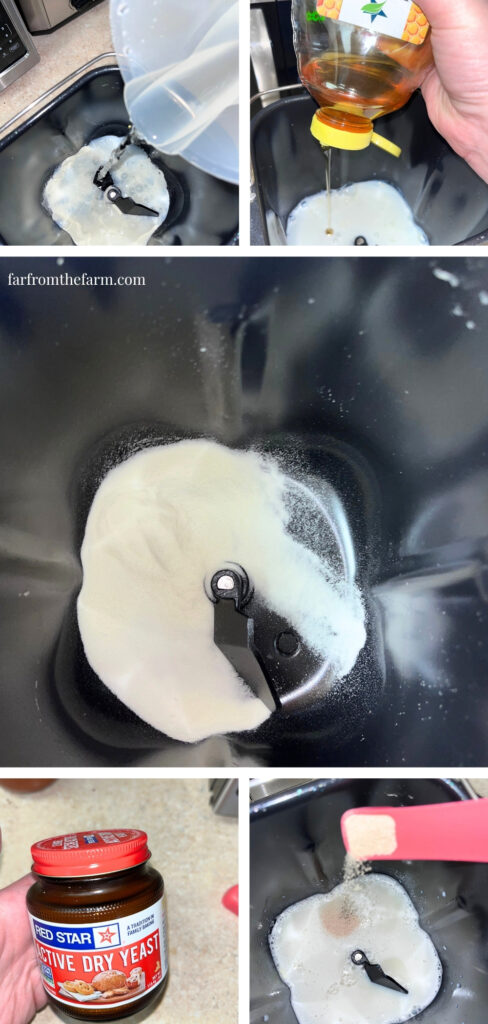
Pour the warm water into your bread machine pan.
Add the milk powder and honey, stirring until the milk powder has dissolved.
Sprinkle over the yeast, stir once, cover and then leave for 5 to 10 minutes until frothy.
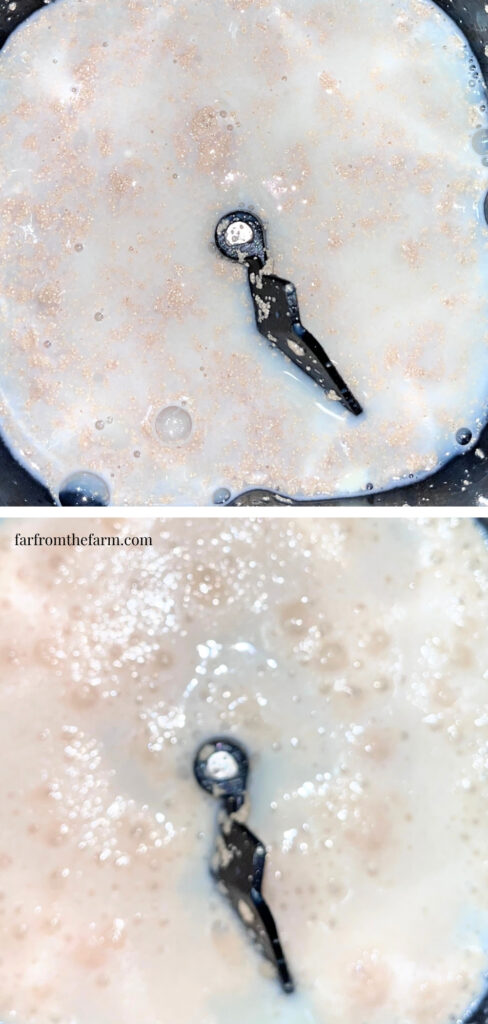
If the mixture doesn’t foam, discard it and begin again with fresh yeast.
Step 2. Add the Remaining Ingredients
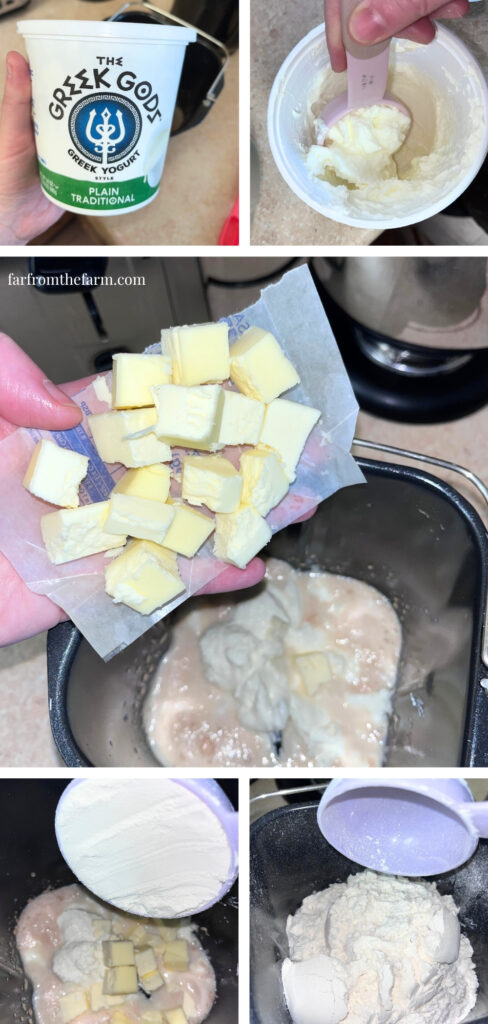
Add the Greek yogurt and the cold cubes of butter.
Pour over the bread flour.
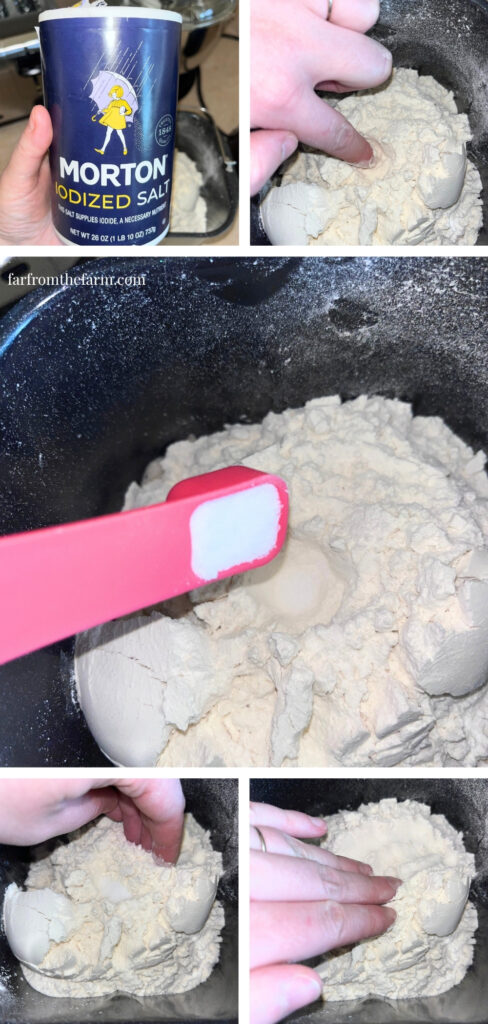
Make a small well in the flour and add the salt, keeping it away from the yeast until mixing begins.
Step 3. Start the Bread Machine
Insert the bread pan back into your bread machine.
Select:
- White Bread Cycle
- 2 lb loaf
- Medium crust
Press Start.
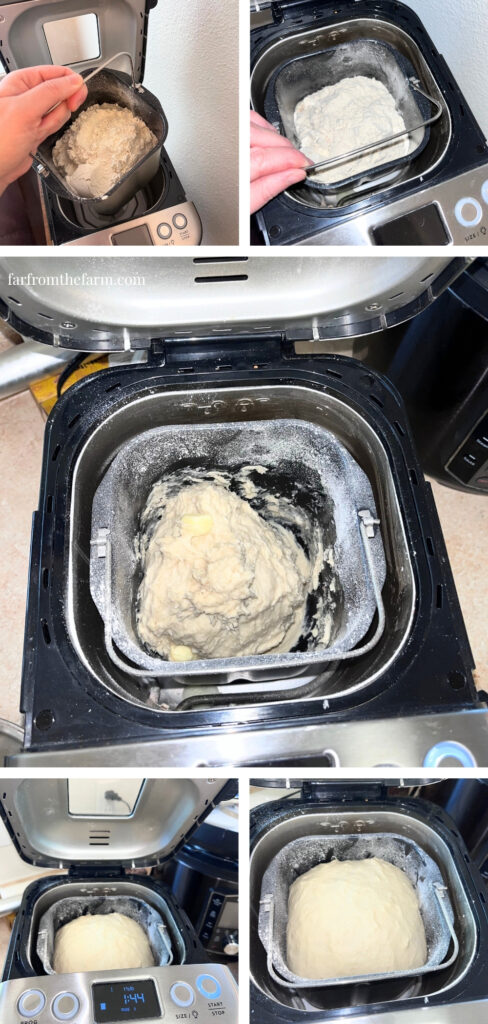
The bread machine will mix, knead, rise and bake the loaf for you.
Step 4. Cool the Loaf
Once baked, carefully remove the loaf from the bread machine.
Wrap it in a clean tea towel while it cools to help keep the crust beautifully soft.
Leave it for at least 10 minutes before slicing.
Enjoy!
Alternative Method: How to Bake the Bread in the Oven after using the Bread Machine Dough Cycle.
If you prefer a loaf with a more traditional bakery shape, I almost always use this method instead.
Step 1.
Prepare the dough exactly as above.
Instead of selecting the White Bread cycle, choose the Dough Cycle.
Allow the machine to complete the full cycle, which usually takes around 1 hour 30 minutes depending on your bread machine.
Step 2.
Turn the dough onto a lightly floured surface.
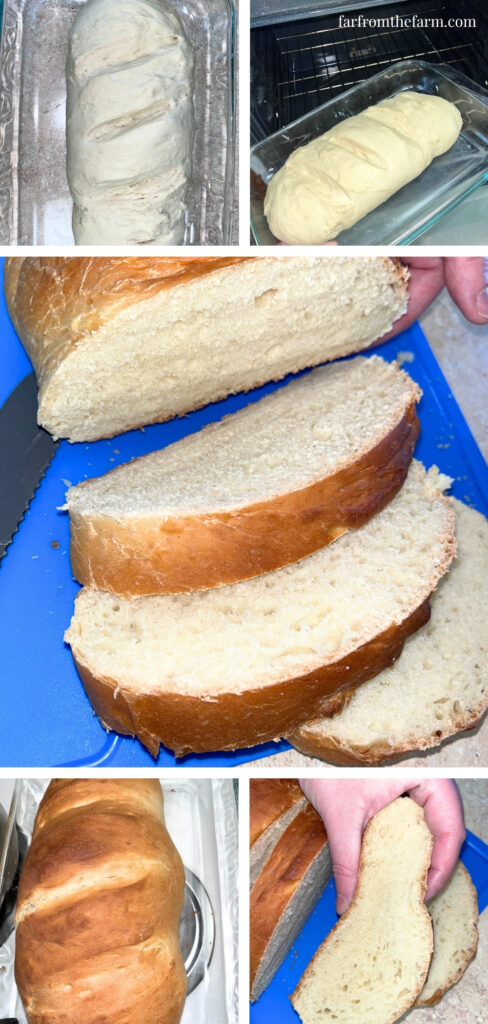
Shape it into your preferred loaf or French bread shape.
Place it onto your prepared baking tray/dish or into a loaf tin.
Step 3.
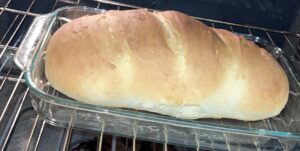
Bake in a preheated 350°F oven for approximately 35 minutes.
If needed, bake for another 5 minutes until fully cooked.
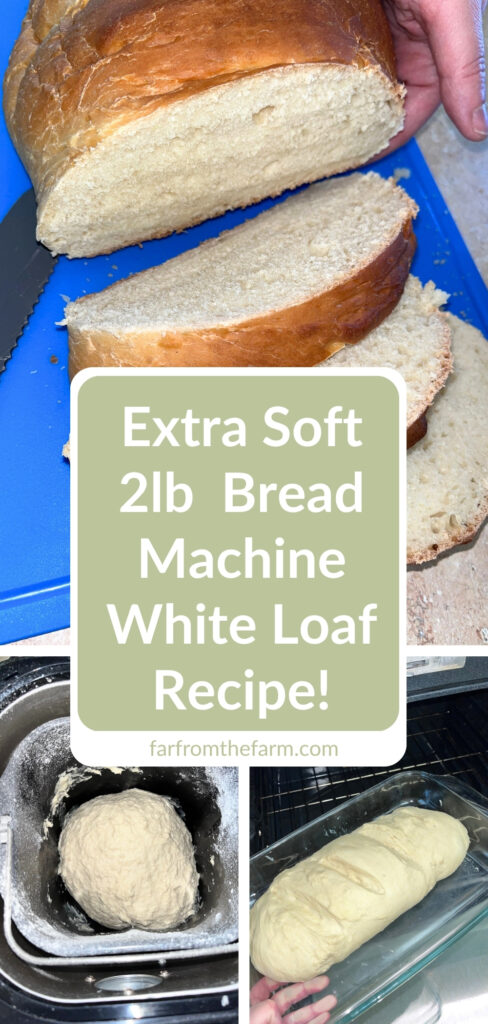
The crust should be a rich golden brown.
No egg wash or milk wash is needed.
Step 4.
Remove from the oven and immediately wrap the loaf in a clean tea towel while it cools.
Allow it to rest for at least 10 minutes before slicing.
Notes
- Activating the yeast first adds a few extra minutes but dramatically improves consistency.
- Plain Greek yogurt gives the softest texture, but flavored yogurts can create fun variations.
- Wrapping the finished loaf in a clean towel while cooling helps maintain an exceptionally soft crust.
- This recipe works beautifully baked completely in the bread machine or finished in the oven after the dough cycle.
- Every bread machine mixes a little differently, so check the dough during the first few minutes. It should feel soft, smooth, and only slightly tacky. If it looks dry, add 1 tsp water at a time. If it looks overly wet, sprinkle in a little extra bread flour.
Troubleshooting
The most common cause is inactive yeast. Water that’s too hot can kill the yeast, while water that’s too cool won’t activate it properly. Old yeast is another frequent culprit.
The Fix: Activate your yeast in the warm water, honey, and milk powder mixture before adding the remaining ingredients. After 5 to 10 minutes it should be foamy and bubbly. If it isn’t, discard it and start again with fresh yeast.
A slightly tacky dough is perfectly normal, especially in recipes containing Greek yogurt. If the dough sticks heavily to the sides of the pan without forming a smooth ball, it probably needs a little more flour.
The Fix: Add bread flour 1 tablespoon at a time during the first few minutes of kneading until the dough becomes soft, smooth, and elastic without being wet.
Dense bread is usually caused by too much flour, insufficient rising time, or yeast that wasn’t fully active before mixing.
The Fix: Measure flour carefully using the spoon-and-level method or, even better, weigh it with a digital scale. Allow the dough cycle to finish completely and don’t rush the final rise if you’re baking in the oven.
If bread rises too much before baking, the gluten structure can weaken and collapse in the oven.
The Fix: Bake the loaf once it has roughly doubled in size rather than waiting until it becomes enormous. Proper shaping also helps the dough support itself during baking.
Homemade bread naturally contains fewer preservatives than store-bought bread, so moisture can escape more quickly.
The Fix: Wrap the loaf in a clean kitchen towel immediately after baking while it cools. Once completely cool, store it in an airtight bread bag or container to help retain moisture.
Milk powder is one of the easiest ways to make homemade bread softer without adding extra liquid. Many commercial bakeries rely on dried milk because it enriches the dough while keeping the hydration balanced.
The Fix: If you have milk powder available, use it exactly as written. If you need to substitute fresh milk, you’ll need to rebalance the liquid ingredients rather than simply swapping one for the other.
Storage
- Room Temperature: Store completely cooled bread in an airtight bread bag, bread box, or sealed container for up to 3 days.
- Freezing: Slice the loaf before freezing if you plan to toast individual slices later. Freeze in a freezer-safe bag for up to 3 months.
- Thawing: Allow the loaf to thaw at room temperature while still wrapped, or toast slices directly from frozen.
- Refreshing: If the loaf begins to lose a little softness after a couple of days, warm slices briefly in the toaster or microwave for a few seconds to freshen them.
Serving Ideas
This soft Honey Yogurt Bread is incredibly versatile. Serve it with:
- Butter and jam
- Homemade garlic butter
- Toast and honey
- Peanut butter
- Sandwiches
- BLTs
- Grilled cheese
- French toast
- Bread pudding
- Soup
- Pasta dinners
- Chili
- Homemade croutons
- Garlic bread
- Breakfast toast with scrambled eggs
It also slices beautifully for lunchboxes thanks to its soft crumb and sturdy structure.
Why You’ll Love This Recipe!
- Incredibly soft, bakery-style texture.
- Easy enough for complete bread machine beginners.
- Two baking options using the same dough.
- Perfect for bread machines.
- Also works beautifully finished in the oven.
- Uses everyday grocery store ingredients.
- Stays soft for days.
- Makes fantastic sandwiches.
- Excellent for toast and garlic bread.
- Freezes well.
- Family friendly.
- Budget friendly.
- No complicated techniques.
- A wonderful confidence-building first bread machine recipe.
FAQs
Yes. A thick plant-based Greek-style yogurt works very well. Just choose one that’s plain and unsweetened for the closest texture and flavor.
Absolutely. Activate the yeast exactly as directed. Add the remaining ingredients and knead with the dough hook for about 8 to 10 minutes until smooth and elastic. Cover and let rise until doubled, shape the loaf, allow a second rise, then bake at 350°F for approximately 35 minutes.
Milk powder is a classic bakery ingredient that enriches the dough without adding excess liquid. It helps produce a softer crumb, better browning, and a loaf that stays fresh longer than one made with water alone.
Vanilla yogurt produces a slightly sweeter loaf that’s wonderful for breakfast and French toast. Honey yogurt also works beautifully. Just remember that sweetened yogurts may slightly alter the final flavor.
Extra Soft 2lb Honey Yogurt Bread Machine Loaf Recipe!

Ingredients
Equipment
Method
- Activate the Yeast:Pour the warm water into the bread machine pan.Add the milk powder and honey and stir until the milk powder has dissolved.Sprinkle over the active dry yeast, stir once, cover and then leave for 5 to 10 minutes until the mixture is visibly frothy.If the yeast does not foam, discard the mixture and begin again with fresh yeast.

- Add the Remaining Ingredients:Add the Greek yogurt and cold cubed butter to the bread machine pan.Pour the bread flour over the wet ingredients.Make a small well in the flour and add the salt, keeping it away from the activated yeast until the machine begins mixing.
- For a Loaf Baked Completely in the Bread Machine:Insert the bread pan into the machine.Select the White Bread Cycle, 2lb Loaf and Medium Crust settings.Press Start and allow the bread machine to complete the full mixing, kneading, rising and baking cycle.When the White Bread Cycle has finished, carefully remove the loaf from the bread machine.Wrap the loaf in a clean tea towel while it cools to help keep the crust soft.Allow it to cool for at least 10 minutes before slicing.
- For the Dough Cycle and Oven Method:Select the Dough Cycle and allow the machine to complete the full cycle. This usually takes around 1 hour 30 minutes, depending on your bread machine.Preheat the oven to 350°F.Turn the finished dough onto a lightly floured surface and shape it into your preferred loaf or French bread shape.Place the shaped dough onto your prepared baking tray or oven-safe dish, or into a loaf pan.Bake at 350°F for approximately 35 minutes.If needed, continue baking for another 5 minutes until fully baked and beautifully golden brown.No egg wash or milk wash is required.Remove from the oven and immediately wrap the loaf in a clean tea towel while it cools.Allow it to rest for at least 10 minutes before slicing.
Notes
- Check the yeast before continuing. The yeast mixture should become visibly frothy within 5 to 10 minutes. If it doesn’t, start again with fresh yeast rather than risking an entire loaf that doesn’t rise.
- Check the dough during the first few minutes of mixing. It should become soft, smooth and only slightly tacky. If it appears too dry, add water 1 tsp at a time. If it is excessively wet, sprinkle in a small amount of additional bread flour.
- Plain Greek yogurt produces a beautifully soft crumb without leaving the finished loaf tasting strongly of yogurt.
- Cold butter is fine. The bread machine will gradually incorporate the cubes as it mixes and kneads the dough.
- Milk powder helps create the exceptionally soft texture without replacing the water in the recipe with fresh milk.
- For maximum convenience, use the White Bread Cycle and allow the machine to complete the entire loaf.
- For a more traditional bakery-style shape, use the Dough Cycle and finish the loaf in the oven.
- Wrapping the freshly baked loaf in a clean tea towel while it cools helps retain moisture and keeps the crust beautifully soft.
- Allow the loaf to cool for at least 10 minutes before slicing so the crumb has time to begin setting.
Storage
- Allow the bread to cool completely before storing.
- Room Temperature: Keep in an airtight bread bag, bread box or sealed container for up to 3 days.
- Freezing: Freeze the whole loaf or individual slices in a freezer-safe bag for up to 3 months. Slicing before freezing makes it easy to remove only what you need.
- Thawing: Thaw the wrapped loaf at room temperature, or toast individual slices directly from frozen.
- Refreshing: Bread that has lost a little softness after a couple of days can be briefly warmed in the toaster or microwave.
Related Recipes
Nutrition information is automatically calculated, so should only be used as an approximation.
Looking for more homemaking inspiration?

It’s so important to be part of a community that not only understands you but that champions you, encourages, challenges and cheers you on. We couldn’t find one – so we created it instead!
Join the Side Hustle Homemakers Team Julie, Sam and I over at the Recipes, Homesteading and More! Facebook Group for Food Blogging Tips, Homesteading and Homemaking content and encouragement!
We’re 3 very different US/UK military families who met and became instant forever friends. We share what’s working in our kitchens, gardens, homes and more!
We created the group to share real life around recipes, homesteading, homemaking and more. Head on over, say Hi, share you tips and gain some friends and knowledge along the way!
The Takeaway
There’s something deeply satisfying about slicing into a loaf of bread you’ve made yourself.
This Honey Yogurt Bread proves that a bread machine doesn’t have to produce heavy, square loaves with dense crumbs. With one simple extra step of activating the yeast first, plus the richness of Greek yogurt and milk powder, you can make an incredibly soft loaf that’s worthy of the center of the dinner table.
Whether you bake it entirely in your bread machine or finish it in the oven like I usually do, I hope this recipe becomes one you come back to again and again. It’s dependable, beginner friendly, and the kind of loaf that makes ordinary sandwiches feel just a little bit special!
What to Try Next?!
Share & Rate This Recipe!
If this Honey Yogurt Bread earns a regular place in your kitchen, I’d love to hear about it! Please tap the stars on the recipe card below and leave a quick comment sharing how it turned out. Seeing your bakes and reading your tips is one of my favorite parts of running Far From The Farm.
Why You’ll Love Using a Bread Machine In Your Kitchen!
If you’re new here, you’ll quickly learn that I am such a fan of using a bread machine for dough. It has been one of the biggest helps in my kitchen, especially during busy or overwhelming seasons.
My parents gifted me this little Compact Cuisinart Bread Machine recently when I moved from the UK to the States after getting married, and it has worked like a little powerhouse ever since!

It kneads beautifully. It rises dough evenly. It keeps everything contained in one pan so I am not dealing with flour across every surface of the kitchen.
And on days where the house feels chaotic or I am juggling too much, I can add the ingredients, press the dough button, and let it get on with the work while I focus on everything else.
It takes away so much of the guesswork and makes homemade bread, pizza dough, cinnamon rolls, soft rolls, and sweet bakes feel much simpler.
It has also been a real blessing for our budget. Homemade dough costs pennies compared to store prepared versions and certainly compared to eating out. As a military family on baby step 2 of our debt free journey, little savings like that matter across an entire month.

Check out The Bread Machine Academy today!
Learn bread machine baking with beginner-friendly guides on flour, yeast, ingredients, troubleshooting, dough cycles, tips, and techniques!
If you have ever felt intimidated by bread making, this is your gentle nudge to give it a try. A dough cycle handles all the kneading for you.
You get soft, reliable, fluffy dough without standing over a counter for ages or worrying if things rose the way they should. It makes homemade cooking feel doable, even on days that are far from calm.
Browse Bread Machine Recipe Type
There are so many beginner friendly ideas to help you feel confident and excited about homemade dough – join the Facebook group today and share recipes and tips for perfect bread, every time!
Join our new Facebook Group!
THE BEST BREAD STARTS WITH THE RIGHT COMMUNITY…
Beginner-Friendly Bread Machine and Bread Recipes is our new Facebook group for home bakers who want bread baking to feel simple, doable, and encouraging.

Last update on 2026-10-08 / Affiliate links / Images from Amazon Product Advertising API