How to Make the Best Foolproof Soft White Sandwich Bread in a Bread Machine Using Half All Purpose and Half Bread Flour!
Hi! If you’ve been following me for long you’ll already know this, but for those who are new, welcome to Far From The Farm. I’m Mona, the Brit behind the recipes, learning life and food in the States while sharing our debt-free journey and what’s on the menu in our home today!
The smell of fresh bread baking in your own home is unbeatable really. It fills the whole kitchen with that warm cozy bakery smell that somehow makes everything feel calmer for a little while.
And the funny thing is, homemade bread feels like such a luxury these days, but in reality it actually saves us money.
As a military family deep into baby step 2 of our debt free journey, we’ve been making more and more staples at home lately because every single penny we stretch further genuinely matters right now. Bread is one of the biggest ones.
A decent loaf from the grocery store keeps getting more expensive, especially if you want one that is actually soft and pleasant for sandwiches instead of dry and crumbly by the next morning and isn’t full of unpronounceable ingredients and preservatives.
So I keep coming back to my bread machine over and over again.
I’ve got a lot of bread machine recipes in my little collection now, but I still love experimenting with different ways to create softer sandwich bread with the best texture possible. And this one immediately jumped right up near the top of our favorites list.
This loaf comes out beautifully soft while still holding its structure properly for sandwiches, toast, grilled cheese, or egg salad piled ridiculously high like we tend to do around here.
The honey gives the bread a very gentle sweetness without turning it into sweet bread. It just rounds everything out and gives the loaf a softer richer flavor that tastes amazing with savory fillings too.
Our absolute favorite combo with this bread is egg salad sandwiches.
We probably make them at least twice a month because they are cheap, filling, comforting, and easy. I can usually throw the bread ingredients into the machine and make the egg salad in about 15 minutes total before getting on with everything else that needs done around the house. Total win!
And yes, I know using half all purpose flour and half bread flour might sound a little strange at first.
You absolutely can make bread using only one or the other if that is all you have in the pantry.
But this half and half combination really is worth it.
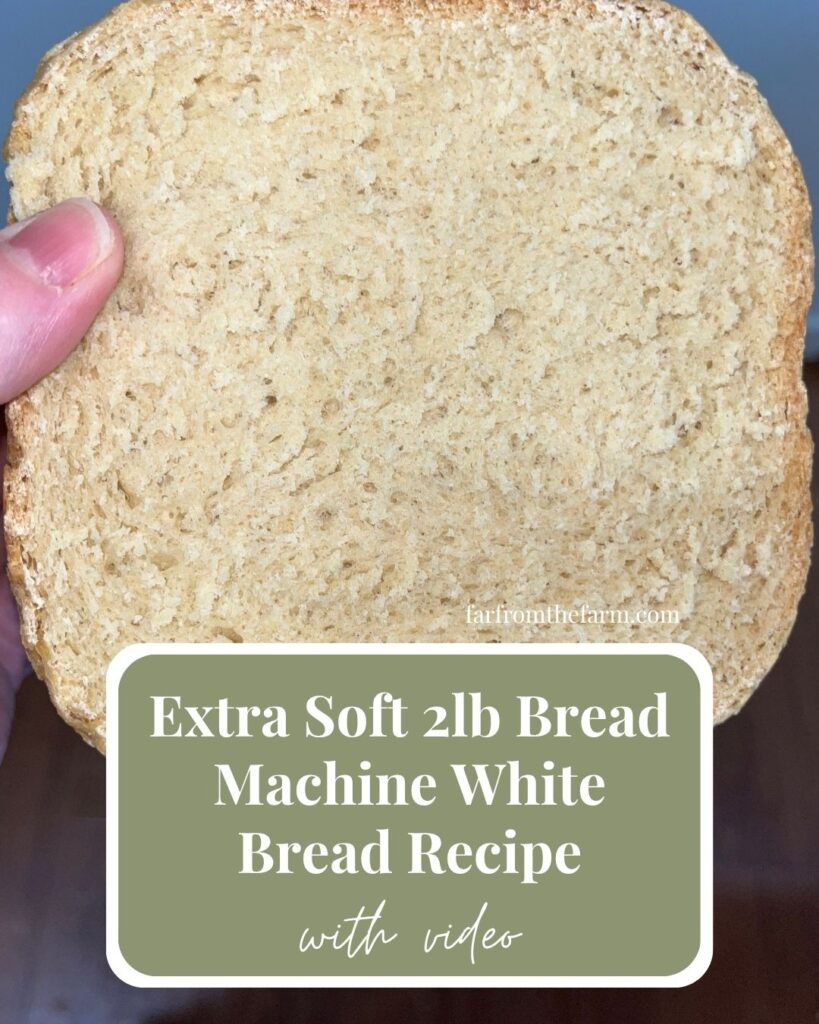
The all purpose flour helps create that extra soft fluffy texture while the bread flour keeps enough structure and chew for proper sandwich bread that slices beautifully without collapsing into crumbs.
It gives you the best of both worlds.
And of course I just have to mention again, that using a bread machine has genuinely changed the way I cook at home, and I think it could help you out too!
My little bread machine does so much for me, dough for sweet rolls, soft dinner rolls, pizza nights, everyday sandwich loaves, quick cakes, even small batches of jam.
It takes on all the fiddly steps and frees me up to carry on with everything else at home. It keeps things consistent and budget friendly, and honestly it has made homemade baking feel achievable even on my busiest days. I’ll share the one I use later on in this post.
And just a reminder that if you’re struggling and you need help with managing your budget or starting your own debt free journey then here’s some FREE resources below you may find helpful!
living frugally and fully
free tips and resources to make the most of what you have
As always, these photos are from my real kitchen here on base. No staged lighting or spotless counters. Just real life and real food made in a small space. Proof that you can feed your family well without needing a dream kitchen or fancy tools!
So roll up your sleeves and head into the kitchen with me to make this extra soft homemade bread machine sandwich loaf!

Why You’ll Love Using a Bread Machine In Your Kitchen!

If you’re new here, you’ll quickly learn that I am such a fan of using a bread machine for dough. It has been one of the biggest helps in my kitchen, especially during busy or overwhelming seasons.
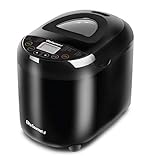
My parents gifted me this little Compact Cuisinart Bread Machine recently when I moved from the UK to the States after getting married, and it has worked like a little powerhouse ever since!

It kneads beautifully. It rises dough evenly. It keeps everything contained in one pan so I am not dealing with flour across every surface of the kitchen.
And on days where the house feels chaotic or I am juggling too much, I can add the ingredients, press the dough button, and let it get on with the work while I focus on everything else.
It takes away so much of the guesswork and makes homemade bread, pizza dough, cinnamon rolls, soft rolls, and sweet bakes feel much simpler.
It has also been a real blessing for our budget. Homemade dough costs pennies compared to store prepared versions and certainly compared to eating out. As a military family on baby step 2 of our debt free journey, little savings like that matter across an entire month.

If you have ever felt intimidated by bread making, this is your gentle nudge to give it a try. A dough cycle handles all the kneading for you.
You get soft, reliable, fluffy dough without standing over a counter for ages or worrying if things rose the way they should. It makes homemade cooking feel doable, even on days that are far from calm.
There are so many beginner friendly ideas to help you feel confident and excited about homemade dough!
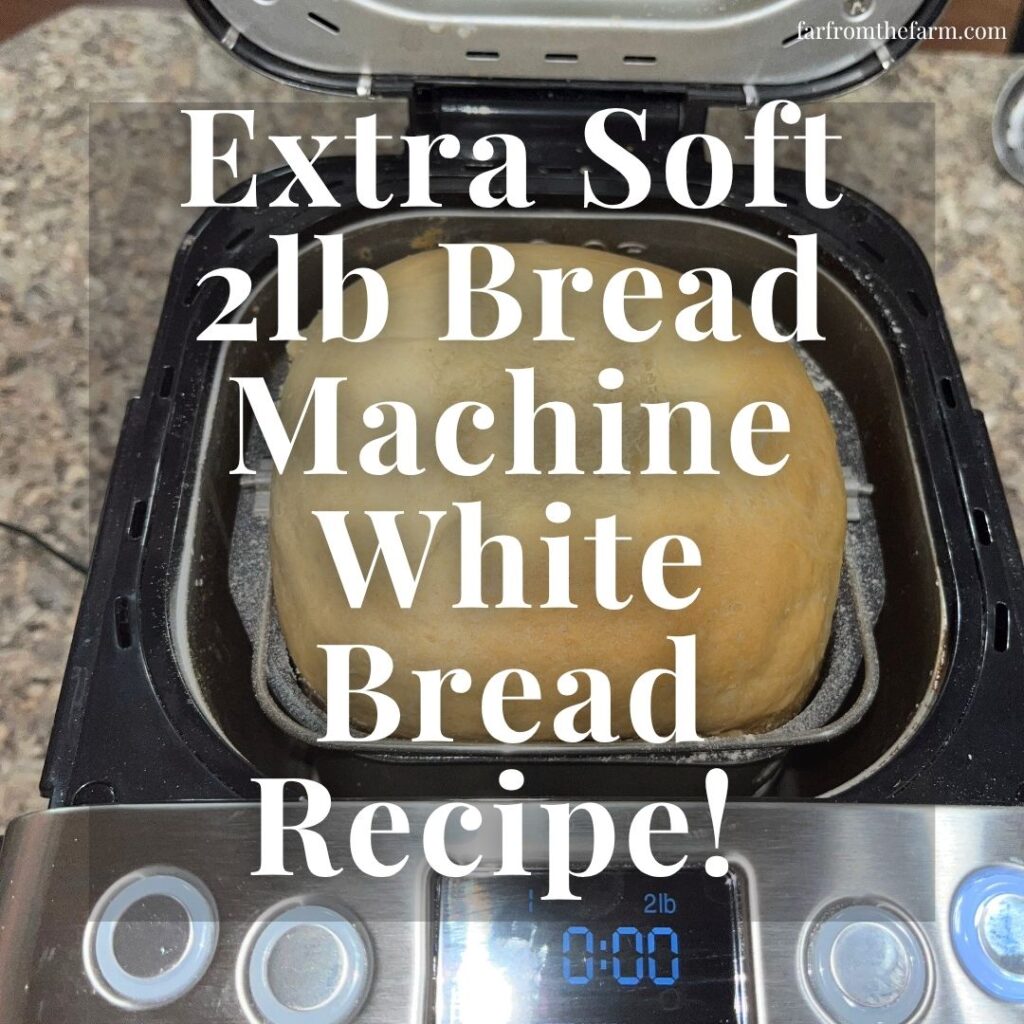
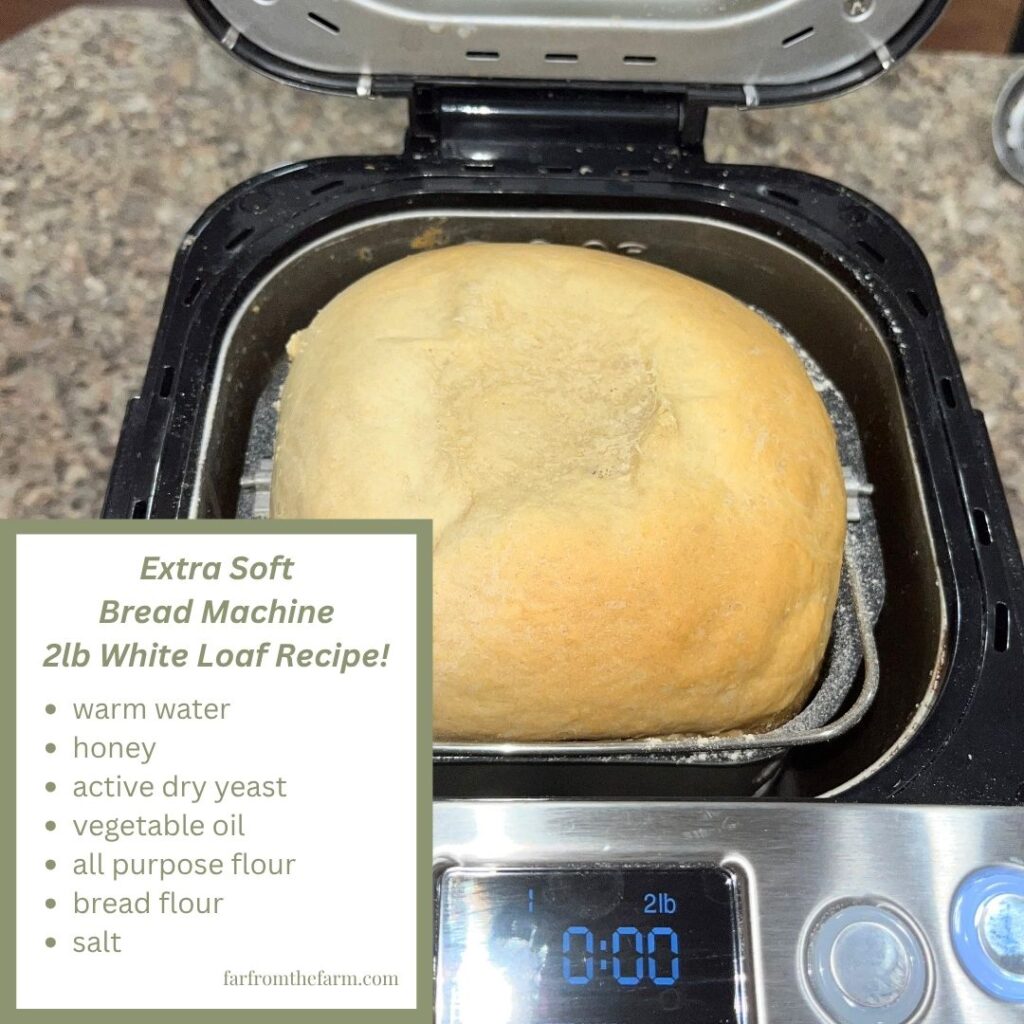
Sneak Peak!
Sometimes you need to see the end product before you commit to making it, right?! So here’s a quick glimpse of how it turned out for me today along with the recipe at a glance!
Equipment
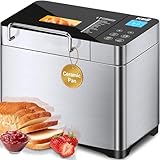
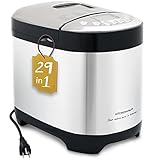
- Bread machine, choose one that can make 2 lb loaves.
- Measuring jug, cups and spoons
- Spoon
- Plastic wrap
- Clean kitchen towel
- Cooling rack
- Bread slicer
Available on Amazon.com [ad]


Ingredients
Makes a 2lb loaf of bread
- 1 1/4 cups warm water
- 3 tbsp honey
- 2 1/4 tsp active dry yeast
- 1/3 cup vegetable oil
- 2 cups all purpose flour
- 2 cups bread flour
- 1 1/2 tsp salt
Available on Amazon.com [ad]


Step-By-Step Instructions
Step One: Add the warm water and honey
Pour the warm water into the insert pan of your bread machine.
Add the honey and stir briefly until mostly combined.
The warm water helps activate the yeast while the honey adds gentle sweetness and helps create a softer loaf.
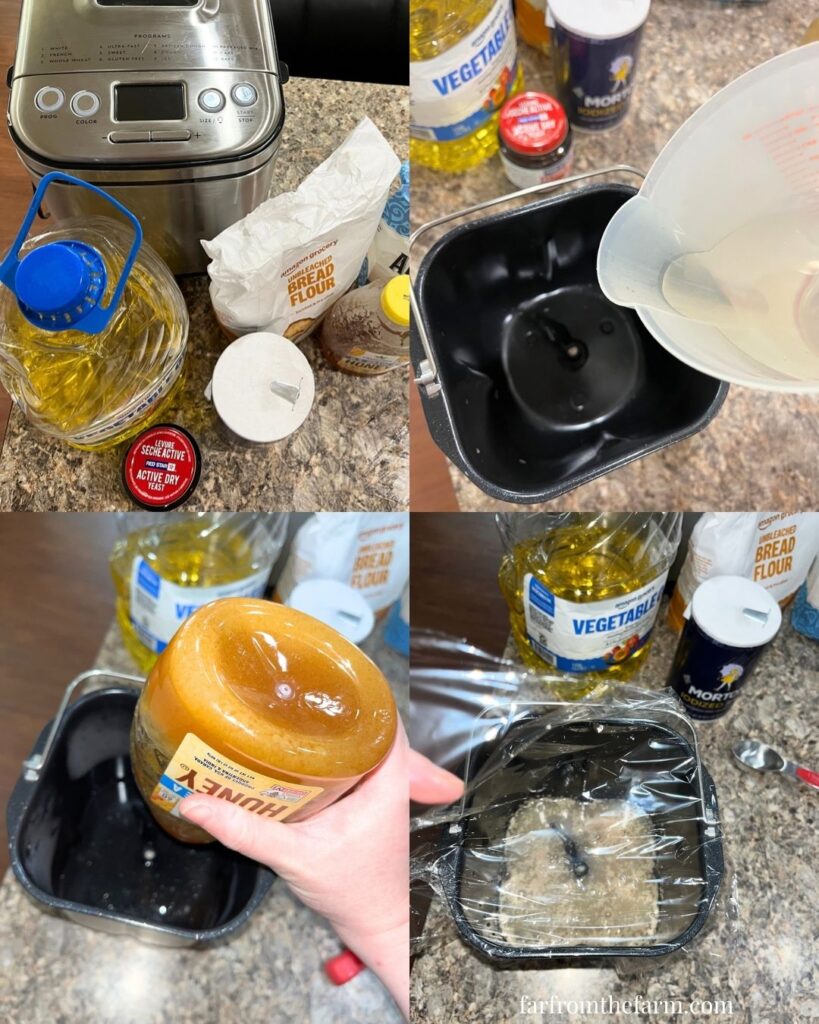
Step Two: Add the yeast
Sprinkle the yeast into the water mixture and stir briefly.
Step Three: Check the yeast
Cover the pan with plastic wrap or a clean towel, and let it rest for 5 to 10 minutes until it looks bubbly and frothy. That’s how you know the yeast is alive and ready to go.
Here’s the part no bread machine manual ever seems to tell you. If the yeast doesn’t bloom here, don’t keep going. I’ve had to throw out whole loaves before because the yeast was bad, and you won’t find out until it’s baked if you add it last like most manuals say.
Taking five minutes now saves three wasted hours later!
Check the images below to see the kind of change you should see after the yeast has activated:
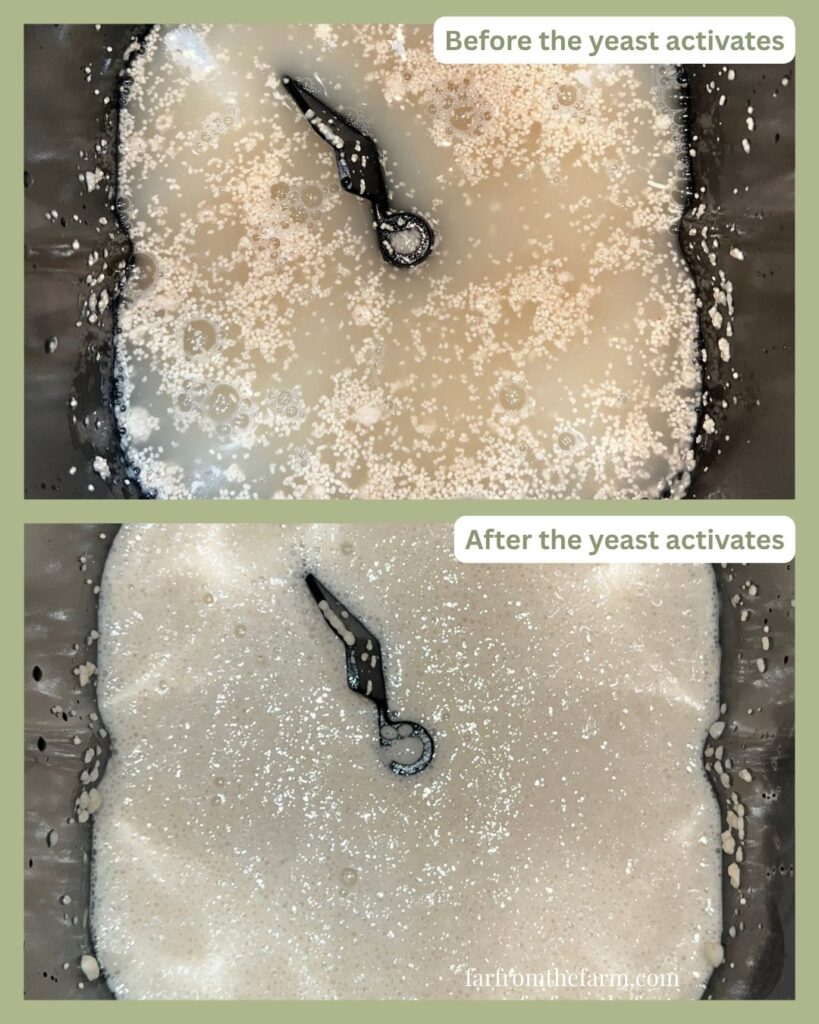
After a few minutes the top should look frothy and bubbly.
That tells you the yeast is active and ready to work.
If nothing happens, discard the mixture and start again with fresh yeast.
It is much better to catch inactive yeast now rather than waste all the flour afterwards.
Step Four: Add the vegetable oil
Pour in the vegetable oil.
This helps create a softer more tender loaf while also helping the bread stay softer longer after baking.
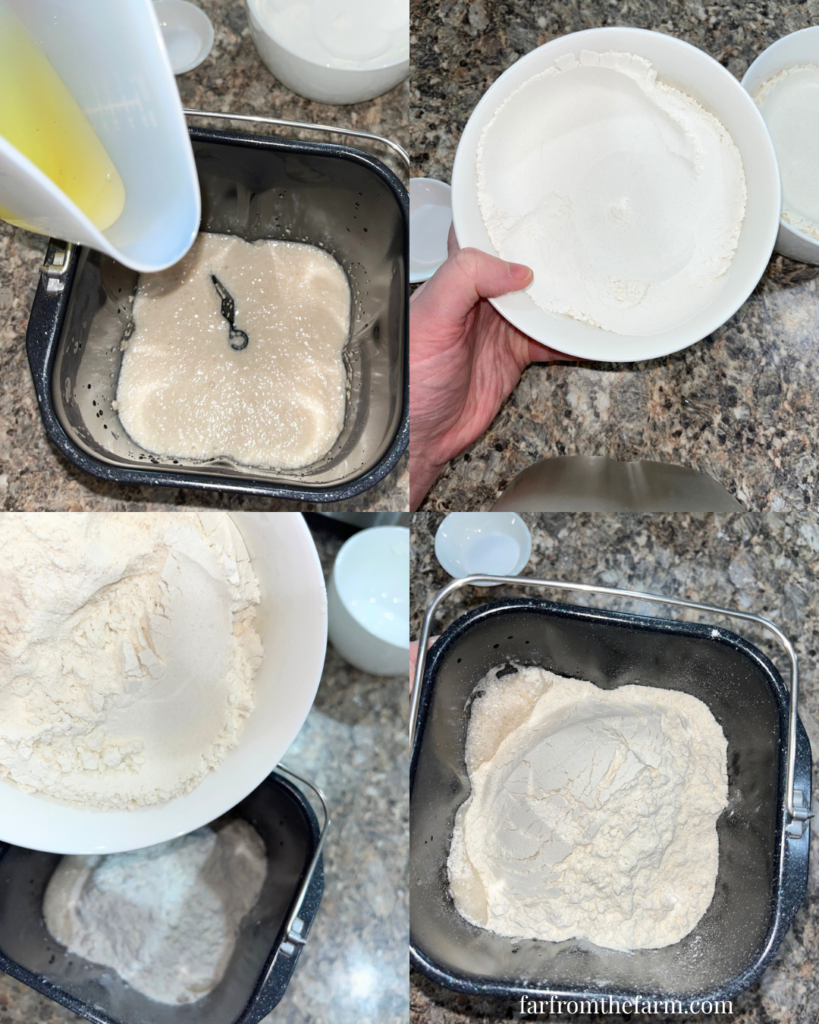
Step Five: Add the flours
Add both the all purpose flour and bread flour on top of the liquid mixture.
No need to stir anything together.
The bread machine will handle all of the mixing and kneading for you.
Step Six: Add the salt
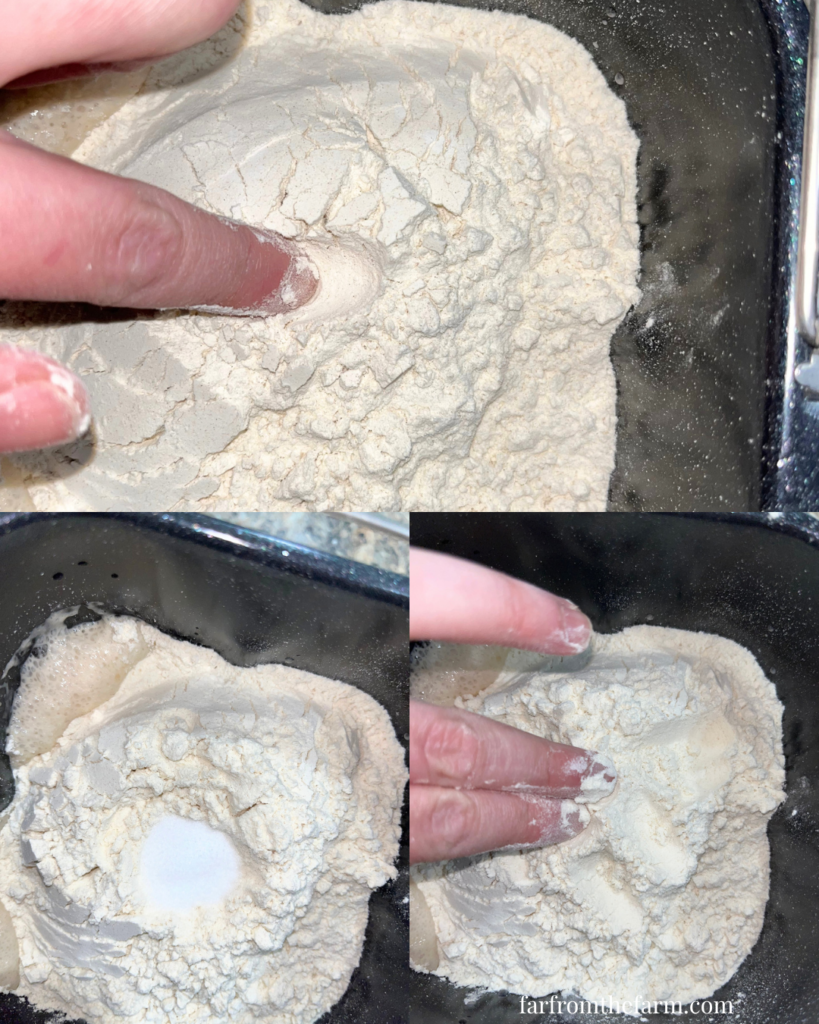
Make a small hole in the top of the flour using your finger or spoon.
Add the salt into that little space and lightly cover it with some surrounding flour.
I find this helps prevent the salt touching the yeast mixture too early which can sometimes affect the rise.
Step Seven: Insert the pan
Place the bread pan back into the bread machine securely.
Double check everything is sitting properly before starting the cycle.
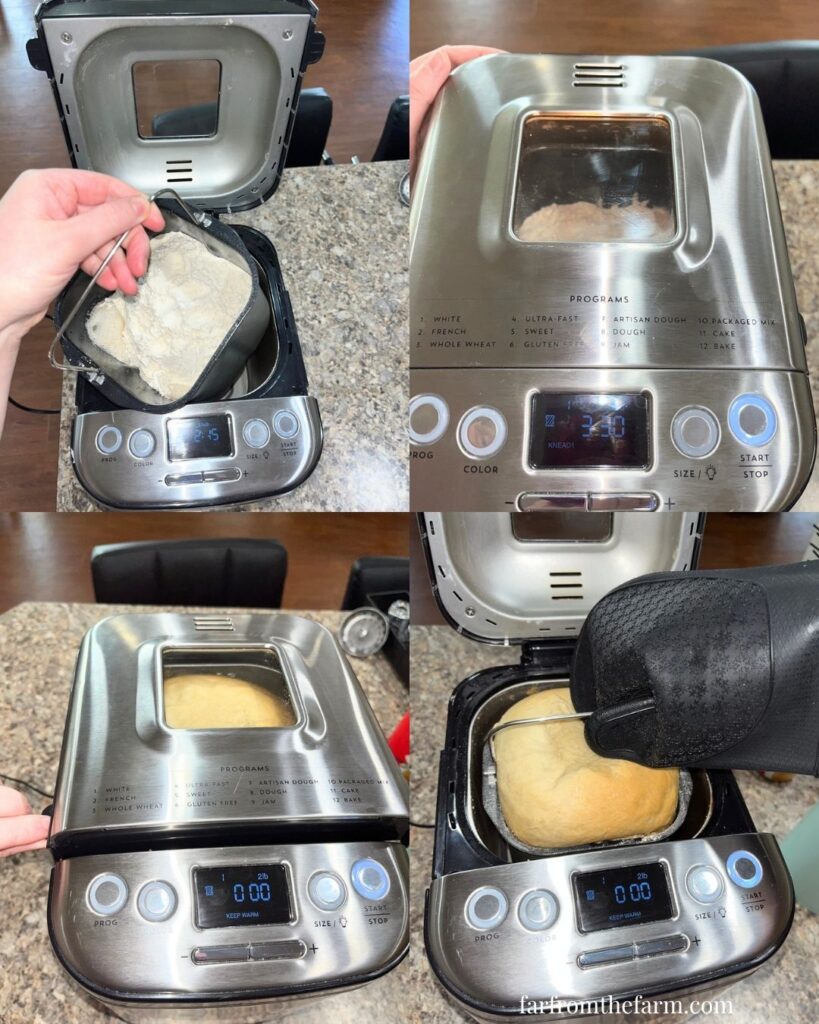
Step Eight: Select the settings
Choose the white bread programme on your bread machine.
Select the 2 lb loaf setting and your preferred crust color.
We used medium crust for the loaf shown in the photos and video.
Press start and allow the bread machine to do all the work.
Most white bread cycles take around 3 1/2 hours from start to finish.
Step Nine: Cool the bread
Once the bread has finished baking, carefully remove the pan from the machine.
Tip the loaf out onto a cooling rack.
Cover loosely with a clean towel while cooling because this helps keep the crust softer.
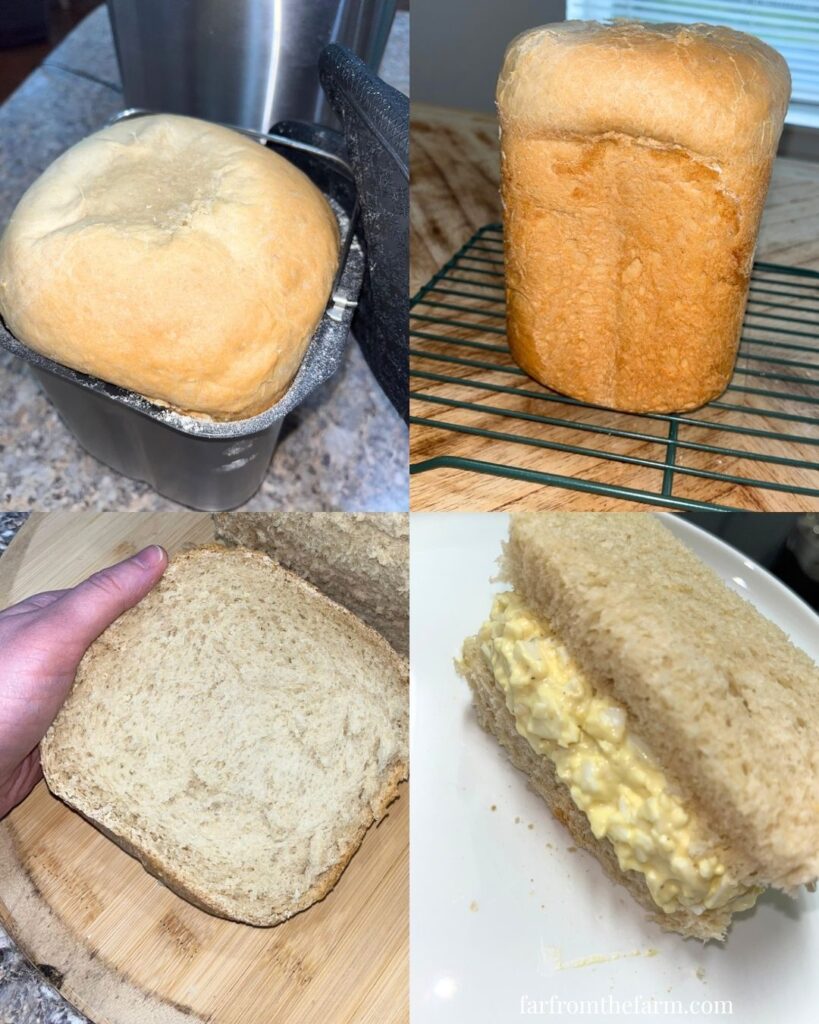
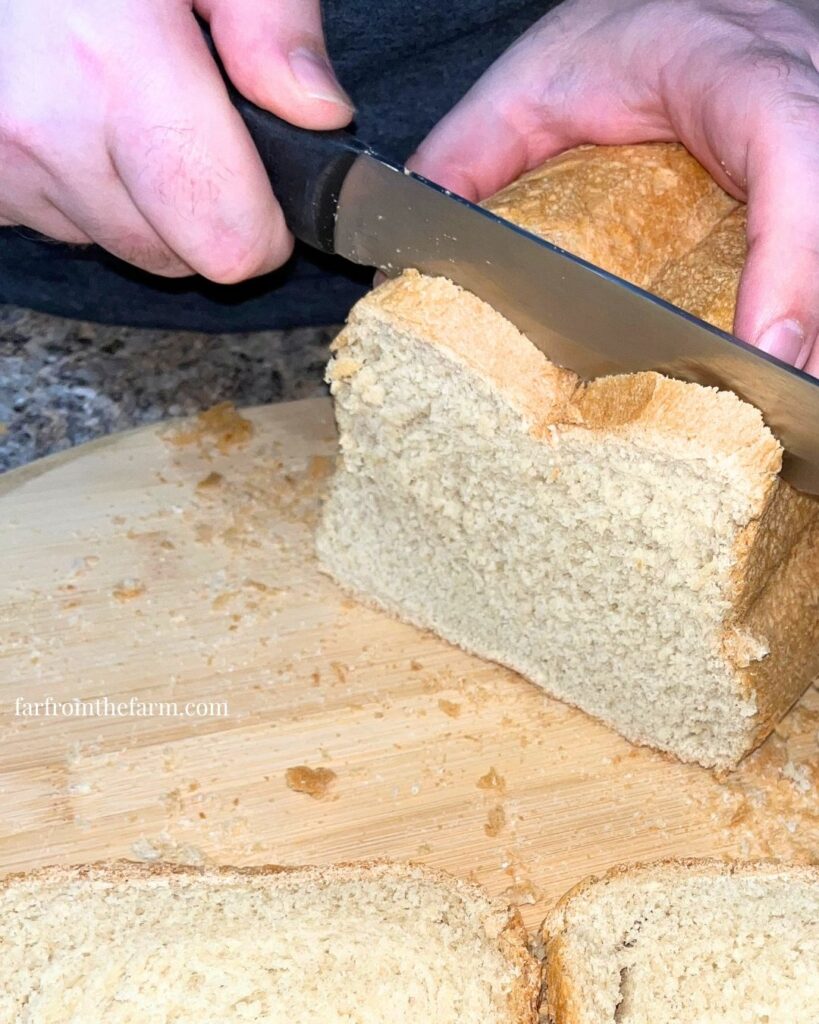
Step Ten: Slice and enjoy
Allow the bread to cool fully before slicing for the best texture and crumb.
This loaf slices beautifully for sandwiches and also freezes very well.
We usually freeze leftover slices so we always have bread ready for toast.
Notes and Troubleshooting
Notes
- Using half all purpose flour and half bread flour creates an extra soft texture while still keeping good structure.
- Honey adds subtle sweetness without overpowering savory sandwich fillings.
- Medium crust gives a lovely soft exterior while still holding shape well.
- This loaf freezes beautifully once sliced.
Troubleshooting
- Too dense? Your yeast may not have activated properly or your water may have been too cool.
- Loaf collapsing on top? Too much liquid or slightly too much yeast can sometimes cause this.
- Bread too dry? Check flour measurements carefully because adding too much flour changes the texture quickly.
- Crust too firm? Try using the light crust setting next time and cover the loaf with a clean towel while cooling.
Storage
- Store bread in an airtight container or bread bag at room temperature for up to 3 days.
- Slice and freeze leftovers for longer storage.
- Toast straight from frozen as needed.
Serving Ideas
- Egg salad sandwiches
- Grilled cheese
- Toast with butter and jam
- Peanut butter sandwiches
- French toast
- Serve alongside soup or pasta
- Garlic toast for spaghetti night
Why You’ll Love This Recipe!
- Extra soft sandwich bread texture
- Perfect balance of fluffiness and structure
- Budget friendly ingredients
- Easy bread machine method
- Freezer friendly
- Great for family sandwiches
- Honey adds gentle flavor without too much sweetness
- Reliable everyday loaf recipe
FAQ
Can I use only bread flour?
Yes, but the loaf will have slightly more chew and structure.
Can I use only all purpose flour?
Yes. The bread will still work but may be slightly softer and less structured.
Can I use olive oil instead of vegetable oil?
Absolutely. I love to use olive oil if I’m serving this with something savoury. But I do find vegetable oil is best for a neutral flavor though, and gives more of a classic store-bought sandwich bread result.
Do I need to proof the yeast first?
You technically do not have to and you usually won’t find that step in bread machine instruction manuals. But I personally prefer blooming it first because it helps avoid wasted ingredients if the yeast is inactive.
Can I freeze this bread?
Yes! Slice first, freeze in a freezer bag, and toast slices straight from frozen.

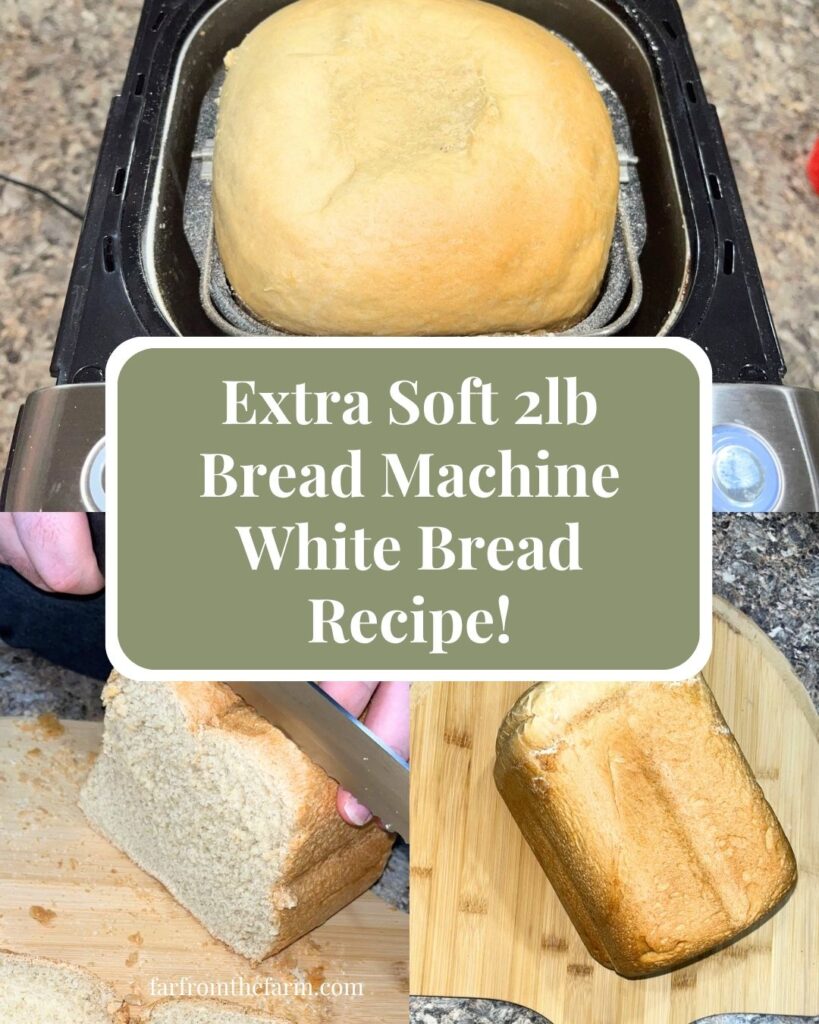
Extra Soft 2lb Bread Machine White Bread Recipe with Video!
Ingredients
Equipment
Method
- Pour the warm water into the bread machine pan. Add the honey and stir briefly.
- Add the yeast and stir gently. Cover loosely with plastic wrap or a clean towel and leave for 5 to 10 minutes until frothy and bubbly.
- If the yeast mixture is bubbly, add the vegetable oil.
- Add both flours on top of the liquid mixture. Do not stir.
- Make a small hole in the flour and add the salt, lightly covering it with surrounding flour.
- Insert the bread pan into the bread machine securely.
- Select the white bread programme, 2 lb loaf size, and medium crust setting.
- Press start and allow the bread machine to complete the full cycle. Most cycles take around 3 1/2 hours.
- Carefully remove the finished loaf and place onto a cooling rack.
- Cover loosely with a clean towel while cooling to help keep the loaf soft.
- Allow the bread to cool fully before slicing.
Notes
- Using half all purpose flour and half bread flour gives a softer sandwich bread texture while still keeping good structure.
- Honey adds gentle sweetness without making the loaf overly sweet.
- Medium crust gives a soft exterior while still holding shape well.
- Blooming the yeast first helps avoid wasted ingredients from inactive yeast.
- This loaf freezes beautifully once sliced.
Storage
- Store bread in an airtight container or bread bag at room temperature for up to 3 days.
- Slice and freeze leftovers for longer storage.
- Toast slices straight from frozen as needed.
Related Recipes
- Check out all our Bread Machine Recipes!
Nutrition information is automatically calculated, so should only be used as an approximation.
Looking for more homemaking inspiration?

It’s so important to be part of a community that not only understands you but that champions you, encourages, challenges and cheers you on. We couldn’t find one – so we created it instead!
Join the Side Hustle Homemakers Team Julie, Sam and I over at the Recipes, Homesteading and More! Facebook Group for Food Blogging Tips, Homesteading and Homemaking content and encouragement!
We’re 3 very different US/UK military families who met and became instant forever friends. We share what’s working in our kitchens, gardens, homes and more!
We created the group to share real life around recipes, homesteading, homemaking and more. Head on over, say Hi, share you tips and gain some friends and knowledge along the way!
The Takeaway
This extra soft 2lb bread machine white bread is a reliable sandwich loaf for everyday family meals.
The half all purpose flour and half bread flour combination gives you a softer crumb than a full bread flour loaf, while still keeping enough structure for slicing, sandwiches, grilled cheese, toast, and freezer storage.
The honey adds gentle sweetness, the vegetable oil helps keep the loaf soft, and the bread machine handles the mixing, kneading, rising, and baking for you.
If you want an easy bread machine white bread recipe that makes a full 2lb loaf and works for real-life lunches, this is a practical one to keep in your weekly rotation.
What to Try Next?!


Share & Rate This Recipe!
If this extra soft bread machine loaf becomes part of your weekly routine too, I’d love if you could leave a quick review on the recipe card and share it with another bread loving friend!
Last update on 2026-07-02 / Affiliate links / Images from Amazon Product Advertising API