A Roundup of Creative Projects from Budget to Bougie for Memorial Day Weekend!
Memorial Day isn’t just about red, white, and blue—it’s about remembrance.
One of the most meaningful ways to mark the day is by crafting something with your hands, whether it’s a simple Dollar Tree project with the kids or a more elegant centerpiece for your holiday table.
This roundup features ten craft ideas that span every budget and style—from quick kid-friendly activities to beautiful home decor you’ll want to keep up all summer long.
Each craft includes a short description and links to helpful tutorials, so you can jump straight into the fun without a ton of prep!
Patriotic Mesh Wreath
Creating a vibrant and patriotic wreath doesn’t have to be expensive. With this simple tutorial you can craft a stunning red, white, and blue deco mesh wreath that’s perfect for Memorial Day and doesn’t break the bank!
Materials Needed:
- Wire wreath frame
- Red, white, and blue deco mesh rolls
- Pipe cleaners or floral wire
- Optional: Decorative accents like mini flags, stars, or ribbons
Instructions:
- Prepare the Mesh: Cut the deco mesh into uniform strips, approximately 6-8 inches in length.
- Form Ruffles: Gather each strip in the center to create a ruffle effect.
- Attach to Frame: Use pipe cleaners or floral wire to secure the ruffles onto the wire wreath frame, alternating colors to achieve a balanced look.
- Add Decorations: Incorporate optional decorative accents to enhance the wreath’s festive appearance.
This project is beginner-friendly and allows for personalization based on your preferred aesthetic.
Craft Essentials:
- Red, white, and blue deco mesh rolls – wide and flexible for full wreath coverage
- Wire wreath frame – standard size, works well with mesh or ribbon projects
Available from Amazon.com [ad]


Painted Popsicle Stick Flags
Engaging children in crafting activities is a wonderful way to teach them about the significance of Memorial Day.
Creating painted popsicle stick flags is a simple and enjoyable project that results in charming decorations for your home or classroom.
Materials Needed:
- Jumbo popsicle sticks
- Red, white, and blue acrylic paint
- Paintbrushes
- Glue
- Star stickers or white paint pen
- Optional: Ribbon or string for hanging
Instructions:
- Prepare the Popsicle Sticks: Lay out seven jumbo popsicle sticks. Paint four sticks red and three sticks white to represent the stripes of the flag. Allow them to dry completely.
- Create the Union (Blue Section): Cut two smaller pieces from another popsicle stick and paint them blue. Once dry, these will be attached to the top left corner of the flag.
- Assemble the Flag: Align the painted red and white sticks horizontally, alternating colors. Use glue to attach two unpainted popsicle sticks vertically across the back to hold them together.
- Add the Union: Glue the blue-painted pieces onto the top left corner of the assembled flag.
- Decorate with Stars: Apply star stickers onto the blue section or use a white paint pen to draw stars.
- Optional Hanging Feature: Attach a ribbon or string to the back of the flag for easy hanging.
This craft is not only fun but also serves as a meaningful way to discuss the importance of Memorial Day with children.
Craft Essentials:
- Jumbo popsicle sticks: Sturdy and ideal for crafting
- Acrylic paint set: Includes red, white, and blue colors
Available from Amazon.com [ad]


Mason Jar Lanterns
Illuminate your Memorial Day gatherings with charming mason jar lanterns. This craft is versatile, allowing for personalization to match your décor, and is suitable for both adults and children under supervision.
Materials Needed:
- Mason jars: Clear glass jars of any size.
- Tissue paper: Red, white, and blue colors.
- Mod Podge or diluted white glue: Acts as an adhesive and sealant.
- Foam brush or paintbrush: For applying the adhesive.
- Scissors: To cut tissue paper into desired shapes.
- Twine or ribbon: Optional, for hanging or decorative accents.
- Tea light candles or LED lights: To illuminate the jars.
- Star stickers or stencils: Optional, for creating patterns.
Instructions:
- Prepare the Jars: Ensure the mason jars are clean and dry.
- Cut Tissue Paper: Cut the tissue paper into desired shapes or strips.
- Apply Adhesive: Using the foam brush, apply a thin layer of Mod Podge to a section of the jar’s exterior.
- Attach Tissue Paper: Place the tissue paper onto the glued area, smoothing out any wrinkles.
- Seal the Design: Once the jar is covered as desired, apply another layer of Mod Podge over the tissue paper to seal it.
- Add Decorations: Attach star stickers or use stencils to add patterns.
- Dry Completely: Allow the jars to dry thoroughly.
- Insert Lighting: Place a tea light candle or LED light inside the jar.
- Add Finishing Touches: Tie twine or ribbon around the jar’s neck for added decoration or to create a handle.
These lanterns can be used to line walkways, as table centerpieces, or hung from trees to create a festive ambiance.
Craft Essentials:
- Mason Jars: Classic Ball mason jars
- Mod Podge: Sealer, glue, and finish in one.
- LED Tea Light Candles: Safe, flameless lighting option.
Available from Amazon.com [ad]


Patriotic Handprint Canvas
Creating a Patriotic Handprint Canvas is a heartfelt and personalized way to commemorate Memorial Day.
This craft is suitable for children and adults alike, resulting in a keepsake that can be displayed during patriotic holidays or gifted to loved ones.
Materials Needed:
- Blank canvas: Choose your preferred size; an 8×10-inch canvas works well.
- Acrylic paint: Red, white, and blue colors.
- Paintbrushes: Various sizes for detailing.
- Palette or disposable plate: For mixing and holding paints.
- Water cup: To rinse brushes.
- Paper towels or cloth: For cleaning hands and brushes.
- Optional: Star stickers or stencils for added decoration.
Instructions:
- Prepare the Canvas: Lay the canvas flat on a protected surface. Ensure hands are clean and dry before starting.
- Paint the Hand: Using a paintbrush, apply blue paint to the palm and base of the thumb, and red and white stripes to the fingers, mimicking the American flag’s design.
- Make the Handprint: Carefully press the painted hand onto the canvas, positioning it as desired. Gently lift the hand straight up to avoid smudging.
- Add Stars: Once the handprint is dry, use white paint to add stars to the blue area, or apply star stickers for a three-dimensional effect.
- Personalize: Consider adding the date, a meaningful quote, or the names of individuals being honored.
- Allow to Dry: Let the canvas dry completely before displaying or gifting.
This craft not only serves as a decorative piece but also as a meaningful tribute to those who have served.
Craft Essentials:
- Acrylic Paint Set: Includes red, white, and blue colors.
- Blank Canvas Pack: Multiple sizes available for various projects.
Available from Amazon.com [ad]

DIY Poppy Pin
Crafting your own poppy pin is a simple but deeply meaningful way to honor the fallen on Memorial Day.
This wearable symbol is especially fitting for church events, school ceremonies, or simply as a quiet tribute throughout the day.
While the red poppy isn’t as commonly used in the U.S. as it is in the UK, Canada, or Australia, it remains a powerful emblem of remembrance.
In those countries, wearing a red poppy—especially around Remembrance Day in November—is a widely embraced tradition, symbolizing the blood shed by those who served.
Including it in your Memorial Day craft lineup brings both beauty and gravity to your observance.
Materials Needed:
- Red felt or fabric – for the poppy petals
- Black button or black felt – for the center
- Green felt (optional) – for leaves
- Scissors – for shaping petals and leaves
- Hot glue gun or fabric glue – for assembly
- Pin backing – to make it wearable
Instructions:
- Cut the Petals: Cut four simple petal shapes from red felt.
- Assemble the Flower: Overlap the petals to form a full circle, gluing them at the center.
- Add the Center: Attach a black button or a circle of black felt to represent the flower’s center.
- Optional Leaf Detail: Add green felt leaves to the back if desired.
- Attach the Pin: Secure the pin backing using strong adhesive or hot glue.
This craft is easy to replicate in bulk, making it a lovely group activity for church craft nights or classrooms—and the finished poppies can be worn or gifted to guests.
Craft Essentials:
- Red felt sheets (or tissue paper) – soft and easy to cut for petals
- Black buttons – ideal for creating the flower center
- Pin backings – secure and easy to attach


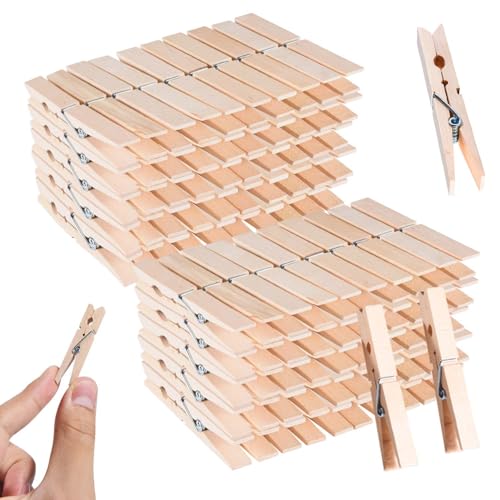
Patriotic Clothespin Wreath
A patriotic clothespin wreath is a charming and budget-friendly way to adorn your home for Memorial Day.
This craft transforms simple materials into a vibrant decoration that showcases the red, white, and blue.
Materials Needed:
- Wire wreath frame: A 14-inch frame works well.
- Wooden clothespins: Approximately 70.
- Spray paint: Red, white, and blue colors.
- Wooden stars: Optional, for added embellishment.
- Hot glue gun and glue sticks: For attaching decorations.
Instructions:
- Prepare the Clothespins: Divide the clothespins into three groups: 25 for red, 25 for white, and 20 for blue.
- Paint the Clothespins: Spray paint each group of clothespins in their respective colors. Allow them to dry completely.
- Attach Clothespins to Wreath Frame: Clip the blue clothespins onto one section of the wreath frame to represent the flag’s stars section. Alternate red and white clothespins around the remaining sections to create the stripes.
- Add Stars: If using wooden stars, paint them white and let them dry. Then, glue them onto the blue section of the wreath.
This wreath serves as a festive decoration for your front door or indoor spaces during Memorial Day celebrations.
Craft Essentials:
- Wire wreath frame: Sturdy base for attaching clothespins.
- Wooden clothespins: Standard size, suitable for painting.
- Acrylic spray paint set: Includes red, white, and blue colors.


Patriotic Bandana Tablecloth
Creating a patriotic bandana tablecloth is a simple and festive way to enhance your Memorial Day décor. This craft is budget-friendly and adds a vibrant touch to your table setting.
Materials Needed:
- Red, white, and blue bandanas: Typically, 12-15 bandanas, depending on table size.
- Sewing machine or fabric glue: For assembling the tablecloth.
- Iron: To press bandanas before assembly.
Instructions:
- Plan the Layout: Lay the bandanas on a flat surface, arranging them in a pattern that suits your aesthetic and fits your table dimensions.
- Prepare the Bandanas: Iron each bandana to remove wrinkles, ensuring a smooth finish.
- Assemble the Rows: Sew or glue bandanas edge-to-edge to form rows. Ensure consistent seam allowances for a uniform appearance.
- Join the Rows: Connect the rows together using your chosen method, aligning the seams carefully.
- Finish the Edges: Hem the outer edges for a polished look and to prevent fraying.
This tablecloth can be reused for future patriotic events and adds a personalized touch to your celebrations.
Craft Essentials:
- Assorted bandanas: Red, white, and blue patterns.
- Fabric glue: For no-sew assembly.
Available from Amazon.com [ad]


Painted Lawn Stars
Adding painted stars to your lawn is a festive and eye-catching way to celebrate Memorial Day.
This simple project transforms your yard into a patriotic display, perfect for gatherings and celebrations.
Materials Needed:
- Cardboard or poster board: For creating the star stencil.
- Utility knife or scissors: To cut out the stencil.
- Water-based marking spray paint: Red, white, and blue colors.
- Protective gloves and mask: For safety during painting.
Instructions:
- Create the Star Stencil: Draw a star shape of your desired size onto the cardboard. Carefully cut out the star to create a stencil.
- Position the Stencil: Lay the stencil flat on the area of the lawn where you want the star to appear.
- Apply the Paint: Wearing protective gloves and a mask, spray the paint over the stencil, ensuring even coverage. For a vibrant display, alternate between red, white, and blue paints.
- Remove the Stencil: Carefully lift the stencil to reveal the painted star.
- Repeat: Continue the process to create multiple stars across your lawn as desired.
This decoration is temporary and will naturally fade after a few mowings or with rainfall, making it ideal for short-term celebrations.
Craft Essentials:
- Water-based marking spray paint: Safe for grass and provides vibrant colors.
- Cardboard sheets or star stencil: Sturdy material for creating reusable stencils (or buy one ready made!)
Available from Amazon.com [ad]


Patriotic Mason Jar Lanterns
Illuminate your Memorial Day celebrations with these charming patriotic mason jar lanterns. This craft is simple, budget-friendly, and adds a festive glow to your décor.
Materials Needed:
- Mason jars: Cleaned and labels removed.
- Red, white, and blue tissue paper: Cut into small squares or shapes.
- Mod Podge or white glue: For adhering the tissue paper.
- Foam brush: For applying glue.
- Twine or ribbon: For decorating the jar rim.
- Tea light candles or LED lights: To illuminate the jars.
Instructions:
- Prepare the Jars: Ensure mason jars are clean and dry.
- Cut Tissue Paper: Cut red, white, and blue tissue paper into small squares or desired shapes.
- Apply Glue: Using the foam brush, apply a thin layer of Mod Podge to a section of the jar’s exterior.
- Attach Tissue Paper: Place tissue paper pieces onto the glued area, overlapping slightly for a collage effect.
- Seal the Design: Once the jar is covered, apply another layer of Mod Podge over the tissue paper to seal it. Allow it to dry completely.
- Add Decorative Touches: Tie twine or ribbon around the neck of the jar for added flair.
- Insert Lighting: Place a tea light candle or LED light inside the jar to illuminate.
These lanterns serve as festive centerpieces or walkway illuminations during Memorial Day events.
Craft Essentials:
- Mod Podge: Versatile decoupage glue for various crafts.
- Foam Brushes: Ideal for smooth glue application.
- LED Tea Lights: Safe and reusable lighting option.
Available from Amazon.com [ad]


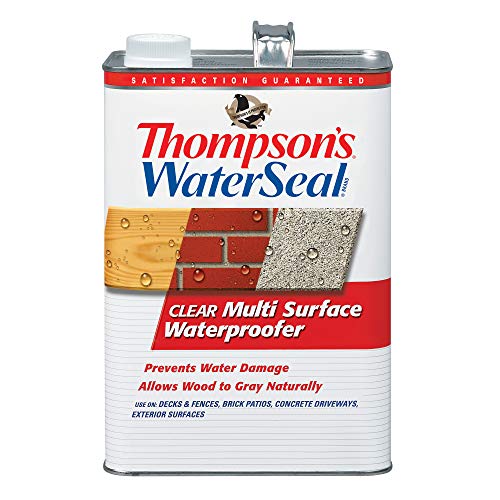
American Flag Pallet Art
Creating an American flag from reclaimed pallet wood is a rustic and patriotic addition to your Memorial Day décor. This project repurposes materials to craft a meaningful piece of art suitable for both indoor and outdoor display.
Materials Needed:
- Wood pallet: Ensure it’s clean and free from harmful chemicals.
- Hammer and nails or wood screws: For assembly.
- Sandpaper or sanding block: To smooth the wood surface.
- Painter’s tape: For masking areas during painting.
- Red, white, and blue paint: Suitable for wood surfaces.
- Paintbrushes: Various sizes for different sections.
- Star stencil or star stickers: To create the stars section.
- Clear sealant (optional): To protect the finished piece.
Instructions:
- Prepare the Pallet: Disassemble the pallet if necessary, and sand all pieces to remove rough edges and splinters.
- Assemble the Flag Base: Arrange the pallet planks horizontally to form the flag’s stripes. Secure them together using additional wood pieces on the back and nails or screws.
- Mark the Union Section: Use painter’s tape to delineate the blue field (union) in the top left corner.
- Paint the Stripes: Alternate painting the planks red and white, starting with red at the top. Allow the paint to dry completely.
- Paint the Union: Paint the marked-off section blue and let it dry thoroughly.
- Add the Stars: Place the star stencil or stickers on the blue section and paint them white. Once dry, remove the stencil or stickers carefully.
- Apply Sealant (Optional): To protect your artwork, especially if displayed outdoors, apply a clear sealant over the entire piece.
This handcrafted flag serves as a striking symbol of patriotism and can be displayed on porches, in living rooms, or at community events.
Craft Essentials:
- Acrylic Paint Set: Includes red, white, and blue colors suitable for wood.
- Clear Wood Sealant: Protects the finished piece from weather elements.
Available from Amazon.com [ad]

The Takeaway
Memorial Day is a time for remembrance, reflection, and appreciation. These ten crafts—from kid-friendly handprint flags to more involved projects like American flag pallet art—offer something for every skill level and budget.
Whether you’re crafting with your children, decorating your porch, or preparing your home for a gathering, these DIYs allow you to participate in the day with intentionality and heart.
More than just decorations, these creations become conversation starters and ways to honor the real meaning of the holiday.
And many of them are reusable for the Fourth of July and Labor Day, making them a worthwhile investment of both time and creativity!
What to Read Next?

Share this Post!
Loved these creative Memorial Day craft ideas?
Share this article with a friend, pin it to your patriotic Pinterest board, or send it to your church or homeschool group to inspire meaningful projects this May!
Last update on 2026-07-27 / Affiliate links / Images from Amazon Product Advertising API