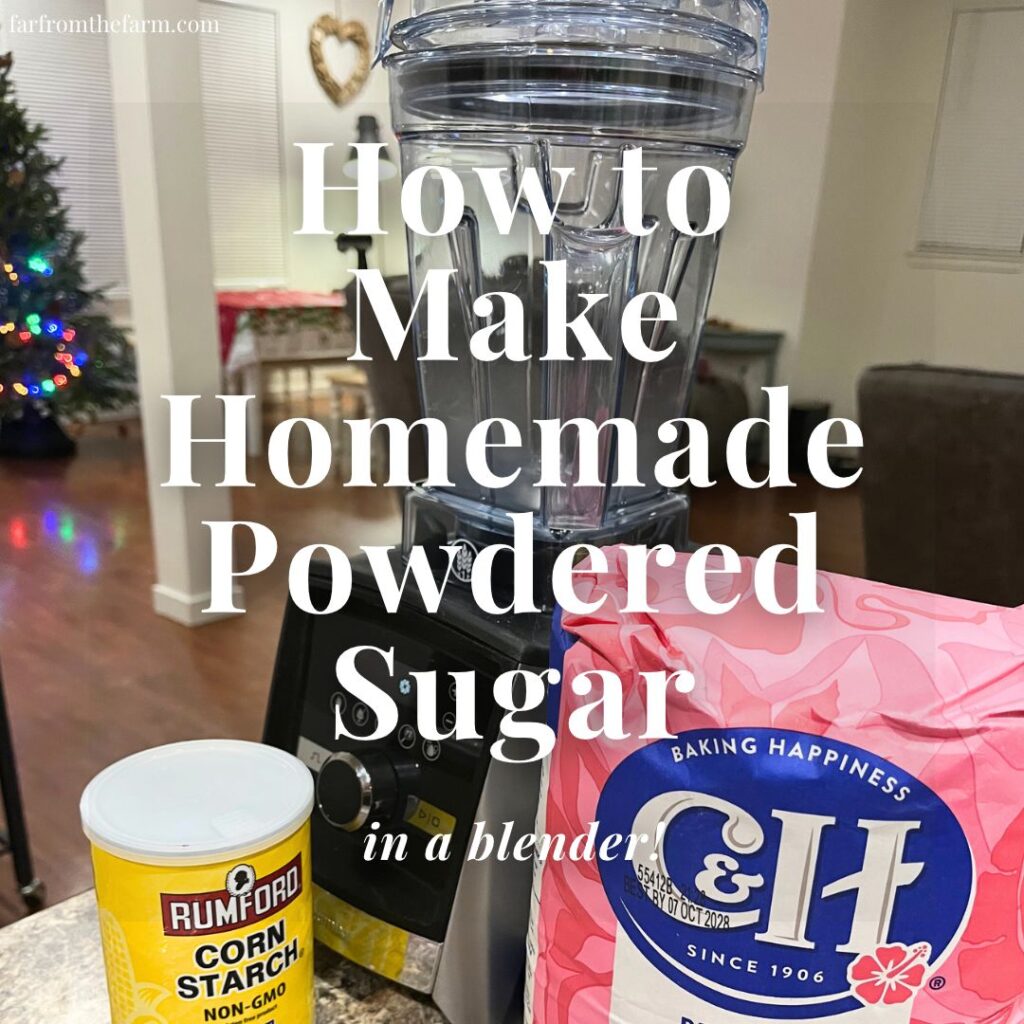
Turn ordinary granulated sugar into soft, fluffy confectioners’ sugar (icing sugar) in 2 minutes using a Vitamix or high-speed blender – perfect for last minute baking!
“Whether you call it powdered sugar here in the States or icing sugar back home in Britain, making your own in a blender takes just two minutes and two pantry staples, saving you a last-minute trip to the supermarket when you’re halfway through a batch of buttercream!” – Mona, Far From The Farm.
Homemade powdered sugar is one of those incredibly useful little kitchen staples that can save you a trip to the supermarket when you’re halfway through baking! If you’ve got granulated sugar and a decent blender sitting in your kitchen, you can make your own in just a few minutes.
Hi! If you’ve been following me for long you’ll already know this, but for those who are new, welcome to Far From The Farm. I’m Mona, the Brit behind the recipes, learning life and food in the States while sharing our debt-free journey and what’s on the menu in our home today!
One of the funny little things about moving from Britain to America has been getting used to all the different names for everyday ingredients. Back home, we’d call this icing sugar.
Here in the States, you’ll usually find it labelled powdered sugar or confectioners’ sugar. Same general ingredient, different name, and another one to add to my ever-growing list of British and American food differences!
And if you do much baking at home, you’ll know just how annoying it is to discover you’ve run out of something when you’re already halfway through making a recipe. You’ve got the cake cooling, the cookies waiting to be decorated or the buttercream ready to mix, and suddenly there’s no powdered sugar left in the cupboard.
It’s hardly worth getting in the car for one ingredient, especially when you probably already have everything you need to make a perfectly useful homemade alternative.
That’s one of the reasons I love learning how to make more of our everyday pantry staples from scratch. Not everything needs to come ready-made in a packet, and sometimes the simplest kitchen tricks turn out to be the most useful.
We’ve been making more and more things at home as part of our efforts to stretch the grocery budget. As a military family working through Baby Step 2 of our debt-free journey, every penny we can save or stretch that little bit further genuinely helps. It’s not about making everything from scratch for the sake of it, but about being a little more resourceful with what we’ve already got.
And sometimes that means discovering you don’t actually need to buy another bag of something when there’s a perfectly good alternative sitting in your kitchen cupboard!
And just a reminder that if you’re struggling and you need help with managing your budget or starting your own debt free journey then here’s some FREE resources below you may find helpful!
living frugally and fully
free tips and resources to make the most of what you have
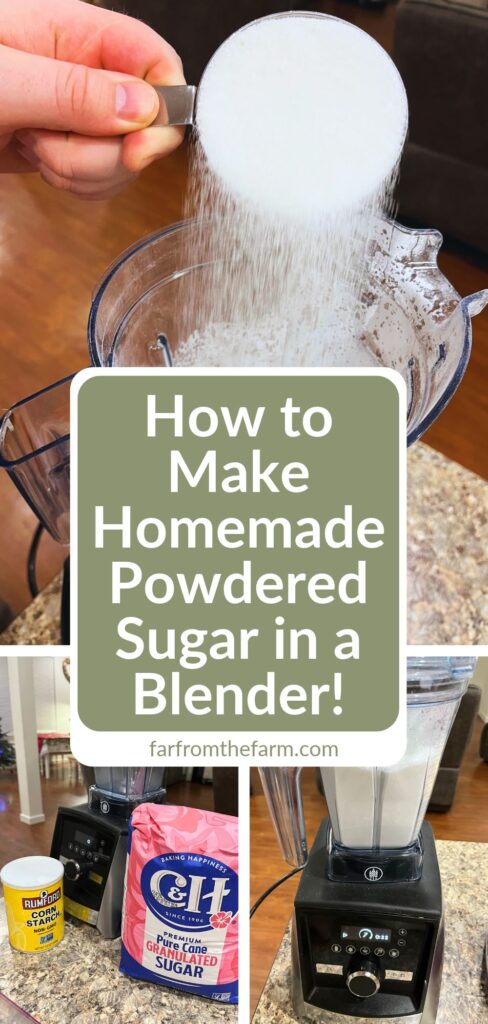
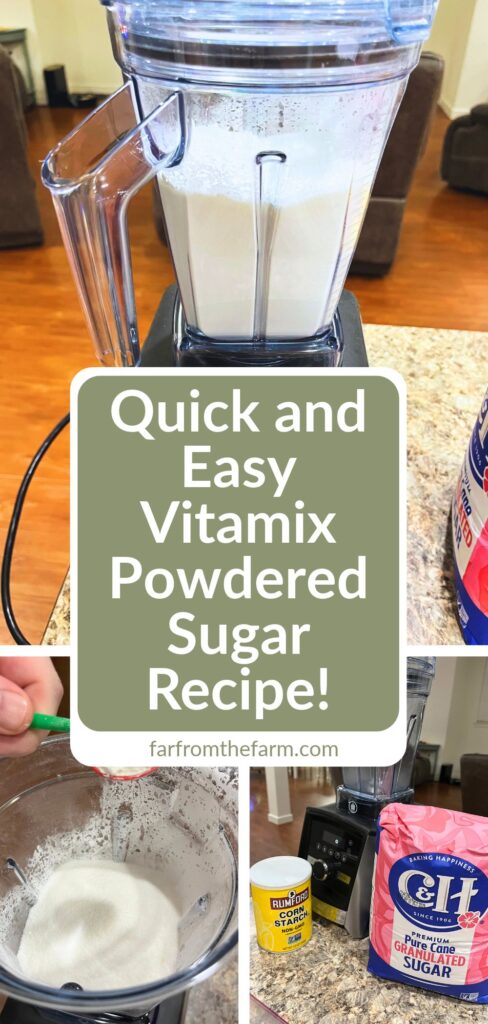
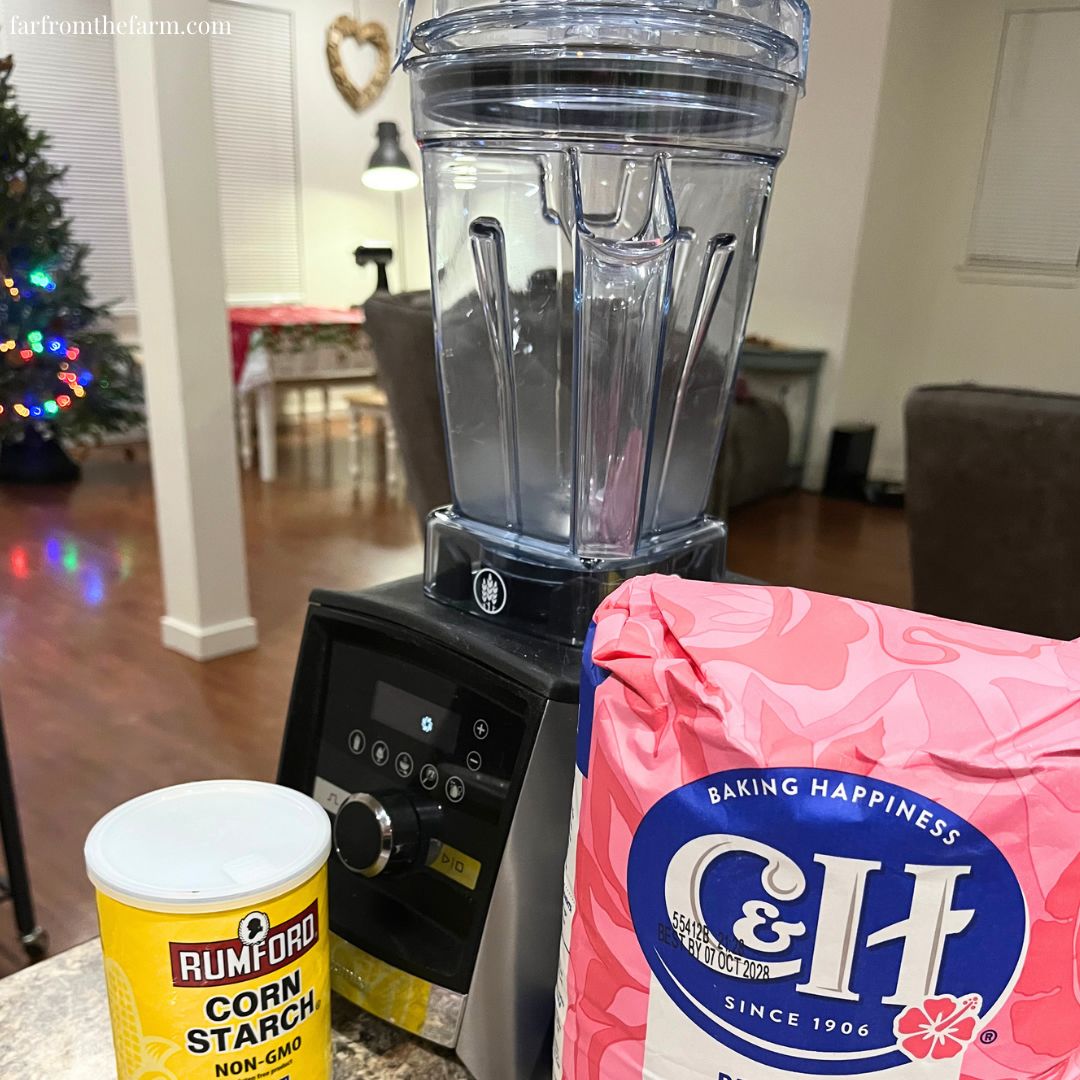
For this particular batch, we used our Vitamix blender along with ordinary white granulated sugar and powdered cornstarch. Nothing particularly fancy, and certainly nothing that required a special trip to the shops. The finished powdered sugar went straight into a large labelled freezer bag, ready to use whenever we needed it.
It’s easy and you can make it in whatever quantity suits your baking plans. If you only need a little for dusting over a dessert, there’s no need to make an enormous batch, provided your blender can handle the smaller quantity. If you’re planning ahead for a few baking projects, you can make more and keep it stored in a dry, airtight container.
Of course, there are occasions when commercially manufactured powdered sugar is worth buying, particularly if you need an exceptionally fine, consistent texture for delicate cake decorating. But for plenty of everyday baking jobs, knowing how to make your own is a handy skill to have.
As always, these photos are from my real kitchen here in our sweet military base home. No AI recipe images or staged lighting or spotless marble counters. Just real life and real food made in a small space. Proof that you can feed your family well without needing a dream kitchen or fancy tools!
So, if you’ve ever wondered how to turn ordinary granulated sugar into homemade powdered sugar, or icing sugar as we’d call it back in Britain, here’s how we make ours using a blender!
Recipe Disclaimer
All Far From The Farm recipes are shared as a guide based on what works in my home kitchen. Results may vary depending on your ingredients, equipment, and cooking setup, so always use your own judgement. Please check all ingredients for allergies, intolerances, or dietary needs before making any recipe. Far From The Farm is not responsible for any reactions or outcomes from the use of these recipes. Nutritional information is an estimate only.
Mona – Far From The Farm
Why Use a Vitamix Blender to Make Powdered Sugar?
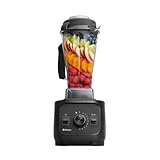
If you’ve already got a Vitamix blender sitting on your kitchen counter, making homemade powdered sugar is another useful way to put it to work!
They’re not cheap – definitely an investment, but Vitamix blenders are particularly good at processing ingredients that need to be ground very finely, thanks to their powerful motors and high-speed blades. That’s exactly what we’re looking for when turning ordinary granulated sugar into something fine enough to use for dusting desserts, making glazes or mixing into everyday frostings.
For the batch photographed here, I used our Vitamix blender. You don’t necessarily need a Vitamix to make powdered sugar, but a high-powered blender makes the job considerably easier than trying to achieve the same results with a less powerful machine.
The finer you can grind the sugar, the closer you’ll get to the soft, powdery consistency of commercially manufactured confectioners’ sugar. Just remember that homemade results can vary, particularly when compared with the exceptionally fine 10X powdered sugar commonly sold in American supermarkets.
Available on Amazon.com [ad]



Is the Vitamix Dry Grains Container Better for Making Powdered Sugar?
If you own a compatible Vitamix Dry Grains Container, it’s a particularly good choice for making homemade powdered sugar.
Unlike the standard wet container, which is primarily designed to pull ingredients down towards the blades, the Dry Grains Container has blades designed to push dry ingredients upwards and away from the blades as they circulate.
That difference is useful when grinding ingredients such as wheat berries, rice and granulated sugar because it helps keep dry ingredients moving through the container rather than simply collecting around the blades.
The Dry Grains Container is also designed to withstand the abrasive nature of grinding dry ingredients regularly. Granulated sugar crystals can gradually cloud the inside of a blender container, so having a dedicated dry container can help preserve your everyday blending jug.
You don’t have to buy a separate Dry Grains Container just to make this recipe, though. Many compatible Vitamix wet containers can also process granulated sugar, and that’s perfectly reasonable for occasional batches when the manufacturer’s instructions allow it.
If you make homemade powdered sugar regularly, grind your own flour or enjoy preparing other dry pantry staples from scratch, the Dry Grains Container becomes a much more worthwhile addition to your kitchen.
One final thing worth remembering is that Vitamix containers aren’t universally interchangeable. Check compatibility with your particular blender before purchasing an additional container.
Available on Amazon.com [ad]

Equipment Needed to Make Homemade Powdered Sugar
- Vitamix blender or another high-speed blender: A powerful blender is ideal for grinding granulated sugar into a fine powder.
- Vitamix Dry Grains Container (optional): Particularly useful if you regularly grind dry ingredients such as sugar, grains or coffee beans.
- Measuring cups and spoons: For measuring the sugar and cornstarch.
- Fine-mesh sieve: To remove any larger sugar crystals and help achieve a smoother finished texture.
- Silicone spatula: For scraping out the finished powdered sugar.
- Airtight container or freezer-safe storage bag: To keep your homemade powdered sugar dry and ready for future baking.
Available on Amazon.com [ad]

Ingredients for Homemade Powdered Sugar (Icing Sugar)
Makes approximately 1 3/4 cups of homemade powdered sugar
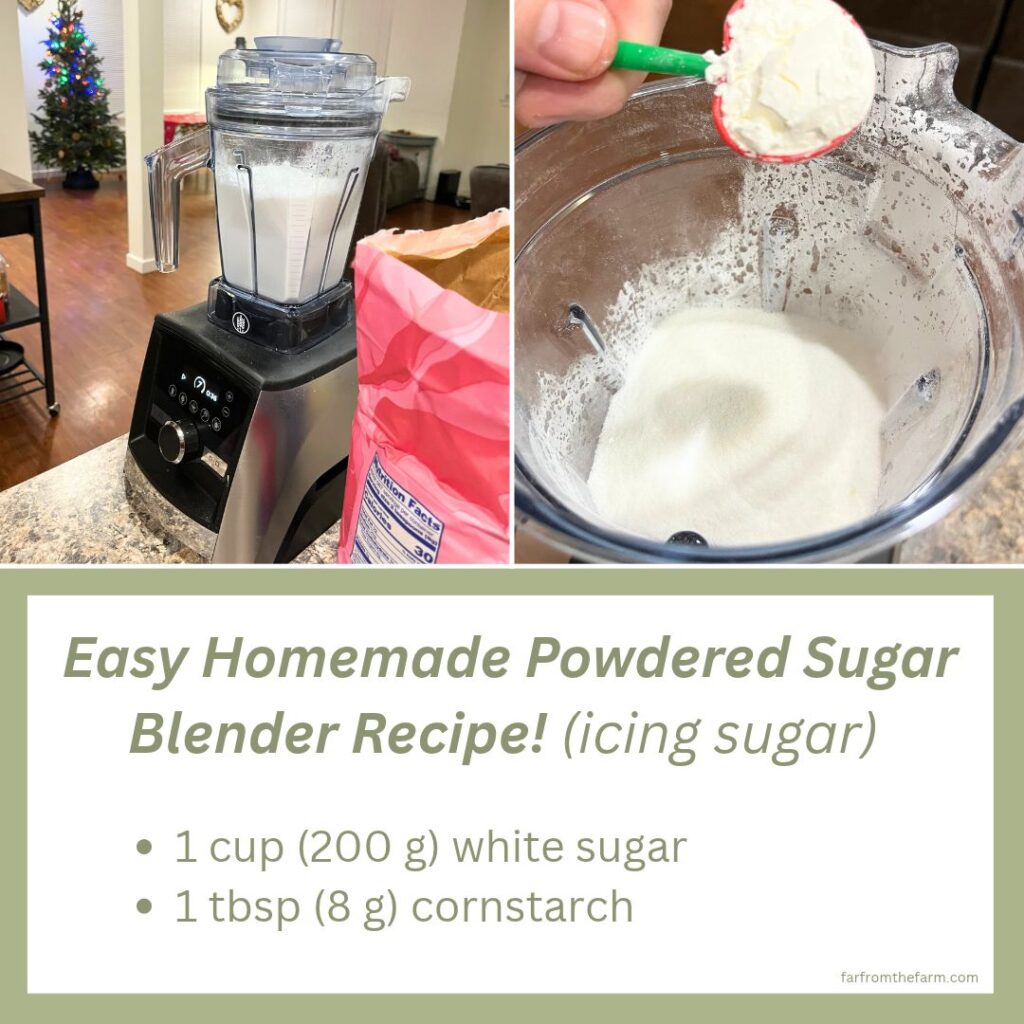
- 1 cup (200 g) white granulated sugar
- 1 tbsp (8 g) cornstarch (optional)
What Kind of Sugar Is Best for Homemade Powdered Sugar?
Regular white granulated sugar is the best starting point for this recipe. It’s inexpensive, readily available in American supermarkets and works well when ground finely in a powerful blender.
For my batch, I used ordinary C&H granulated white sugar. There’s no need to buy superfine sugar or caster sugar specifically for this recipe.
Do You Need Cornstarch to Make Homemade Powdered Sugar?
Not necessarily! You can make powdered sugar using granulated sugar alone, particularly if you’re planning to use it immediately.
However, most commercially packaged powdered sugar in the United States contains a small amount of cornstarch to help prevent clumping during storage.
Adding cornstarch to your homemade version can help keep the finished sugar free-flowing, especially if you’re making a batch to store in the pantry for future baking.
And here’s another little British-American ingredient difference worth knowing: cornstarch in America is called cornflour in Britain. They’re the same ingredient, but American corn flour is something different entirely!
If you’re making powdered sugar for a recipe that specifically requires starch-free sugar, simply leave the cornstarch out.
Step-by-Step Instructions: How to Make Homemade Powdered Sugar in a Blender
Making homemade powdered sugar is surprisingly straightforward, especially if you’re using a high-powered blender like our Vitamix. The trick is to grind the sugar finely enough without overheating it, and to give all those tiny sugar crystals a chance to pass through the blades.
Step 1: Make Sure Your Blender Is Completely Dry
Before you begin, check that your blender container and blades are clean and completely dry.
Even a little leftover moisture can cause the sugar to stick together, making it harder to achieve that lovely fine, powdery consistency.
If you’re using a Vitamix Dry Grains Container, fit it securely onto your blender base. Otherwise, use your regular compatible blender container.
Step 2: Add the Granulated Sugar
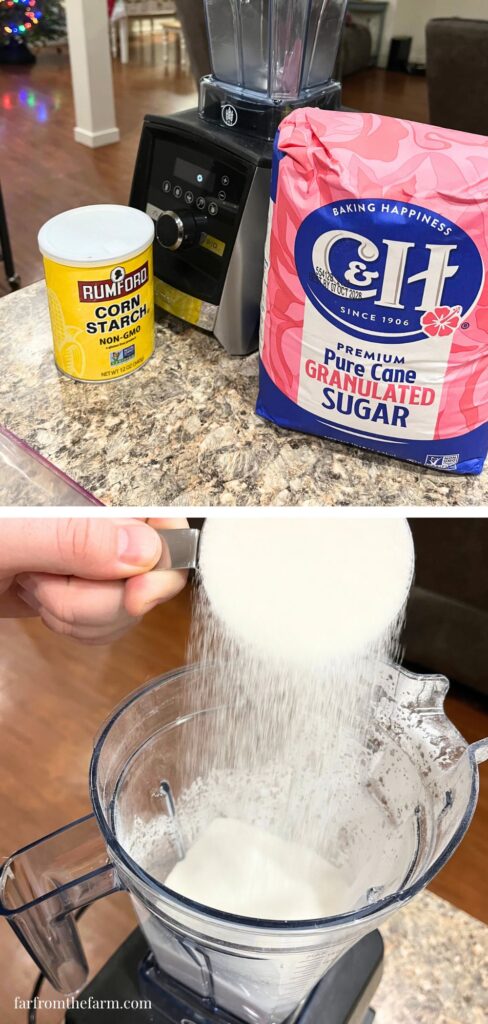
Measure 1 cup (200 g) of white granulated sugar and pour it into your blender container.
Make sure you’re using enough sugar for your particular blender’s blades to process effectively. Very small quantities can sometimes circulate poorly in larger containers, leaving some of the sugar untouched.
Step 3: Add the Cornstarch (Optional)
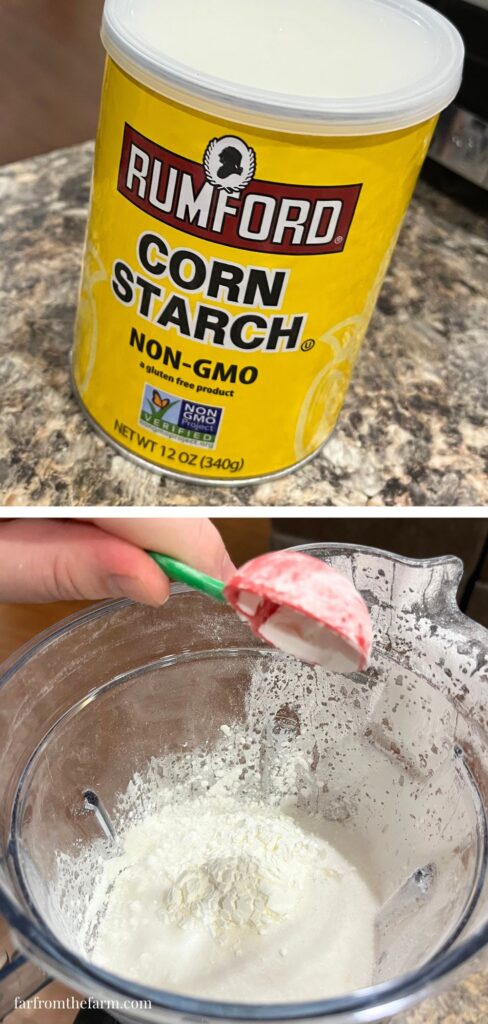
If you’re making powdered sugar to store for future baking, add 1 tbsp (8 g) of cornstarch to the granulated sugar.
The cornstarch helps reduce clumping during storage. If you’re making a small batch to use immediately, or need powdered sugar without added starch, you can leave it out.
Step 4: Blend the Sugar Until Fine and Powdery
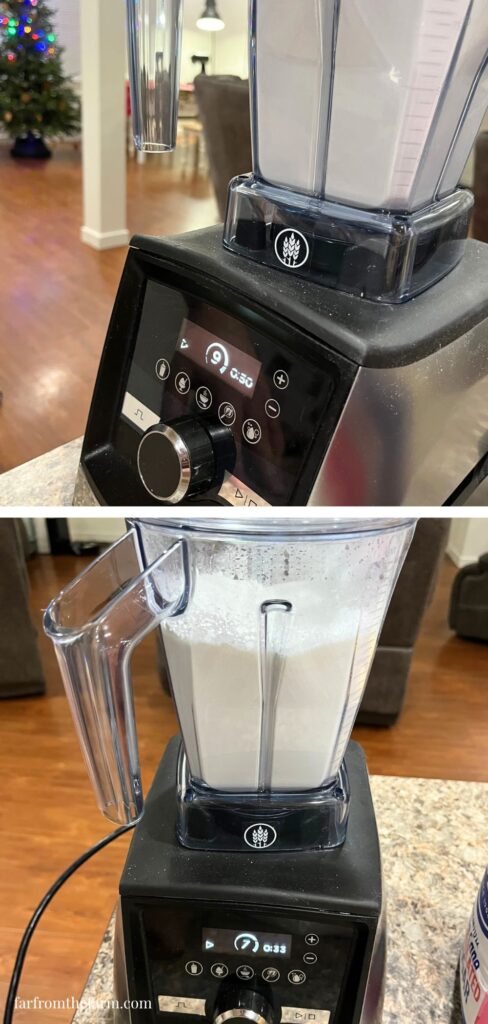
Secure the blender lid and begin blending on a low speed, gradually increasing to high according to your blender manufacturer’s instructions.
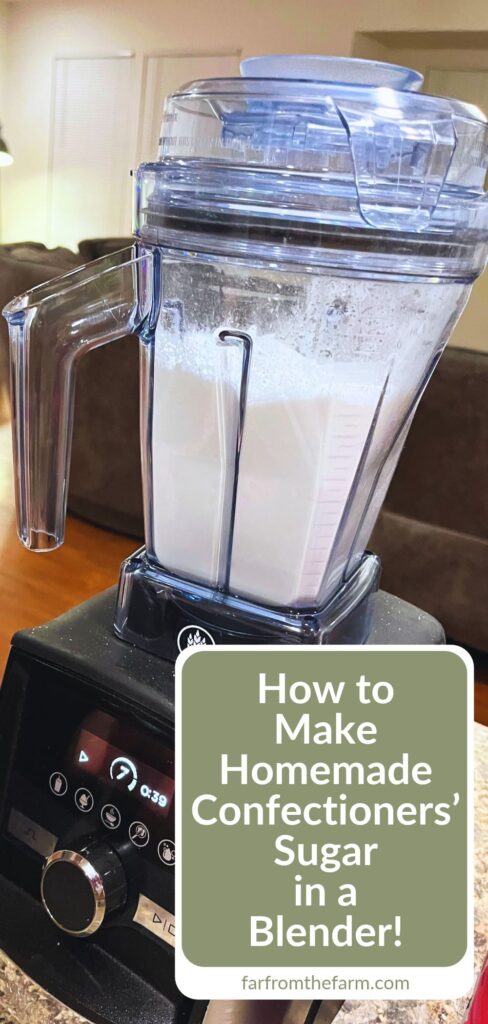
Process the sugar until it becomes a fine, white powder. Depending on your blender and container, this may take around 30 seconds to 2 minutes, although the finished texture matters more than the exact time.
Stop and check the consistency rather than running the blender continuously for longer than necessary. Excessive blending can warm the sugar and encourage clumping.
Step 5: Allow the Powdered Sugar to Settle
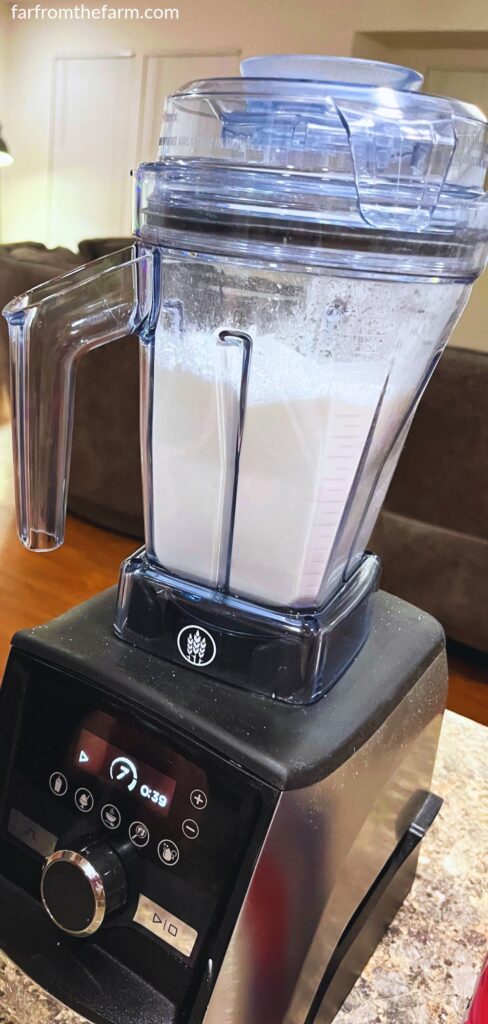
Turn off the blender and leave the lid in place for approximately 1 minute before opening it.
Freshly blended powdered sugar creates a surprisingly fine cloud of sugar dust, particularly when using a powerful blender like a Vitamix!
Giving everything a moment to settle makes transferring the sugar much less messy.
Step 6: Check the Texture and Sift if Necessary
Rub a tiny amount of the finished sugar between your fingers. It should feel soft and powdery rather than noticeably gritty.
If you can still feel larger sugar crystals, return the sugar to the blender and process it briefly again.
For an especially smooth finish, pass the powdered sugar through a fine-mesh sieve. Any larger crystals left behind can go back into the blender for another short round of grinding.
Remember that homemade powdered sugar may not be quite as fine as commercially manufactured 10X confectioners’ sugar, even when using a powerful blender.
Step 7: Use Immediately or Transfer to Airtight Storage
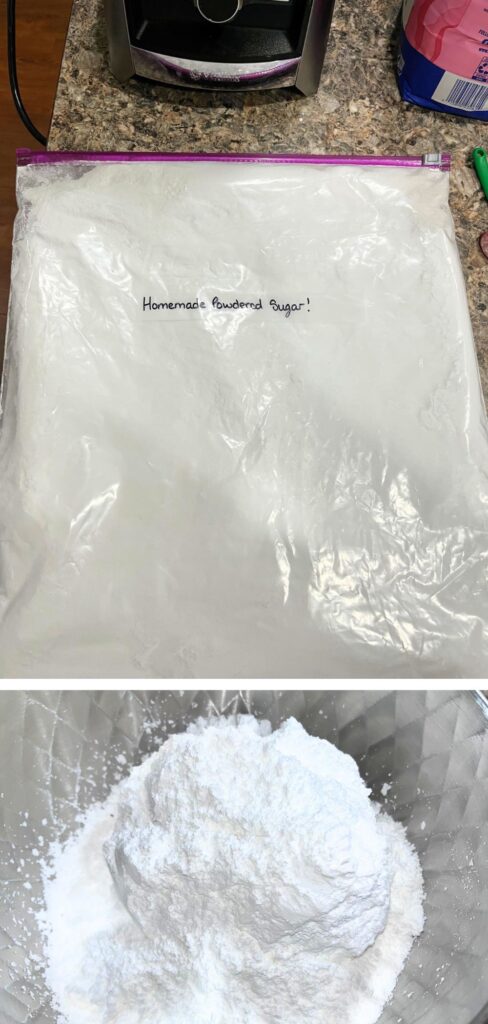
Your homemade powdered sugar is now ready to use!
Spoon it into your baking recipe straight away, or transfer it to a completely dry, airtight container or freezer-safe storage bag.
I used a labelled freezer bag for the batch shown in my photographs, which makes it easy to keep track of what’s inside and when it was made.
Store it somewhere cool and dry, away from steam and moisture, so it’s ready the next time you’re baking and discover the powdered sugar has run out!
Notes for Making Homemade Powdered Sugar in a Blender
There are a few things worth knowing before making your own powdered sugar, particularly if you’re planning to use it for buttercream frosting, delicate glazes or recipes where a completely smooth finish matters!
1. Homemade Powdered Sugar Isn’t Always as Fine as Store-Bought
Commercial powdered sugar in the United States is commonly sold as 10X confectioners’ sugar, meaning it has been ground to an exceptionally fine consistency.
A powerful blender like a Vitamix can produce beautifully fine homemade powdered sugar, but the finished texture may still be slightly coarser than commercially manufactured 10X sugar.
For dusting cakes, making simple glazes and plenty of everyday baking recipes, this may not make much difference. For very smooth buttercream, royal icing or delicate piping work, commercially manufactured powdered sugar can give more predictable results.
2. You Can Make Powdered Sugar Without Cornstarch
The cornstarch in this recipe is optional. If you’re making powdered sugar to use immediately, you can blend the granulated sugar on its own.
Cornstarch is particularly helpful when you’re making a batch to store because it reduces the likelihood of the sugar clumping together.
However, it doesn’t make homemade powdered sugar completely moisture-proof or guarantee that it will remain free-flowing indefinitely. Proper airtight storage is still important.
3. Use White Granulated Sugar for the Most Predictable Results
Regular white granulated sugar produces the familiar white colour and neutral sweetness associated with powdered sugar.
You can grind other types of sugar, including some less-refined varieties, but the results won’t necessarily behave exactly like standard confectioners’ sugar. Brown sugar, for example, contains molasses and has a higher moisture content, making it unsuitable as a straightforward replacement in this particular recipe.
4. Measure Your Powdered Sugar After Blending
One cup of granulated sugar doesn’t produce exactly one cup of powdered sugar by volume.
Once the crystals are ground into a fine powder, the finished sugar occupies a different volume, and that volume can change depending on how finely it’s ground and how much it settles.
For recipes that specify powdered sugar by weight, use a kitchen scale for the most accurate results.
If your baking recipe uses cups, gently stir or fluff the finished powdered sugar before spooning it into your measuring cup and levelling it off. Avoid packing it down unless your recipe specifically instructs you to.
5. Don’t Overfill Your Blender
It’s tempting to make an enormous batch in one go, especially if you do a lot of baking, but your blender needs enough room to circulate the sugar effectively.
Stick to quantities recommended for your particular blender and container. If you’re making several cups of powdered sugar, processing smaller batches may produce a more consistent texture.
6. Keep Everything Completely Dry
Sugar absorbs moisture from its surroundings, and finely ground sugar is particularly prone to clumping when exposed to humidity.
Make sure your blender container, sieve, spatula and storage container are completely dry before using them.
Avoid blending sugar immediately after washing your container unless you’ve dried every part thoroughly, including the area around the blades.
7. Avoid Breathing in the Fine Sugar Dust
Grinding sugar in a high-speed blender produces a very fine powder that can become airborne when you remove the lid.
Allow the sugar dust to settle before opening the container, and pour the finished sugar gently rather than tipping it out quickly.
This is especially worth remembering when making larger batches in a Vitamix!
Troubleshooting Homemade Powdered Sugar
Making your own powdered sugar in a blender is quick and straightforward, but getting that truly soft, velvety consistency comes down to friction, airflow, and moisture control. Most kitchen hiccups happen because the sugar isn’t circulating through the blades properly, the motor is warming the crystals too much, or humidity is sneaking into the jar.
Here are the most common problems you might run into while blending or baking with homemade powdered sugar, and exactly how to fix them!
The granulated sugar crystals haven’t been pulverized long enough, or larger crystals are escaping the blades. Unlike commercial 10X confectioners’ sugar, which is milled through industrial screens, a home blender relies on high-speed blade impact to break down coarse sugar crystals.
The Fix: Sift your finished batch through a fine-mesh sieve into a clean, dry bowl. Tip any coarse crystals left sitting in the mesh straight back into your blender and pulse in 15-second bursts until completely powdery. Always rub a pinch between your thumb and forefinger. If you can feel individual grains, it needs another quick blend.
Your blender blades have created an air pocket (cavitation) underneath the sugar, or the batch size is too small for the container. When dry ingredients pack around the sides of a wide wet container, the blades spin freely in empty air while the sugar sits untouched above them.
The Fix: Turn off the blender and give the container a gentle shake from side to side to collapse the air pocket, or use a completely dry silicone spatula to push the sugar down from the walls (never do this while the machine is running). If you are using a wide 64-ounce Vitamix wet container, make sure you use at least 1 cup of granulated sugar so the blades have enough volume to pull the crystals into a vortex.
Friction from the high-speed blades overheated the sugar, or residual moisture was hiding inside the blender jar. Sugar begins to soften and melt from blade friction if blended continuously for too long, turning fine powder into warm, sticky clumps. Even a single drop of water trapped under the blade assembly will cause sugar to seize.
The Fix: Stop blending immediately and let the sugar cool completely to room temperature spread out on a sheet of parchment paper. Once cool and dry, break up any soft lumps with a fork and sift through a fine-mesh sieve. For your next batch, blend in 30-second intervals rather than one long run, and wipe under the blades with a dry paper towel before starting.
High-speed blending creates static electricity inside dry plastic containers, pulling ultra-fine sugar dust onto the walls. This is completely normal, especially in dry weather or when using a Vitamix Dry Grains Container, and it doesn’t mean your sugar is damp.
The Fix: Turn off the blender and leave the lid closed for a full 60 seconds so the airborne dust settles. Tap the sides of the container firmly with the palm of your hand to knock the static-charged powder back down, then use a completely dry silicone spatula to scrape the walls clean.
Grinding dry sugar creates heavy resistance on the blades, especially on low speeds. Running a high-powered blender on a slow setting forces the motor to work harder without enough airflow to cool itself down.
The Fix: Switch the blender off right away and let the motor rest for 10 to 15 minutes until cool. When you start again, quickly ramp the speed dial all the way up to High (as recommended by Vitamix for dense dry ingredients) so the cooling fan runs at maximum airflow, and work in 30 to 45 second bursts.
Hard granulated sugar crystals act like tiny sandblasters against polycarbonate blender walls at high speeds. This cosmetic etching (often called “crazing” or clouding) is very common when grinding dry grains, spices, or sugar in a standard wet container and does not affect how the blender works.
The Fix: While existing clouding on a plastic jar cannot be polished out completely, you can protect your everyday smoothie container by using a dedicated Vitamix Dry Grains Container, which is built specifically for abrasive dry ingredients, or a glass blender jar if your model offers one.
Homemade powdered sugar contains slightly larger microscopic crystals than commercial 10X sugar, and butter doesn’t contain enough liquid to dissolve them quickly. While milk or lemon juice dissolves sugar easily in a glaze, thick American buttercream is mostly fat, leaving any unground crystals noticeable on your tongue.
The Fix: Always sift your homemade powdered sugar through a fine-mesh sieve before beating it into butter. If your frosting is already mixed and feels slightly gritty, beat in 1 tablespoon of warm milk or heavy cream and whip on medium-high speed for an extra 2 to 3 minutes to help the remaining crystals dissolve.
You measured your sugar by volume before blending, or you omitted the cornstarch. One cup of granulated sugar weighs about 200 grams, whereas one cup of store-bought powdered sugar weighs only about 120 grams. Commercial powdered sugar also relies on cornstarch to thicken and whiten liquid glazes.
The Fix: Always measure your finished powdered sugar after blending. Fluff it gently with a spoon, scoop it into your measuring cup, and level it off, or weigh out 120 g per cup called for in your recipe. If your glaze is still too thin, whisk in an extra 1/2 teaspoon of cornstarch or a couple more spoonfuls of sifted homemade powdered sugar until it coats the back of a spoon.
Ambient humidity entered your storage container, or warm sugar was sealed inside a bag before cooling down. Even with cornstarch added, finely ground sugar acts like a sponge for moisture in the air, and sealing warm sugar traps condensation inside the container.
The Fix: If the lumps are completely dry and rock-hard from settling, break them up with a rolling pin inside a sealed freezer bag, then whiz the pieces in your dry blender for 10 seconds to restore the fluffy texture. If the sugar feels damp, sticky, or smells stale, discard it and blend a fresh batch. Store future batches only after the sugar is completely cool, inside a rigid airtight container kept away from the kettle, stove, and dishwasher.
High-speed blades whip air into the ultra-fine powder, creating a pressurized cloud inside the sealed jar. Lifting the lid too quickly pulls that fine dust straight up into your kitchen air.
The Fix: Leave the blender switched off with the lid locked on for at least 1 minute after blending so the suspended particles settle back to the bottom. Remove the lid slowly and tilt it away from your face before pouring the sugar into your storage container.
How to Store Homemade Powdered Sugar (Icing Sugar)
One of the nicest things about making your own powdered sugar is that you don’t have to use it all immediately. If you’ve made a larger batch in your Vitamix blender, you can store the leftovers for future baking, provided you keep them properly sealed and away from moisture.
Powdered sugar is particularly good at absorbing moisture from the surrounding air, so keeping it dry is the most important part of storing it successfully.
Homemade powdered sugar made with white granulated sugar can keep for a long time when stored correctly. Sugar itself is shelf-stable, and adding dry cornstarch doesn’t mean your finished mixture needs refrigerating.
For the best texture and freshness, I recommend using your homemade powdered sugar within 6 months, although this is a practical quality recommendation rather than a strict expiration date.
Store it in a completely dry, airtight container in a cool pantry or kitchen cupboard, away from direct sunlight, steam and heat.
If you’ve made your powdered sugar without cornstarch, it’s especially important to keep the container sealed tightly because the fine sugar particles may clump together more readily.
Absolutely! You don’t need to buy special storage containers just for this recipe.
For my batch, I transferred the finished powdered sugar into a labelled freezer-safe bag, which is a convenient option when you’re trying to make the most of limited kitchen storage space.
If you’re using a Ziploc-style bag, press out as much excess air as you reasonably can before sealing it, without squeezing the sugar out of the top. Make sure the seal is completely closed and keep the bag somewhere it won’t be punctured or exposed to moisture.
For longer-term pantry storage, I prefer placing the sealed bag inside a rigid container for a little extra protection.
Yes, you can freeze homemade powdered sugar, although freezing isn’t necessary for preserving it because properly stored sugar is already shelf-stable.
If you do choose to freeze it, use a moisture-resistant, freezer-safe bag or airtight container and make sure it’s sealed securely.
The biggest concern isn’t the freezing itself. It’s condensation forming when you remove the sugar from the freezer.
To prevent this, leave the container completely sealed until the sugar has returned to room temperature. Opening it while it’s still cold can allow moisture from the air to settle on the sugar, causing clumps.
For everyday baking, storing homemade powdered sugar in a cool, dry pantry is generally the simpler option.
No. Refrigeration isn’t recommended for homemade powdered sugar.
Refrigerators contain moisture, and moving the sugar between cold and warm environments can encourage condensation. That makes clumping more likely, particularly when the sugar is stored in a container that isn’t completely airtight.
A dry kitchen cupboard is a better choice.
A little cornstarch helps reduce clumping, but the storage conditions matter just as much.
Keep your powdered sugar away from the kettle, dishwasher and cooking steam. Always use a completely dry spoon when measuring it out, and reseal the container promptly after each use.
If a few small, dry lumps form during storage, you can usually break them apart with a spoon or sift the sugar before baking.
However, if the sugar has become noticeably damp, developed an unusual smell or shows any signs of contamination, discard it and make a fresh batch.
My little tip: Label your container or freezer bag with the date you made the powdered sugar and note if you added cornstarch. That way, when you’re reaching for it months later, you’ll know exactly what’s inside!
Serving Ideas and Ways to Use Homemade Powdered Sugar
Homemade powdered sugar is one of those handy ingredients that can be used in so many different baking recipes. From a quick dusting over a warm cake to a simple icing for homemade cookies, it’s worth having some ready in the cupboard.
And if you’re British like me, don’t forget that powdered sugar is what we’d generally call icing sugar back home! Here are some of my favourite ways to put it to good use…
Make Homemade Buttercream Frosting
Powdered sugar is one of the main ingredients in traditional American buttercream frosting, where it’s beaten with softened butter and a little milk or cream to create a sweet, spreadable frosting (this this easy soft buttercream recipe here!).
You can use finely blended homemade powdered sugar for everyday buttercream, particularly if you’re frosting cupcakes or spreading it over a simple homemade cake.
Just be aware that the texture matters here. If your homemade sugar is even slightly gritty, that graininess may carry through into the finished buttercream.
For exceptionally smooth frosting or intricate piping, store-bought 10X confectioners’ sugar is usually the more reliable option.
Make a Simple Powdered Sugar Glaze
One of the easiest ways to use homemade powdered sugar is to turn it into a quick glaze for cakes, muffins, cinnamon rolls or sweet breads.
Simply combine sifted powdered sugar with a small amount of milk, water or lemon juice until you reach your preferred consistency.
A thicker glaze works well for drizzling over cinnamon rolls, while a thinner glaze is lovely for lightly coating a homemade loaf cake.
Dust Over Cakes, Brownies and Desserts
Sometimes a little powdered sugar is all you need to finish a homemade dessert.
Try sifting a light layer over:
- Brownies and chocolate cakes
- Homemade doughnuts
- Pancakes and waffles
- French toast
- Bundt cakes and loaf cakes
- Shortbread and other simple cookies
- Fresh berries and fruit desserts
A fine-mesh sieve is particularly useful here because it gives you a light, even dusting rather than little piles of sugar.
For the prettiest finish, dust desserts shortly before serving. Powdered sugar can gradually dissolve when it comes into contact with moisture, especially on warm or particularly moist baked goods.
Make Homemade Cookie Icing
Homemade powdered sugar can also be used to make a simple icing for sugar cookies, gingerbread and other decorated biscuits.
For a basic cookie glaze, combine powdered sugar with a little liquid and adjust the consistency until it’s thick enough to coat your cookies without running straight off.
If you’re making detailed royal icing decorations or need a particularly smooth finish, commercially manufactured powdered sugar may be a better choice because of its finer, more consistent texture.
Use It in Recipes That Call for Confectioners’ Sugar
You’ll find powdered sugar listed in all sorts of American baking recipes, sometimes under the name confectioners’ sugar.
It’s commonly used in cream cheese frosting, whipped cream, certain cookie doughs, dessert fillings and sweet glazes.
Just remember that homemade powdered sugar isn’t automatically interchangeable by volume with the granulated sugar you started with. Measure the finished powdered sugar according to the recipe you’re making, preferably by weight when that information is available.
And if you’ve added cornstarch to your homemade batch, keep that in mind when using it in recipes where starch content or texture is particularly important.
Keep a Small Batch Ready for Everyday Baking
You don’t always need a huge bag of powdered sugar sitting in the pantry, especially if you only use it occasionally.
Making a small batch in your blender can be particularly convenient when you need just enough to dust a cake, whip up a quick glaze or finish a batch of homemade cookies.
It’s also a useful little trick to remember when you’re trying to stretch the grocery budget and make better use of the ingredients you already have at home.
Why You’ll Love This Homemade Powdered Sugar Recipe!
- Just two pantry ingredients! All you need is ordinary white granulated sugar and a little optional cornstarch. No special baking ingredients or expensive extras.
- Ready in minutes! A high-speed blender does most of the work, making this a handy solution when you’ve run out of powdered sugar halfway through baking.
- Perfect for putting your Vitamix to work! If you already own a Vitamix blender, this is another practical way to use it, especially if you have the compatible Dry Grains Container.
- Budget-friendly baking! Making more of our pantry staples at home is one of the little ways we’re stretching our grocery budget while working through Baby Step 2 of our debt-free journey.
- Make as much or as little as you need! You can adjust the quantity to suit your baking plans, provided you’re using enough sugar for your blender to process effectively.
- No unnecessary additives! You know exactly what’s going into your homemade confectioners’ sugar, and you can leave out the cornstarch if your recipe calls for powdered sugar without added starch.
- Handy for everyday baking! Use it for dusting desserts, simple icings, glazes and other recipes where an ultra-fine commercial powdered sugar isn’t essential.
- Easy to store for later! Keep your finished powdered sugar in a dry, airtight container or freezer-safe bag so it’s ready for your next baking project.
Frequently Asked Questions About Homemade Powdered Sugar
These are a few of the questions worth knowing the answers to before making your own powdered sugar (icing sugar)…
1 cup (200 g) of white granulated sugar yields approximately 1 3/4 cups of fluffy homemade powdered sugar. Grinding the crystals incorporates air and increases the overall volume, even though the total weight stays the same. Always measure your finished powdered sugar after blending rather than assuming a 1-to-1 cup conversion.
Use 1 tablespoon (8 g) of cornstarch for every 1 cup (200 g) of granulated sugar. This matches the roughly 3% to 4% starch ratio found in commercial American confectioners’ sugar. Adding cornstarch absorbs ambient moisture and keeps your homemade batch free-flowing during storage.
Yes, you can make powdered sugar in a standard blender, though it takes longer and requires sifting.High-speed blenders like a Vitamix pulverize sugar in 30 to 60 seconds, while standard blenders usually need 1 to 2 minutes of pulsing. Always sift the finished batch through a fine-mesh sieve to catch any larger crystals left behind.
A food processor is not recommended for powdered sugar because its blades sit too high and wide to pulverize fine crystals. Instead of creating soft, fluffy icing sugar, a food processor usually stops at a gritty texture closer to British caster sugar or superfine sugar. A high-speed blender or a clean electric spice grinder works much better.
Yes, a dedicated electric spice grinder, coffee grinder, or NutriBullet works brilliantly for small batches of powdered sugar. Just make sure the grinder has never been used for coffee beans or strong spices, or your frosting will pick up those flavors. Process in 15-second bursts so the small motor does not overheat.
Any high-speed, high-wattage blender like a Vitamix, Ninja, Blendtec, or Breville can turn granulated sugar into homemade powdered sugar, though I personally use a Vitamix with a Dry Grains Container for the most consistent results. High-powered blenders have the motor strength and blade speed needed to pulverize hard sugar crystals before friction overheats the batch.
For the batch shown in my photos, I used my Vitamix paired with the Vitamix Dry Grains Container, which has specially angled blades that push dry ingredients upward so they circulate evenly instead of packing around the bottom. If you own a Ninja, Blendtec, or standard Vitamix wet jar, it will still work well as long as you check your manufacturer’s manual for dry grinding, blend in short 30-second bursts to avoid overheating the sugar, and sift the finished powder through a fine-mesh sieve to catch any stray crystals.
The “10X” label on commercial powdered sugar refers to how finely the sugar has been milled, with 10X being ultra-fine. Homemade blender powdered sugar usually reaches a texture closer to 4X or 6X sugar. It works wonderfully for dusting desserts, glazes, and everyday buttercream, though commercial 10X sugar is smoother for delicate royal icing piping.
Yes, organic cane sugar works well for homemade powdered sugar, though the finished powder will have a light cream tint. Because organic cane sugar retains a tiny amount of natural molasses, it will not look bright white like refined granulated sugar. Use the exact same 1 cup sugar to 1 tablespoon cornstarch ratio.
No, you cannot turn traditional brown sugar into dry powdered sugar in a blender. Brown sugar contains liquid molasses, which causes the crystals to clump into a sticky paste when heated by high-speed blender blades. If you want a caramel-flavored powdered sugar, blend white granulated sugar with a pinch of dry molasses powder instead.
Yes, both coconut sugar and raw turbinado sugar can be blended into powdered sugar substitutes.Keep in mind that coconut sugar creates a tan-colored powder with a subtle caramel taste, while coarse turbinado sugar takes a little longer to break down and should be sifted well afterward.
Yes, granular sweeteners like erythritol, monk fruit blends, and xylitol blend into powdered sugar in about 30 seconds. Sugar-free sweeteners actually pulverize even faster than real cane sugar and rarely clump, so you can skip the cornstarch completely. Keep xylitol away from pets, as it is toxic to dogs.
Arrowroot powder and tapioca starch are the best 1-to-1 substitutes for cornstarch. Both starches absorb moisture and prevent clumping without leaving a chalky taste, making them great options for corn-free or paleo baking. In Britain, standard cornstarch is simply sold as cornflour.
Sifting is optional for dusting cakes or making simple glazes, but strongly recommended for buttercream frosting and cookie icing. Passing your homemade sugar through a fine-mesh sieve removes any stray coarse crystals that could give your frosting a gritty mouthfeel.
Weigh your homemade powdered sugar on a kitchen scale using 120 g (4.25 oz) per 1 cup called for in your recipe. If you are measuring by volume with cups, gently fluff the powdered sugar with a spoon, scoop it lightly into your measuring cup, and level it off with a knife without packing it down.
You can use homemade powdered sugar for basic cookie glazes, though store-bought 10X sugar is more reliable for intricate royal icing. Royal icing requires ultra-fine sugar to pass smoothly through tiny piping tips without clogging. If you do use homemade sugar, sift it twice through a very fine-mesh sieve first.
No, grinding granulated sugar will not dull or damage stainless steel blender blades. However, hard sugar crystals can cause cosmetic clouding (micro-scratches) on the inside of polycarbonate plastic blender jars over time. If you make dry staples often, a dedicated Vitamix Dry Grains Container protects your main jar.
Homemade powdered sugar stays fresh for up to 6 months when stored in a completely dry, airtight container in a cool pantry. Sugar does not spoil, so this 6-month window is simply to ensure the powder stays fluffy and free of pantry moisture or odors.
Yes, you can easily make flavored powdered sugar by blending freeze-dried fruit, spices, or citrus zest with the granulated sugar. Try adding 2 tablespoons of freeze-dried strawberries, 1/2 teaspoon of ground cinnamon, or the seeds from half a vanilla bean pod for instant flavored dustings and frostings.
Yes, making powdered sugar from bulk granulated sugar typically saves 30% to 50% per pound compared to buying small bags of confectioners’ sugar. It also saves money by preventing last-minute trips to the grocery store when you run out mid-recipe.
No, once granulated sugar crystals have been pulverized into a fine powder, they cannot be turned back into granulated sugar. Because powdered sugar melts and caramelizes at a different rate than coarse crystals, you should not swap it into recipes that call for regular granulated sugar.
Both names describe finely ground white sugar used for frostings and confections, just with different regional histories. In the UK and Commonwealth countries, it is named icing sugar after its main job of making cake icing. In the US, it is called confectioners’ sugar because candy makers and confectioners rely on it, or simply powdered sugar for its texture.
How to Make Homemade Powdered Sugar (Icing Sugar) in a Blender!

Ingredients
Equipment
Method
- Make sure your blender container and blades are completely clean and dry. Fit your compatible Vitamix Dry Grains Container if using one.
- Pour 1 cup (200 g) of white granulated sugar into your blender container.
- Add 1 tbsp (8 g) of cornstarch if making powdered sugar for storage. Omit it if you prefer starch-free powdered sugar.
- Secure the lid and blend according to your appliance's instructions, gradually increasing the speed as appropriate. Process for approximately 30 seconds to 2 minutes, stopping to check until the sugar is finely powdered. Avoid overheating.
- Switch off the blender and leave the lid in place for approximately 1 minute before opening.
- Check that the sugar feels fine rather than gritty. Sift through a fine-mesh sieve if necessary, returning any larger crystals to the blender for another short blend.
- Use immediately or transfer to a completely dry, airtight container or freezer-safe bag. Label and store in a cool, dry cupboard away from moisture.
Notes
-
Cornstarch: Optional, but helps reduce clumping during storage. In Britain, cornstarch is called cornflour.
-
Blender: A Vitamix or another suitable high-speed blender works best. Check your manufacturer’s instructions before grinding dry sugar.
-
Dry Grains Container: A compatible Vitamix Dry Grains Container is especially useful for regular grinding of dry ingredients but isn’t essential for every Vitamix model.
-
Texture: Homemade powdered sugar may be slightly coarser than commercial 10X confectioners’ sugar. Sift before using in frosting or delicate glazes.
-
Yield: The finished volume varies depending on how finely the sugar is ground and how much it settles. For accuracy, weigh the finished sugar when following another recipe.
Storage
- Keep in a completely dry, airtight container in a cool pantry. Aim to use within 6 months for best quality.
- Freezing: Not necessary, but possible in moisture-resistant packaging. Allow the sealed container to reach room temperature before opening to prevent condensation.
Related Recipes
- Check out all our Pantry Staples!
Nutrition information is automatically calculated, so should only be used as an approximation.
Looking for more homemaking inspiration?

It’s so important to be part of a community that not only understands you but that champions you, encourages, challenges and cheers you on. We couldn’t find one – so we created it instead!
Join the Side Hustle Homemakers Team Julie, Sam and I over at the Recipes, Homesteading and More! Facebook Group for Food Blogging Tips, Homesteading and Homemaking content and encouragement!
We’re 3 very different US/UK military families who met and became instant forever friends. We share what’s working in our kitchens, gardens, homes and more!
We created the group to share real life around recipes, homesteading, homemaking and more. Head on over, say Hi, share your tips and gain some friends and knowledge along the way!
The Takeaway
Making your own homemade powdered sugar is such a useful little kitchen trick to have up your sleeve, especially when you’re halfway through baking and discover you’ve run out of icing sugar!
With ordinary granulated sugar, an optional spoonful of cornstarch and a suitable blender, you can make a batch in minutes without another trip to the supermarket.
A Vitamix or other similar high powered blender will make the job particularly easy, but you don’t need to rush out and buy one just for this recipe. The important thing is getting the sugar fine enough for whatever you’re planning to make, and remembering that homemade powdered sugar can sometimes be a little coarser than the commercially manufactured version.
For me, it’s another practical way to make better use of what we already have in the kitchen, stretch our grocery budget and keep homemade baking affordable.
And now you’ll know exactly what to do the next time an American recipe calls for confectioners’ sugar and you’ve only got a bag of ordinary granulated sugar in the cupboard!
What to Try Next?!
Share & Rate This Recipe!
If you give this homemade powdered sugar recipe a try, don’t forget to leave a star rating and a quick comment below. I always enjoy hearing how these recipes turn out in your kitchen!
Last update on 2026-11-15 / Affiliate links / Images from Amazon Product Advertising API