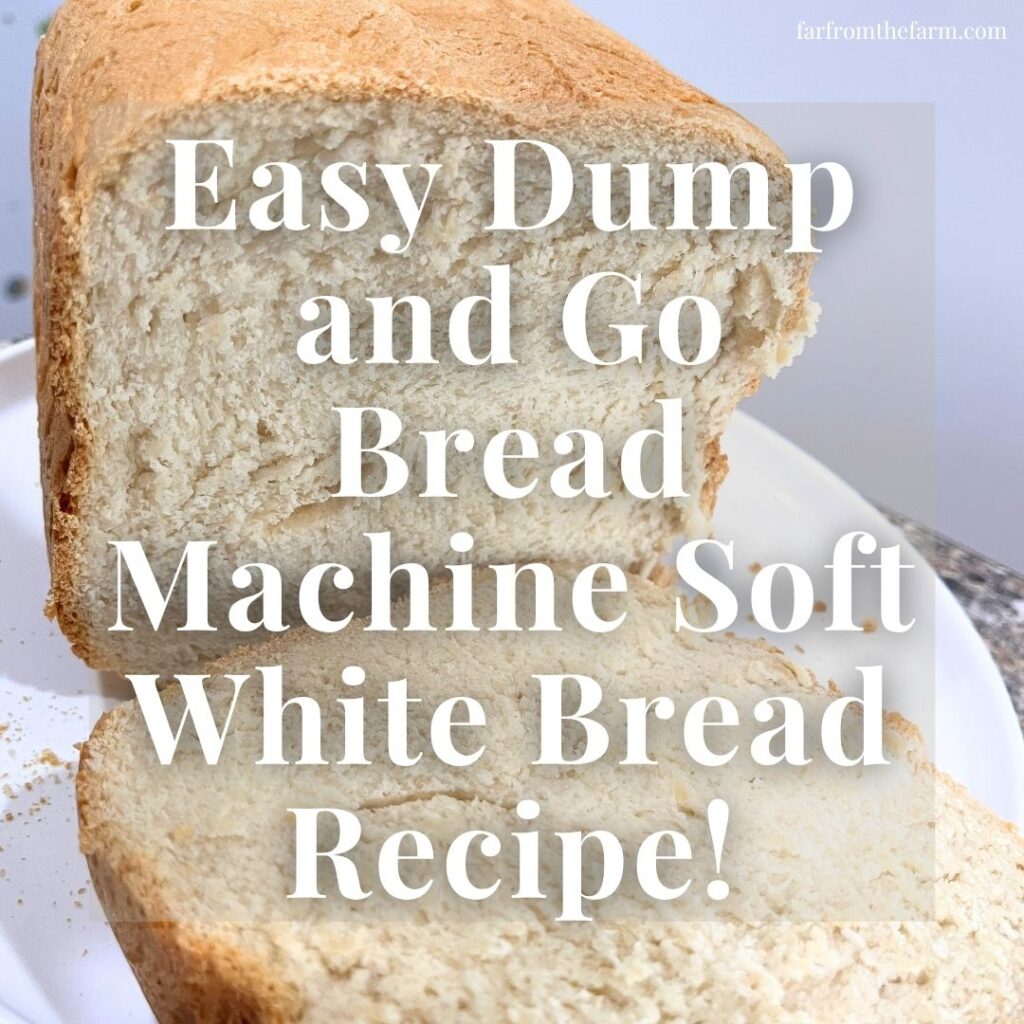
A Foolproof Super Soft White Loaf Recipe for Your Bread Maker!
Hi! If you’ve been following me for long you’ll already know this, but for those who are new, welcome to Far From The Farm. I’m Mona, the Brit behind the recipes, learning life and food in the States while sharing our debt-free journey and what’s on the menu in our home today!
If you’ve seen my other bread machine recipes, you’ll already know just how much I adore that little machine.
It has honestly been one of the biggest game changers in my kitchen. But here’s the thing. Not every bread machine recipe out there is created equal.
Some are overly complicated. Some give you tiny little loaves that barely last a meal. And some just turn out inconsistent depending on the day, the weather, or who knows what else.
And when you’re relying on something like this for real family meals, that just doesn’t cut it. We needed something better. A proper, reliable, dump and go recipe.
Something I could throw together in a few minutes, press start, and just trust that a full sized loaf would come out at the end of it. One that could handle sandwiches for lunch, grilled cheese for dinner, and toast the next morning if it lasted that long.
And most importantly, it needed to be soft!
Not dry. Not crumbly. Not overly airy. Soft enough for sandwiches, but sturdy enough to hold up when you grill it or load it up.
After testing and tweaking, this version quickly became one we come back to again and again. And the secret? Nonfat milk powder.
It might seem like a small addition, but it makes a huge difference to the final texture. It gives the bread that soft, slightly enriched feel without needing fresh dairy, and it’s incredibly budget friendly to keep on hand.
Once you try it, you’ll notice the difference straight away.
As a military family working through baby step 2 of our debt free journey, recipes like this play a bigger role than you might think. Making simple staples at home saves money, stretches ingredients further, and gives us reliable food we can count on without constantly heading back to the store.
And just a reminder that if you’re struggling and you need help with managing your budget or starting your own debt free journey then here’s some FREE resources below you may find helpful!
living frugally and fully
free tips and resources to make the most of what you have
And of course I just have to mention again, that using a bread machine has genuinely changed the way I cook at home, and I think it could help you out too!
My little bread machine does so much for me, dough for sweet rolls, soft dinner rolls, pizza nights, everyday sandwich loaves, quick cakes, even small batches of jam.
It takes on all the fiddly steps and frees me up to carry on with everything else at home. It keeps things consistent and budget friendly, and honestly it has made homemade baking feel achievable even on my busiest days. I’ll share the one I use later on in this post.
As always, these photos are from my real kitchen here in our sweet military base home. No staged lighting or spotless marble counters. Just real life and real food made in a small space. Proof that you can feed your family well without needing a dream kitchen or fancy tools!
So roll up your sleeves and head into the kitchen to make this easy dump and go bread machine white loaf that comes out soft, reliable, and ready for real life meals!
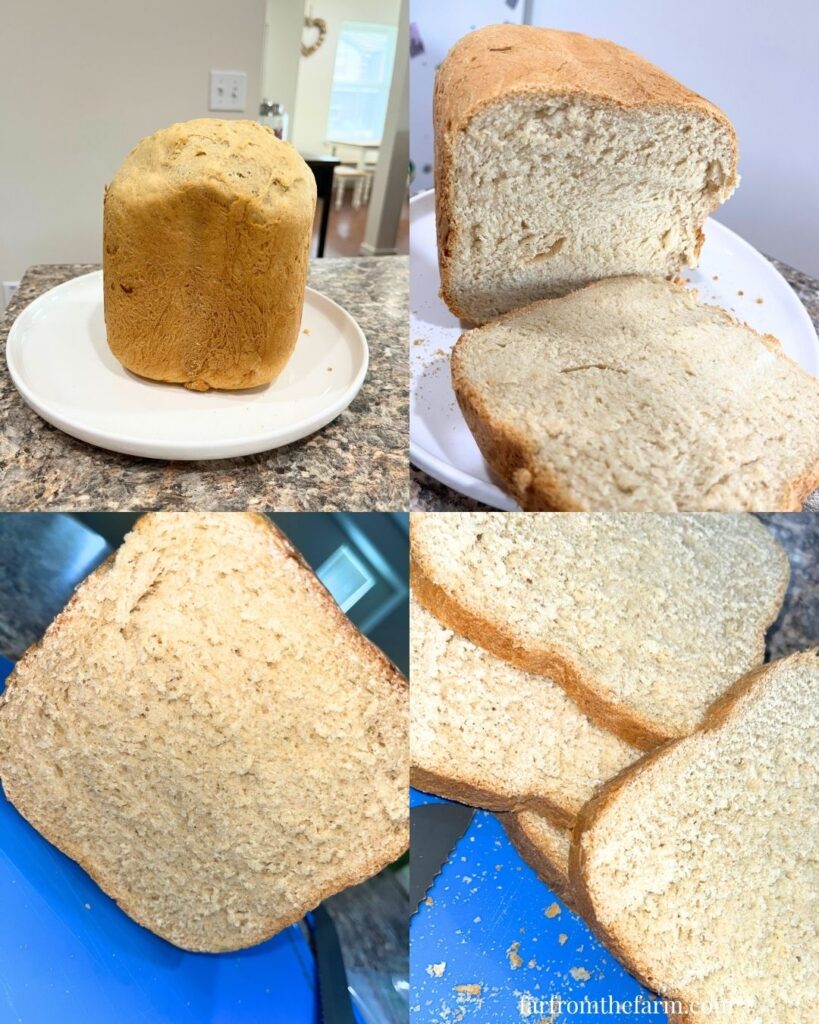
Sneak Peak!
Sometimes you need to see the end product before you commit to making it, right?! So here’s a quick glimpse of how it turned out for me today along with the recipe at a glance!

Why You’ll Love Using a Bread Machine In Your Kitchen!

If you’re new here, you’ll quickly learn that I am such a fan of using a bread machine for dough. It has been one of the biggest helps in my kitchen, especially during busy or overwhelming seasons.
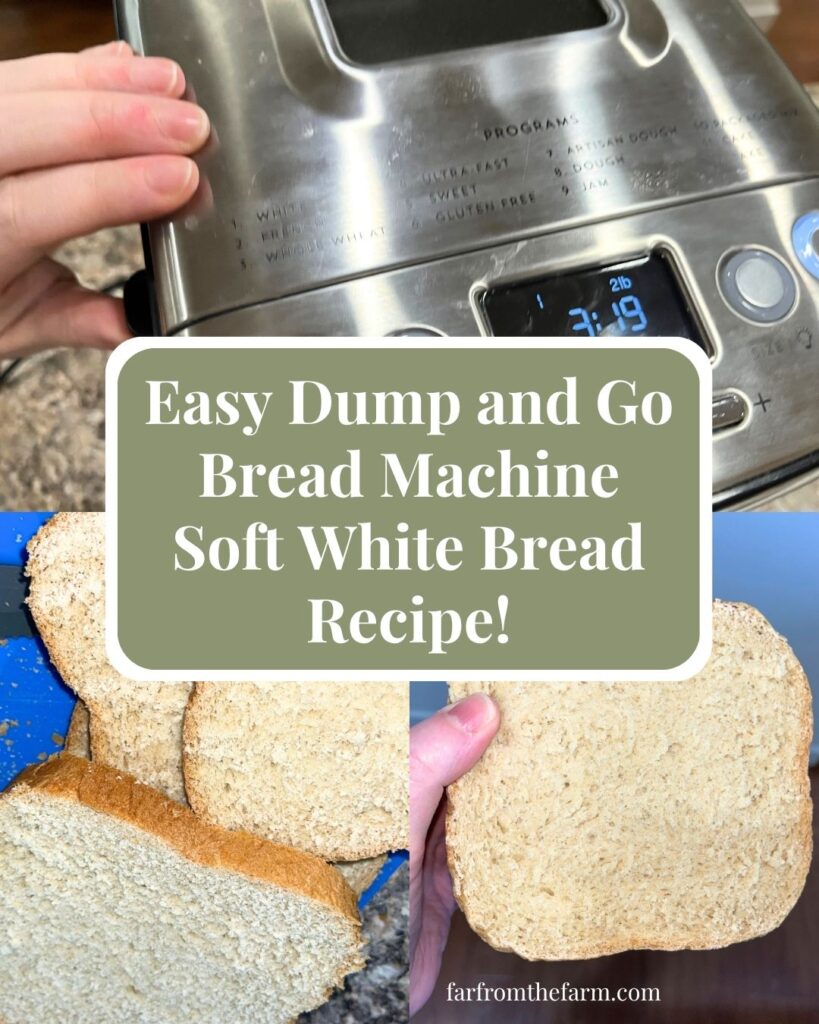
My parents gifted me this little Compact Cuisinart Bread Machine recently when I moved from the UK to the States after getting married, and it has worked like a little powerhouse ever since!

It kneads beautifully. It rises dough evenly. It keeps everything contained in one pan so I am not dealing with flour across every surface of the kitchen.
And on days where the house feels chaotic or I am juggling too much, I can add the ingredients, press the dough button, and let it get on with the work while I focus on everything else.
It takes away so much of the guesswork and makes homemade bread, pizza dough, cinnamon rolls, soft rolls, and sweet bakes feel much simpler.
It has also been a real blessing for our budget. Homemade dough costs pennies compared to store prepared versions and certainly compared to eating out. As a military family on baby step 2 of our debt free journey, little savings like that matter across an entire month.

If you have ever felt intimidated by bread making, this is your gentle nudge to give it a try. A dough cycle handles all the kneading for you.
You get soft, reliable, fluffy dough without standing over a counter for ages or worrying if things rose the way they should. It makes homemade cooking feel doable, even on days that are far from calm.
There are so many beginner friendly ideas to help you feel confident and excited about homemade dough!
Equipment You’ll Need
These are the basics I always use:
- Cuisinart Compact Bread Maker – reliable, easy to use, and perfect for 2 lb loaves
- Measuring spoons
- Measuring jug
- 1 cup flour scoop
Available on Amazon.com [ad]


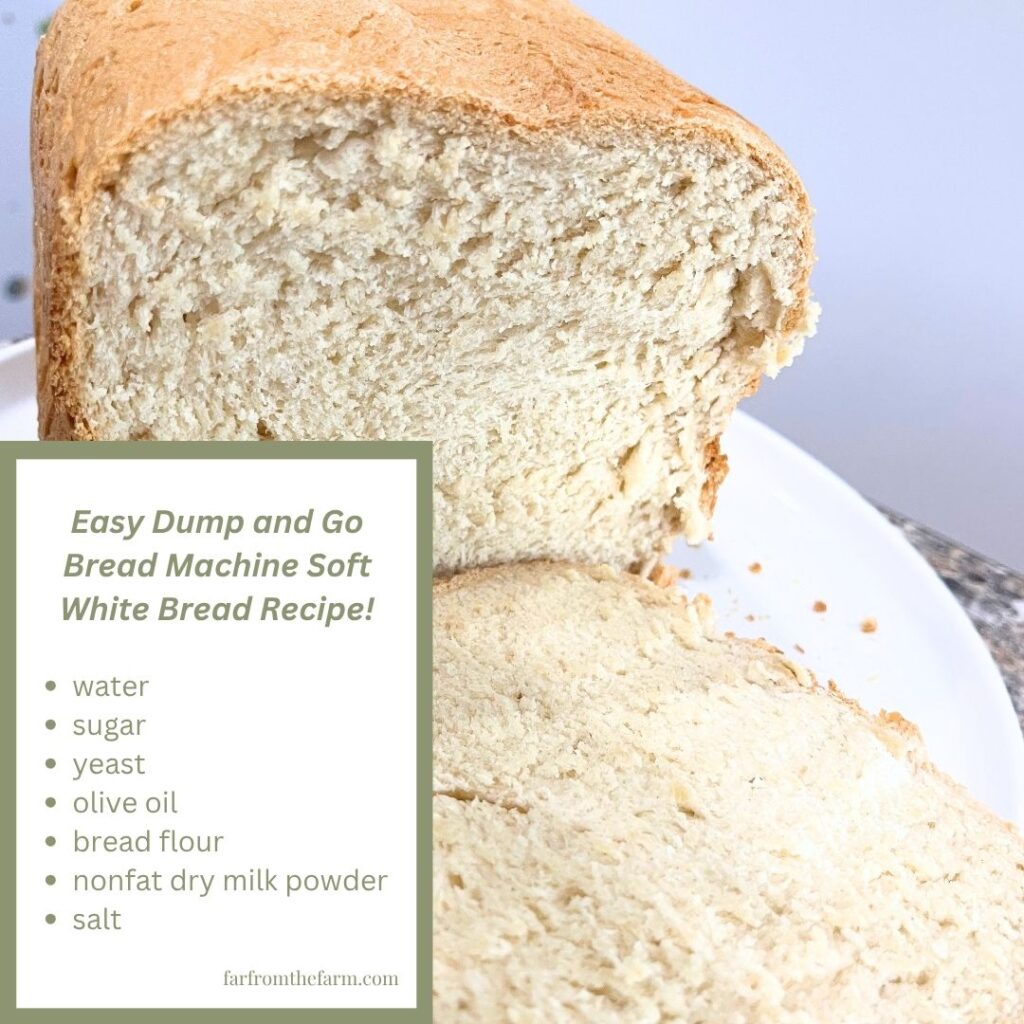
Ingredients
Makes 1 large 2lb loaf
- 1 1/4 cups warm water
- 2 tbsp white sugar
- 2 3/4 tsp bread machine yeast
- 2 tbsp olive oil
- 4 cups bread flour
- 2 tbsp nonfat dry milk powder
- 2 tsp table salt
Available on Amazon.com [ad]

Step By Step Instructions
Step One: Add everything to the pan
Add all ingredients directly into the bread machine pan in the order listed above. No need to mix anything.

Step Two: Set your machine
Place the pan into the bread machine.
Select the white bread cycle, 2 lb loaf size, and the lightest crust setting.

Step Three: Press start and walk away!
Press start and let the machine do all the work.
Most white bread cycles will run for about 3 hours 30 minutes.
Step Four: Cool before slicing
Once finished, remove the loaf carefully and place on a cooling rack.
If you’re planning to use it for sandwiches, let it cool before slicing so it holds its shape properly.
That said, it smells incredible fresh out of the machine, so don’t be surprised if you cut into it early!
Notes and Troubleshooting
Notes
- Nonfat milk powder is key for softness
- Light crust setting keeps the exterior tender
- Bread machines can vary slightly in timing
Troubleshooting
- Dense loaf? Water may have been too cold or yeast inactive
- Too dry? Check flour measurement accuracy
- Collapsed top? Too much liquid or too much yeast
Storage
- Store in an airtight container at room temperature for 1 to 2 days.
- Slice and freeze for longer storage.
- Toast straight from frozen as needed.
Serving Ideas
- Classic sandwiches
- Grilled cheese
- Toast with butter and jam
- Serve alongside soup or pasta
Why You’ll Love This Recipe?!
- True low-fuss dump and go method
- Soft but sturdy texture
- Budget friendly ingredients
- Perfect for family sandwiches
- Reliable every time
FAQ
Can I skip the milk powder?
Absolutely! I’d recommend following THIS VEGAN BREAD RECIPE because it gives me the best results for a dairy-free white loaf made in the bread machine!

Can I use all purpose flour?
Yes, but bread flour gives a better structure.
Do I need to proof the yeast first?
No, this recipe is designed for direct bread machine use.

Easy Dump and Go Bread Machine Soft White Bread Recipe!
Ingredients
Equipment
Method
- Add the warm water, white sugar, bread machine yeast, olive oil, bread flour, nonfat dry milk powder, and table salt directly into the bread machine pan in the order of ingredients listed.
- Place the pan back into the bread machine.
- Select the white bread cycle, 2 lb loaf size, and the lightest crust setting.
- Press start and let the bread machine do all the work. Most cycles will take about 3 hours 30 minutes.
- Once the cycle is finished, carefully remove the loaf from the pan and place it on a cooling rack.
- Let the bread cool before slicing if you want neat sandwich slices. Slice and enjoy.
Video
Notes
- Nonfat milk powder is key for softness
- Light crust setting keeps the exterior tender
- Bread machines can vary slightly in timing
Storage
- Store in an airtight container at room temperature for 1 to 2 days.
- Slice and freeze for longer storage.
- Toast straight from frozen as needed.
Related Recipes
- Check out all our Bread Machine Recipes!
Nutrition information is automatically calculated, so should only be used as an approximation.
Looking for more homemaking inspiration?

It’s so important to be part of a community that not only understands you but that champions you, encourages, challenges and cheers you on. We couldn’t find one – so we created it instead!
Join Julie, Sam and I over at the Side Hustle Homemakers Facebook Community for Food Blogging Tips, Homesteading and Homemaking content and encouragement!
We’re 3 very different US/UK military families who met and became instant forever friends.
We created Side Hustle Homemakers to share real life around recipes, food blogging, homemaking, military life, homesteading and more. Head on over, say Hi, share you tips and gain some friends and knowledge along the way!
The Takeaway
This is the kind of recipe that makes homemade bread feel realistic.
No fuss. No guesswork. Just simple ingredients, a reliable machine, and a loaf that shows up exactly how you need it to.
Soft enough for sandwiches, strong enough for real meals, and easy enough to make again and again.
What to Try Next?!


Share & Rate This Recipe!
If this bread becomes part of your weekly routine, tap the stars on the recipe card and leave a quick comment below. And if you loved it, don’t forget to share it with friends and family too!
Last update on 2026-06-04 / Affiliate links / Images from Amazon Product Advertising API