
Easy and Beautiful DIY Memorial Day Decorations for Your Porch, Mantel, and Home!
Memorial Day is a chance to honor the brave and decorate with heart—and while store-bought flags and buntings have their place, there’s something special about making your own decor that feels both personal and patriotic.
This roundup includes DIY Memorial Day decor projects that are actually worth doing—they’re beautiful, meaningful, and designed to elevate your space, not clutter it.
Whether you’re sprucing up your porch, styling your mantel, or hosting a patriotic picnic, these home-focused DIYs are a lovely way to reflect the spirit of the day.
All tutorials have been checked and are working, so you can dive in with confidence.
DIY Burlap Flag Banner
A burlap flag banner adds a rustic, patriotic touch to your mantel, porch, or entryway. The natural texture of burlap combined with red, white, and blue accents creates a charming Americana vibe.
Materials Needed:
- Burlap fabric or pre-cut pennant flags
- Acrylic paints in red, white, and blue
- Painter’s tape or star-shaped stencils
- Twine or ribbon
- Hot glue gun or sewing kit
Instructions:
- Prepare the Burlap: Cut the burlap into uniform pennant shapes. To prevent fraying, apply a thin layer of clear glue along the edges or use a fray prevention spray.
- Design Your Flags: Use painter’s tape to create stripes or place star stencils on the burlap pieces.
- Paint: Apply red and white paint for stripes and blue with white stars, reflecting the American flag’s design. Allow the paint to dry completely.
- Assemble the Banner: Attach the decorated burlap flags to a length of twine or ribbon using hot glue or by sewing. Ensure equal spacing between each flag.
- Display: Hang your banner across the mantel, along the porch railing, or above a doorway.
DIY Decor Supplies:
- Burlap Pennant Flags – Pre-cut and ready to decorate
- Acrylic Paint Set – Includes vibrant red, white, and blue colors
- Star Stencils – Reusable and perfect for this project
- Jute Twine – Adds a rustic touch to your banner
Available from Amazon.com [ad]


Patriotic Mason Jar Lanterns
These charming mason jar lanterns provide a warm, patriotic glow, perfect for Memorial Day gatherings on your porch, patio, or as indoor accents.
They are simple to create and can be customized to match your decor style.
Materials Needed:
- Mason jars (standard size)
- Frosted glass spray paint or white acrylic paint
- Red and blue acrylic paints
- Star-shaped stickers or stencils
- Painter’s tape
- Sponge brushes
- Twine or ribbon
- Battery-operated tea lights or fairy lights
Instructions:
- Prepare the Jars: Clean the mason jars thoroughly and let them dry completely.
- Apply Base Coat: Use frosted glass spray paint to lightly coat the outside of each jar, giving them a translucent look. Allow to dry as per the manufacturer’s instructions.
- Design with Stars: Place star-shaped stickers randomly around the jar to create a masking effect.
- Paint Over Stars: Paint over the entire jar with red or blue acrylic paint using a sponge brush. Apply multiple coats if necessary, allowing drying time between coats.
- Remove Stickers: Once the paint is completely dry, carefully peel off the star stickers to reveal the frosted star shapes beneath.
- Add Finishing Touches: Wrap twine or ribbon around the neck of the jar for added decoration.
- Illuminate: Place battery-operated tea lights or fairy lights inside the jars to create a warm glow.
- Display: Arrange the lanterns on tables, steps, or hang them using handles made from wire or twine.
DIY Decor Supplies:
- Mason Jars – Standard size, ideal for lanterns
- Frosted Glass Spray Paint – Creates a translucent effect
- Acrylic Paint Set – Includes vibrant red and blue colors
- Star Stickers – For masking star shapes
- Battery-Operated Tea Lights – Safe for indoor and outdoor use
Available from Amazon.com [ad]


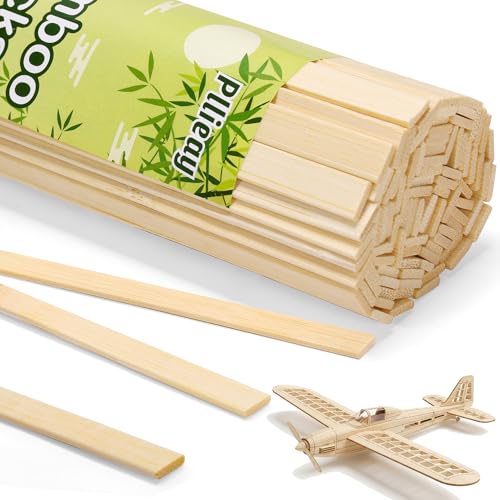
Painted Wood Block Firecrackers
Creating a rustic wooden American flag is a meaningful project that adds a patriotic touch to your home decor.
This handcrafted piece can be displayed on your porch, mantel, or as a wall hanging, embodying both craftsmanship and national pride.
Materials Needed:
- Wooden sticks (e.g., bamboo, pine or cedar)
- Red, white, and blue wood stain or paint
- Wood glue
- Clamps
- Sandpaper (medium and fine grit)
- Star stencil or decals
- Clear wood sealant
- Saw (table saw or miter saw)
- Paintbrushes or rags for staining
Instructions:
- Cut the Wood: Measure and cut the wooden boards into strips for the flag’s stripes and a section for the union (blue field).
- Sand the Pieces: Smooth all wood pieces with sandpaper to prepare for staining and ensure a clean finish.
- Assemble the Flag: Arrange the stripes and union section on a flat surface. Apply wood glue between the pieces and use clamps to hold them together while the glue dries.
- Stain/Paint the Flag: Once the glue is dry, apply red and white stain or paint to the stripes, and blue to the union section. Allow to dry completely.
- Add Stars: Use a star stencil or apply decals to the blue union section to represent the stars.
- Seal the Flag: Apply a clear wood sealant over the entire flag to protect it and enhance its longevity.
- Display: Once fully dry, mount your rustic wooden American flag on your porch, above your mantel, or on a wall to showcase your patriotic craftsmanship.
DIY Decor Supplies:
- Wooden Boards – Suitable for crafting the flag
- Wood Stain Set – Includes red, white, and blue colors
- Star Stencils – For accurate star placement
- Clear Wood Sealant – Protects and preserves the finished flag
Available from Amazon.com [ad]


Patriotic Bandana Wreath
This vibrant bandana wreath adds a festive touch to your Memorial Day decor. It’s simple to make, requiring no sewing, and brings a pop of red, white, and blue to your front door or mantel.
Materials Needed:
- Red, white, and blue bandanas (approximately 8–10 of each color)
- Wire wreath frame (14–16 inches)
- Scissors
- Ribbon or twine for hanging (optional)
Instructions:
- Prepare the Bandanas: Fold each bandana in half diagonally to form a triangle, then cut along the fold to create two triangular pieces.
- Attach Bandanas to the Wreath Frame: Take one triangle, fold it over the wreath frame so that the pointed ends are even, and tie a double knot to secure it in place.
- Continue Tying Bandanas: Repeat the process, alternating colors to create a balanced pattern around the entire wreath frame.
- Fluff and Adjust: Once all bandanas are tied, adjust and fluff them to ensure the wreath looks full and the knots are evenly distributed.
- Add a Hanger (Optional): Attach a piece of ribbon or twine to the top of the wreath for easy hanging.
- Display: Hang your patriotic bandana wreath on your front door, above the mantel, or on a wall to celebrate Memorial Day with a handmade touch.
DIY Decor Supplies:
- Assorted Bandanas – Red, white, and blue designs
- Wire Wreath Frame – Sturdy base for the wreath
- Fabric Scissors – For clean and easy cutting
- Decorative Ribbon – Optional, for hanging
Available from Amazon.com [ad]


Patriotic Tin Can Luminaries
These charming tin can luminaries are an eco-friendly way to illuminate your Memorial Day gatherings.
By upcycling empty cans, you can create glowing accents that add a warm, patriotic ambiance to your porch, patio, or tabletop.
Materials Needed:
- Empty tin cans (cleaned and labels removed)
- Red, white, and blue acrylic paints
- Nail and hammer or metal punch
- Tea light candles or battery-operated LED lights
- Wire (optional, for hanging)
- Drill with small bit (optional, for making holes)
Instructions:
- Prepare the Cans: Clean the tin cans thoroughly and remove any labels. Fill each can with water and freeze overnight; this helps maintain the can’s shape when punching holes.
- Design Your Pattern: On paper, sketch simple patriotic designs like stars, stripes, or the letters “USA.” Tape the design to the can as a guide.
- Punch the Holes: Using a hammer and nail or a metal punch, create holes along the lines of your design. Space the holes evenly for the best visual effect. Once done, let the ice melt and dry the cans completely.
- Paint the Cans: Apply a base coat of white paint to each can. Once dry, use red and blue paints to add stripes, stars, or other patriotic motifs. Allow the paint to dry thoroughly.
- Add Handles (Optional): For hanging luminaries, drill two small holes near the rim of the can on opposite sides. Thread a piece of wire through the holes and twist to secure, forming a handle.
- Illuminate: Place a tea light candle or a battery-operated LED light inside each can.
- Display: Arrange the luminaries along pathways, on tables, or hang them from hooks to create a festive glow during your Memorial Day celebrations.
DIY Decor Supplies:
- Acrylic Paint Set – Includes vibrant red, white, and blue colors
- Metal Punch Set – Ideal for creating precise holes in tin cans
- Battery-Operated LED Tea Lights – Safe and long-lasting illumination
- Craft Wire – For creating handles if desired
Available from Amazon.com [ad]


Patriotic Table Runner
A patriotic table runner is a stylish way to bring red, white, and blue to your dining table or picnic setup.
This sewing project adds a festive touch to your Memorial Day celebrations and can be reused for future patriotic holidays.
Materials Needed:
- Fabric in red, white, and blue patterns
- Coordinating thread
- Sewing machine
- Rotary cutter and mat
- Iron and ironing board
- Pins or clips
- Quilting ruler
Instructions:
- Select and Cut Fabrics: Choose fabrics with patriotic colors and patterns. Cut them into strips or shapes as directed in the tutorial.
- Assemble the Pieces: Lay out your fabric pieces in the desired pattern. Pin or clip them together to prepare for sewing.
- Sew the Fabric Pieces: Using a sewing machine, stitch the fabric pieces together with a 1/4-inch seam allowance. Press the seams open or to one side with an iron.
- Add Batting and Backing (Optional): For a quilted look, add batting and a backing fabric. Quilt as desired to secure all layers.
- Finish the Edges: Trim any excess fabric and square up the edges. Add binding to the edges for a polished finish.
- Press and Display: Give the table runner a final press with the iron and place it on your table as a centerpiece for your Memorial Day festivities.
DIY Decor Supplies:
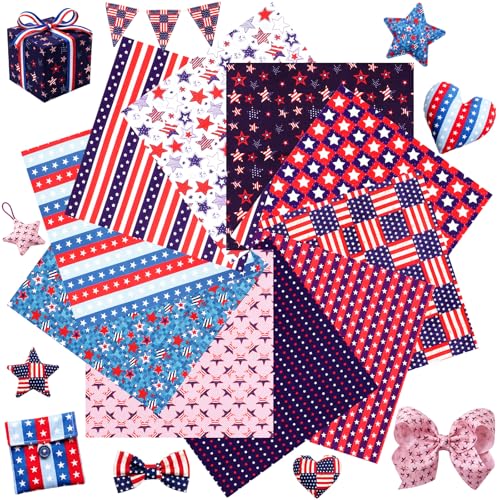
- Patriotic Fabric Bundle – Assorted red, white, and blue patterns
- Sewing Thread Set – Coordinating colors for sewing
- Rotary Cutter and Mat – For precise fabric cutting
- Quilting Ruler – Helps with accurate measurements
Available from Amazon.com [ad]


Patriotic Candle Ring Centerpiece
This elegant candle ring centerpiece adds a festive glow to your Memorial Day table. Crafted with red, white, and blue elements, it serves as a beautiful focal point for your dining or coffee table.
Materials Needed:
- Foam wreath form (12-inch diameter)
- Red, white, and blue artificial flowers (such as roses, carnations, or daisies)
- Greenery sprigs (optional)
- Floral wire and wire cutters
- Hot glue gun and glue sticks
- Pillar candle (3–4 inches in diameter)
- Glass hurricane candle holder (optional)
Instructions:
- Prepare the Wreath Form: Ensure the foam wreath form is clean and free of debris.
- Arrange the Flowers: Trim the artificial flower stems to approximately 2–3 inches in length. Arrange the flowers around the wreath form, alternating colors to create a balanced, patriotic pattern.
- Attach the Flowers: Use the hot glue gun to secure each flower stem into the foam wreath form. For added stability, insert floral wire through the stems and into the foam.
- Add Greenery (Optional): Interspersing greenery sprigs among the flowers can add depth and a natural touch to the arrangement.
- Create Space for the Candle: Ensure the center of the wreath remains open and spacious enough to accommodate the pillar candle and, if using, the glass hurricane holder.
- Assemble the Centerpiece: Place the completed floral wreath on your table. Position the pillar candle in the center of the wreath, placing it inside the glass hurricane holder if desired.
- Display: Light the candle during your Memorial Day gathering to create a warm, inviting atmosphere.
DIY Decor Supplies:
- Foam Wreath Form – Ideal base for the centerpiece
- Artificial Flower Assortment – Red, white, and blue blooms
- Floral Wire and Cutters – For securing flowers
- Flameless LED Pillar Candle – Adds ambient lighting without the risk
- Glass Hurricane Holder – Optional, for candle safety
Available from Amazon.com [ad]


Patriotic Paper Fan Decorations
These festive paper fans are a simple and cost-effective way to add a patriotic flair to your Memorial Day celebrations.
They can be used as wall decorations, hung from ceilings, or even as handheld fans for guests.
Materials Needed:
- Red, white, and blue patterned or solid-color paper (12×12 inches)
- Scissors
- Glue stick or double-sided tape
- Stapler
- Hole punch (optional)
- Ribbon or string for hanging (optional)
Instructions:
- Prepare the Paper: Select your desired paper patterns or colors. For each fan, you will need two to three sheets of paper, depending on the desired fullness.
- Accordion Folding: Take one sheet of paper and fold it accordion-style, making folds approximately 1 inch wide. Repeat this process for the remaining sheets.
- Assemble the Fan:Fold each accordion-folded paper in half to find the center. Staple the center to hold the folds together. Apply glue or double-sided tape to one edge of the folded paper and attach it to the corresponding edge of another folded piece. Continue attaching all pieces until a circular fan shape is formed.
- Secure and Finish: Ensure all edges are securely glued or taped together. If desired, use a hole punch to create a hole at the top of the fan and thread a ribbon or string through for hanging.
- Display: Hang the paper fans on walls, from ceilings, or use them as handheld fans to keep cool during your Memorial Day festivities.
DIY Decor Supplies:
- Assorted Patriotic Scrapbook Paper – Red, white, and blue designs
- Ribbon Set – Assorted colors for hanging decorations
Available from Amazon.com [ad]

Patriotic Floral Centerpiece
This vibrant floral centerpiece brings the colors of the American flag to your table, making it perfect for Memorial Day gatherings.
Combining red, white, and blue flowers with rustic elements, this arrangement adds a festive and elegant touch to your decor.
Materials Needed:
- Red, white, and blue artificial or fresh flowers (e.g., roses, carnations, hydrangeas)
- Mason jar or rustic vase
- Small American flags
- Floral foam (if using fresh flowers)
- Ribbon or twine
- Scissors or floral shears
Instructions:
- Prepare the Vase: If using fresh flowers, soak the floral foam in water until saturated and place it inside the vase or mason jar. For artificial flowers, you can skip the floral foam or use dry foam to secure the stems.
- Arrange the Flowers: Start by placing the largest flowers in the center of the arrangement to create a focal point. Add medium-sized flowers around the center, alternating colors to represent the red, white, and blue theme. Fill in any gaps with smaller flowers or greenery to add fullness and texture.
- Add Flags and Accents: Insert small American flags into the arrangement, positioning them at varying heights for visual interest.Tie a ribbon or twine around the neck of the mason jar or vase to enhance the rustic charm.
- Display: Place the centerpiece on your dining table, mantel, or entryway to add a patriotic touch to your Memorial Day decor.
DIY Decor Supplies:
- Artificial Flower Assortment – Red, white, and blue blooms
- Mason Jar Set – Ideal for rustic centerpieces
- Small American Flags – Perfect for patriotic decorations
- Floral Foam Blocks – For securing fresh flower arrangements
- Decorative Ribbon Set – Assorted colors for embellishing
Available from Amazon.com [ad]


DIY Patriotic Porch Decor
This project involves crafting a decorative piece that embodies the red, white, and blue theme, perfect for celebrating Memorial Day.
Materials Needed:
- Wooden pallet or reclaimed wood
- Sandpaper
- Red, white, and blue paint
- Paintbrushes
- Star stencil
- Hanging hardware (optional)
Instructions:
- Prepare the Wood: Sand the wooden surface to smooth out any rough edges and ensure it’s clean.
- Design the Flag: Using the star stencil, plan the placement of stars and stripes to resemble the American flag.
- Paint the Flag: Apply red and white paint for the stripes, and blue for the field of stars. Allow the paint to dry between coats for a vibrant finish.
- Add Stars: Once the blue paint is dry, use the stencil to paint white stars onto the blue section.
- Finish and Display: After the paint has completely dried, attach hanging hardware if you plan to hang the piece. Display your patriotic decor on your porch to celebrate Memorial Day.
DIY Decor Supplies:
- Wooden Pallet – Suitable for crafting the flag
- Acrylic Paint Set – Includes red, white, and blue colors
- Star Stencil – For accurate star placement
- Paintbrush Set – Variety of sizes for detailed painting
- Sandpaper Assortment – For preparing the wood surface
Available from Amazon.com [ad]


The Takeaway
Creating your own Memorial Day decor adds something special that store-bought items just can’t match.
Each piece you make—whether it’s a rustic flag sign, a glowing lantern, or a bandana wreath—carries your heart, your time, and your love for your home and country.
This roundup was built with real-life usability in mind: everything here is genuinely beautiful, not overly complicated, and designed to be displayed with pride.
Whether you’re decorating for a quiet moment of remembrance or a full family gathering, these projects can help you set the tone. Meaningful. Memorable. And uniquely yours!
What to Read Next?

Share This Post!
Know someone who loves patriotic DIYs as much as you do? Share this article with a friend or pin it for later!
Last update on 2026-06-11 / Affiliate links / Images from Amazon Product Advertising API


