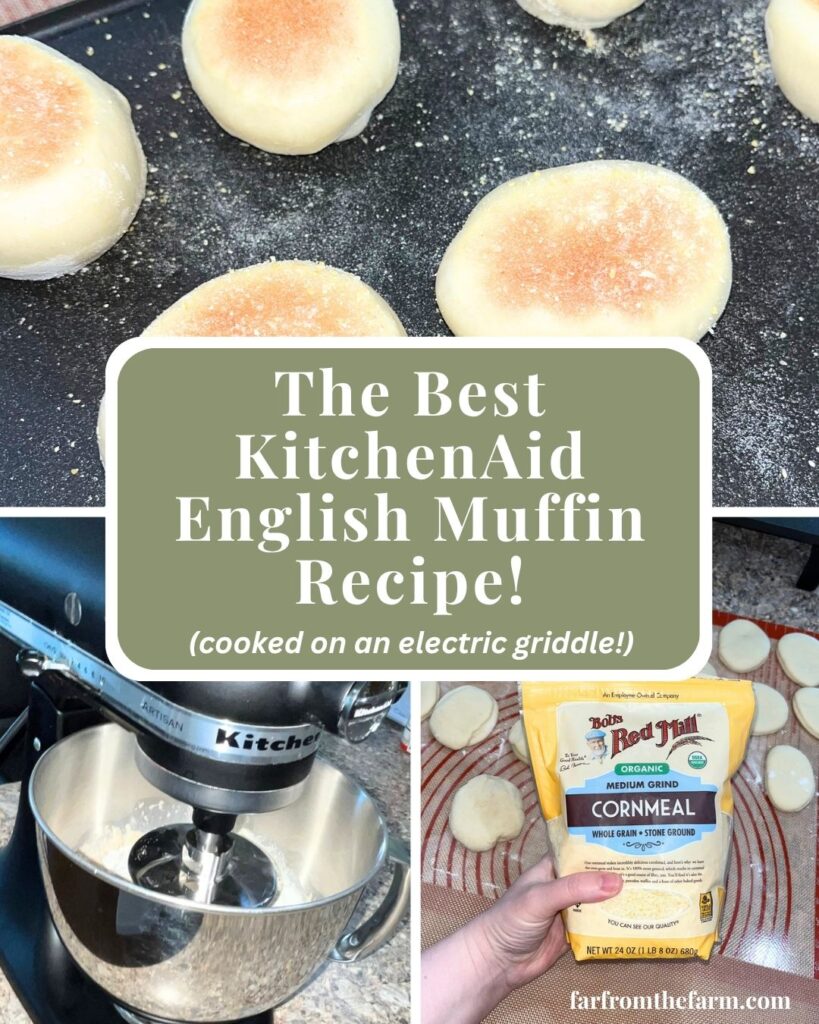
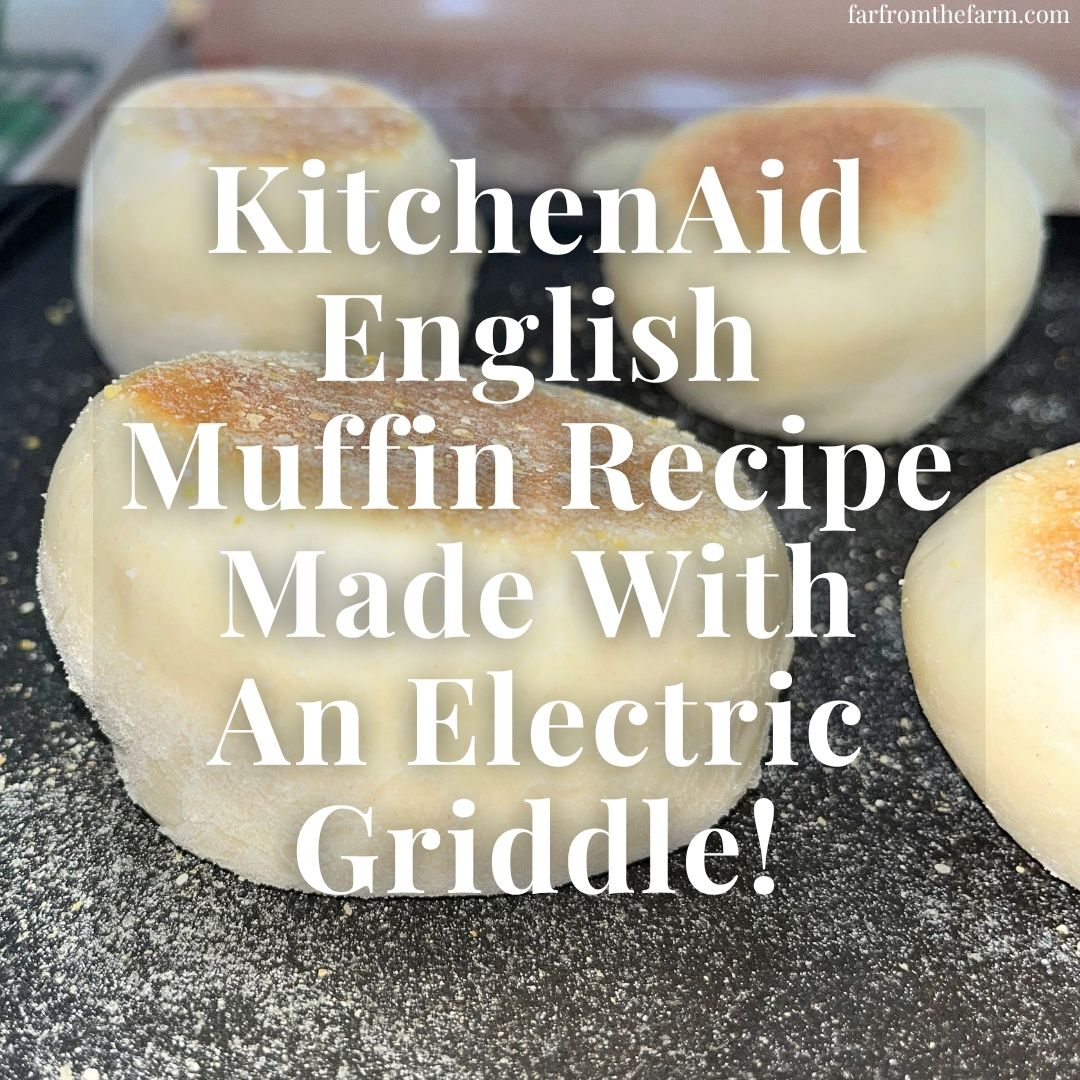
How to Make Stand Mixer English Muffins and Cook them on an Electric Griddle! (plus Dairy-Free option!)
Soft homemade English muffins made with milk powder, pantry staples, and a stand mixer. Perfect for freezer breakfasts, budget meal prep, and homemade sausage McMuffins!
Hi! If you’ve been following me for long you’ll already know this, but for those who are new, welcome to Far From The Farm. I’m Mona, the Brit behind the recipes, learning life and food in the States while sharing our debt-free journey and what’s on the menu in our home today!
OK confession time. I am absolutely that annoying “we’ve got food at home” friend. My husband would probably confirm that with very little hesitation too!
It’s not that I don’t enjoy eating out. I do. I just tend to be pretty picky about what I want to spend money on. If we’re going somewhere really special then great. But spending a surprising amount of money on fast food that we could probably make ourselves at home isn’t top on my list of fun things to do.
So quite often you’ll find me in the kitchen trying to recreate some of my husband’s favorite copycat restaurant and fast food treats. Not because I’m trying to ruin the fun, but because it’s nice being able to enjoy those familiar foods while also keeping an eye on the grocery budget.
These homemade English muffins use pantry ingredients that many of us already have sitting in the cupboard. No fresh milk required. No special ingredients. No last-minute grocery store trip needed with temptations to buy more than I need.
Which is especially handy on those chilly winter mornings when you don’t want to leave the house, or those days right before payday when you’re trying to stretch what you already have on hand.
The English muffin most Americans know today is much more of an American breakfast staple than something I grew up eating back home.
It was popularized in New York by an English-born baker, which explains the name, but it certainly wasn’t a regular feature on British breakfast tables when I was growing up.
In fact, I’d never actually eaten an English muffin until I moved to America, and many Brits will tell you the same. Of course, most of us have probably come across them nowadays. You’ll spot them on breakfast menus and in supermarkets, and no doubt McDonald’s has helped introduce a lot of us to them too!
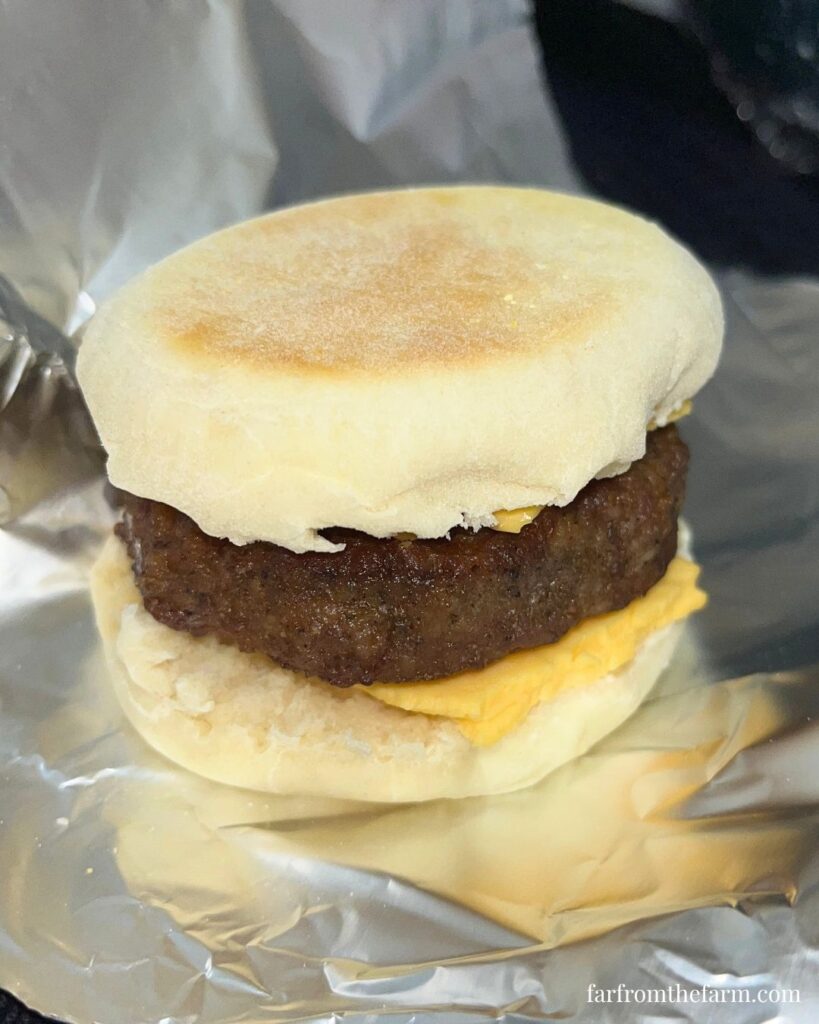
Speaking of McDonald’s, the first English muffin I ever tried was actually part of one of my husband’s favorite McDonald’s breakfast sandwiches. He keeps things simple. Sausage and cheese on an English muffin and he’s a happy man.
I’ve tried buying all sorts of English muffins from the grocery store. Some have been the more expensive bakery-style or sourdough versions. Others have been the cheaper budget-friendly packs.
It’s been very hit and miss.
Most seem to have ingredient lists packed with preservatives and things I can’t pronounce. And considering an English muffin is really just a fairly simple bread product, that always felt a bit unnecessary to me.
Eventually I decided it would be easier to just make our own.
Over the last year I’ve tested a few different English muffin recipes. Some worked. Some produced hockey pucks. Some tasted fine but required ingredients I don’t always have available.
Eventually we landed on this version that we just love. And it’s pretty practical to make too. Milk powder stays in my pantry for ages. The remaining ingredients are also kitchen staples.
Cornmeal gives English muffins their classic bakery-style finish and helps create that familiar texture on the outside. I use Bob’s Red Mill Medium Grind Cornmeal, but regular yellow or white cornmeal works just fine too. If you don’t have cornmeal on hand, semolina is a great substitute and gives a very similar result.
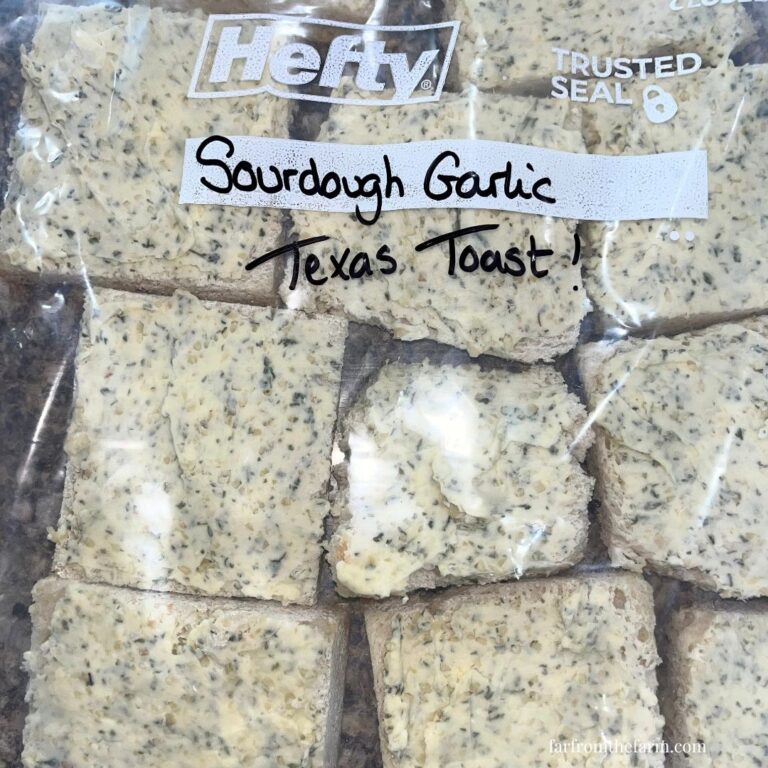
The finished muffins freeze beautifully, making them perfect for homemade breakfast sandwiches throughout the month.
One thing I do want to mention before you start. When you mix this dough, it’s going to look wrong. Very wrong. You’ll probably be convinced you’ve ruined it. You haven’t.
The dough is supposed to be incredibly soft and sticky. In fact, if you’re looking at the bowl and wondering how on earth this gloopy mess could ever become English muffins, you’re right on track.
Resist the temptation to keep adding flour. That soft dough is one of the secrets to getting tender homemade English muffins instead of dense dry ones.
Cooking these muffins on an electric griddle makes it so much easier for me – I can perch in at the kitchen counter on my favorite bar stool and have them ready in no time.
And if I leave them a little thick I can just finish them off in the oven to make sure there’s no raw dough left inside! More on how to do that later . . .
So long story short, my husband got his perfect homemade version of a Sausage McMuffin. I get the satisfaction of making it from scratch. And by making more of our food at home our grocery budget gets a little breathing room too!
As a military family currently working through Baby Step 2 of our debt-free journey, we’re making more things at home these days. Every dollar we don’t spend unnecessarily is another dollar that can go towards our goals. Those little savings really do add up over time.
And just a reminder that if you’re struggling and you need help with managing your budget or starting your own debt free journey then here’s some FREE resources below you may find helpful!
living frugally and fully
free tips and resources to make the most of what you have
As always, these photos are from my real kitchen here in our sweet military base home. No staged lighting or spotless marble counters. Just real life and real food made in a small space. Proof that you can feed your family well without needing a dream kitchen or fancy tools!
So roll up your sleeves, grab your stand mixer, and let’s head into the kitchen to make these soft pantry ingredient English muffins!

Equipment
- KitchenAid stand mixer (or similar stand mixer) with dough hook attachment and mixing bowl
- Measuring jug
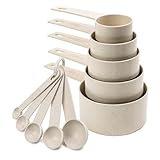
- Measuring cups and spoons
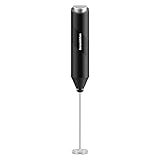
- Mini battery-powered milk frother
- Plastic wrap or clean kitchen towel
- Silicone bench mat or silicone bench protector
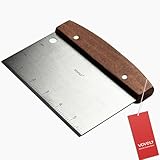
- Bench scraper
- Rolling pin
- 3-inch cutter or drinking glass etc
- Spatula
- Cooling rack
Available on Amazon.com [ad]


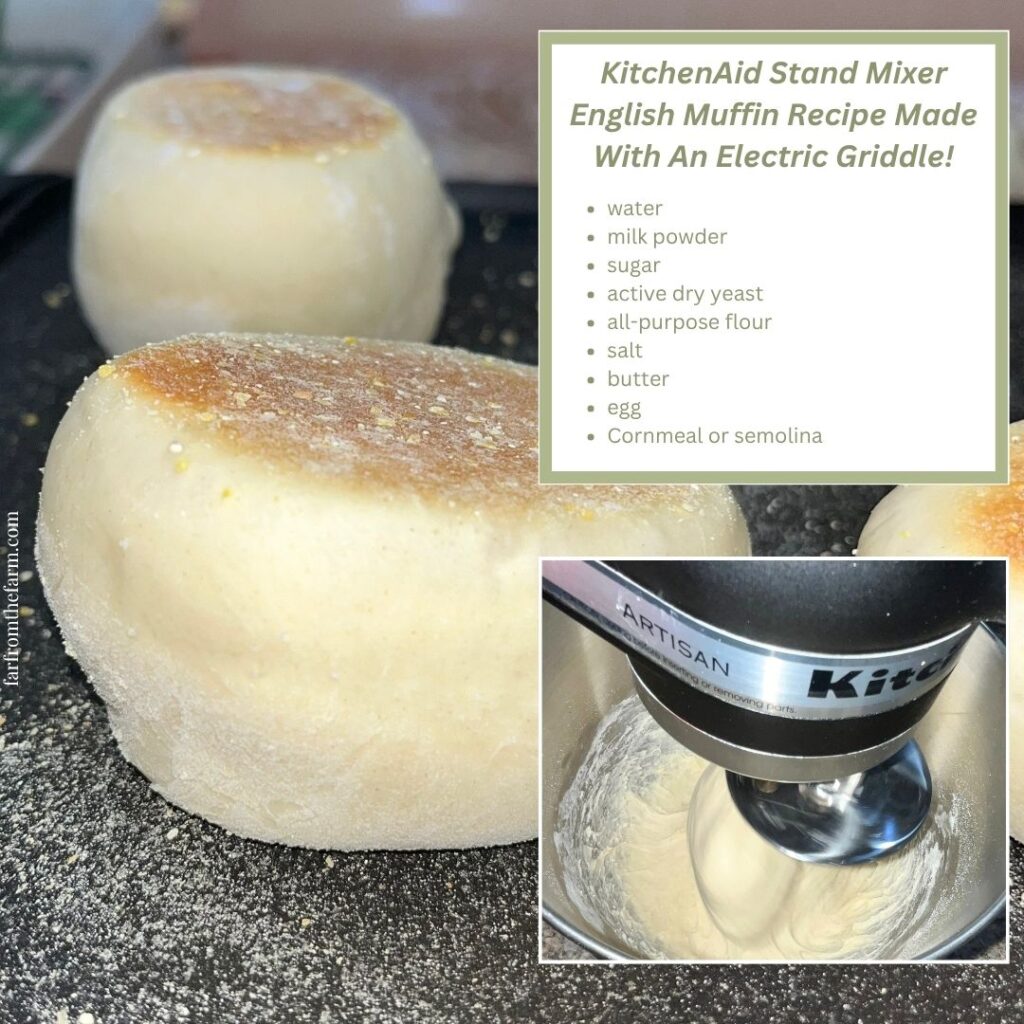
Ingredients
Makes 18-20 English Muffins
- 1 1/4 cups warm water
- 1/4 cup nonfat milk powder (or your favorite dairy-free milk powder alternative)
- 2 tbsp sugar
- 3 tsp active dry yeast
- 3 cups all-purpose flour
- 1 tsp salt
- 3 tbsp salted butter, cold and cut into small cubes (or dairy-free butter alternative)
- 1 large egg
- Cornmeal or semolina, for dusting (I use Bob’s Red Mill Medium Grind Cornmeal, but semolina works beautifully too!)
Available on Amazon.com [ad]


Why Use Milk Powder Instead of Fresh Milk in this English Muffin Recipe?
Many traditional English muffin recipes use fresh milk, but I actually prefer using milk powder for this version.
First, it’s incredibly convenient. Milk powder lasts for months in the pantry, which means I can make a batch of English muffins whenever the mood strikes without worrying whether I have fresh milk in the refrigerator.
Second, it makes this recipe much more budget friendly and practical for pantry baking. As a military family working through our debt-free journey, I love having recipes that rely on ingredients I already keep stocked year-round.
And finally, milk powder still gives these homemade English muffins a soft, tender texture without requiring any special ingredients.
How to Use Fresh Milk Instead of Milk Powder
If you don’t keep milk powder in your pantry, don’t worry. You can easily make these English muffins using fresh milk instead.
Simply replace the:
- 1 ¼ cups warm water
- ¼ cup nonfat milk powder
with:
- 1 ¼ cups warm milk
Continue with the rest of the recipe exactly as written.
Whether you use milk powder or fresh milk, you’ll still end up with delicious homemade English muffins that freeze and toast wonderfully!
How to Make These English Muffins Dairy-Free!
Good news! These homemade English muffins are very easy to adapt for a dairy-free diet.
The only dairy ingredients in this recipe are the nonfat milk powder and butter. Simply replace the milk powder with your favorite dairy-free milk powder or use warm unsweetened dairy-free milk instead of the water and milk powder combination.
For the butter, use your favorite dairy-free butter substitute or plant-based baking stick.
When preparing this recipe for someone with a dairy allergy, always double-check ingredient labels, especially on dairy-free butter substitutes, as ingredients can vary between brands.
With a couple of simple swaps, you can still enjoy soft homemade English muffins that freeze beautifully and make fantastic breakfast sandwiches.
Step-by-Step Instructions
Step 1
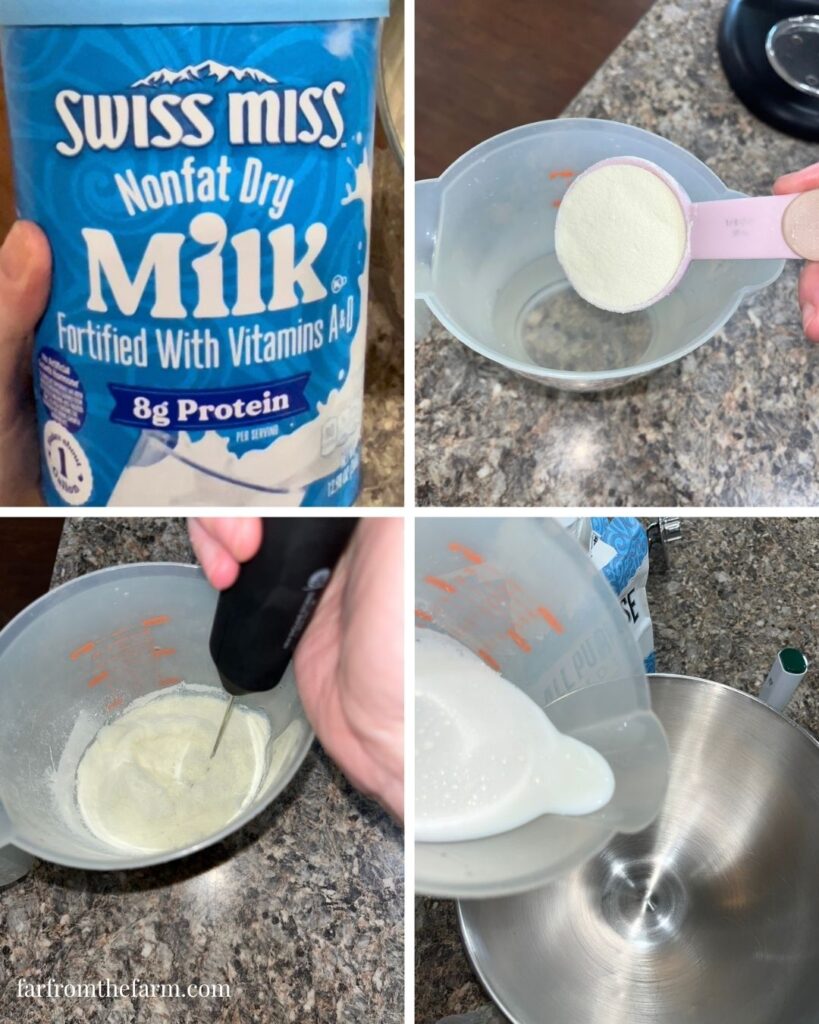
Add the nonfat milk powder (or dairy free milk powder alternative) to the warm water and blend it together using a mini milk frother until fully combined.
Pour the mixture into the bowl of your stand mixer.
Step 2
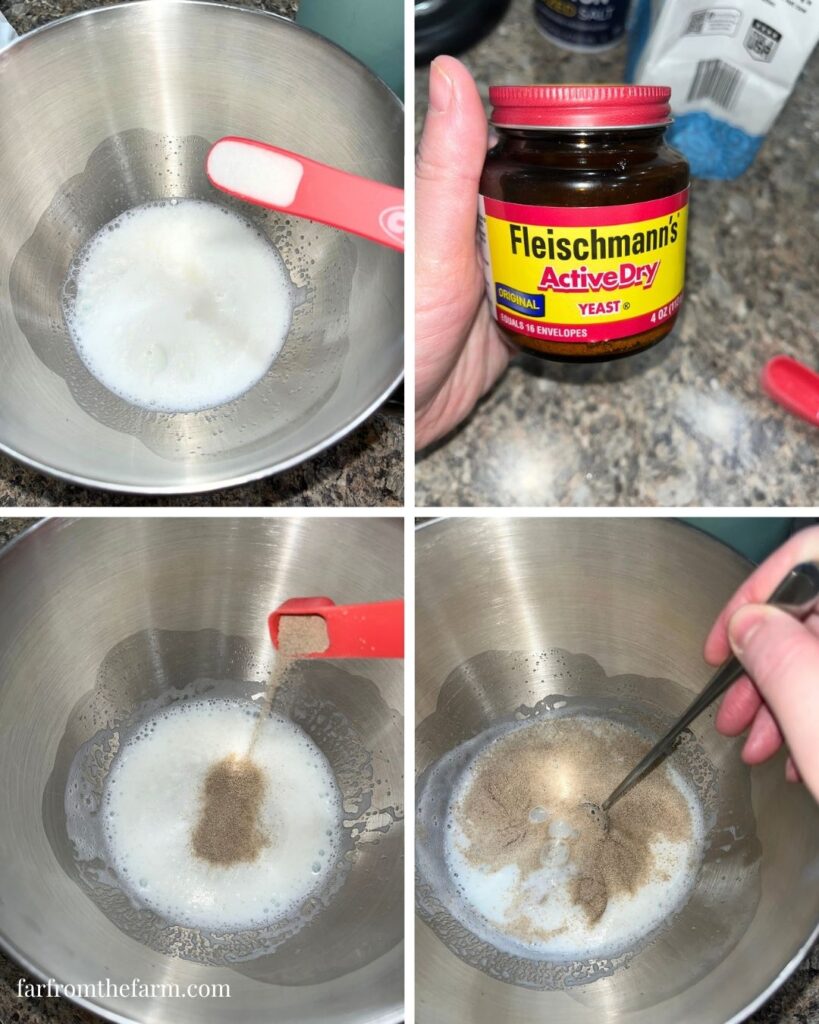
Add the sugar and active dry yeast.
Give everything a quick stir, then cover the bowl with plastic wrap or a clean kitchen towel.
Allow it to sit for 5 to 10 minutes.
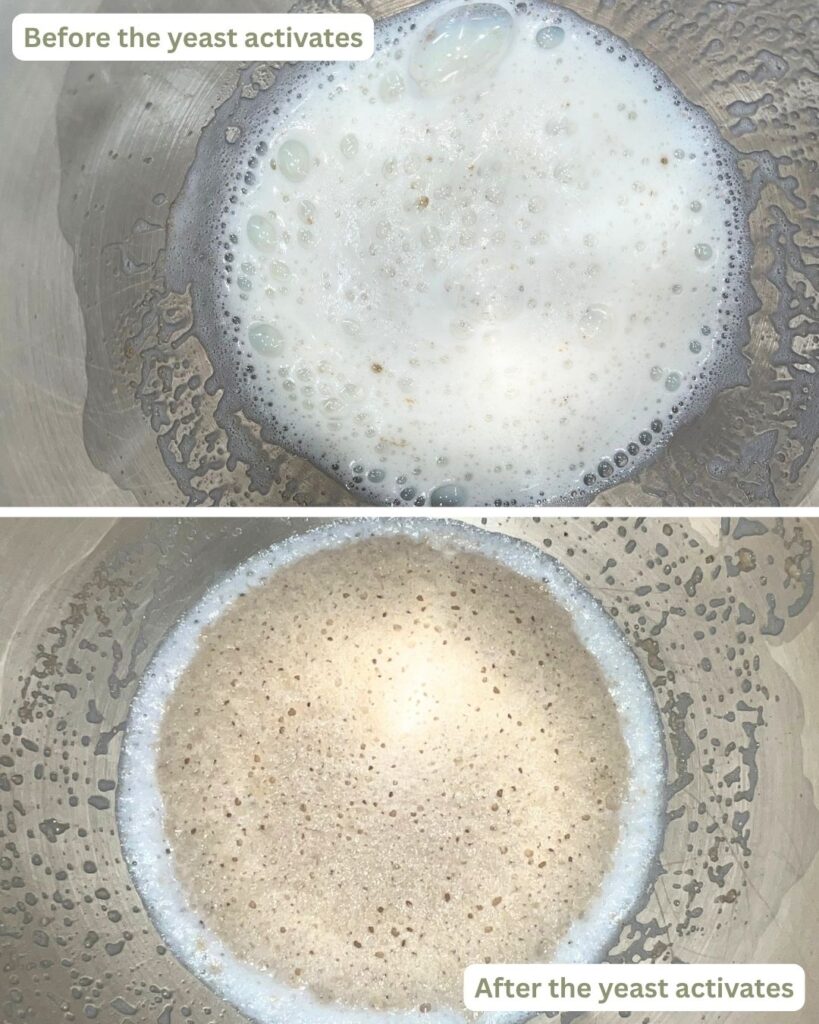
When the yeast is active (also known as ‘proofed’), the mixture should look foamy and bubbly across the surface. If nothing happens, discard it and start again with fresh yeast.
Step 3
Add the cubed cold butter (or dairy-free butter alternative) and egg to the yeast mixture.
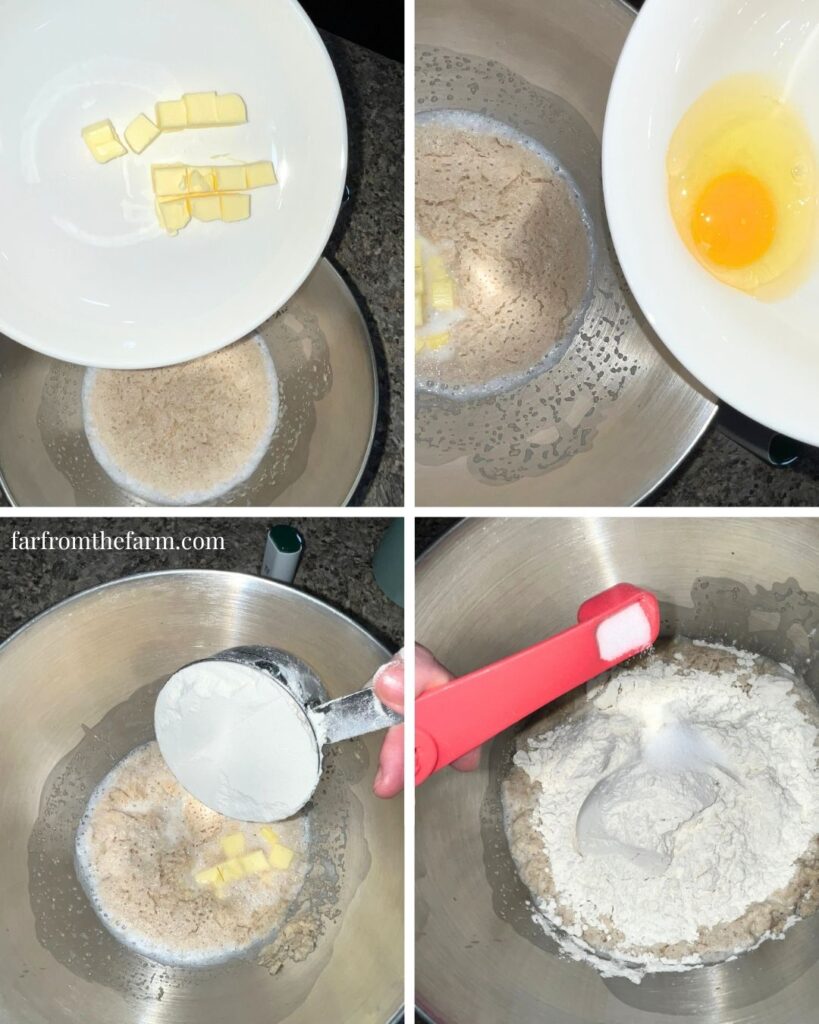
Step 4
Add the flour and salt.
Step 5
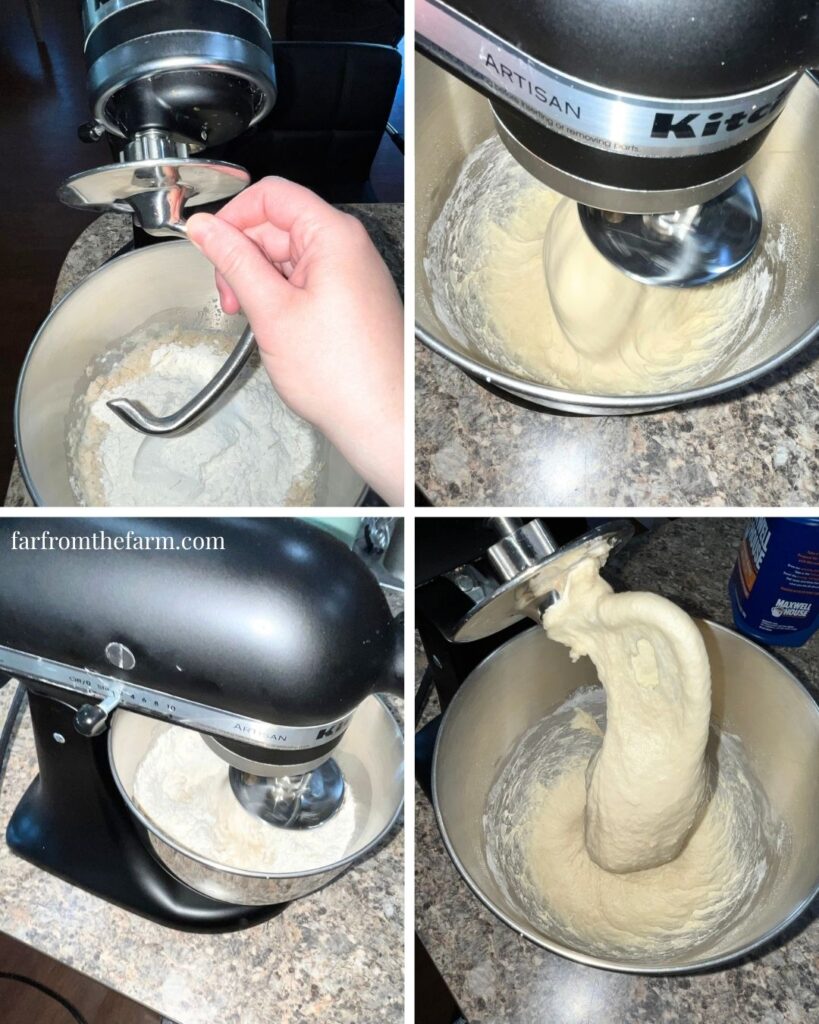
Attach the dough hook and knead on the lowest mixer setting for 7 to 8 minutes.
The dough will begin coming together but it will remain much softer than a traditional bread dough.
Step 6
This is the stage where most people panic.
Because the dough will be extremely sticky and loose.
It may look more like thick batter than bread dough.
Don’t panic.
Don’t add extra flour.
That sticky texture is exactly what helps create soft English muffins later.
Wet one hand thoroughly with cold water.
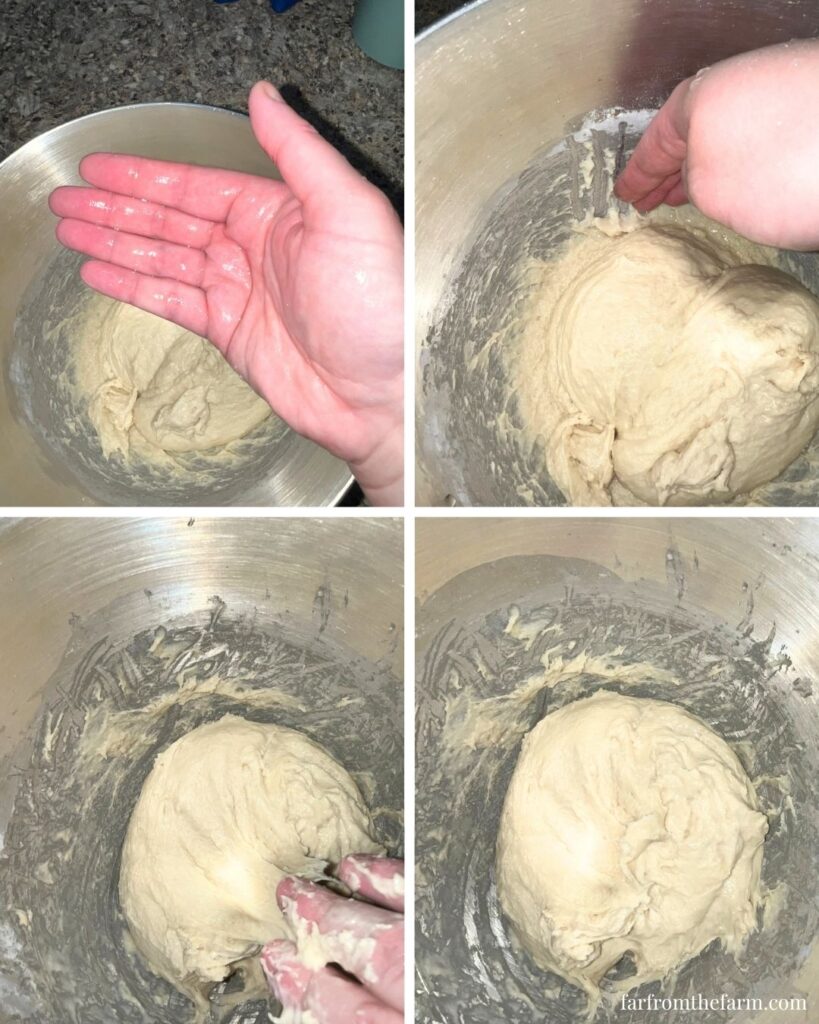
Using your wet hand, slide down the inside edge of the bowl while rotating the bowl with your other hand. Gather the dough toward the center of the bowl.
Once it’s gathered, gently stretch one side of the dough upward and fold it back over itself several times.
If you’ve ever watched sourdough bakers perform stretch-and-folds, it’s a similar idea. You’re helping strengthen the gluten without loading the dough with extra flour.
Step 7
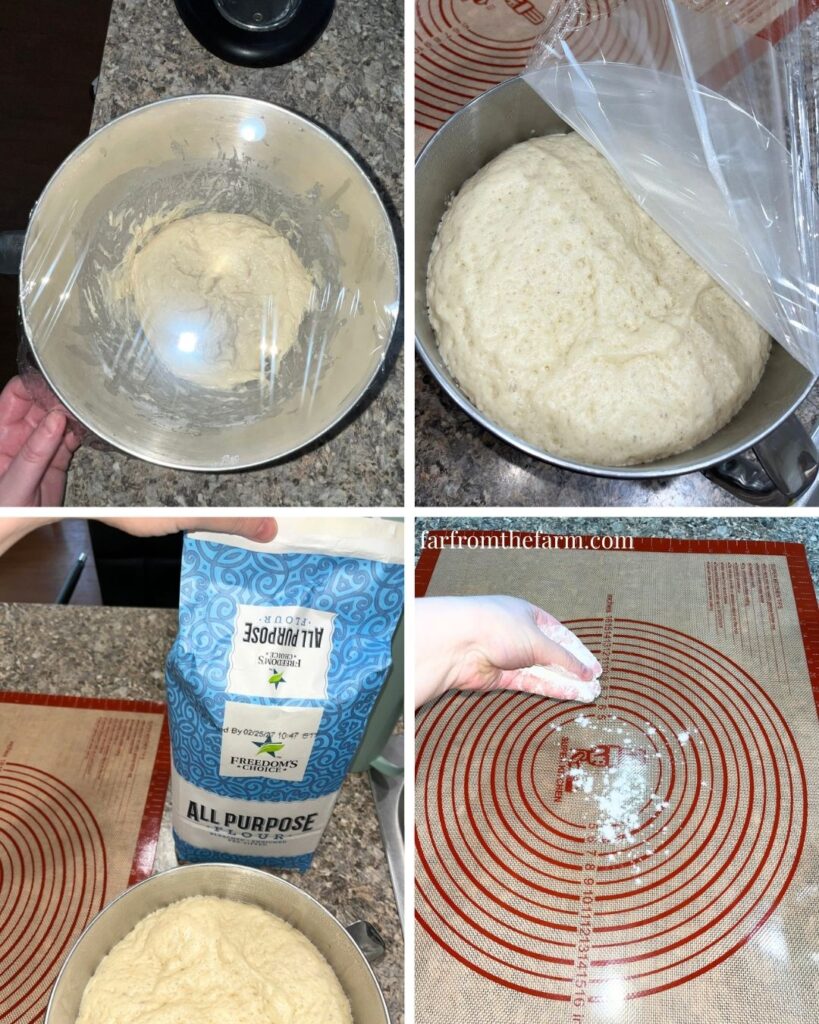
Cover the bowl again with plastic wrap or a damp kitchen towel.
Allow the dough to rise for approximately 1 hour and 30 minutes or until doubled in size.
The dough should look puffy, airy, and noticeably larger.
Step 8
Preheat your electric griddle to 300°F when the dough is fully risen.
Step 9
Lightly flour your silicone bench mat.
Carefully tip the dough onto the surface.
The dough will still appear very soft and sticky. Some fibrous-looking strands will cling stubbornly to the bowl. That’s completely normal.
Use your hand or bench scraper to gently encourage every last bit onto the work surface.
Again, resist the urge to keep adding flour. A little for handling is fine. Large amounts will make the finished muffins dry.
Step 10
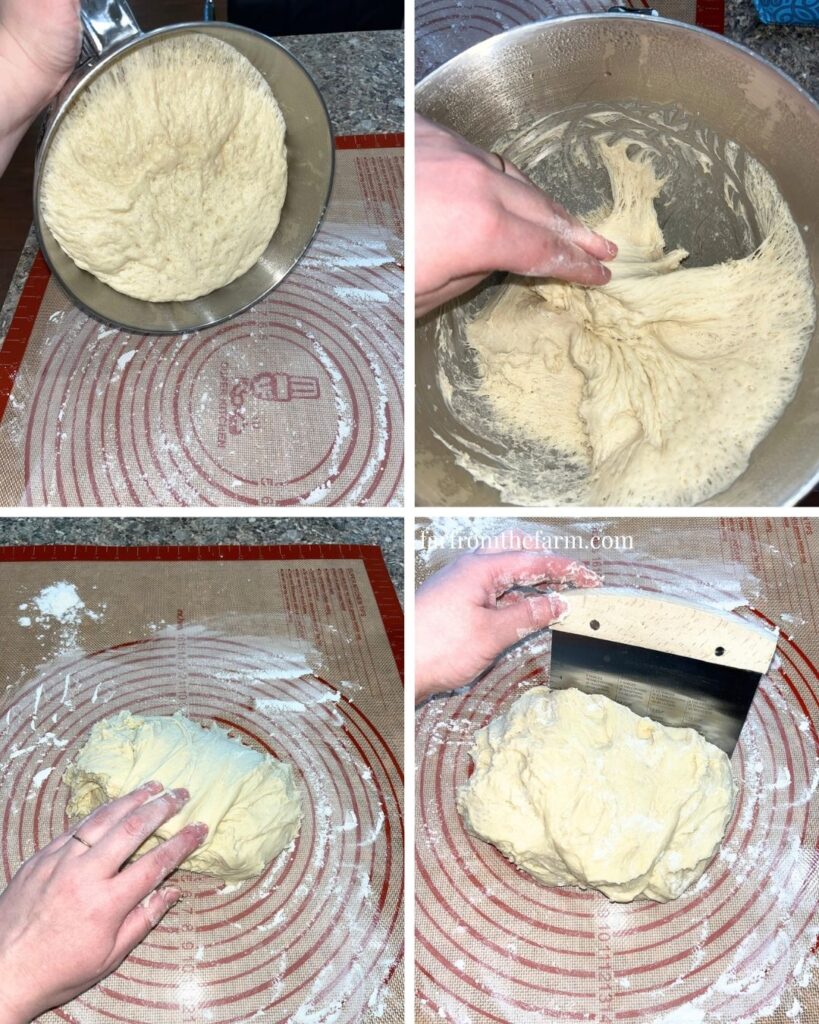
Using a bench scraper, gently lift, fold, and turn the dough over itself several times, for about 2 minutes.
You’re not fully kneading here. You’re simply helping the dough gather into a smoother mass that’s easier to roll.
Continue until it feels slightly more manageable and no longer wants to spread across the counter quite as aggressively.
The dough should still feel soft and slightly tacky.
Step 11
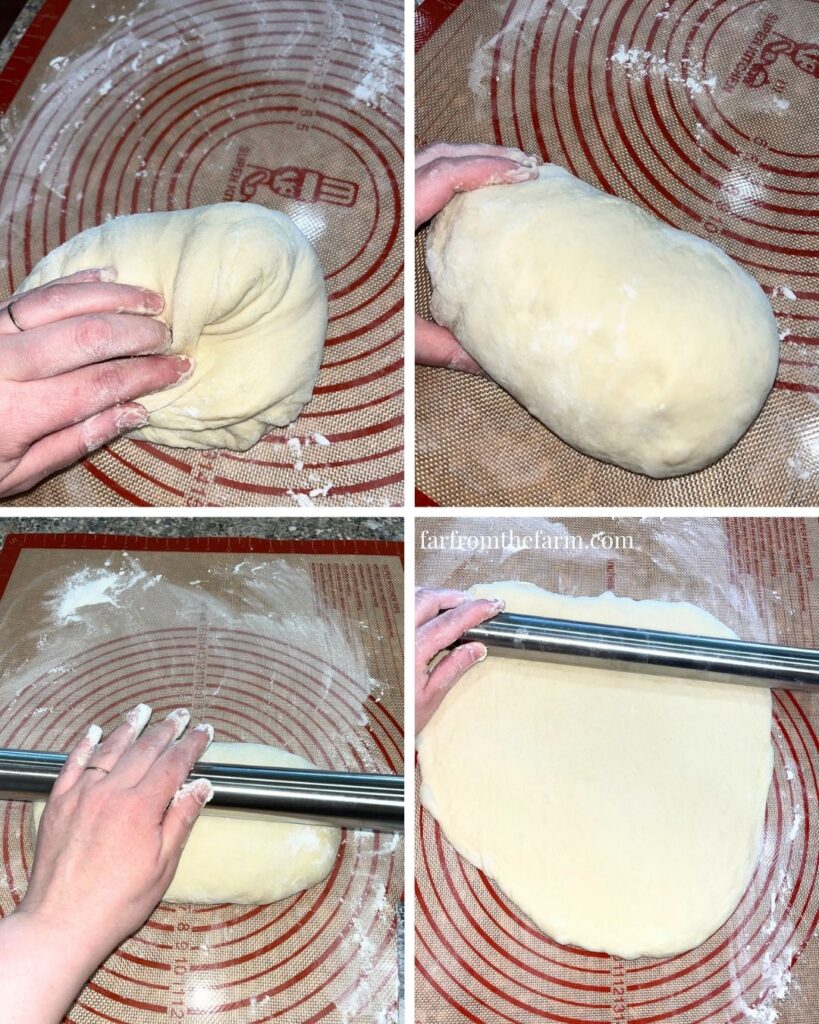
Using a rolling pin, roll the dough to approximately 1/4 inch thickness.
Step 12
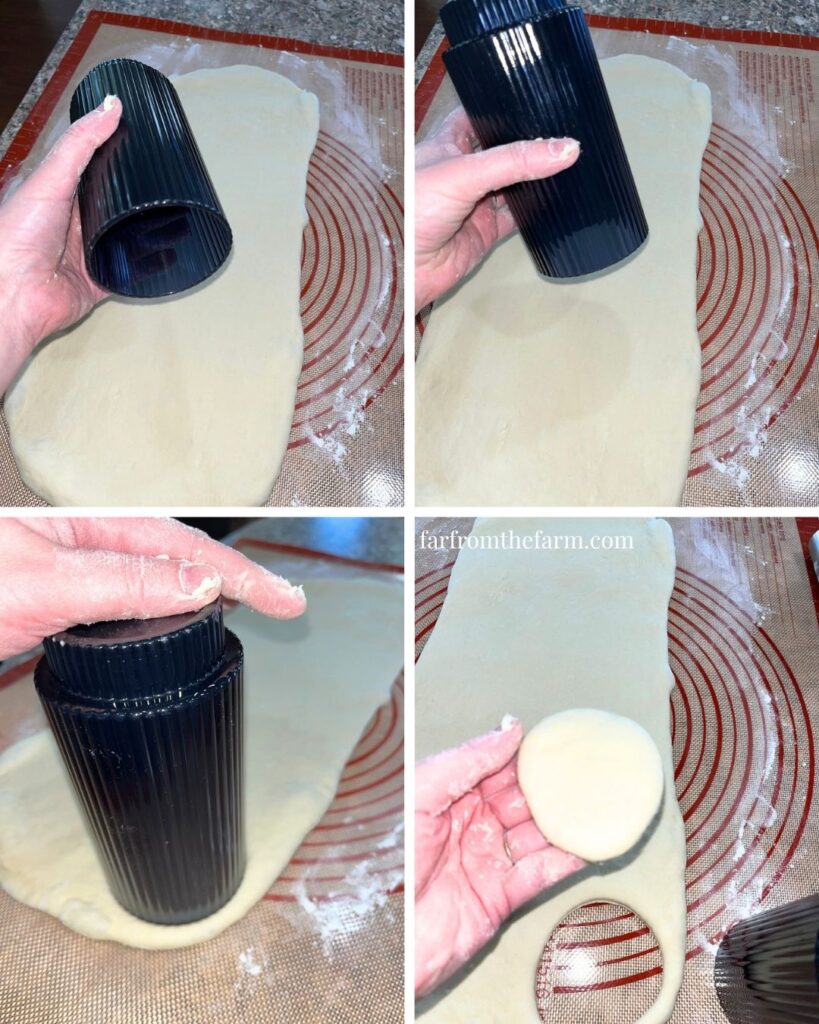
Using a 3-inch cutter or drinking glass, cut out your English muffins.
Gather scraps as needed and gently reroll to use the remaining dough.
You should get approximately 18 to 20 English muffins.
Step 13
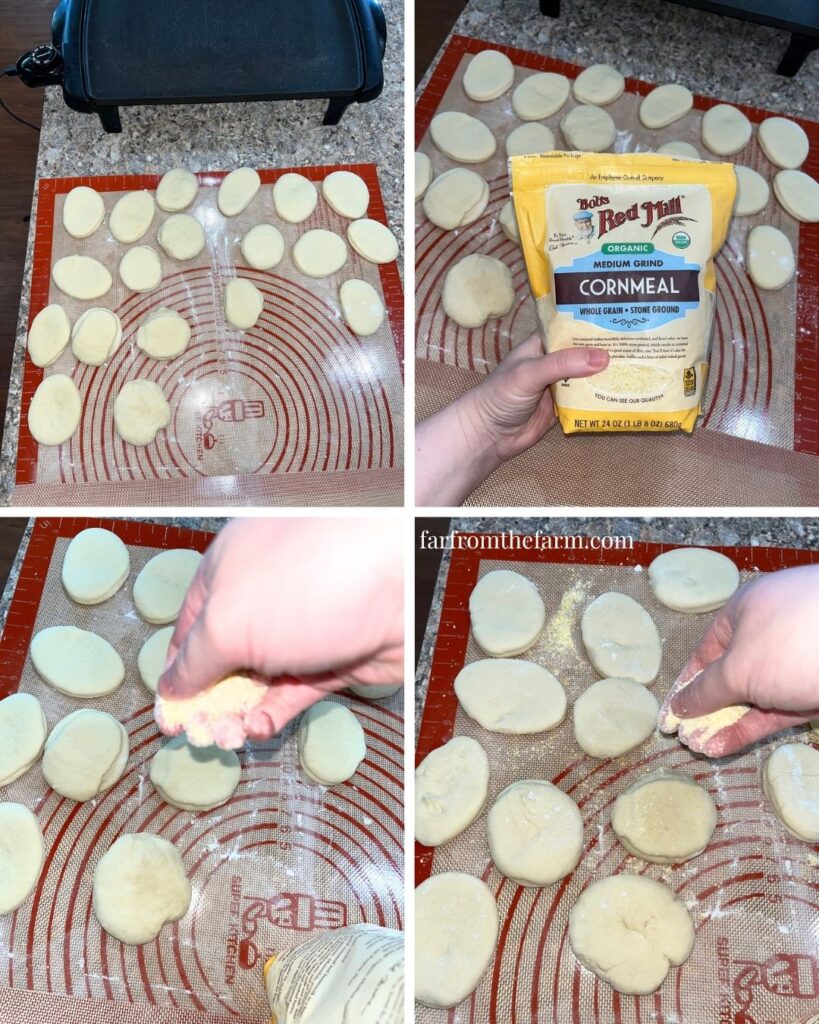
Sprinkle a medium grind cornmeal or semolina lightly over each round.
Flip them over and repeat on the other side.
This gives the classic English muffin finish and texture.
Step 14
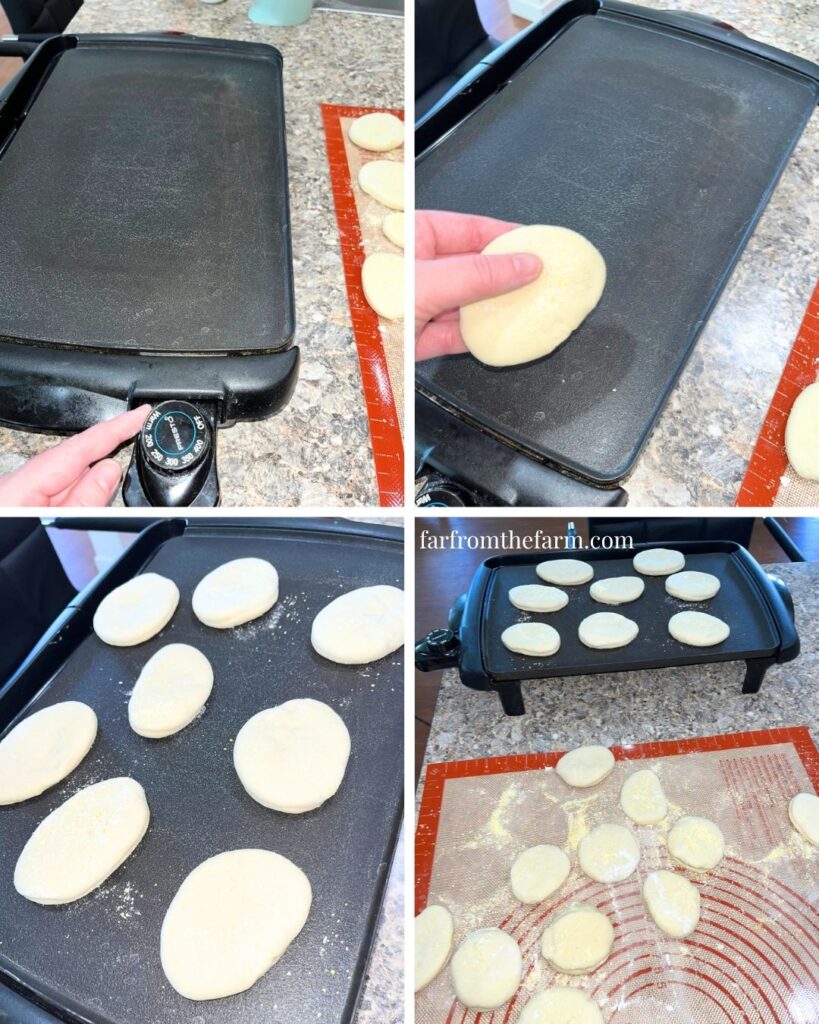
Place the English muffins onto the preheated 300°F electric griddle. We keep the temperature intentionally that low as it promotes a light colored final product that is cooked evenly, rather than burned on the outside and raw on the inside.
Cook for approximately 12 minutes on the first side.
Carefully flip and cook for another 12 minutes on the second side.
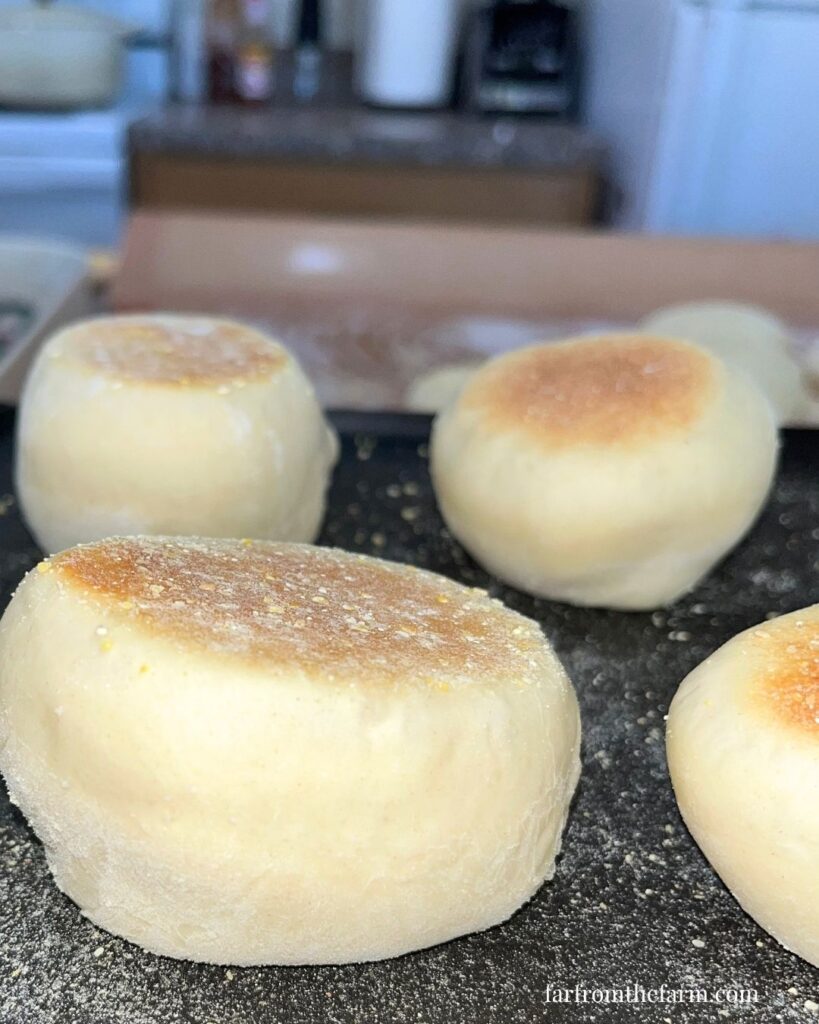
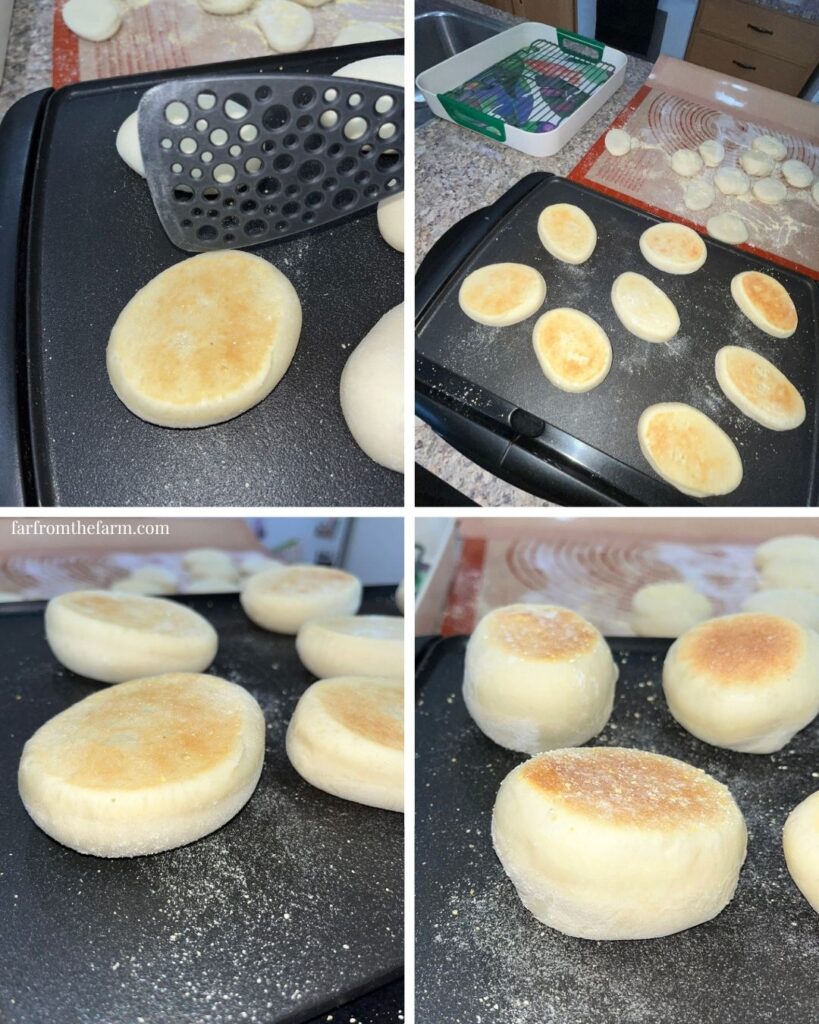
The tops and bottoms should be lightly golden and feel firm when gently pressed.
If your muffins ended up slightly thicker than intended and you’re concerned about the centers, split one open with a fork and check the middle. The inside should look soft and fluffy rather than wet or doughy.
Top Tip: If needed, transfer them to a 350°F oven for about 10 minutes to finish cooking through.
Step 15
Transfer the finished English muffins to a cooling rack.
If serving immediately, allow them to cool just enough to handle.
If you’re freezing them, wait until completely cooled.
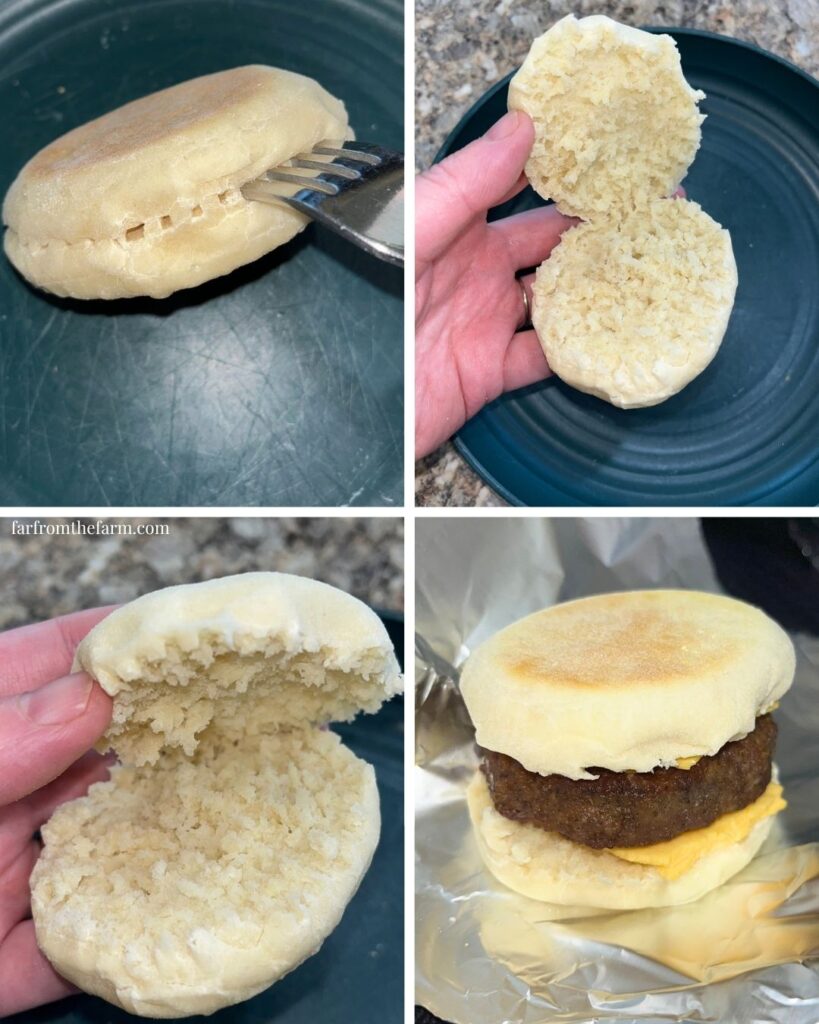
Before freezing, use the tines of a fork to work your way around the center seam of each muffin. Don’t pull them apart completely. Just create the natural split line and uniquely wonderful crumb that English muffins are known for.
This makes them much easier to separate after thawing.
My muffins are still doughy inside, can I finish them off in the oven?
Absolutely!
If your homemade English muffins look beautifully golden on the outside but still seem a little raw, gummy or doughy in the middle, don’t panic. This is actually a really common issue when making thicker English muffins at home, and it has a very easy fix.
One of the reasons I love cooking English muffins on an electric griddle is that you have complete control over the final texture.
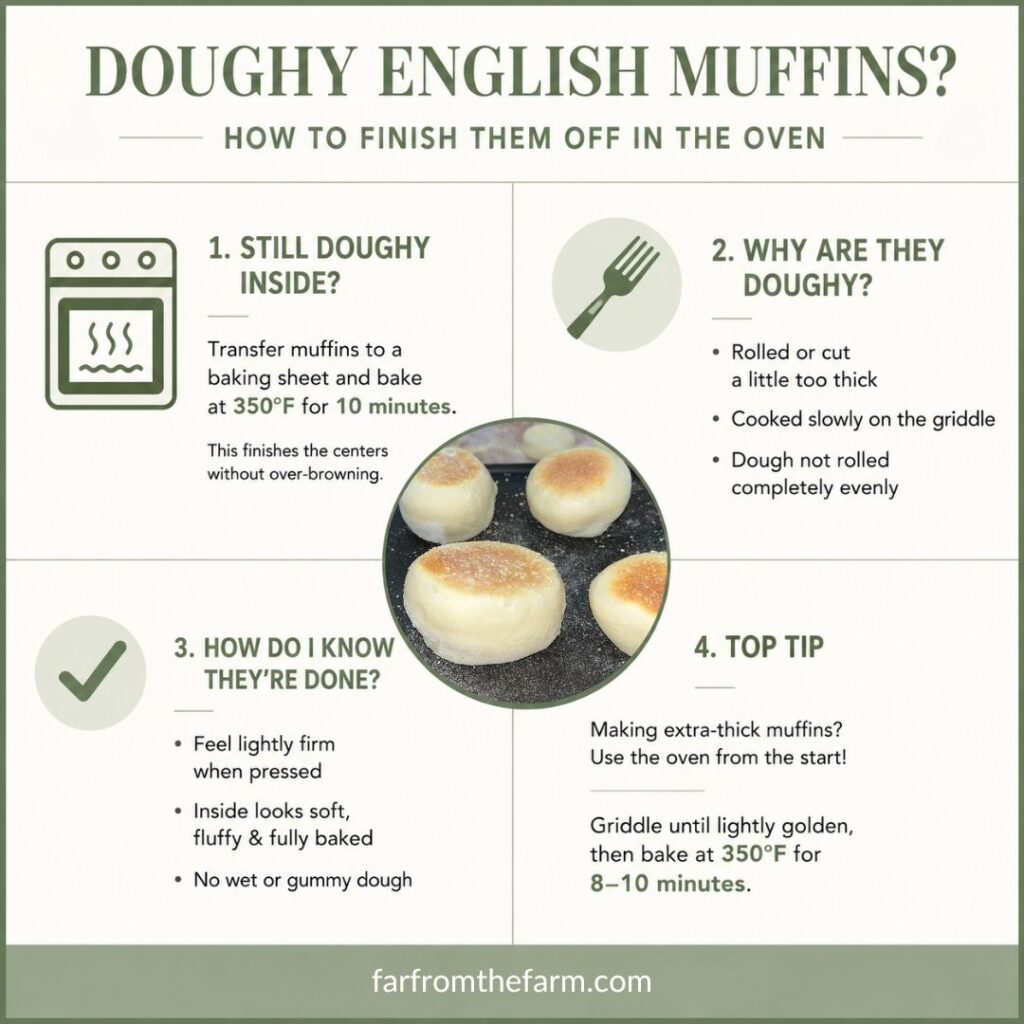
If your muffins are a little thicker than planned or you’re unsure whether the centers are fully cooked, simply transfer them to a baking sheet and place them into a preheated 350°F oven for about 10 minutes.
This allows the centers to finish baking without over-browning the outside.
To check if they’re done, use a fork to split one open. The inside should look soft and fluffy with no wet or gummy dough remaining.
I actually use this trick myself whenever I intentionally make slightly thicker English muffins for homemade breakfast sandwiches. A thicker muffin is great for holding sausage, egg, and cheese, but sometimes it needs a little extra time for the heat to reach the center.
So if your English muffins seem undercooked after coming off the griddle, don’t throw them away. A quick 10-minute trip through the oven will usually solve the problem completely.
Why Are My English Muffins Doughy in the Middle?
The most common reason is that the muffins were rolled or cut slightly thicker than intended.
Because English muffins cook relatively slowly on a griddle, thicker dough rounds sometimes brown nicely on the outside before the center has fully cooked through.
Another possibility is that your dough wasn’t rolled completely evenly. A few muffins that are slightly thicker than the others can sometimes need a little extra cooking time, even when the rest of the batch is perfectly done.
How Do I Know When Homemade English Muffins Are Done?
A fully cooked English muffin should feel lightly firm when gently pressed.
When split open with a fork, the inside should look soft, fluffy, and fully baked without any wet or sticky dough.
If you’re ever unsure, it’s always better to give them a few extra minutes in the oven rather than risk serving them undercooked.
Top Tip
If you know ahead of time that you prefer extra-thick English muffins for breakfast sandwiches, plan on using the oven-finishing method from the beginning.
Cook them on the griddle until lightly golden, then transfer them to a 350°F oven for 8 to 10 minutes to guarantee a perfectly cooked center every time.
What cornmeal should I use for homemade English muffins?
For homemade English muffins, a medium-grind cornmeal works best. It gives that classic bakery-style coating and texture without being overly coarse. I use Bob’s Red Mill Medium Grind Cornmeal, but regular yellow or white cornmeal will work just fine too.
Here’s a helpful little graphic you can pin and save for later to reference:
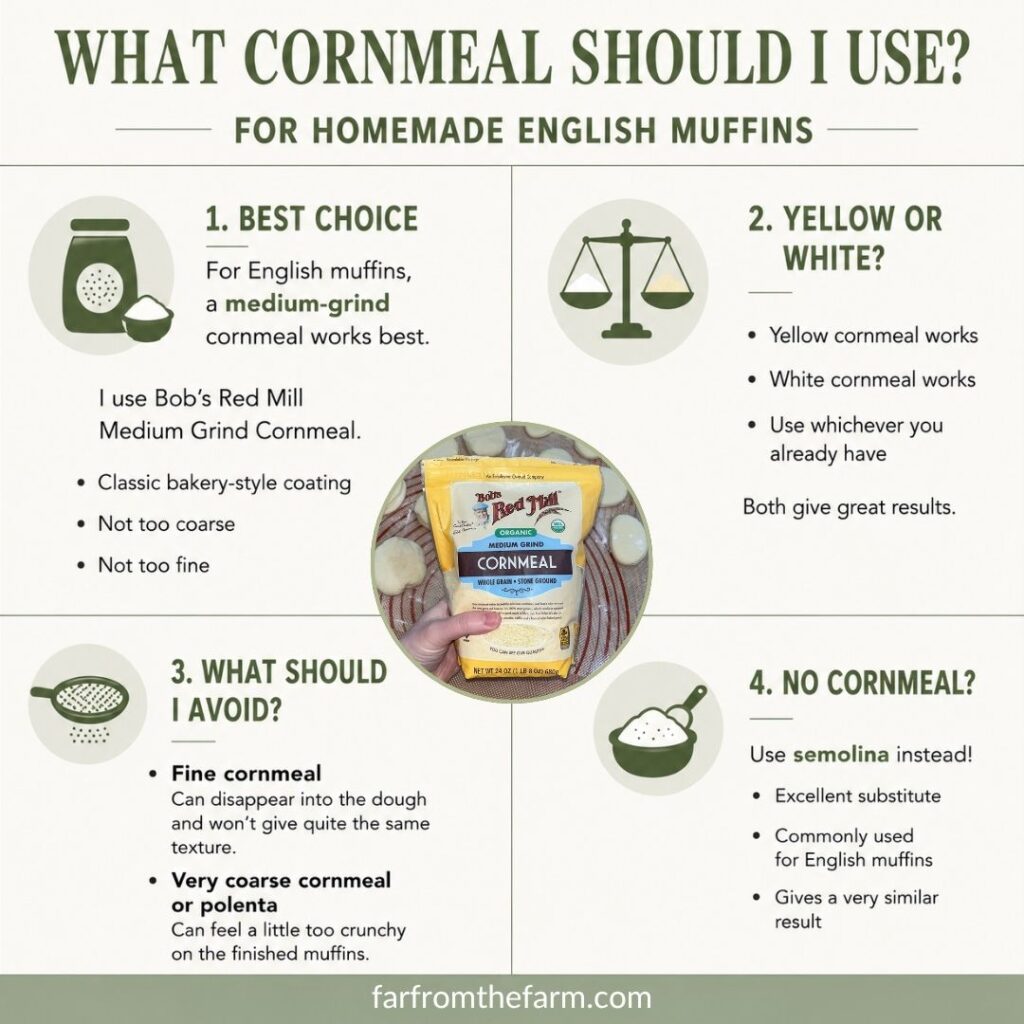
Fine cornmeal can disappear into the dough and won’t give quite the same traditional English muffin texture. Very coarse cornmeal or polenta can feel a little too crunchy on the finished muffins.
The cornmeal is mainly used to dust the outside of the muffins and help create that familiar English muffin finish.
If you don’t have cornmeal on hand, semolina is an excellent substitute and is commonly used for English muffins as well.
Available on Amazon.com [ad]

Notes and Troubleshooting
Notes
- This recipe uses milk powder rather than fresh milk, making it ideal for pantry baking.
- The dough is intentionally very soft. That softness helps create a tender finished English muffin.
- Cornmeal gives the classic bakery-style finish (medium-grind), but semolina works beautifully too.
- These muffins were designed specifically for homemade breakfast sandwiches and freeze exceptionally well.
- If you’re making homemade sausage breakfast sandwiches, try keeping the muffins close to the size of your sausage patties for easier assembly later.
Troubleshooting
The dough looks too sticky
Good. Seriously! This dough is much softer than traditional bread dough. As long as you’ve measured correctly, resist adding large amounts of flour.
My muffins turned out dry
Too much additional flour was likely added during shaping. The dough should remain soft throughout the process.
They spread out too much
The dough may have risen slightly too long or been handled too aggressively during shaping. They’ll still taste great.
Storage
- Store cooled English muffins in an airtight container for up to 2 days.
- Or to keep for longer you can store in an airtight container in the refrigerator for up to 5 days.
- These freeze exceptionally well. Allow muffins to cool completely. Then partially separate each muffin using a fork before freezing. Place into freezer bags or airtight containers and freeze for up to 3 months.
Reheating
- Allow to thaw overnight in the refrigerator or at room temperature.
- Toast directly from frozen if desired.
- They’re especially good toasted before assembling breakfast sandwiches.
Serving Ideas
These homemade English muffins are incredibly versatile. Serve them:
- Toasted with butter and jam
- With peanut butter and honey
- As the base for homemade breakfast sandwiches
- With sausage, egg, and cheese
- Alongside scrambled eggs and bacon
- With homemade freezer breakfast meal prep
- As part of a weekend brunch spread
- Toasted and topped with avocado and eggs
My husband’s favorite remains the simple sausage and cheese version inspired by his beloved McMuffin!
Why You’ll Love This Recipe!
- Uses pantry ingredients you may already have on hand
- No fresh milk required
- Perfect for stretching the grocery budget
- Great freezer meal prep recipe
- Soft texture with classic English muffin flavor
- Stand mixer does most of the work
- Ideal for homemade breakfast sandwiches
- Makes a large batch
- Budget friendly
- Easy to keep ingredients stocked year-round
FAQ
Yes. If your English muffins seem slightly doughy in the center after cooking on the griddle, place them on a baking sheet and bake at 350°F for about 10 minutes.
This allows the center to finish cooking without over-browning the outside.
For more details see the ‘My muffins are still doughy inside, can I finish them off in the oven?‘ section above.
No. Despite the name, the English muffin most Americans know today is generally considered an American food.
It was popularized in New York by Samuel Bath Thomas, an English immigrant who moved to the United States in the 1870s. Like many foods developed by immigrants, the creator’s nationality became attached to the name, which can make it sound as though the food itself came from that country.
In reality, the English muffin became an American breakfast staple and was far more common in the United States than it ever was in Britain. While it’s now widely available in the UK, much of that familiarity came much later through American fast-food chains (thank you McDonald’s!), coffee shops, supermarkets, and breakfast menus.
So despite the name, the modern English muffin is generally considered an American breakfast food rather than a traditional British one.
A medium-grind cornmeal works best for homemade English muffins. It gives that classic bakery-style coating and texture without being too fine or too coarse.
I use Bob’s Red Mill Medium Grind Cornmeal, but regular yellow or white cornmeal will also work. If you don’t have cornmeal on hand, semolina is an excellent substitute.
For more details, including which types of cornmeal to avoid, see the ‘What cornmeal should I use for homemade English muffins?’ section above.
Yes. Either works beautifully. See above comments.
Absolutely. Replace the 1 ¼ cups warm water and ¼ cup nonfat milk powder with 1 ¼ cups warm milk and continue the recipe as written.
For more details on using fresh milk versus milk powder in this recipe, see the “How to Use Fresh Milk Instead of Milk Powder” section above.
Yes. English muffins freeze exceptionally well. Allow muffins to cool completely. Then partially separate each muffin using a fork before freezing. Place into freezer bags or airtight containers and freeze for up to 3 months.
KitchenAid English Muffin Recipe – Cooked on an Electric Griddle!
Ingredients
Equipment
Method
- Mix the warm water and nonfat milk powder (or your favorite dairy-free milk powder alternative) together until fully combined, then pour into the bowl of a stand mixer.
- Add the sugar and active dry yeast. Stir, cover, and allow to sit for 5 to 10 minutes until foamy.
- Add the butter (or dairy-free butter alternative) and egg.
- Add the flour and salt.
- Using the dough hook attachment, knead on the lowest mixer setting for 7 to 8 minutes.
- Wet one hand with cold water, gather the sticky dough into the center of the bowl, then stretch and fold it over itself several times.
- Cover and allow the dough to rise for about 1 hour 30 minutes or until doubled in size.
- Preheat an electric griddle to 300°F.
- Lightly flour a silicone bench mat and carefully turn the dough out onto the surface.
- Using a bench scraper, gently lift, fold, and turn the dough several times until it becomes easier to handle, for about 2 minutes.
- Roll the dough to approximately 1/4-inch thickness.
- Cut into rounds using a 3-inch cutter or drinking glass.
- Sprinkle both sides lightly with medium-grind cornmeal or semolina.
- Cook on the preheated electric griddle for about 12 minutes per side until lightly golden and cooked through.
- If the centers still seem doughy, finish in a 350°F oven for about 10 minutes.
- Transfer to a cooling rack and allow to cool before serving, storing, or freezing.
Notes
- The dough will be much softer and stickier than traditional bread dough. Resist adding large amounts of flour.
- Milk powder makes this a useful pantry recipe when you do not have fresh milk on hand.
- For the classic English muffin finish, use medium-grind cornmeal or semolina for dusting. I use Bob’s Red Mill Medium Grind Cornmeal, but regular yellow or white cornmeal will also work.
- Avoid very coarse cornmeal or polenta if possible, as it can feel too crunchy on the finished muffins.
- If making these for homemade breakfast sandwiches, keep the muffins close to the size of your sausage patties.
- If the muffins are thicker than planned or still seem doughy in the center after griddle cooking, place them on a baking sheet and finish them in a 350°F oven for about 10 minutes.
Want to use fresh milk?
Simply replace the:- 1 ¼ cups warm water
- ¼ cup nonfat milk powder
- 1 ¼ cups warm milk
Dairy-Free Adaptations
These homemade English muffins are very easy to adapt for a dairy-free diet. Simply replace the milk powder with your favorite dairy-free milk powder or use warm unsweetened dairy-free milk instead of the water and milk powder combination. For the butter, use your favorite dairy-free butter substitute or plant-based baking stick.Storage
- Store cooled English muffins in an airtight container at room temperature for up to 2 days.
- For longer storage, keep them in an airtight container in the refrigerator for up to 5 days.
- To freeze, cool completely first. Use the tines of a fork to partially split each muffin around the center seam, but do not pull apart completely. Place into freezer bags or airtight containers and freeze for up to 3 months.
- Toast from frozen, or thaw overnight in the refrigerator before using.
Related Recipes
- Check out all our other easy Bread Recipes!
- You may also love our Freezer Meals!
Nutrition information is automatically calculated, so should only be used as an approximation.
Looking for more homemaking inspiration?

It’s so important to be part of a community that not only understands you but that champions you, encourages, challenges and cheers you on. We couldn’t find one – so we created it instead!
Join Julie, Sam and I over at the Side Hustle Homemakers Facebook Community for Food Blogging Tips, Homesteading and Homemaking content and encouragement!
We’re 3 very different US/UK military families who met and became instant forever friends.
We created Side Hustle Homemakers to share real life around recipes, food blogging, homemaking, military life, homesteading and more. Head on over, say Hi, share you tips and gain some friends and knowledge along the way!
The Takeaway
If you’re trying to stretch the grocery budget a little further, stock your pantry wisely, or simply enjoy making more food from scratch, these homemade English muffins are well worth keeping in your recipe collection.
I love that they use simple ingredients, freeze beautifully, and save us from running to the store when we’re out of fresh milk!
What to Try Next?!


Share & Rate This Recipe!
If these homemade English muffins earn a place in your freezer meal prep rotation, I’d love to hear about it! Leave a comment, rate the recipe card, and share it with a friend who loves homemade bread and budget-friendly breakfasts!
Last update on 2026-06-10 / Affiliate links / Images from Amazon Product Advertising API