How to Make Fluffy and Fragrant Garlic Rolls Quickly in Your KitchenAid Stand Mixer
Hi! If you’ve been following me for long you’ll already know this, but for those who are new, welcome to Far From The Farm. I’m Mona, the Brit behind the recipes, learning life and food in the States while sharing our debt-free journey and what’s on the menu in our home today!
I haven’t always been the biggest fan of garlic bread (I know, shocking!) but my husband and family absolutely love it in all its forms. So I’ve been on a quiet little mission to perfect an easy, quick dinner roll dough that can become garlic rolls, knots, or breadsticks without breaking the grocery budget.
This recipe is simple, affordable, and ideal for busy home cooks. It’s a perfect base dough for buttery garlic rolls or savory pull-apart buns, and it mixes beautifully in a KitchenAid stand mixer, and no arm workout required.
It’s also a cheap way to fill up hungry bellies while staying frugal. Recipes like this help stretch our grocery budget further and make the debt-free journey feel a little lighter (and tastier!).
And just a reminder that if you’re struggling and you need help with managing your budget or starting your own debt free journey then here’s some FREE resources below you may find helpful!
living frugally and fully
free tips and resources to make the most of what you have
As always, these photos are from my real kitchen here in our sweet military base home. No staged lighting or spotless marble counters. Just real life and real food made in a small space. Proof that you can feed your family well without needing a dream kitchen or fancy tools!
So roll up your sleeves and join me in the kitchen for this wonderfully fragrant, fluffy garlic roll recipe!
Equipment Needed
- Stand mixer with bowl and dough hook
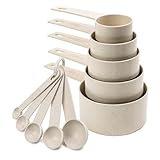
- Measuring cups and spoons
- Measuring jug
- Large bowl (for dough to rest)
- Plastic wrap
- Bench scraper
- 9×13 inch glass dish
- Pastry brush
- Parchment paper (optional, but makes cleanup easier)
Available on Amazon.com [ad]


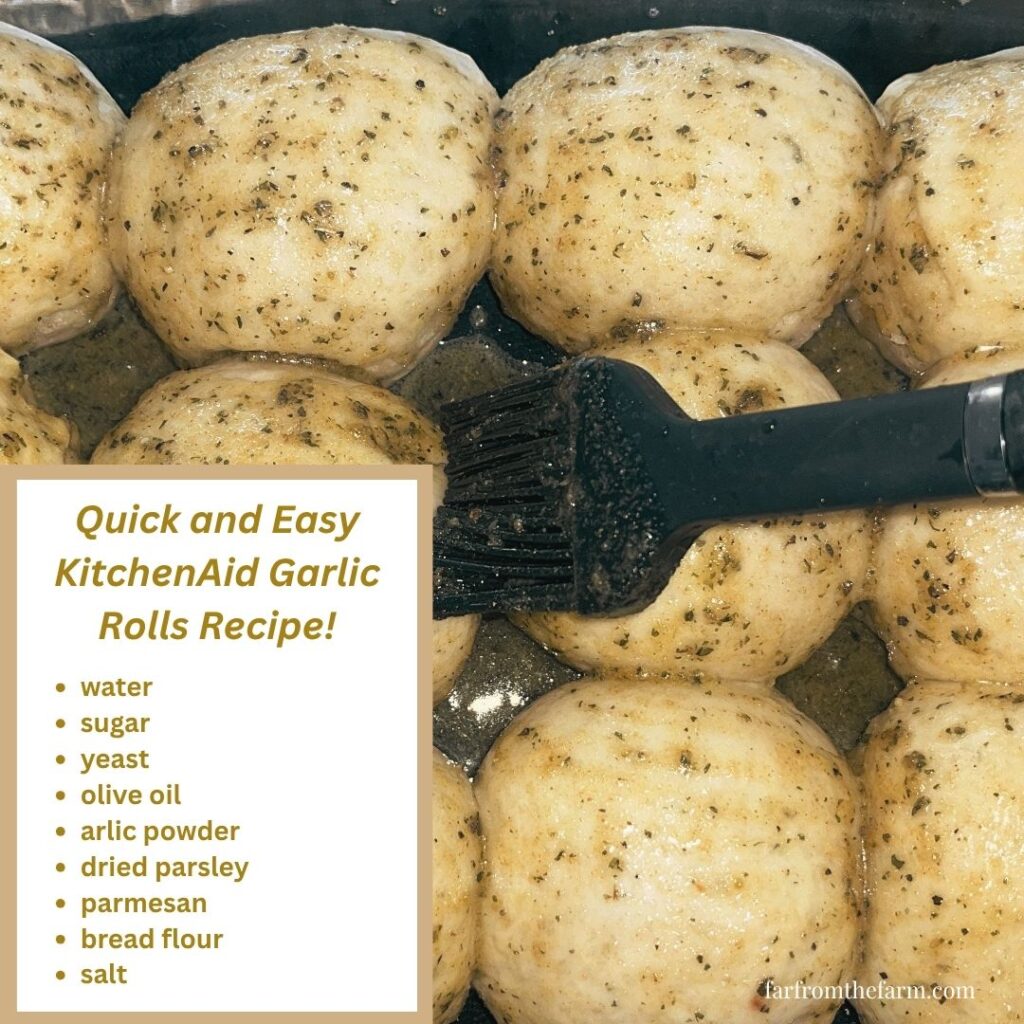
Ingredients (Makes 12 Rolls)
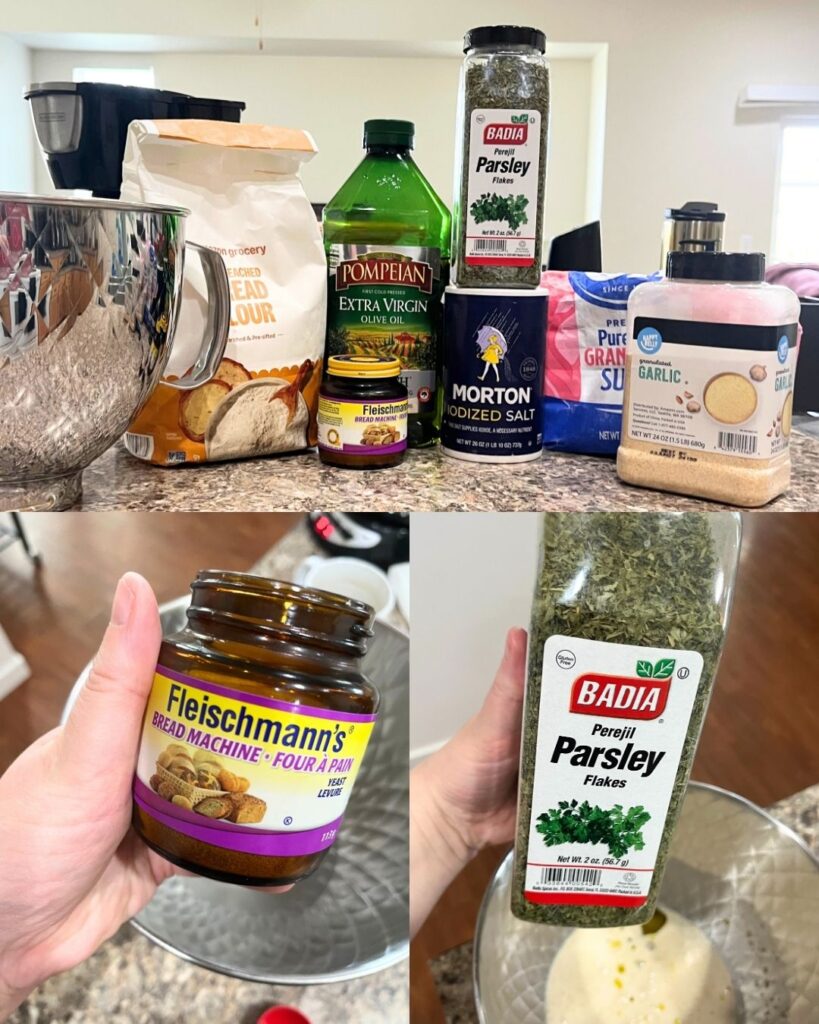
- 1 & ¾ cups warm water
- 1 & ½ teaspoons sugar
- 2 & ¼ teaspoons quick yeast (bread machine yeast works great!)
- 2 tablespoons olive oil (plus a little extra for brushing the rolls with before baking)
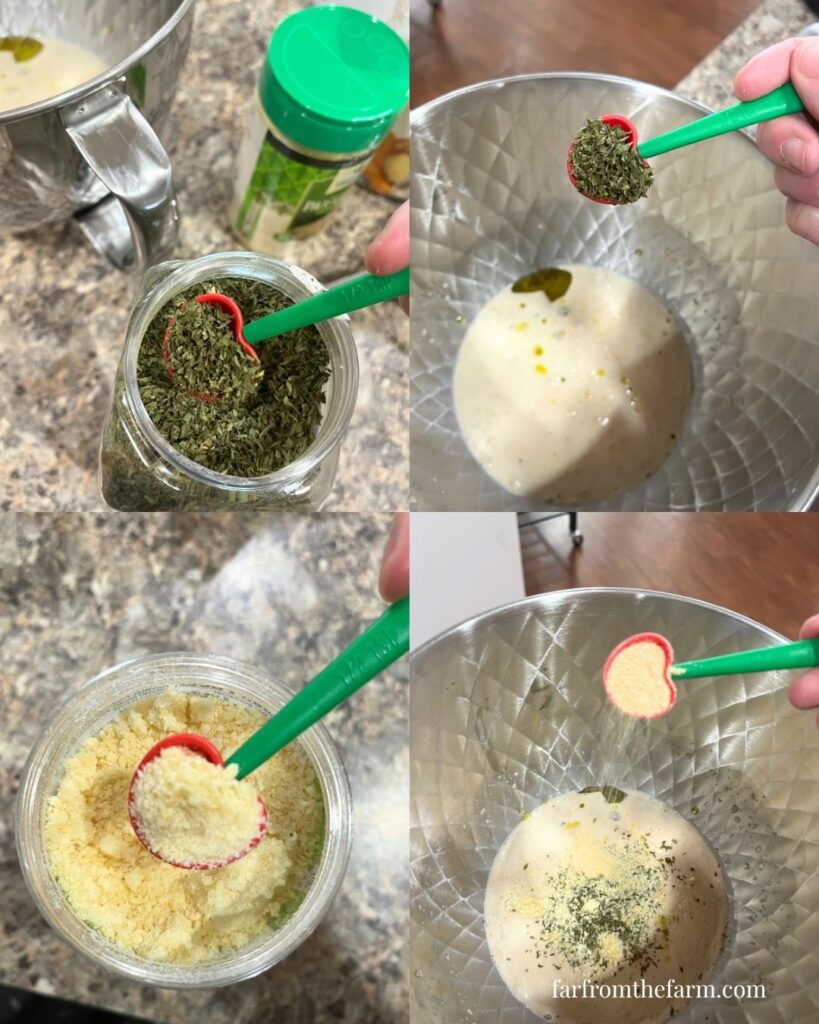
- 1 teaspoon garlic powder
- ½ teaspoon dried parsley
- ½ teaspoon dried parmesan
- 4 cups bread flour
- 1 & ½ teaspoons salt
Optional
4 tbsp Garlic Butter for brushing the tops of the rolls with after they have baked.
Step-by-Step Instructions
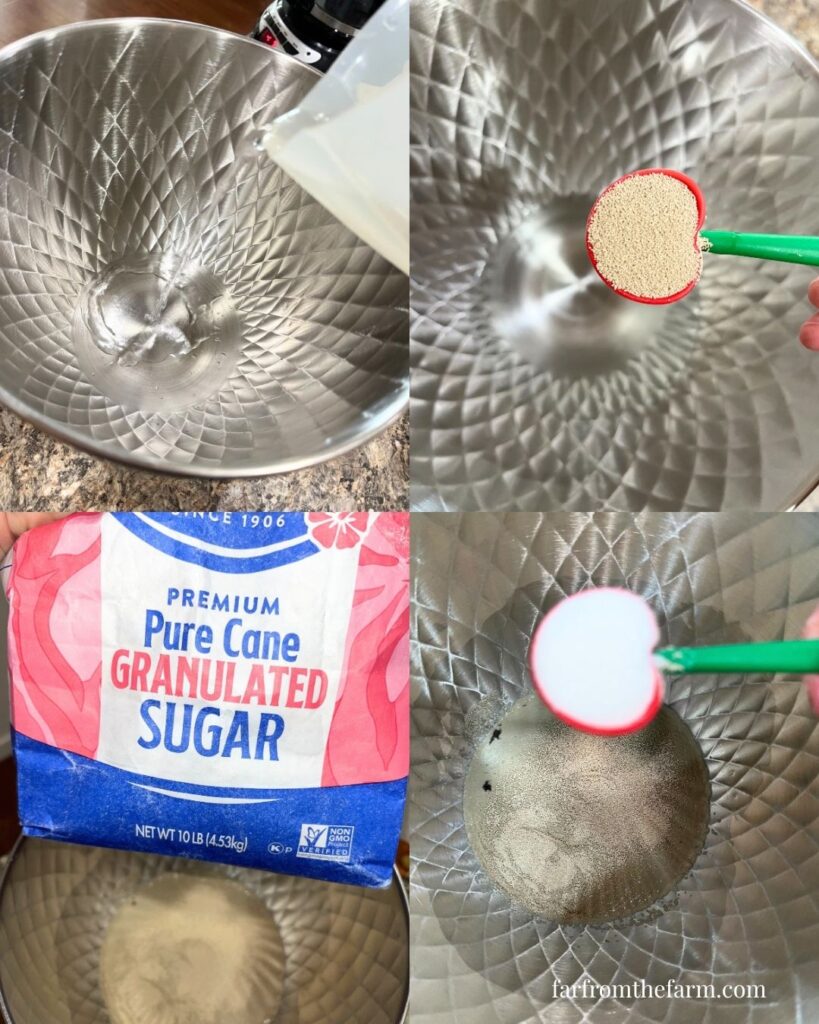
Step 1: Activate the Yeast
Add the warm (not hot) water, sugar, and yeast to the bowl of your stand mixer. Stir gently, then cover with plastic wrap.
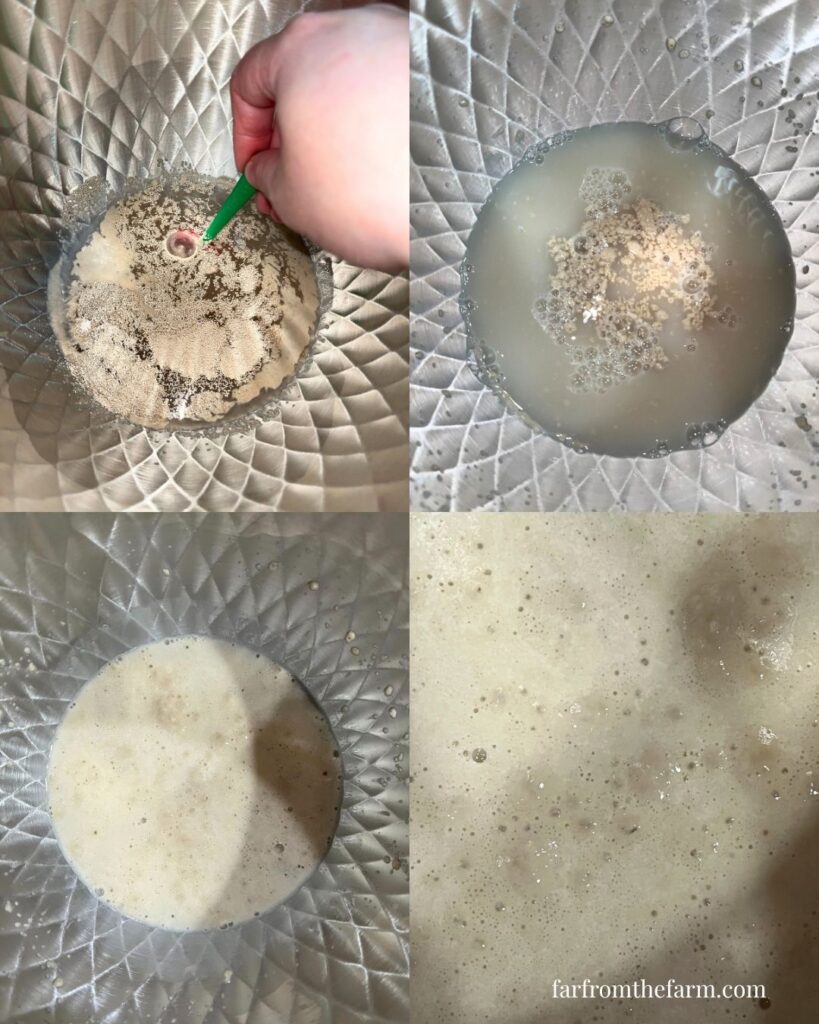
Set aside for 5 to 10 minutes until the mixture turns frothy and bubbly on top – that’s how you’ll know if your yeast is alive and active.
If there’s no bubbling after 10 minutes, your yeast may be inactive and you’ll need to start over with a fresh batch.
Step 2: Add the Flavor Base
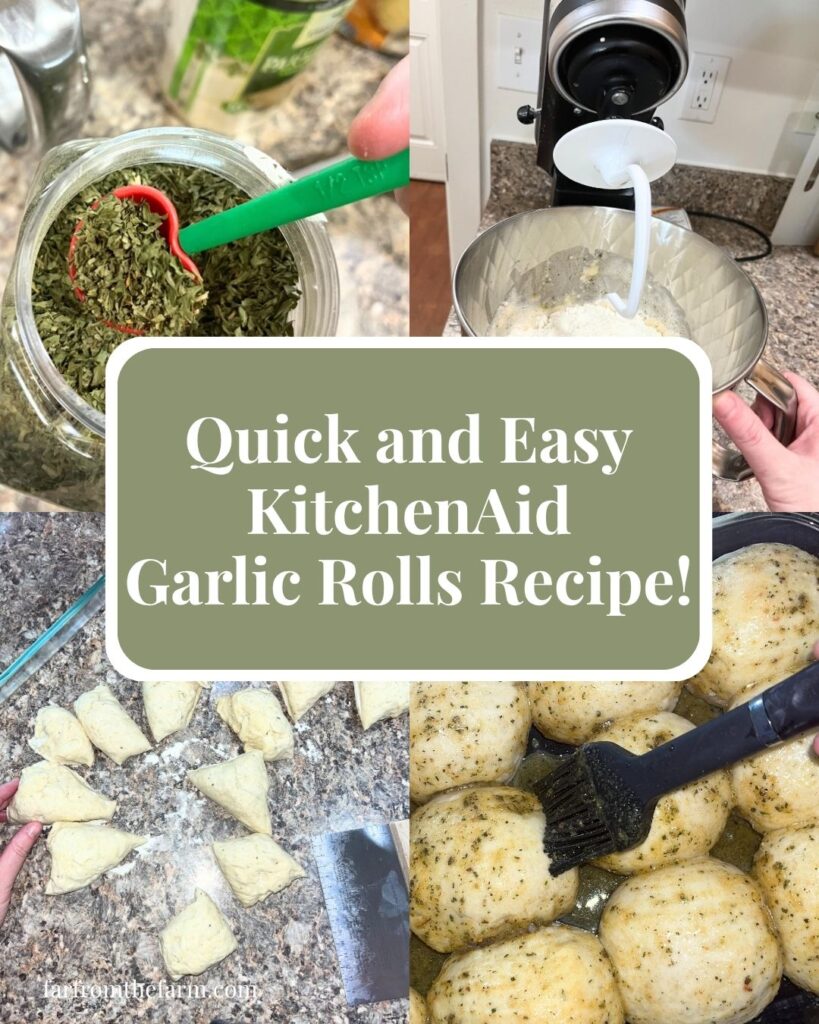
Once proofed, add olive oil, garlic powder, dried parsley, and dried parmesan into the yeast mixture. Stir gently to combine.
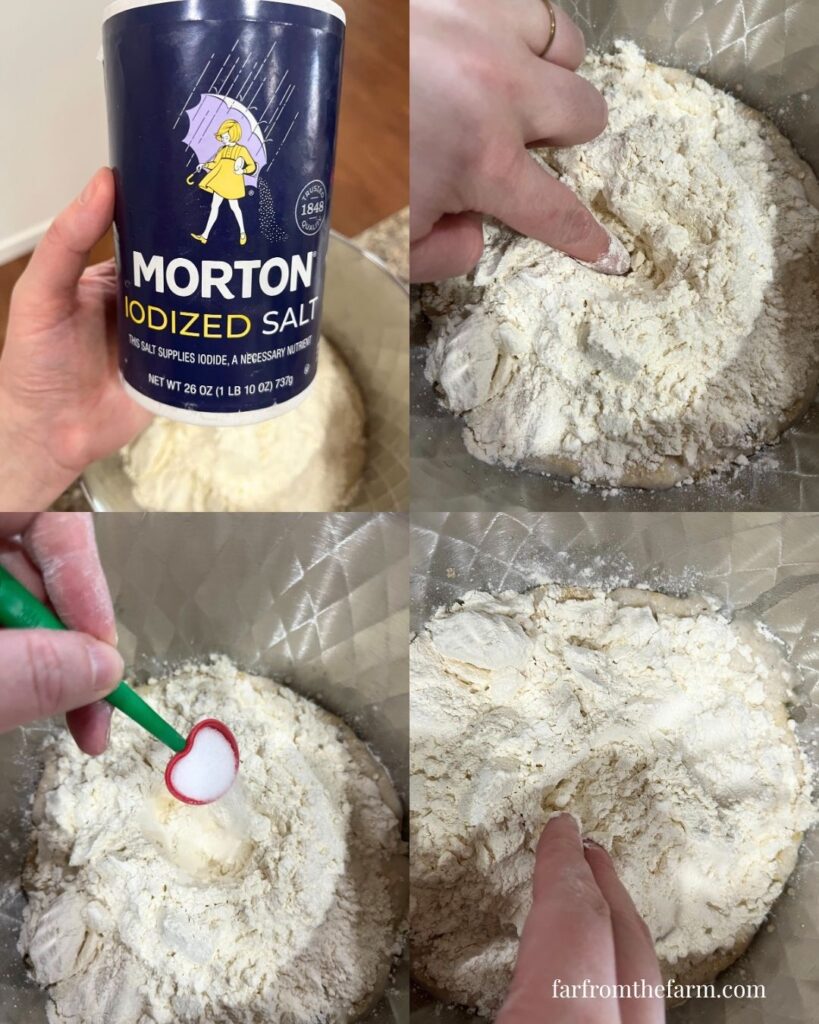
Step 3: Add the Flour and Salt
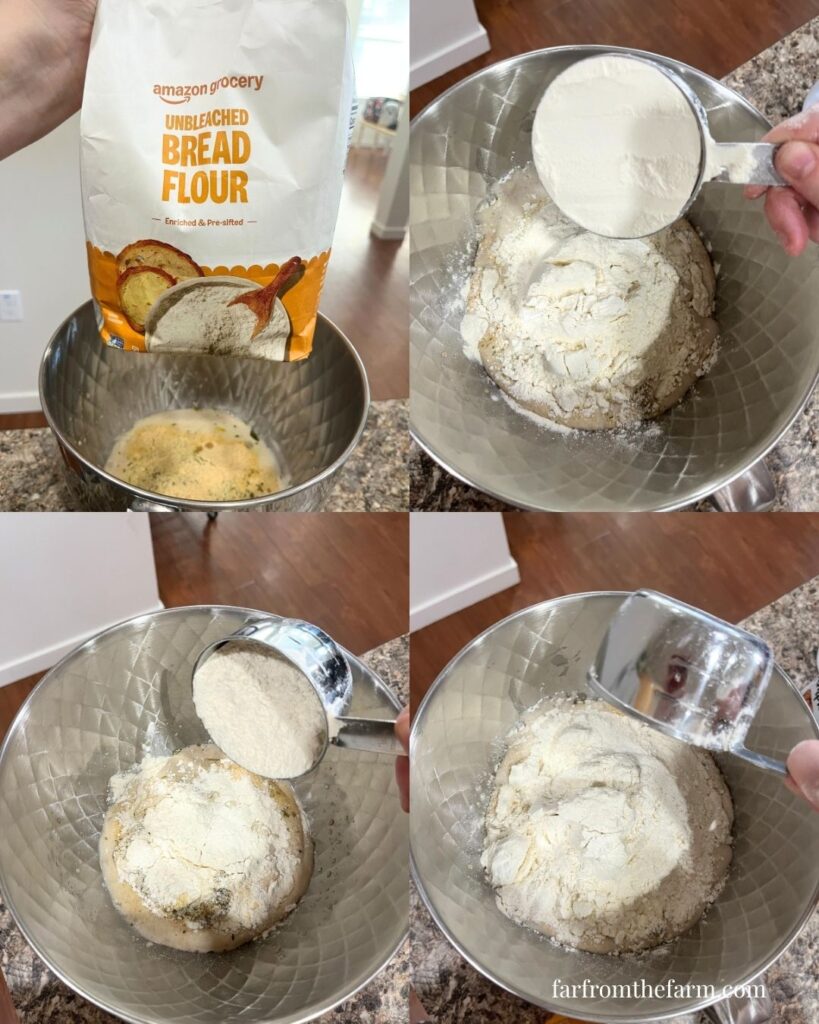
Add the bread flour. You can add the flour all at once or gradually, whichever works best for your mixer.
Then I add in the salt – which I like to do using my finger to make a hole in the flour and put the salt in that, then cover it up with some of the surrounding flour – see image below.
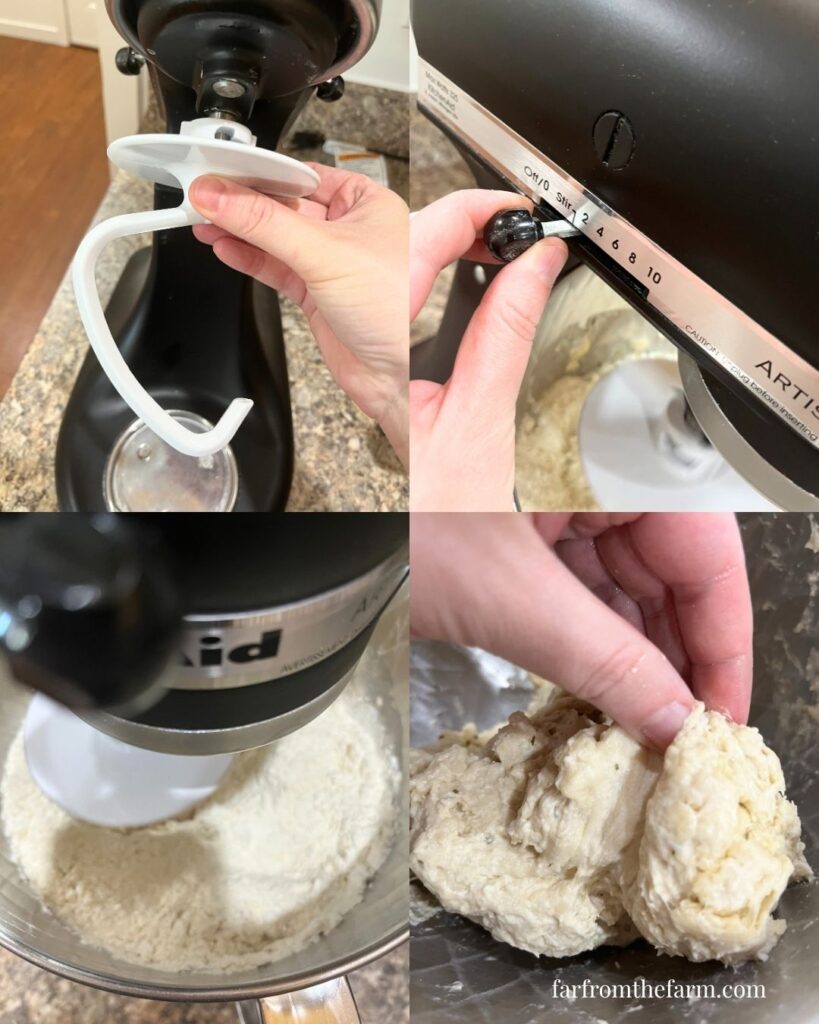
Step 4: Knead the Dough
Using the dough hook on your stand mixer, knead on low speed for 5 minutes. The dough should mostly pull away from the sides of the bowl and not be overly sticky.
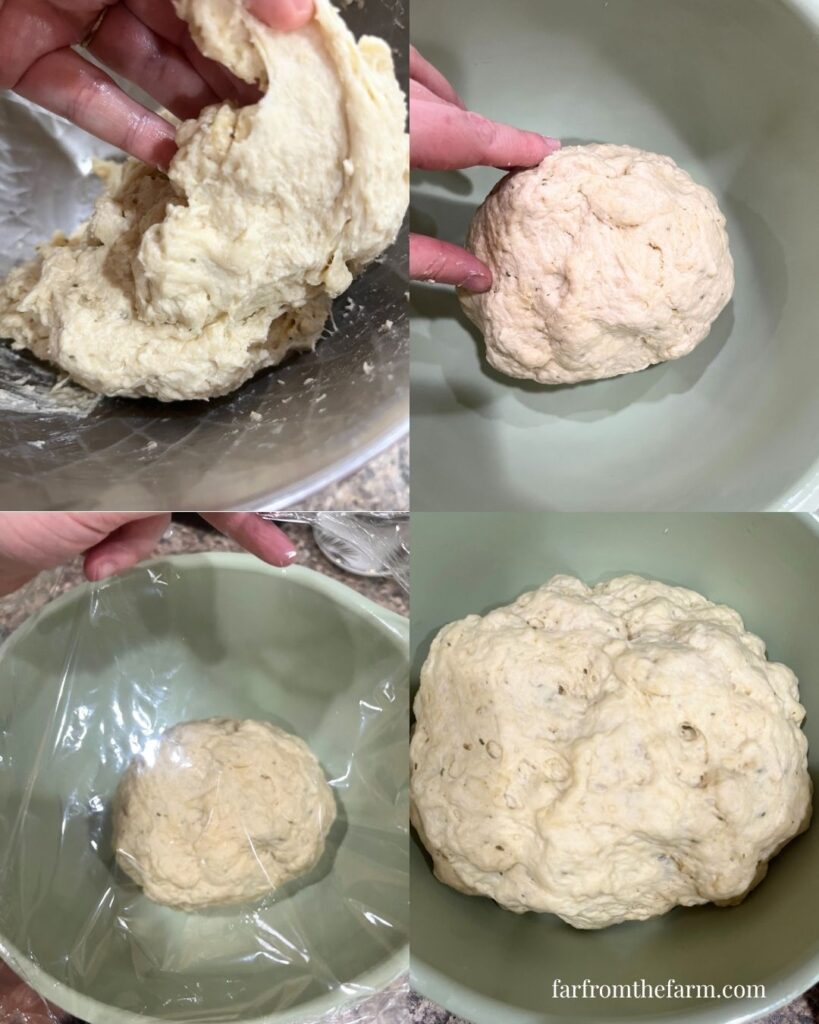
Step 5: First Rise
Remove the dough and place it into a lightly oiled large bowl. Cover with plastic wrap and set aside in a warm spot for 30 minutes or until doubled in size.
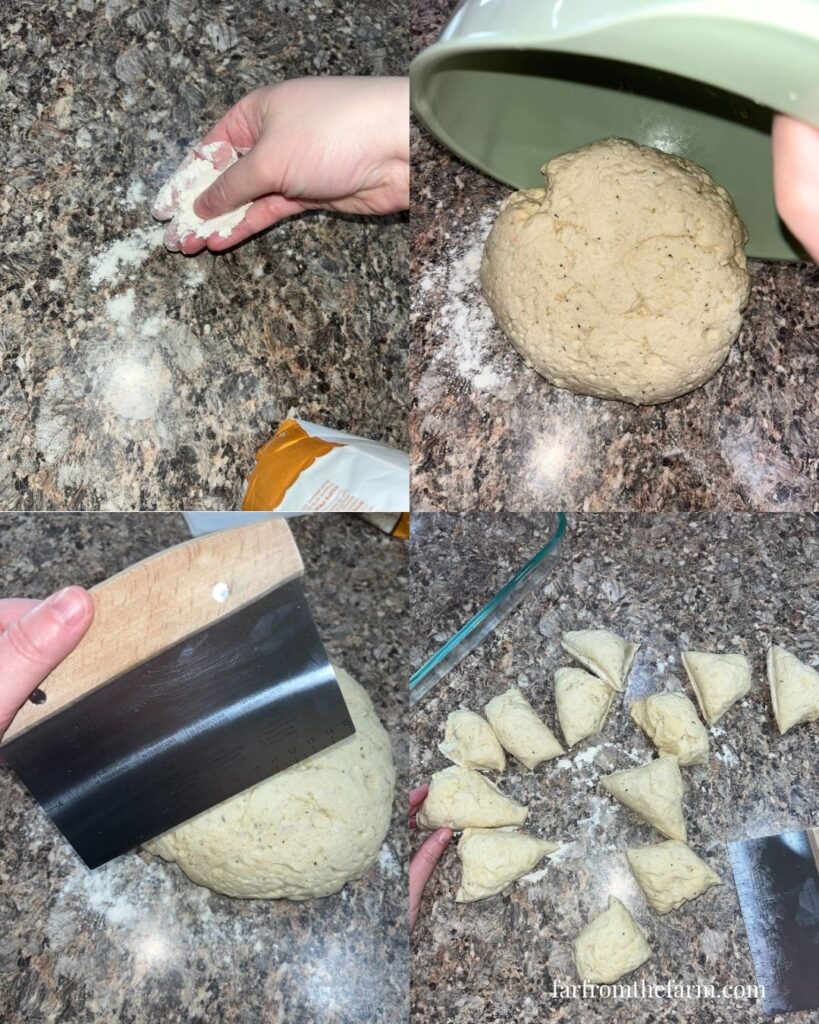
Step 6: Shape the Rolls
Gently remove the dough from the bowl, being careful not to punch it down. Divide into 12 equal pieces and shape into rolls, knots, or any shape you prefer.
I use a bench scraper to help with keeping the dough puffy whilst still dividing it, but you can certainly do this step without.
Step 7: Second rise.
Place the shaped rolls on a parchment-lined 9×13 baking dish, cover with plastic wrap or a damp kitchen towel and let rise for at least another 10 minutes (up to 30 minutes).
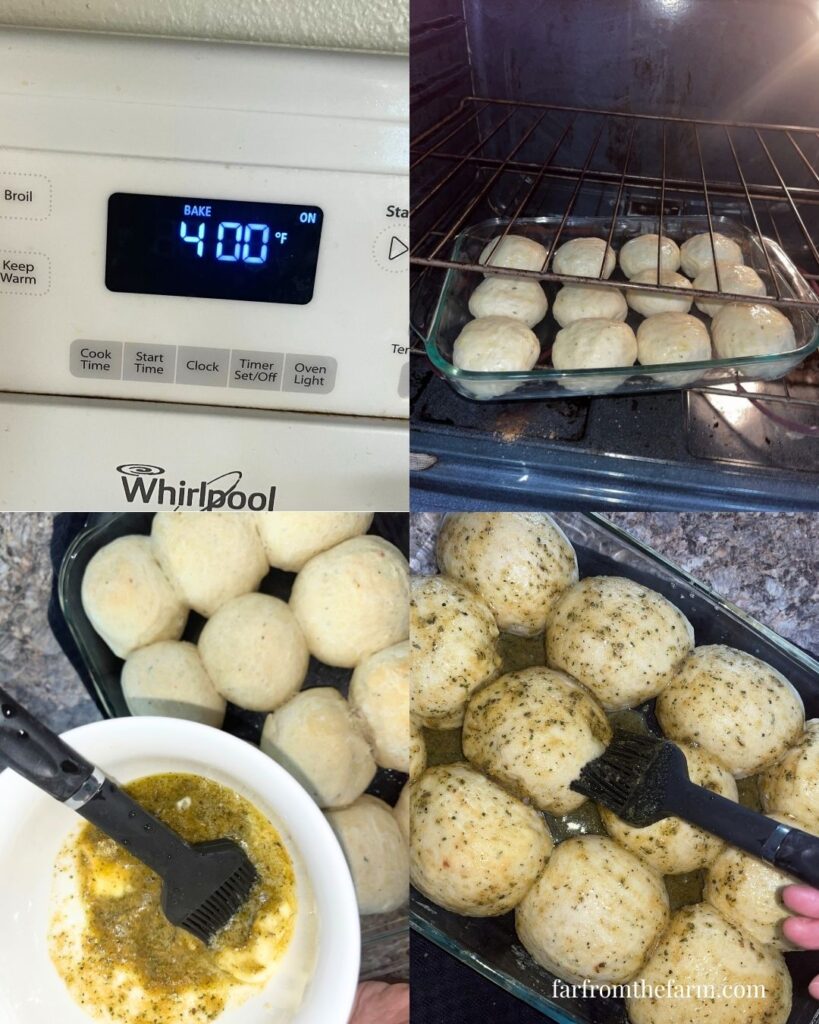
Preheat your oven to 400°F whilst they rise.

Step 8: Bake.
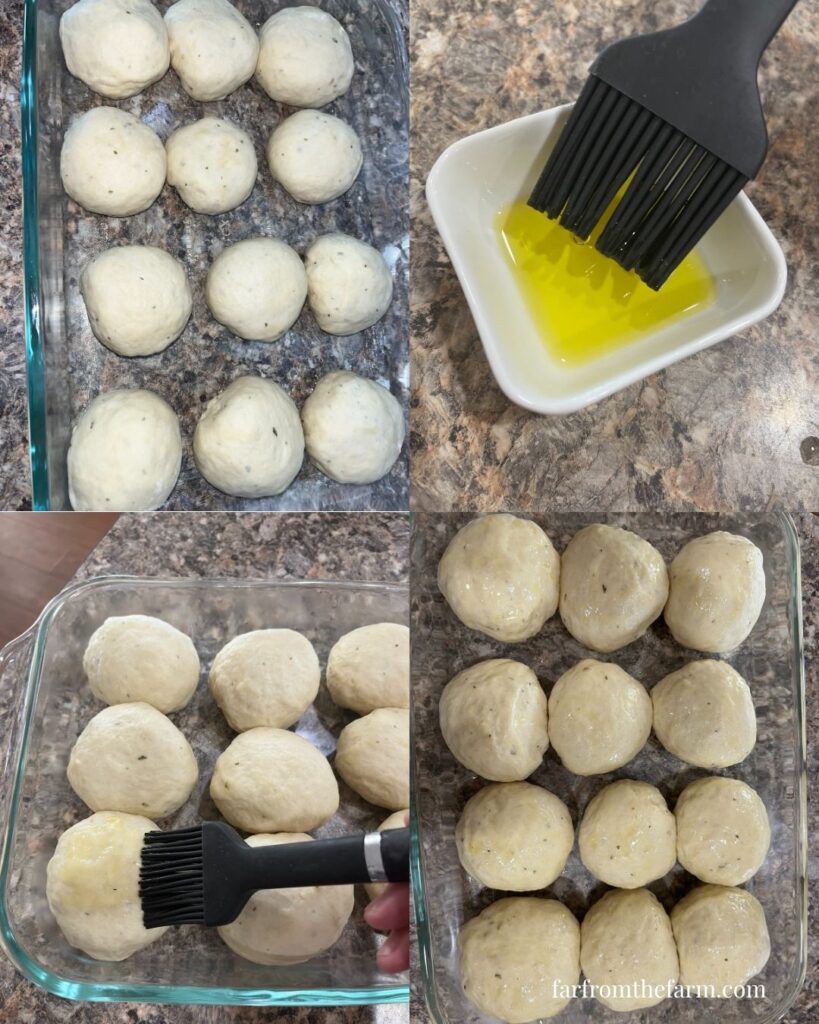
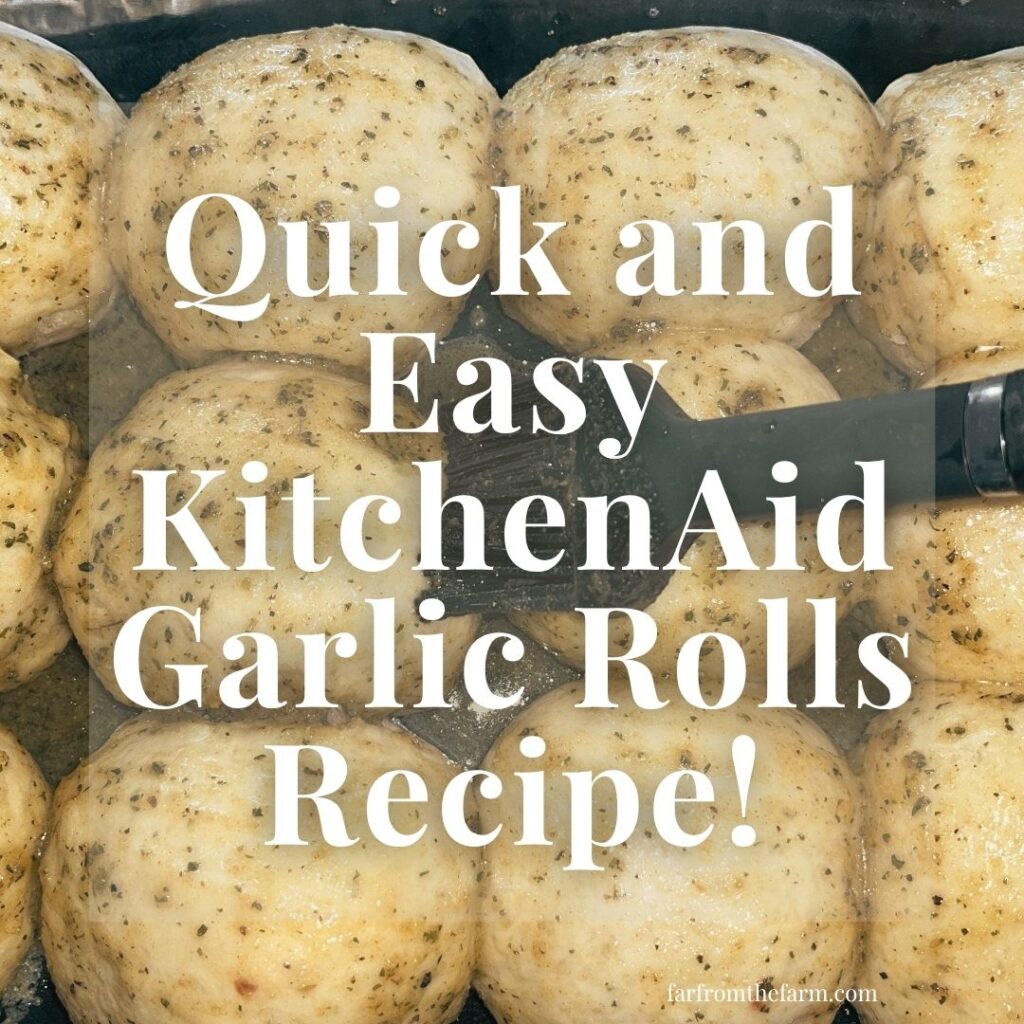
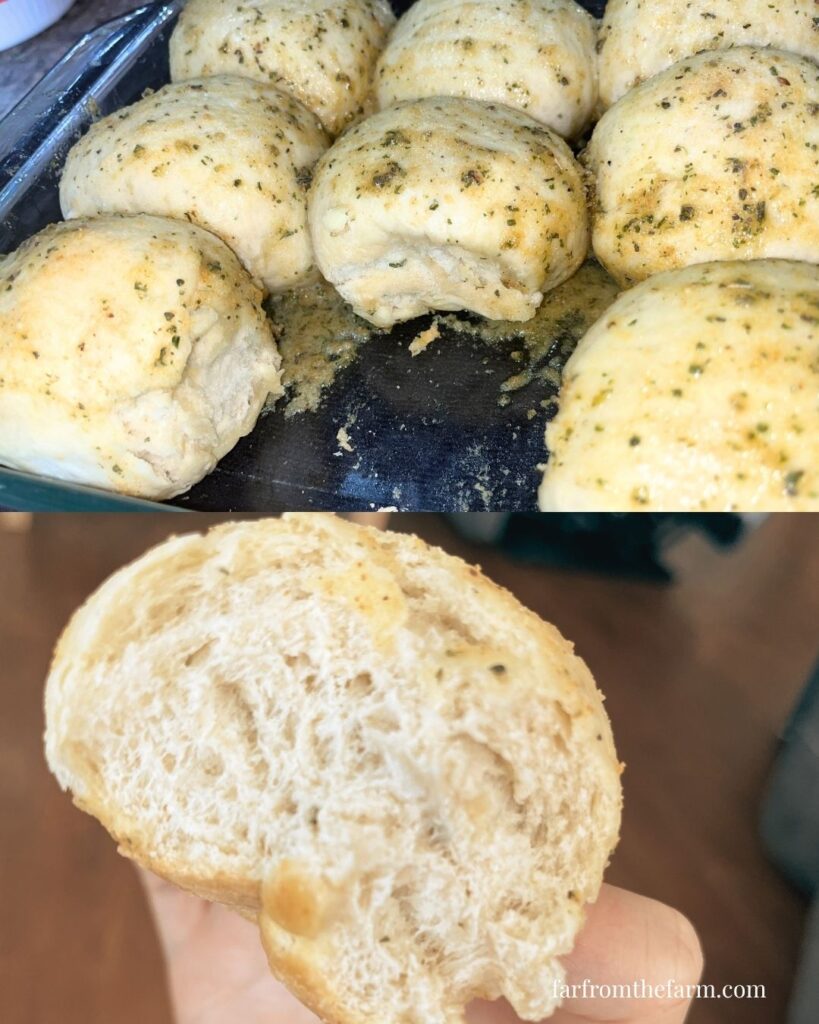
Brush lightly with olive oil and bake at 400°F for 15 minutes, until golden brown.
Step 9: Serve Warm!
Best enjoyed while still warm, and an optional step (but highly recommended!) is to brush with my garlic butter recipe. Serve warm as a side with pasta or soup, or enjoy them straight from the oven.
Notes & Troubleshooting
Notes:
- You can make this dough ahead of time and refrigerate overnight for extra flavor.
- Great base for pizza dough or breadsticks too!
Troubleshooting:
- Dough not rising? Your yeast may be old or the water too hot. Aim for lukewarm, about 105°F.
- Rolls too dense? Knead for at least 5 minutes as under-kneading leads to tough dough.
- Tops too brown before centers cooked? Tent lightly with foil halfway through baking.
Storage
- Store cooled rolls in an airtight container for up to 3 days at room temperature.
- To reheat, warm in the oven at 325°F for 5 minutes or in the microwave for 15 seconds.
Serving Ideas
- Serve alongside spaghetti, lasagna, or soup.
- Slice and use for sliders or mini sandwiches.
- Turn leftovers into garlic croutons by slicing and toasting in olive oil!
Why You’ll Love This Recipe
- Easy to make in your KitchenAid mixer
- Budget-friendly ingredients
- Soft, fluffy texture every time
- Perfectly seasoned with garlic, herbs, and parmesan
- Freezer-friendly for make-ahead baking
FAQ
Can I make these without a stand mixer?
Yes, you can knead by hand for about 8 to 10 minutes until smooth.
Can I freeze the dough?
Yes! Freeze the shaped, unbaked rolls on a tray, then transfer to a bag. Bake from frozen, adding 5 extra minutes.
Can I double the recipe?
Absolutely, just make sure your mixer bowl is big enough!

Quick and Easy KitchenAid Garlic Rolls Recipe!
Ingredients
Equipment
Method
- Add the warm (not hot) water, sugar, and yeast to the bowl of your stand mixer. Stir gently, then cover with plastic wrap.Set aside for 5 to 10 minutes until the mixture turns frothy and bubbly on top – that’s how you’ll know if your yeast is alive and active.If there’s no bubbling after 10 minutes, your yeast may be inactive and you’ll need to start over with a fresh batch.
- Once proofed, add olive oil, garlic powder, dried parsley, and dried parmesan into the yeast mixture. Stir gently to combine.
- Add the bread flour and *salt. You can add the flour all at once or gradually, whichever works best for your mixer. * When adding the salt I like to use my finger to make a hole or 'well' in the flour and put the salt in that, then cover it up with some of the surrounding flour. That way it stops the salt getting in to contact with the yeast too early on in the kneading process and potentially affecting the rise quality of the dough.
- Using the dough hook on your stand mixer, knead on low speed for 5 minutes. The dough should mostly pull away from the sides of the bowl and not be overly sticky.
- Remove the dough and place it into a lightly oiled large bowl. Cover with plastic wrap and set aside in a warm spot for 30 minutes or until doubled in size.
- Gently remove the dough from the bowl, being careful not to punch it down. Divide into 12 equal pieces and shape into rolls, knots, or any shape you prefer.I use a bench scraper to help with keeping the dough puffy whilst still dividing it, but you can certainly do this step without.
- Place the shaped rolls on a parchment-lined 9×13 baking dish, cover with plastic wrap or a damp kitchen towel and let rise for at least another 10 minutes (up to 30 minutes).Preheat your oven to 400°F whilst they rise.
- Brush lightly with olive oil and bake at 400°F for 15 minutes, until golden brown.
- Best enjoyed while still warm, and an optional step (but highly recommended!) is to brush with my garlic butter recipe.
Notes
- You can make this dough ahead of time and refrigerate overnight for extra flavor.
- Great base for pizza dough or breadsticks too!
Storage
- Store cooled rolls in an airtight container for up to 3 days at room temperature.
- To reheat, warm in the oven at 325°F for 5 minutes or in the microwave for 15 seconds.
Nutrition information is automatically calculated, so should only be used as an approximation.
The Takeaway
These KitchenAid Garlic Rolls are soft, aromatic, and downright comforting. They prove that frugal food can still feel special, even when made in a small, everyday kitchen.
With just a few pantry staples and a stand mixer, you’ll have bakery-style rolls that taste incredible and make dinner nights feel just a little more put together.
What to Try Next?!


Share & Rate This Recipe!
If you tried this recipe, please share your feedback with a quick star rating or comment below. And if you loved it, don’t forget to share it with friends and family too!
Last update on 2026-05-14 / Affiliate links / Images from Amazon Product Advertising API


These rolls look and taste great! And the aroma is heavenly! Having some of these with our lasagna tonight.
Thank you Rob – I appreciate you guys trying them out!
– Mona @ Far From The Farm